
DIY Cloud Nursery Mobile

In this tutorial, I’m going to show you how to make a beautiful DIY baby mobile for your nursery. Making your own baby room decor is such a no-brainer, it looks amazing and saves you money!
You’re going to fall in love with how this minimalist baby mobile looks in your nursery. The gentle swaying of the little clouds creates the softest, dreamiest feel, it’s so calming and peaceful.
Whether you’re going for a modern nursery vibe or something more classic, this mobile’s gender-neutral design fits beautifully with absolutely any style.
And if you’re making this cloud baby mobile as a gift (how sweet are you?!), you can relax knowing it’ll work perfectly for any nursery, no matter the theme or gender. Once you hand this over to the mum-to-be, she’s going to be completely blown away!
I’ve created my DIY baby mobile using a soft ivory felt, but feel free to mix it up with other colours if you like. You could keep the ivory clouds and add a few colorful felt balls or even some sweet little felt stars for a bit of extra magic.
Want to complete the look? You could add a matching cloud garland, I’ll show you how here: DIY Cloud Garland
Now, I know this step-by-step tutorial might seem a little overwhelming at first glance, but don’t worry, every step is super simple. I’ll walk you through everything carefully so you can create your own beautiful nursery mobile to hang with pride.
And remember: you don’t have to rush it! Creating something by hand is good for the soul, take your time, relax, and enjoy the process.
I always find it helps to read through the tutorial once or twice before getting started. It makes everything feel way less intimidating, especially if you’re new to crafting.
Once you make your first nursery mobile, you’ll see how easy (and addictive!) it really is you’ll be making these baby mobiles as gifts for every parent-to-be in your life in no time!
Selling nursery mobiles
Once you start making your own baby decor, you might find yourself wanting to sell it too! Baby mobiles are always a hit, not just with parents-to-be, but also with anyone looking for a special, thoughtful gift.
That makes nursery mobiles a fantastic addition to your shop or even a great way to kickstart a new business.
Sticking with gender-neutral colours can make buying decisions really simple for your customers, but you can also offer a range of colour options to appeal to different tastes.
A smart way to boost your sales is by offering this matching cloud garland as an upsell, maybe even creating a discounted bundle to make it even more tempting.
If you're thinking about selling your creations, don’t miss my super-helpful Beginner’s Guide to Pricing Your Handmade Items -when you’re starting out, pricing can be much trickier than you think.
You might also want to check out Make It, List It, Sell It!, where I walk you through the best places for beginners to start selling handmade products.
Safety
I’ve made sure to use only the best materials to create a safe nursery mobile, we’ll be working with wool products, wood, and cotton string only.
Since your DIY crib mobile will be hanging in a baby’s nursery, it’s really important to make sure all the pieces are securely attached and firmly in place.
Always hang the cloud nursery mobile well out of baby’s reach, and be sure not to place it directly above the crib or where your little one can grab it.
As soon as your little one can stand or pull themselves up, it’s time to take the mobile down. You can tuck it away as a keepsake, save it for your next little bundle, or even repurpose it into a gorgeous cloud garland!
Speaking of which, the cloud garland is a perfect way to use up any leftover felt, so be sure to check that out too.
Alright, let’s dive in and get started!
What you will need to make a nursery mobile

Cloud template click to download your free template
Glue - for sticking the template to card so any old glue will do
A piece of card - Used Amazon envelopes work perfectly
Scissors - they need to be sharp enough to cut through fabric. I like to use fabric scissors for this. If you’re thinking of making more than one they’re worth the investment. Don’t use them on paper, it will make them blunt.
Cutting mat - you can do this with only a tape measure if you really want to but I believe a cutting board makes things easier. If you’re on a budget or unlikely to use a cutting board again use a tape measure but I’d attach it along the edge of the table.
Wool felt fabric -I have used Ivory wool felt. A 40% wool blend is less expensive and is easy to work with and looks great for this project.
Sewing Thread - I highly recommend Gutterman thread
Two needles - you need a large (I have used 7cm) and regular sewing needles.
Hollowfibre Stuffing - choose one that features the relevant fire safety standards
Thread/string for hanging - I l like to use Crochet thread size 10
Beech wood ring - size 22cm/9"
Ivory Felt Balls 2cm - optional. You can make the baby mobile without felt balls if you prefer.
Create your cloud template…

Cut around the outline of the printed cloud template. Glue the cut out cloud shape to the card.
Once the glue is dry cut around the cloud template.
After you make your own nursery mobile you can reuse your cloud template to make this matching cloud garland.
Draw cloud shapes onto the felt…

Neatly fold the piece of wool felt in half so that you have two layers of wool felt to work with. Make sure all edges are neatly aligned, this makes it much quicker and easier to cut symmetrical cloud shapes.
For best results, give the felt a quick iron to remove any creases and secure the fold.

Place the cloud template on the top layer of the wool felt. Use your pen to carefully draw around the template.
You will need to draw seven clouds onto the fabric. Draw them pretty close together so no felt is wasted.
This should leave you with enough left over felt should you need an ‘emergency’ cloud. You can use any leftover felt to make the matching cloud garland.
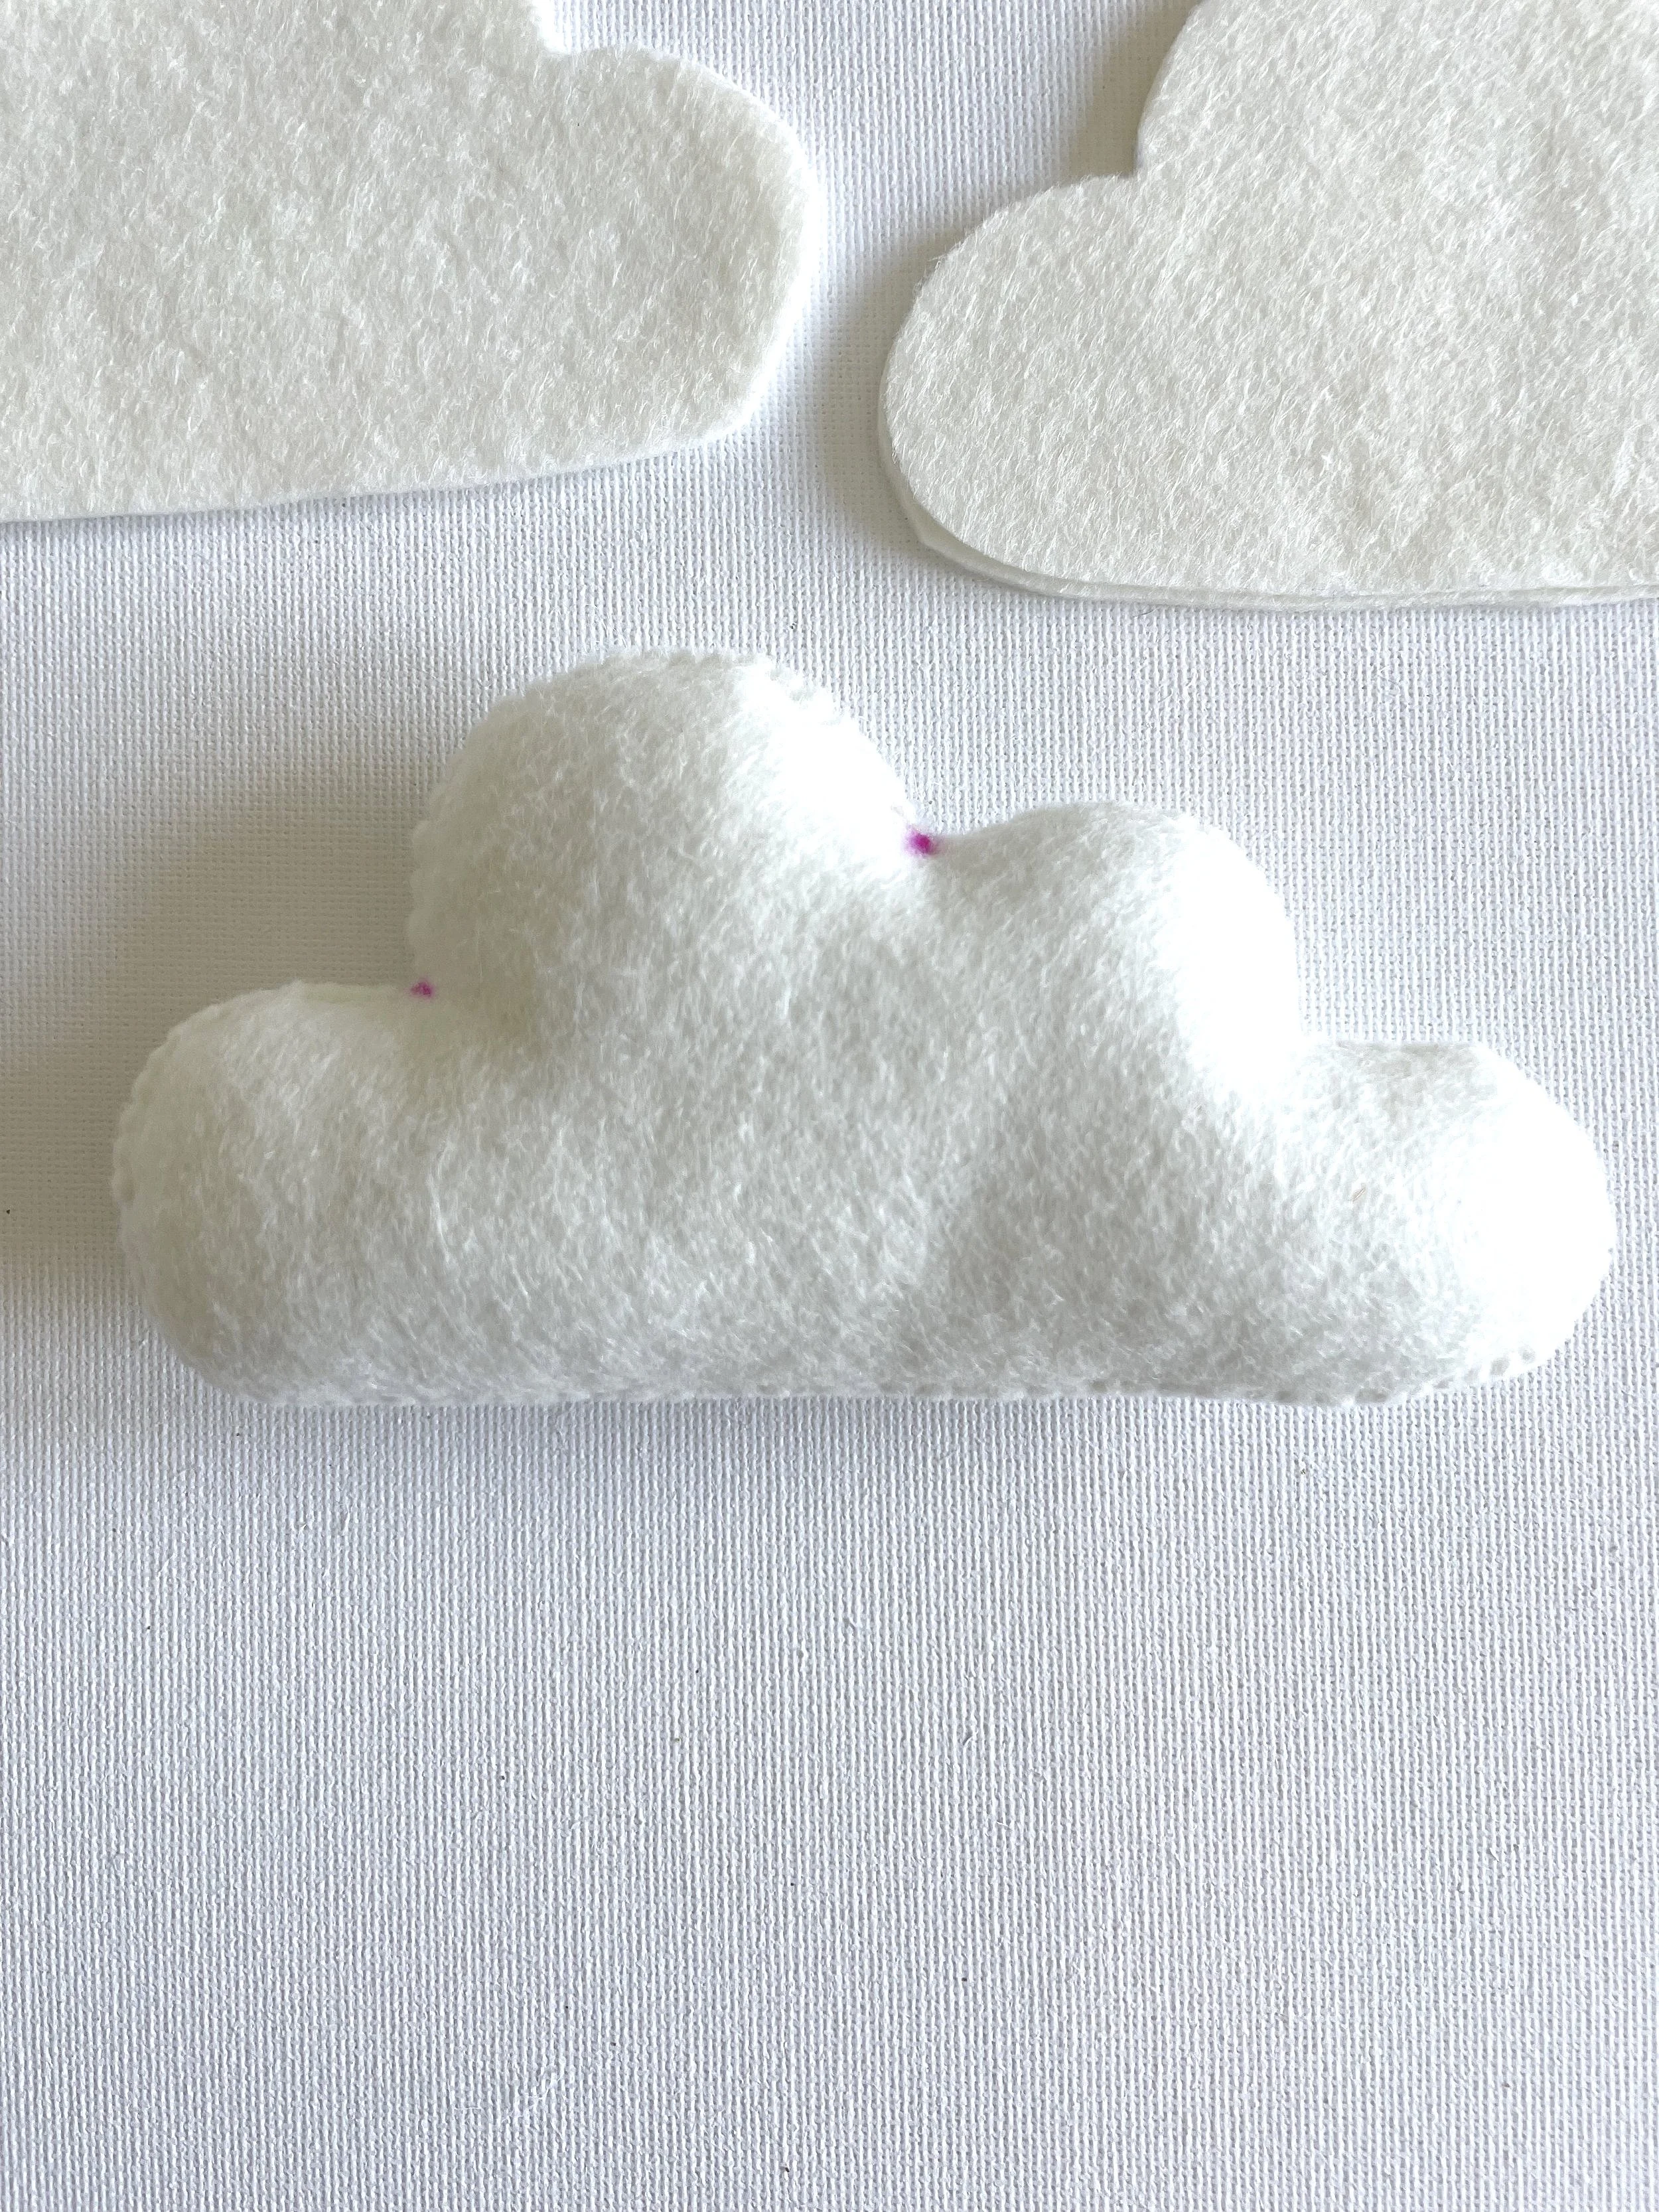
Cut out the clouds…
Use your scissors to cut carefully through both layers of wool and around the cloud shapes.
Once cut out, turn over the top cloud that has been marked with pen. Any visible pen marks should now be on the inside of each cloud and will not be visible on your finished nursery mobile.
Sew your Clouds
Now it’s time to sew your nursery mobile! Don’t worry if you’re brand new to sewing, I’ll walk you through two simple stitches to get you started.
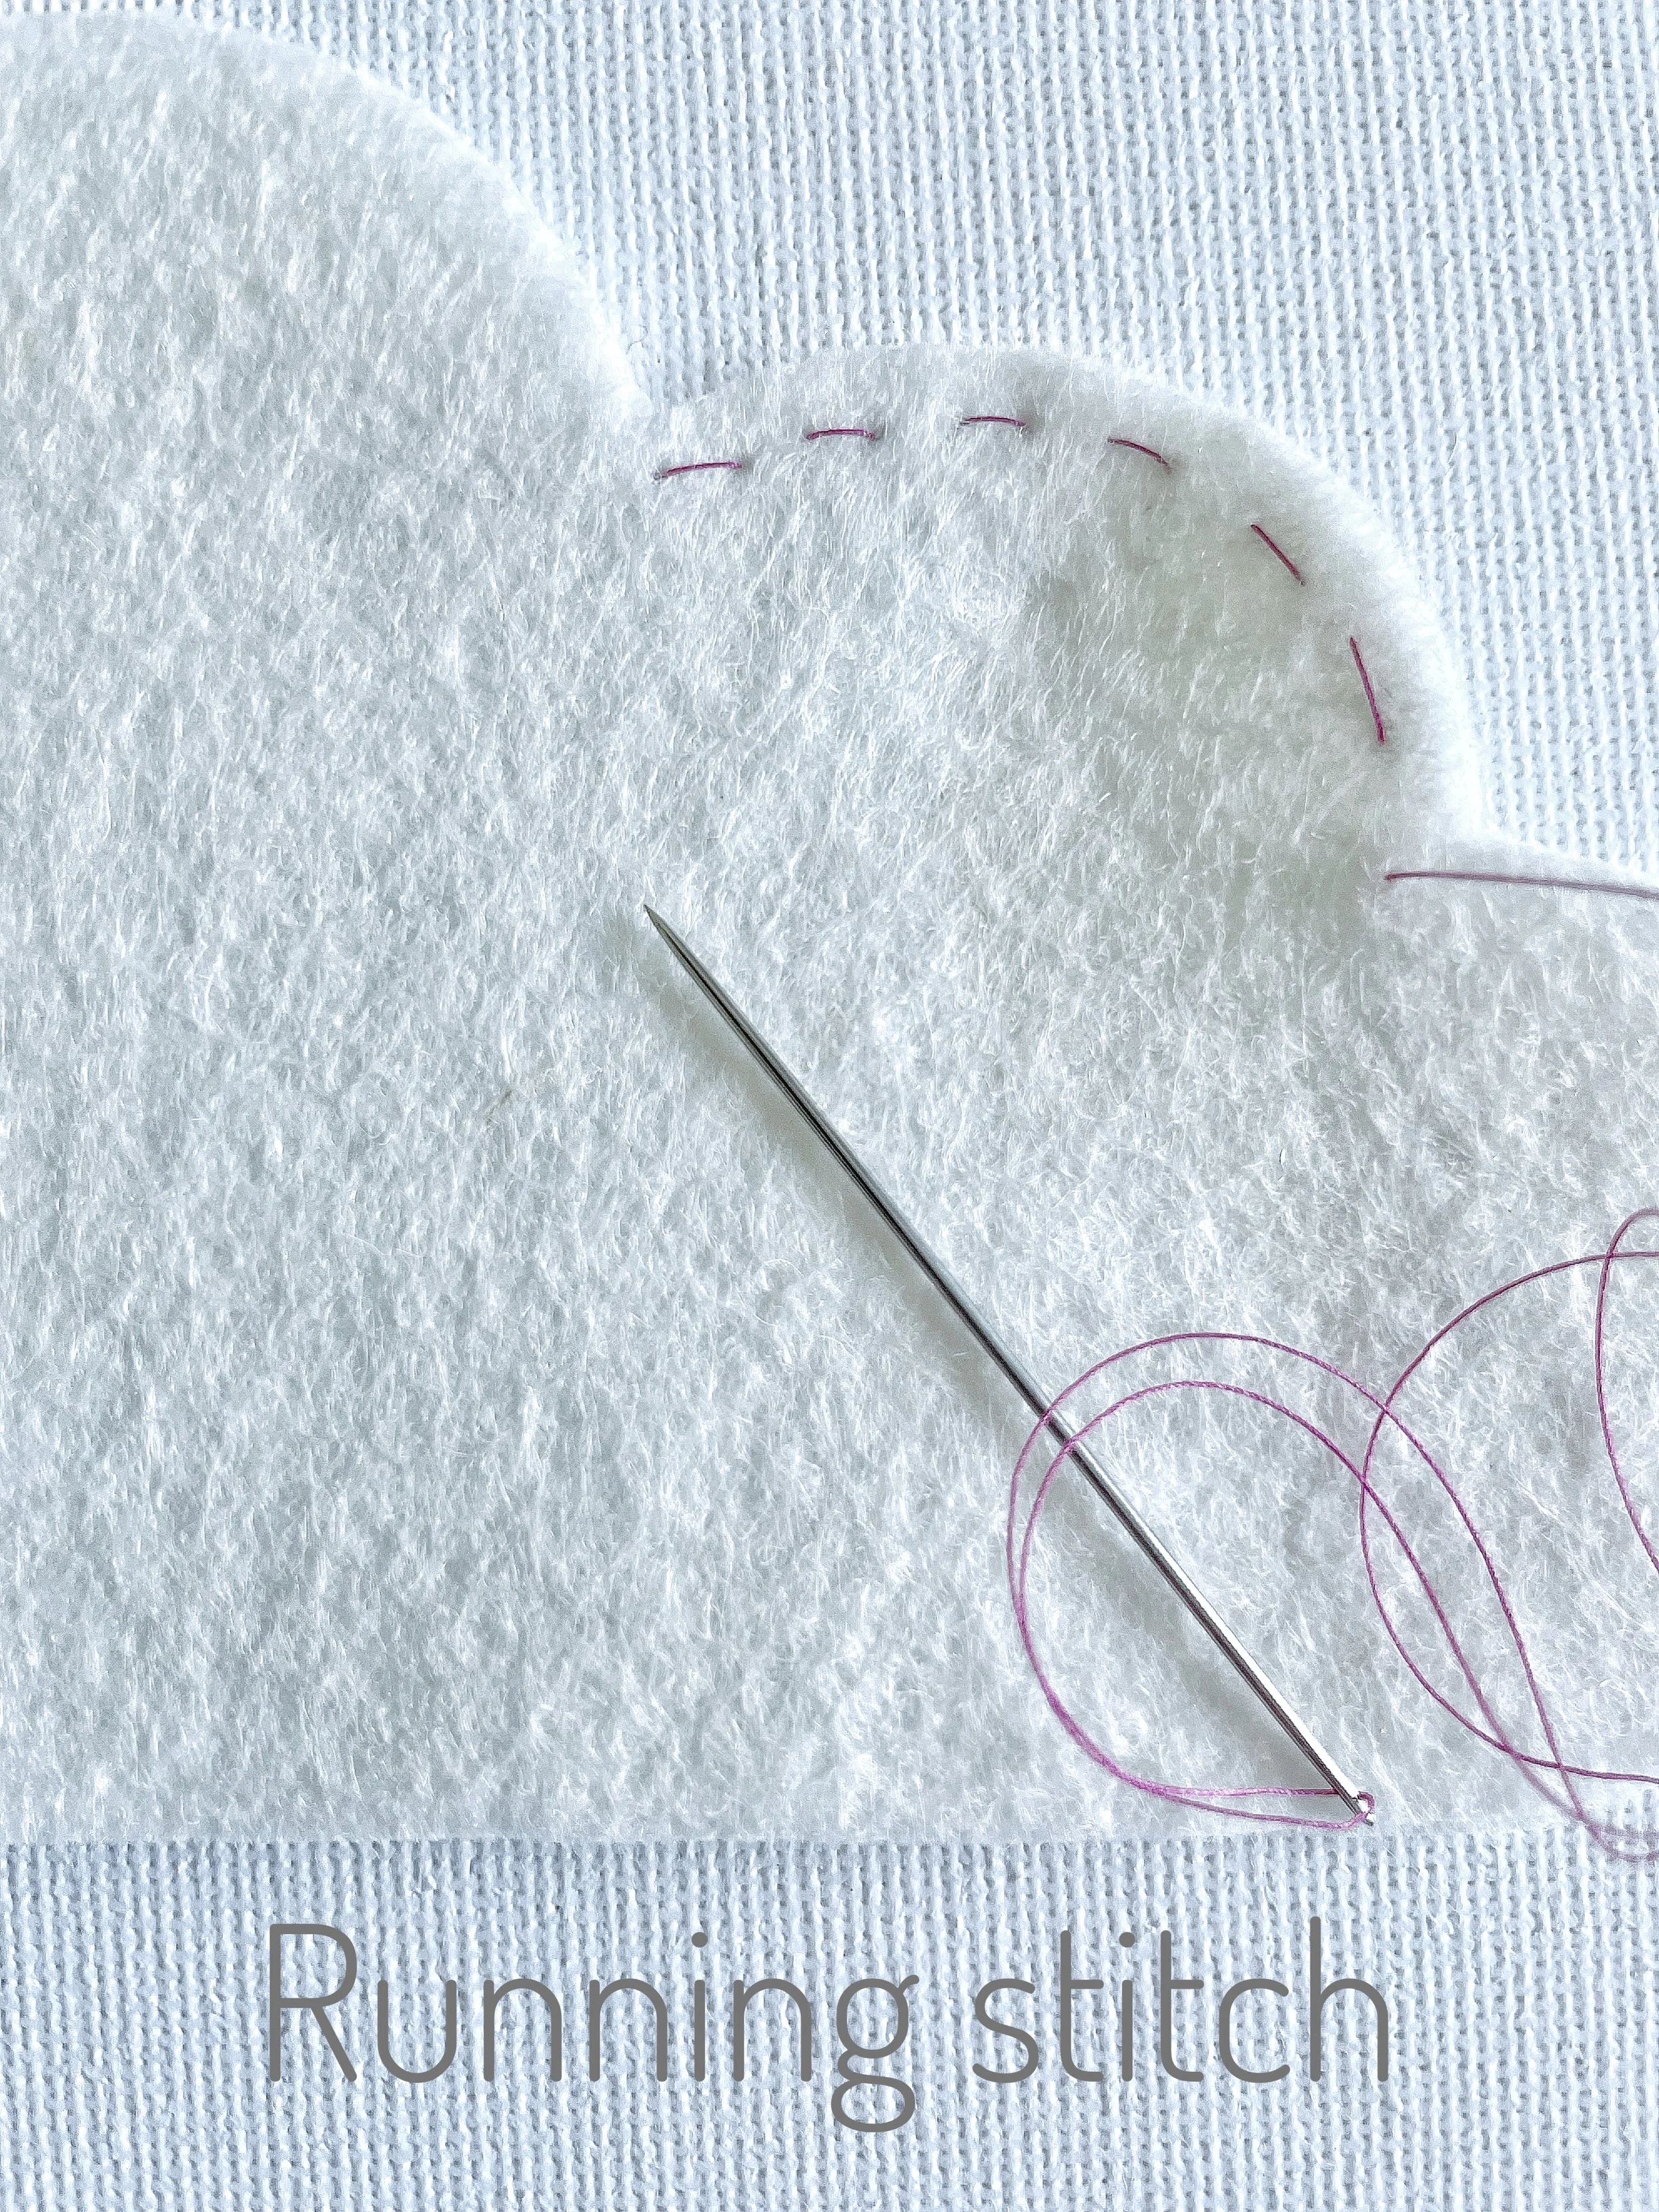
First up is the running stitch. It’s beginner-friendly and doesn’t take much practice to master.
I’m using pink thread in the examples so you can easily see the stitches, but when you sew your nursery mobile, you’ll want to use thread that matches your fabric.
Instead of writing out all the steps for each stitch, I thought it would be much easier (and more fun!) for you to learn from a video. This running stitch tutorial from Red Ted Art is absolutely perfect for beginners. You can watch it here: Running stitch tutorial.
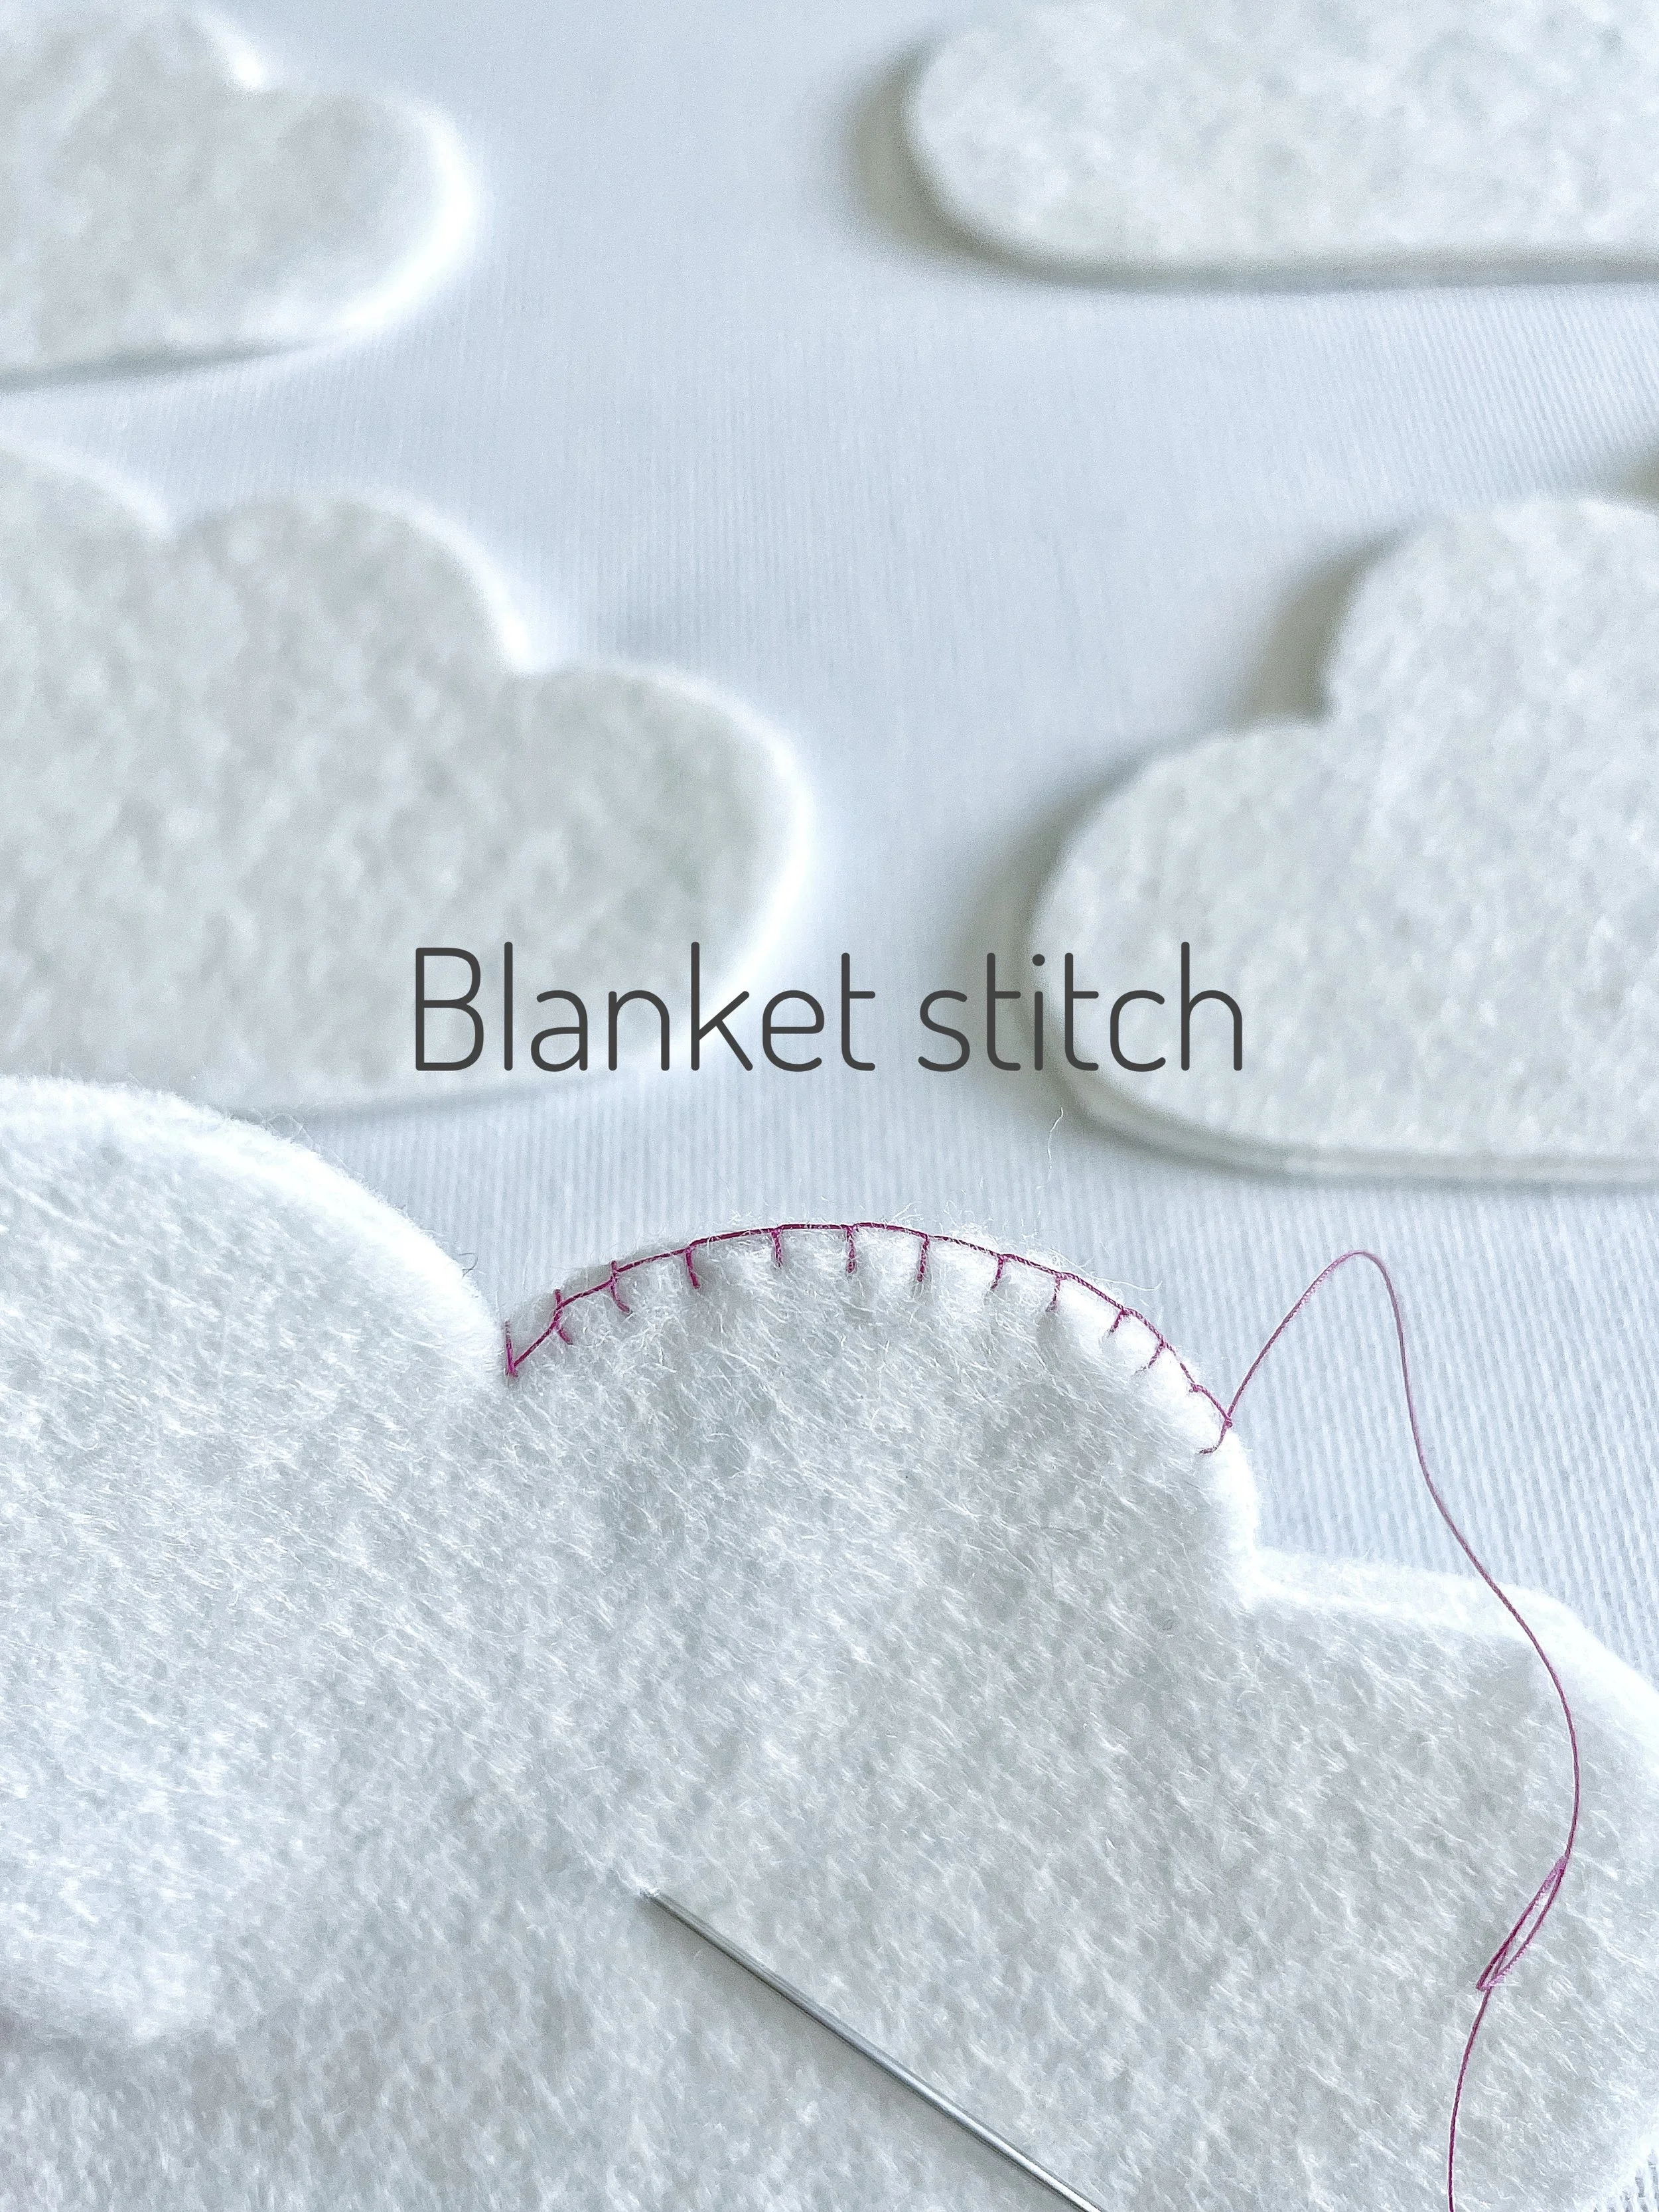
If you’re more confident with your sewing, the blanket stitch is a great choice for the DIY Nursery mobile.
I’ve included a link to a fantastic blanket stitch tutorial by Red Ted Art. If you’d like to give it a try, you can watch it here: Blanket stitch tutorial
Now it’s time to sew your clouds with your chosen stitch.
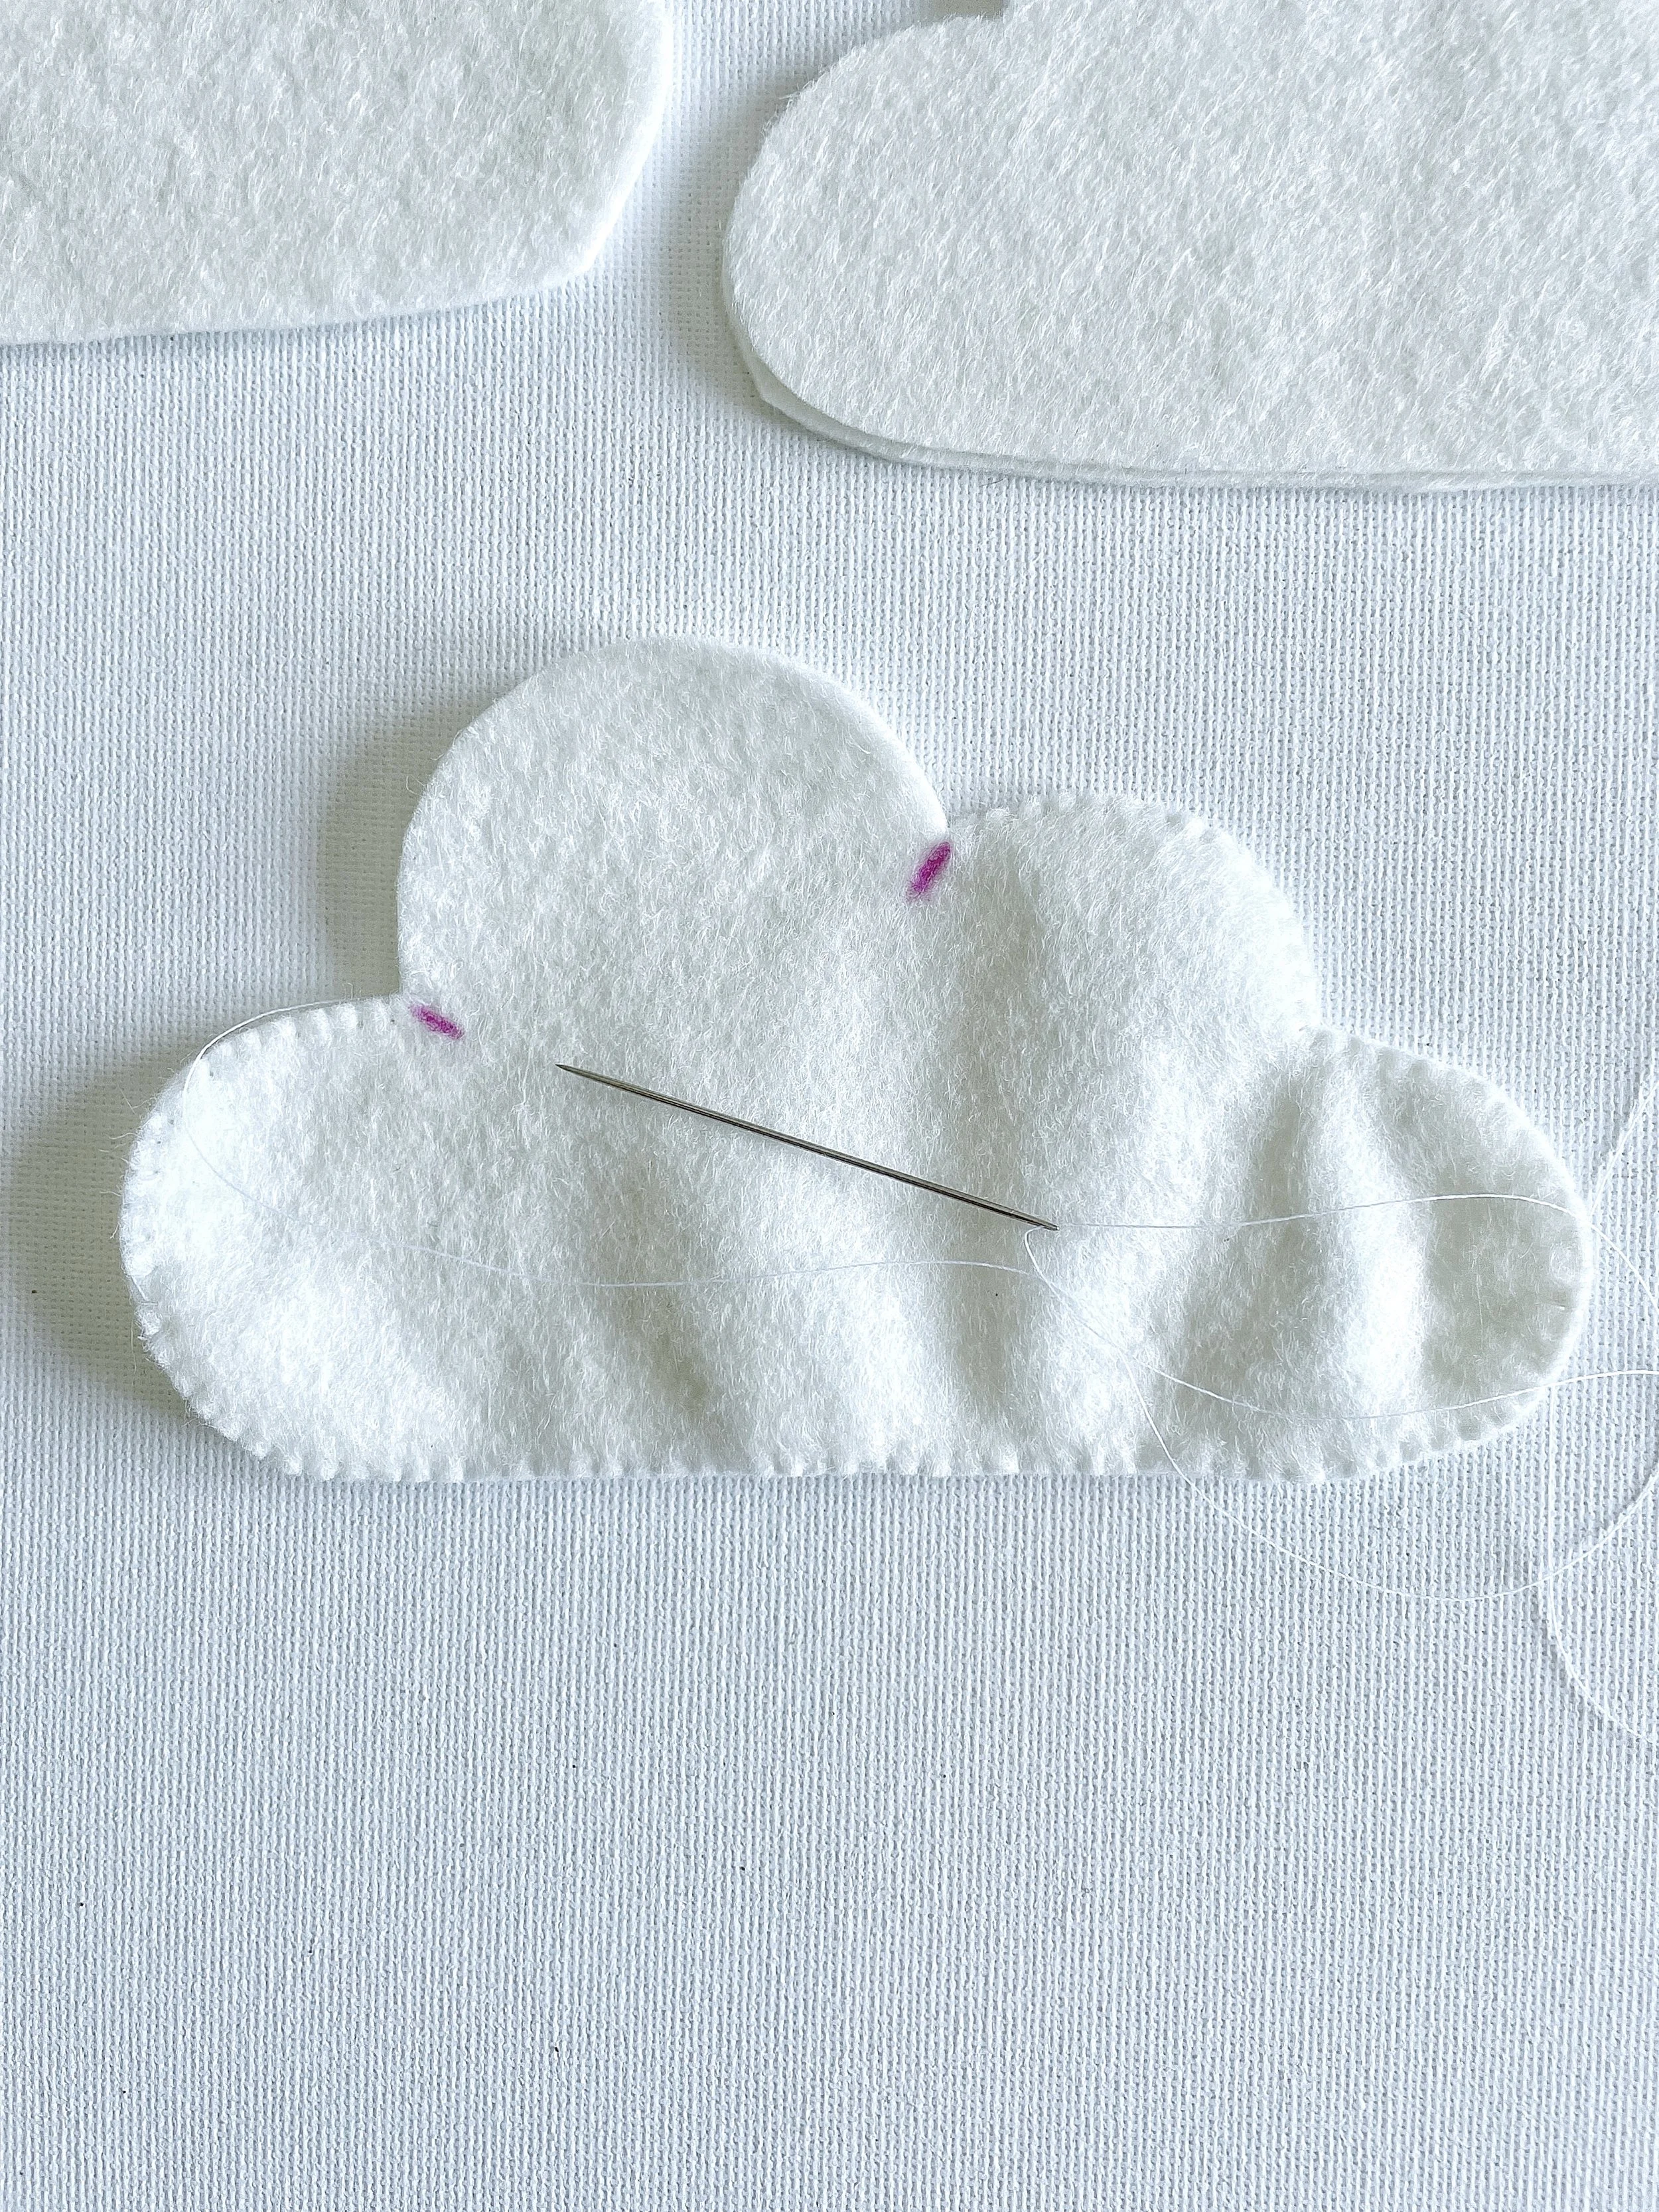
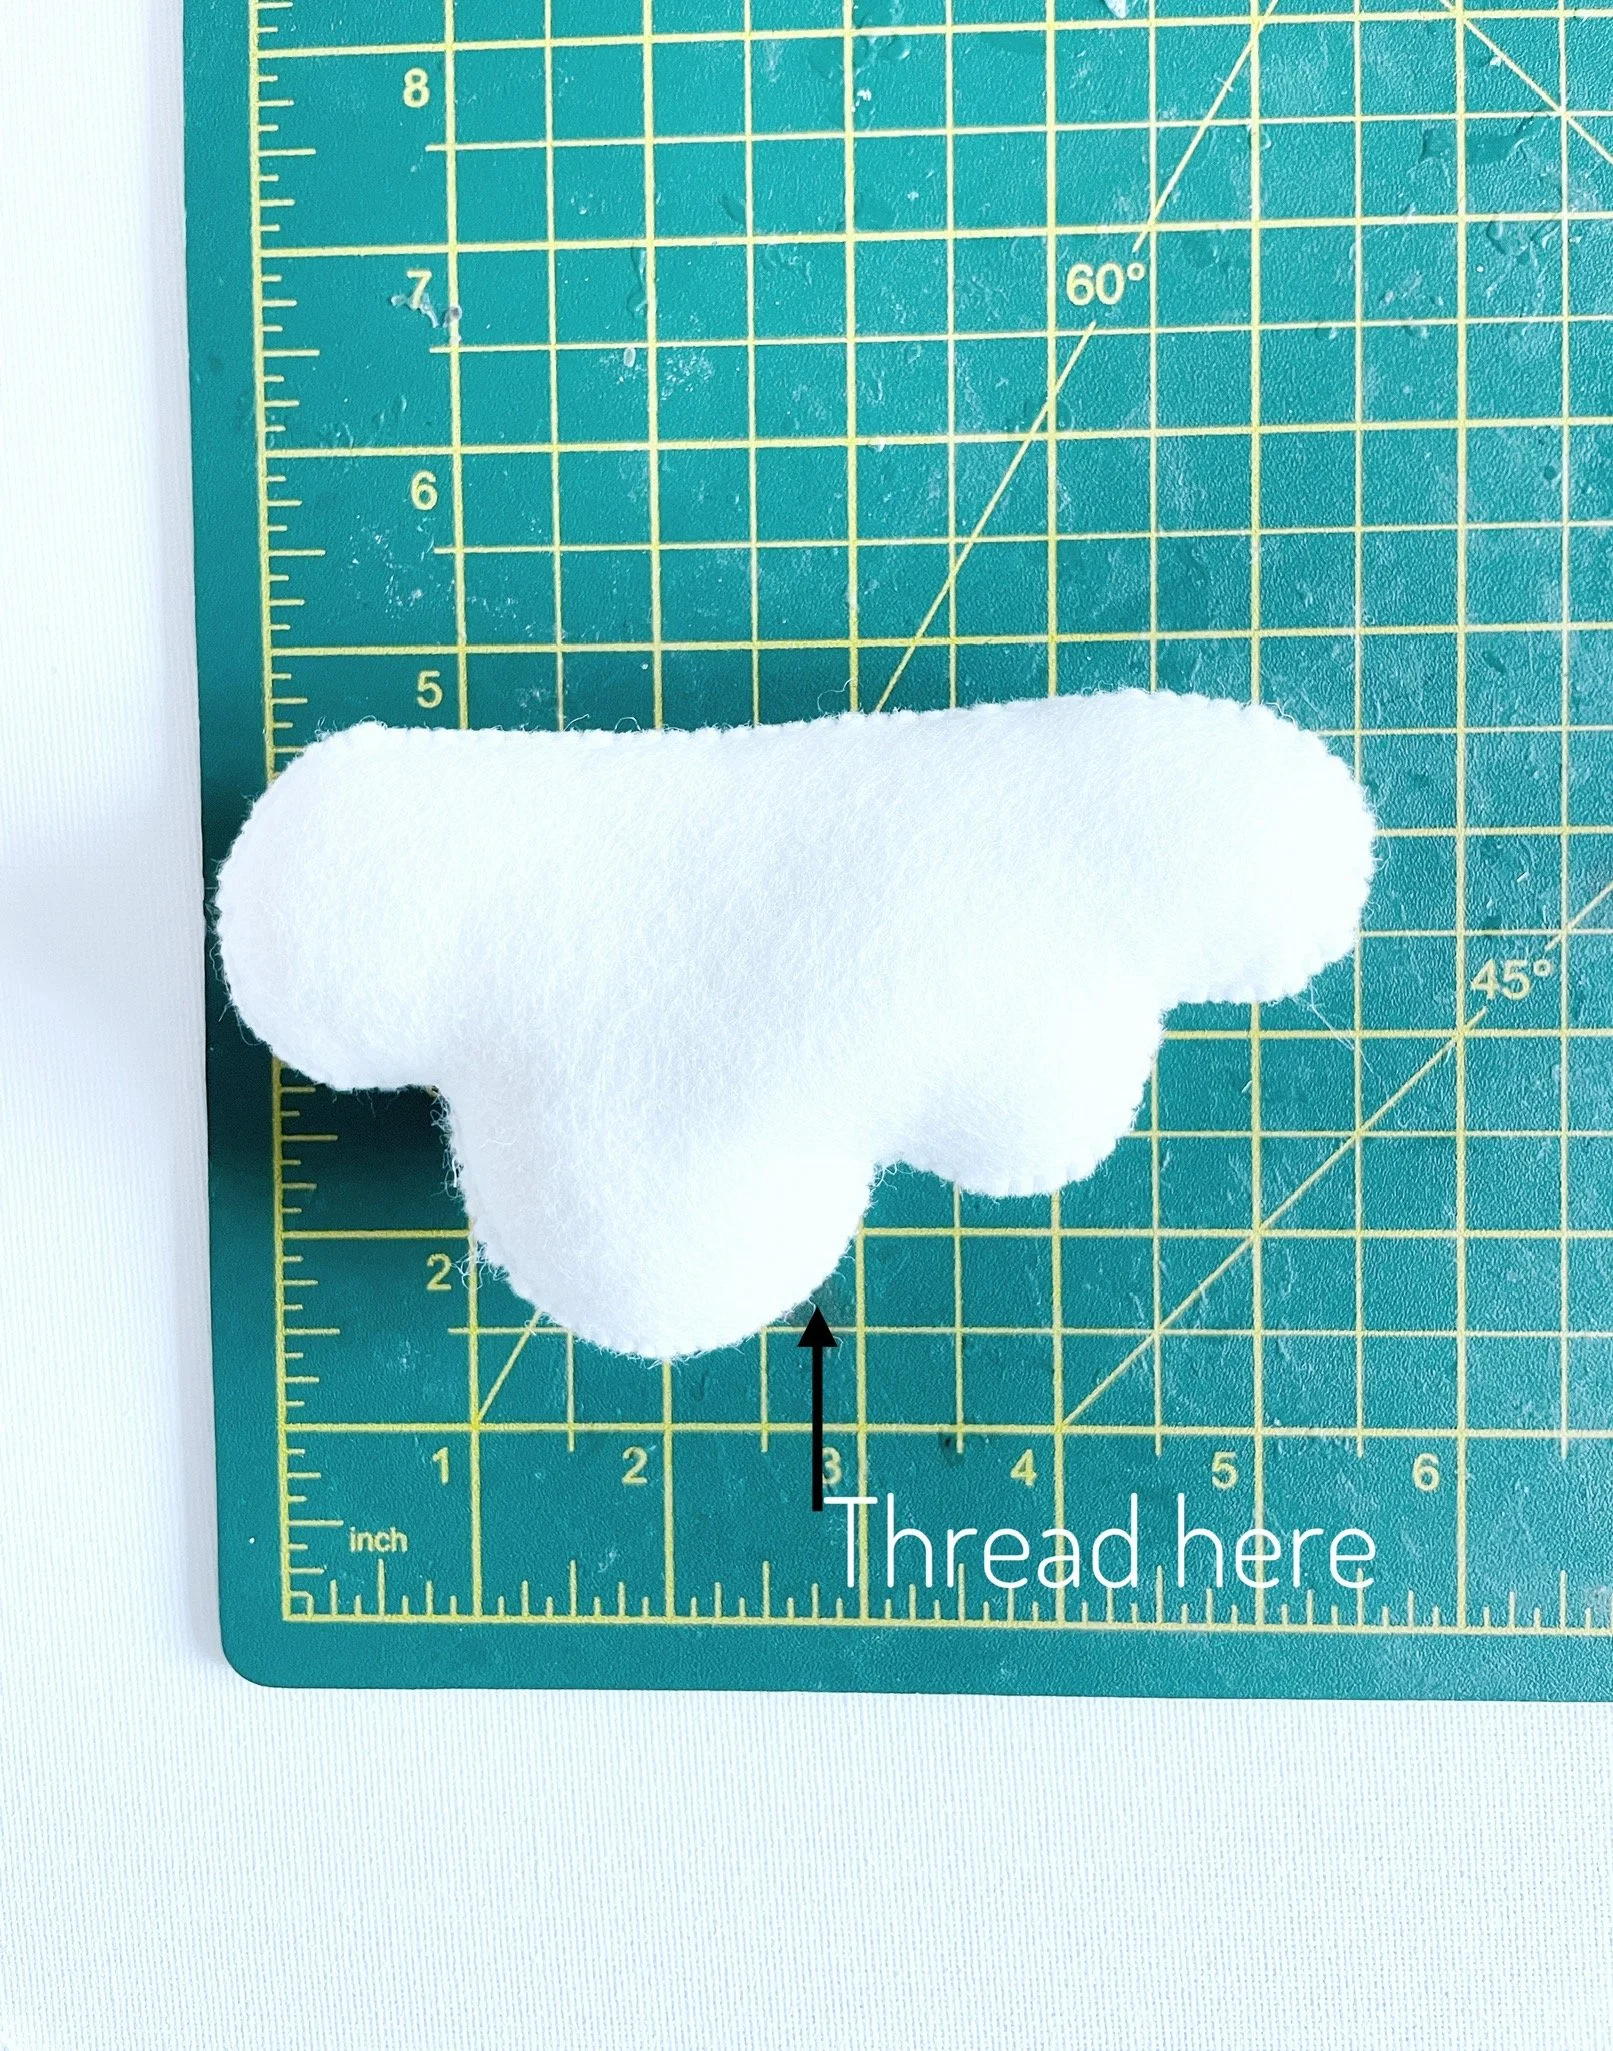
Use your chosen stitch to sew around the outline of your cloud. Leave a gap at the top of each cloud as shown above (marked with pink pen).
You will use this gap to add the stuffing to your cloud.
Stuff your clouds…
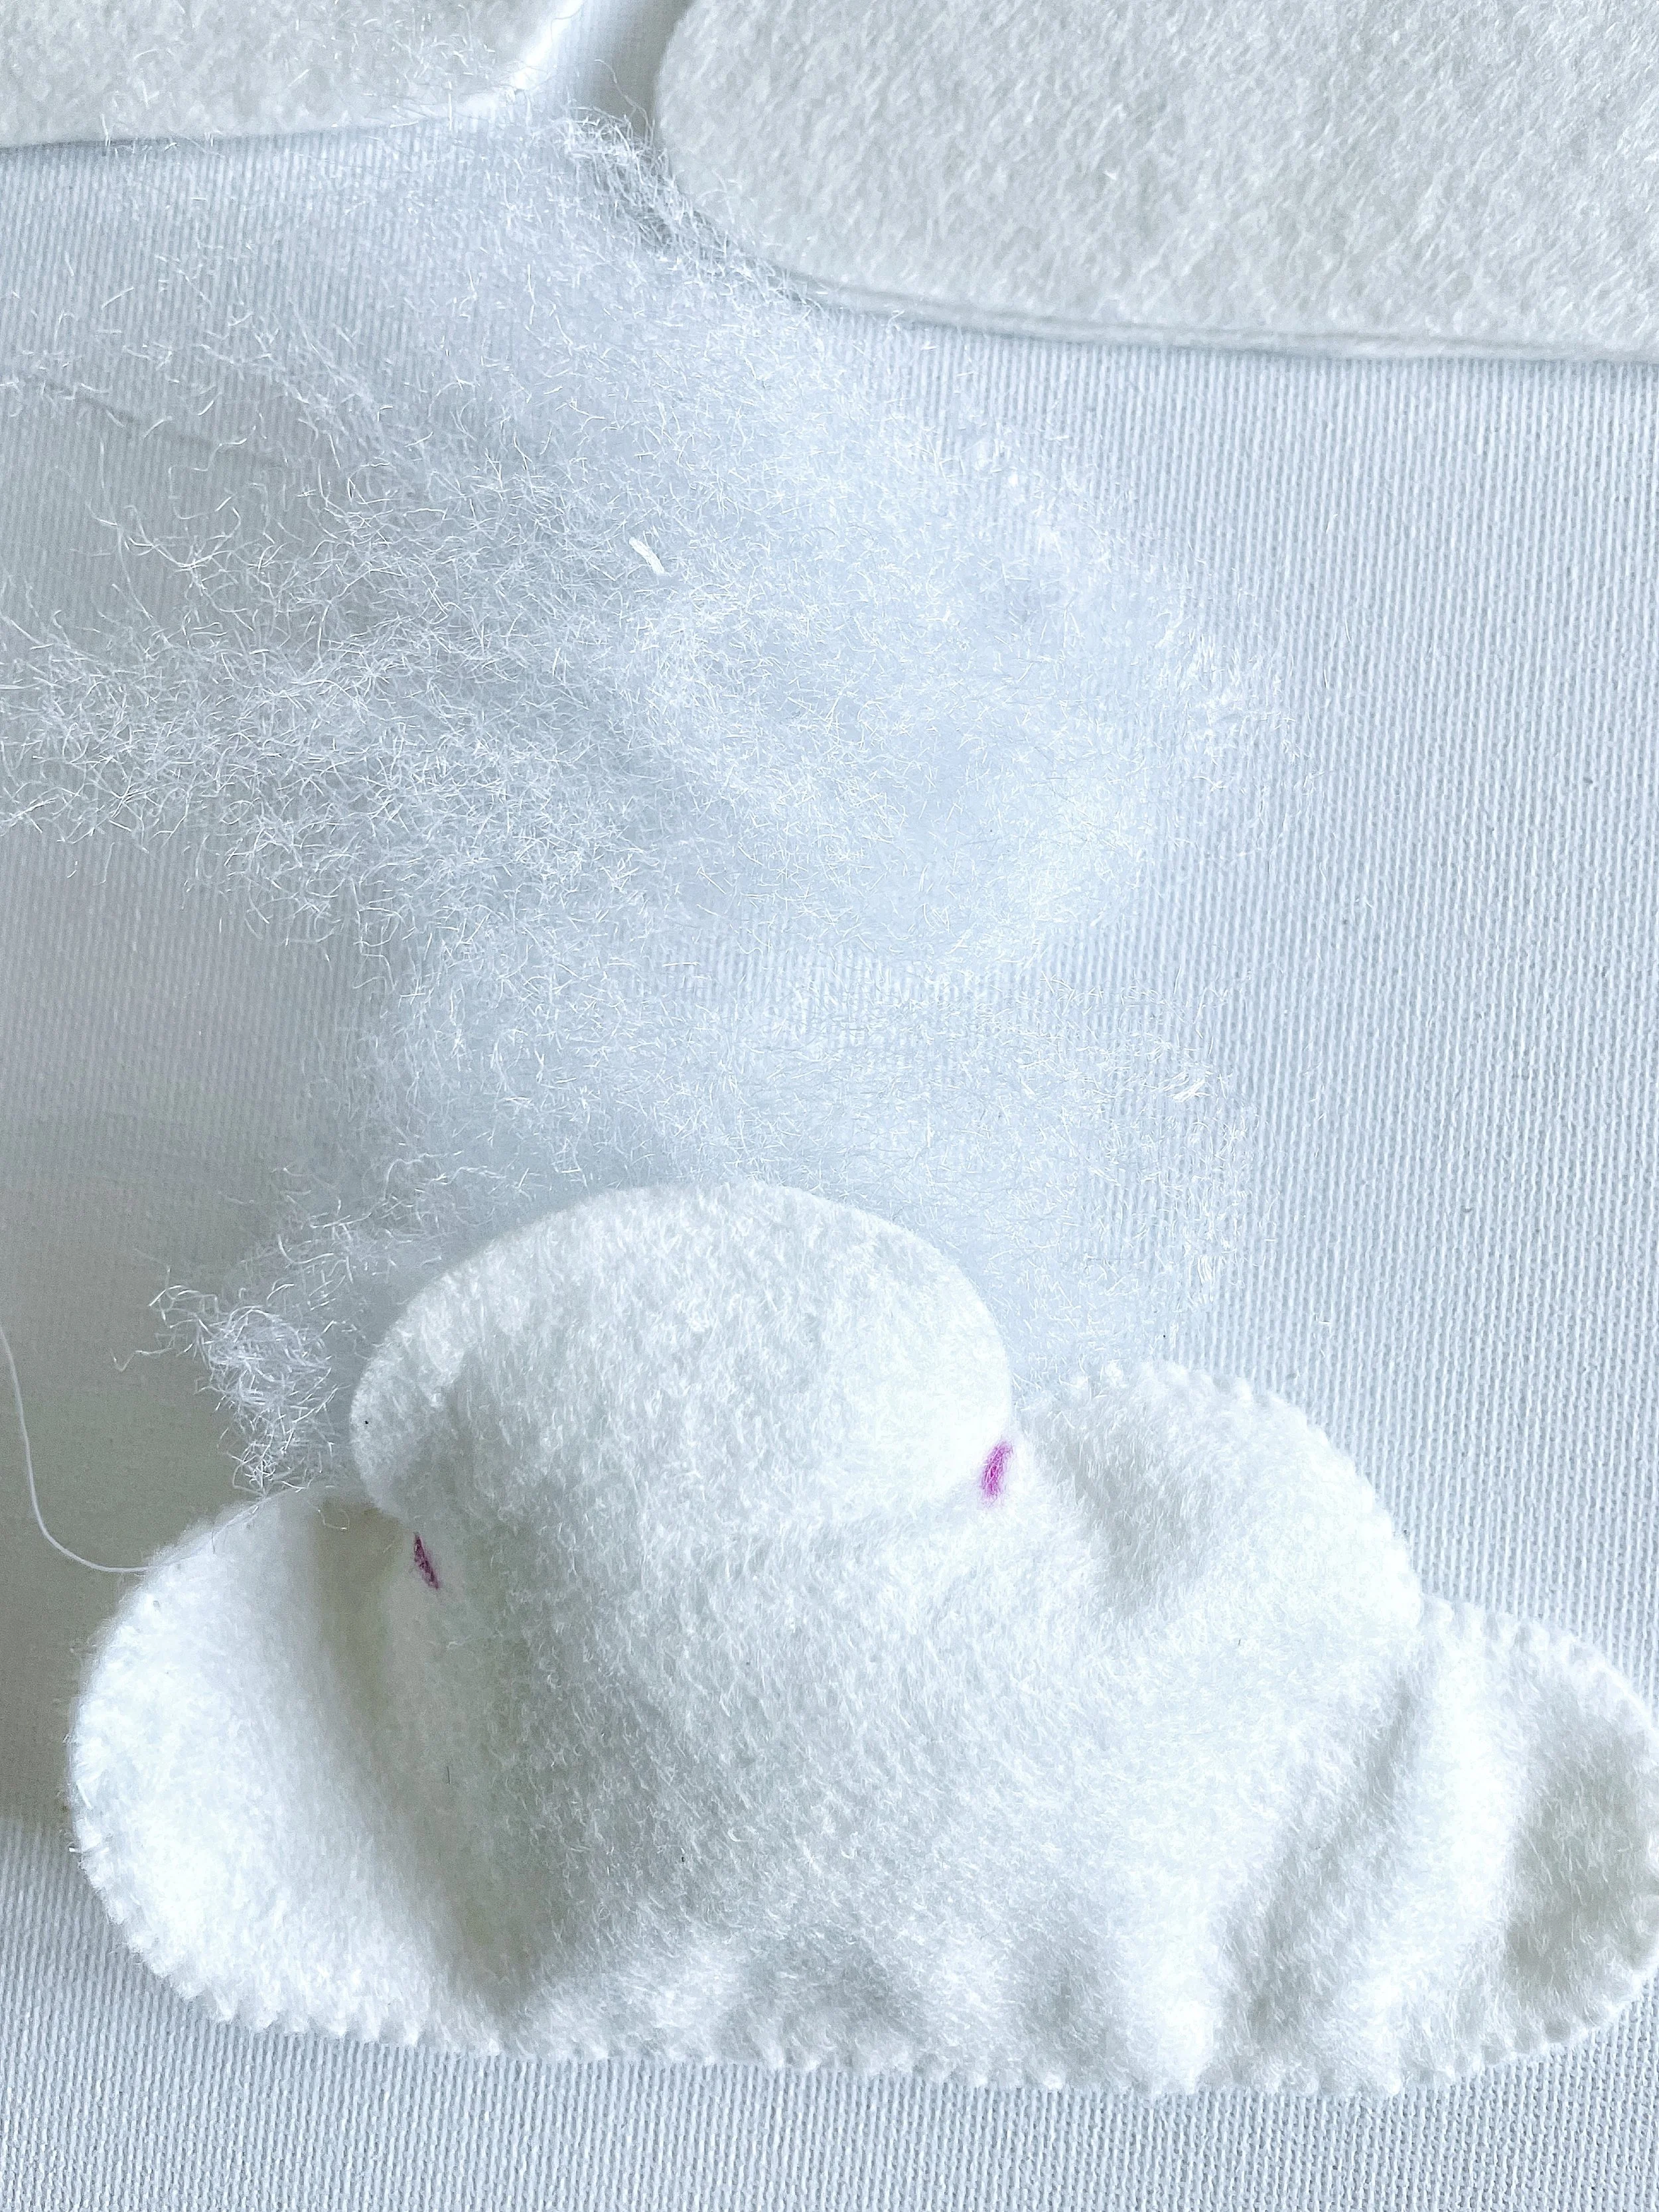
Take a small amount of stuffing and using a wooden chopstick (or something similar) gently push the stuffing into the gap at the top of the cloud.
Using your chopstick gently push the stuffing to the bottom edges of cloud. Be careful! It's easy to damage the stitching with your chopstick if you are too rough.
Continue to add the stuffing until the cloud is nicely stuffed. You're aiming for soft, plushy clouds.
Be careful not to overfill the cloud as this will cause the stitching to gape or snap.
Sew up the gap at the top of cloud. Add the last bit of stuffing before the final stitches are added. Repeat this until all of the clouds are sewn.
Well done! The hardest part is over with. Soon you’ll have a beautiful baby mobile for your nursery!
Measure and mark the beech hoop…

Start by using your pencil to mark six evenly spaced points around your beech hoop. These marks will show you exactly where to attach your strings.
If you’re using a 22cm (9 inch) beech hoop, you’ll want to make a mark every 12cm around the ring.
Add the string…

Cut seven pieces of string, each 40 inches long.
Take one piece of string and fold it in half. Line up the fold with one of the pencil marks on your beech hoop, so that each side of the string hangs down about 20 inches.
Now, take one end of the string and loop it once around the hoop. Then, using both ends of the string together, tie a tight knot to secure it in place.
Repeat this process with five more pieces of string, attaching one to each pencil mark, until all six marks are covered.
You’ll have one piece of string left over — don’t worry, that’s for the cloud in the centre!
Make a loop to hang your mobile…
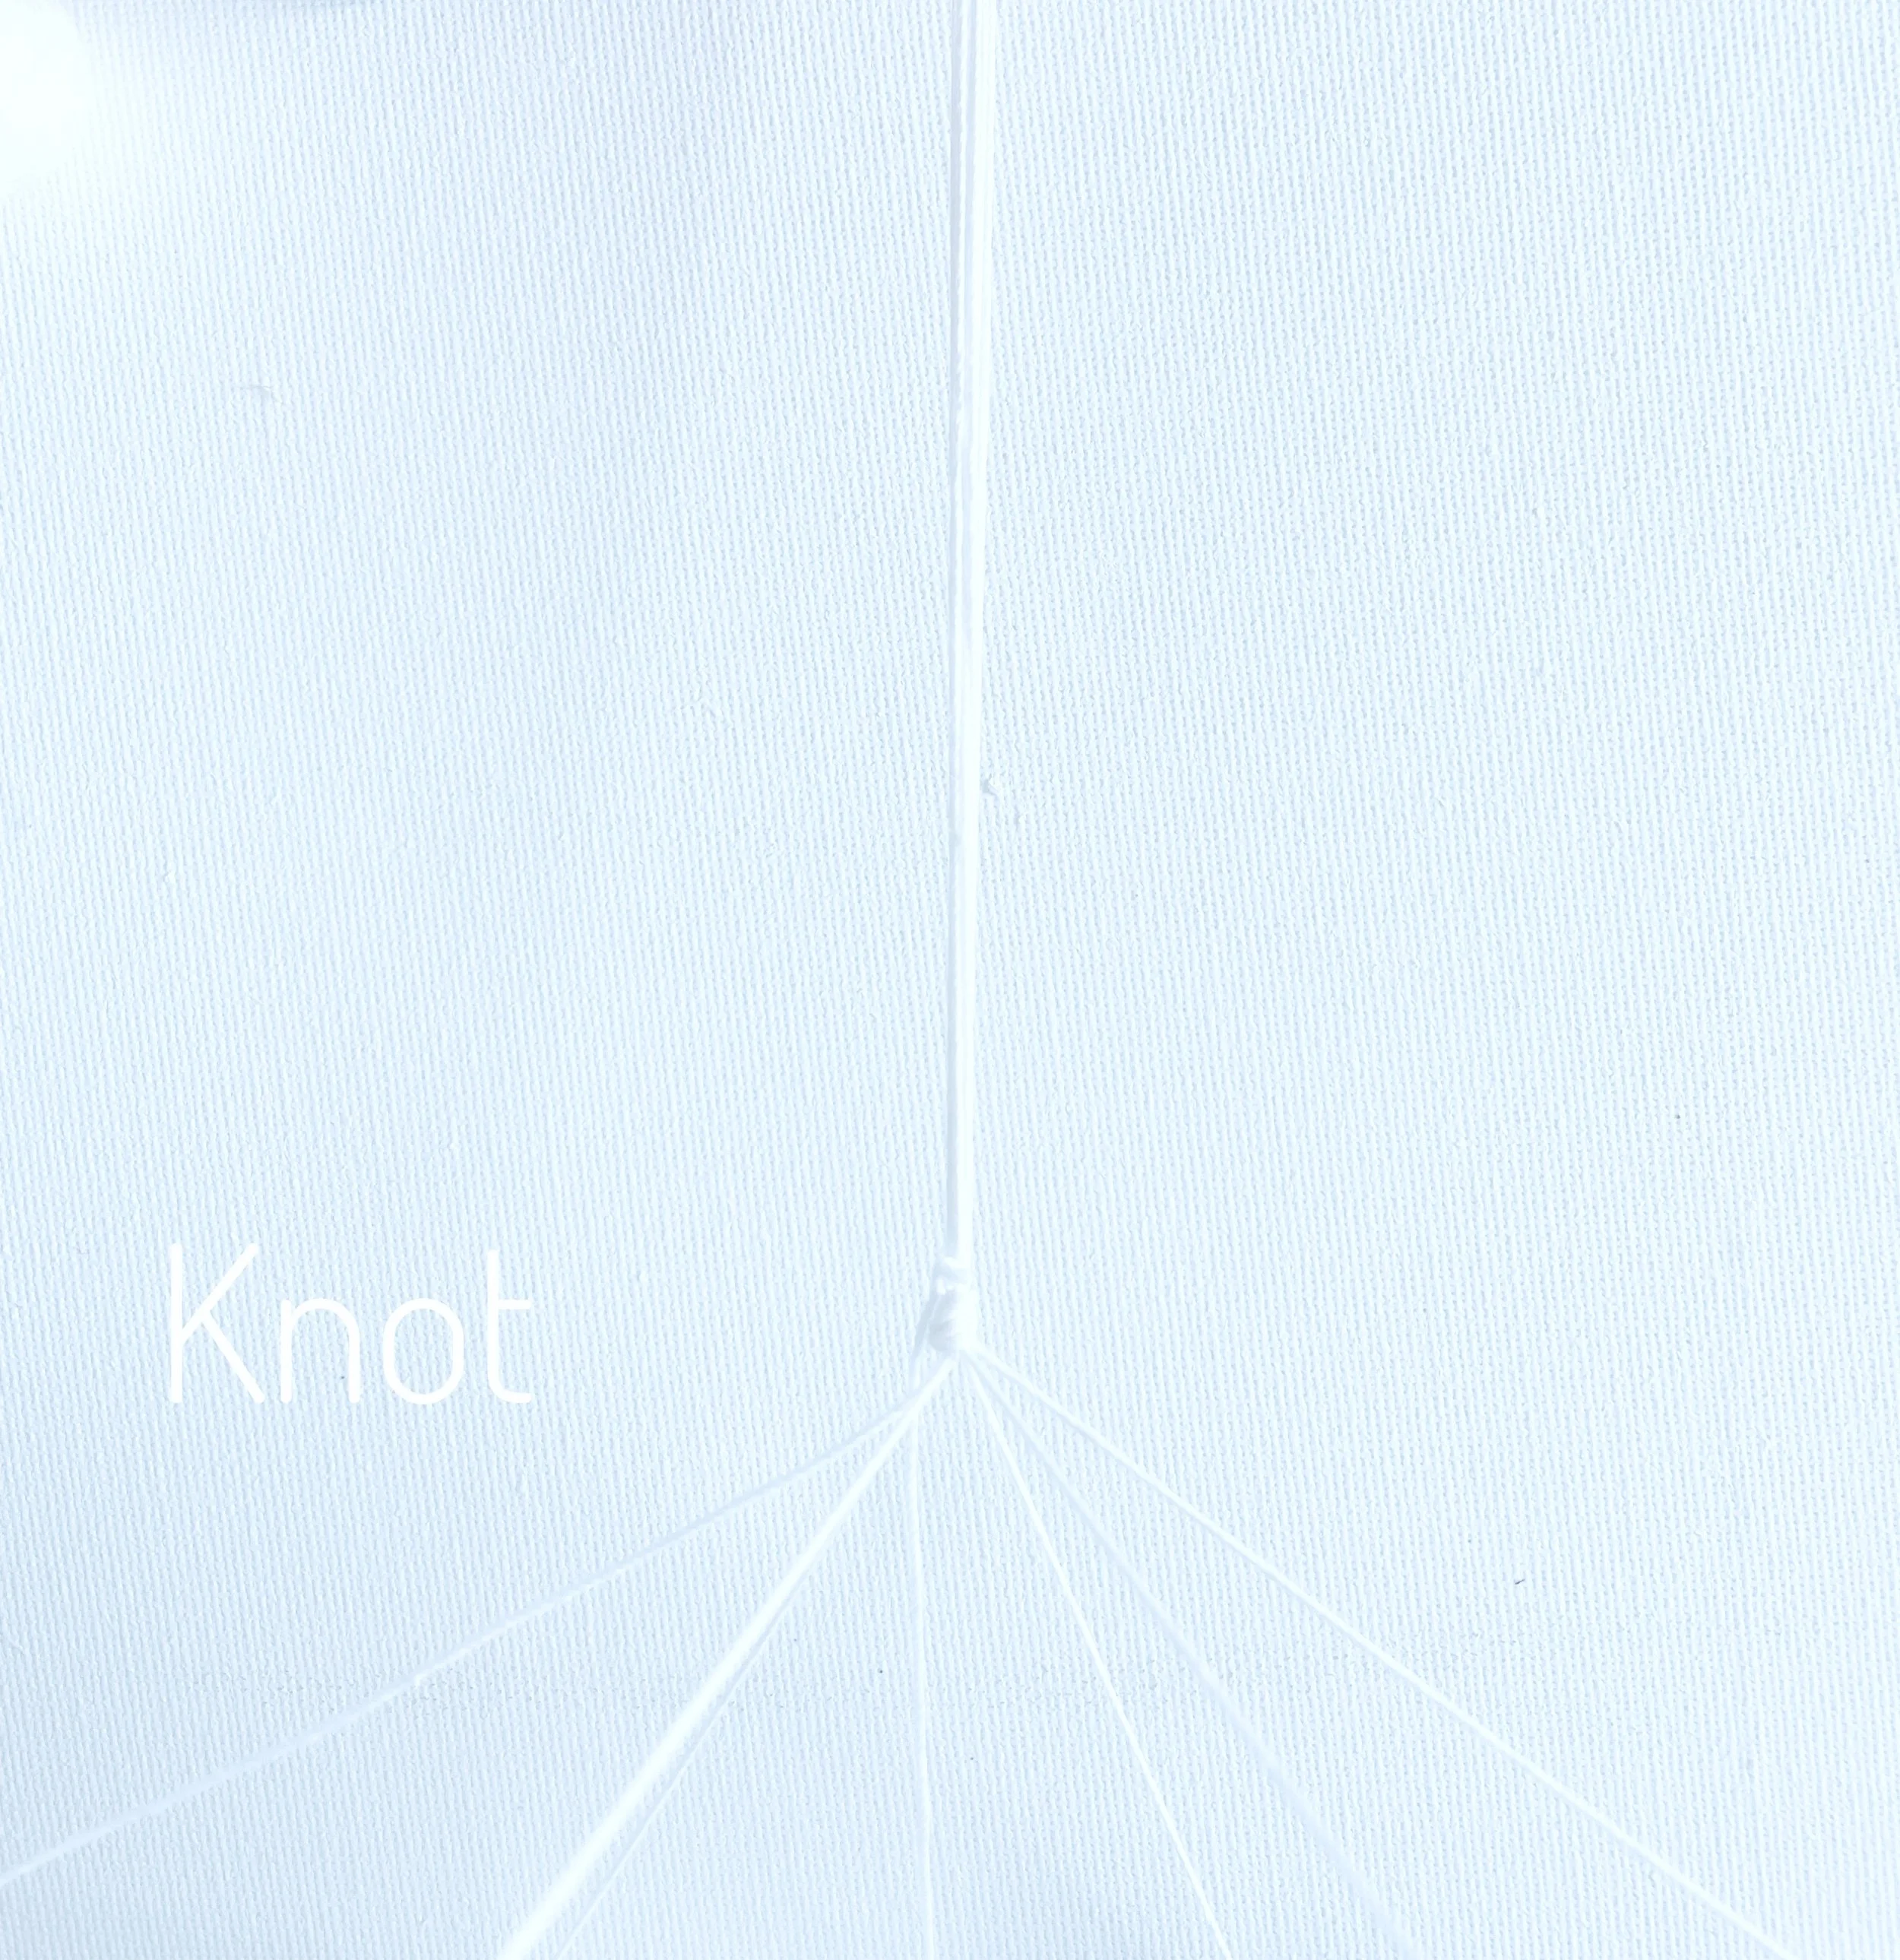
Gather together six strands of string and make sure they’re all positioned correctly. You want the bottom length of the strings to hang down neatly on the outside of the hoop, and the top parts to be pulled upwards, all gathering from the outside.
Now, lift them up together and add your extra piece of string, making sure it falls right in the centre. Tie all the strings together securely with one big knot.
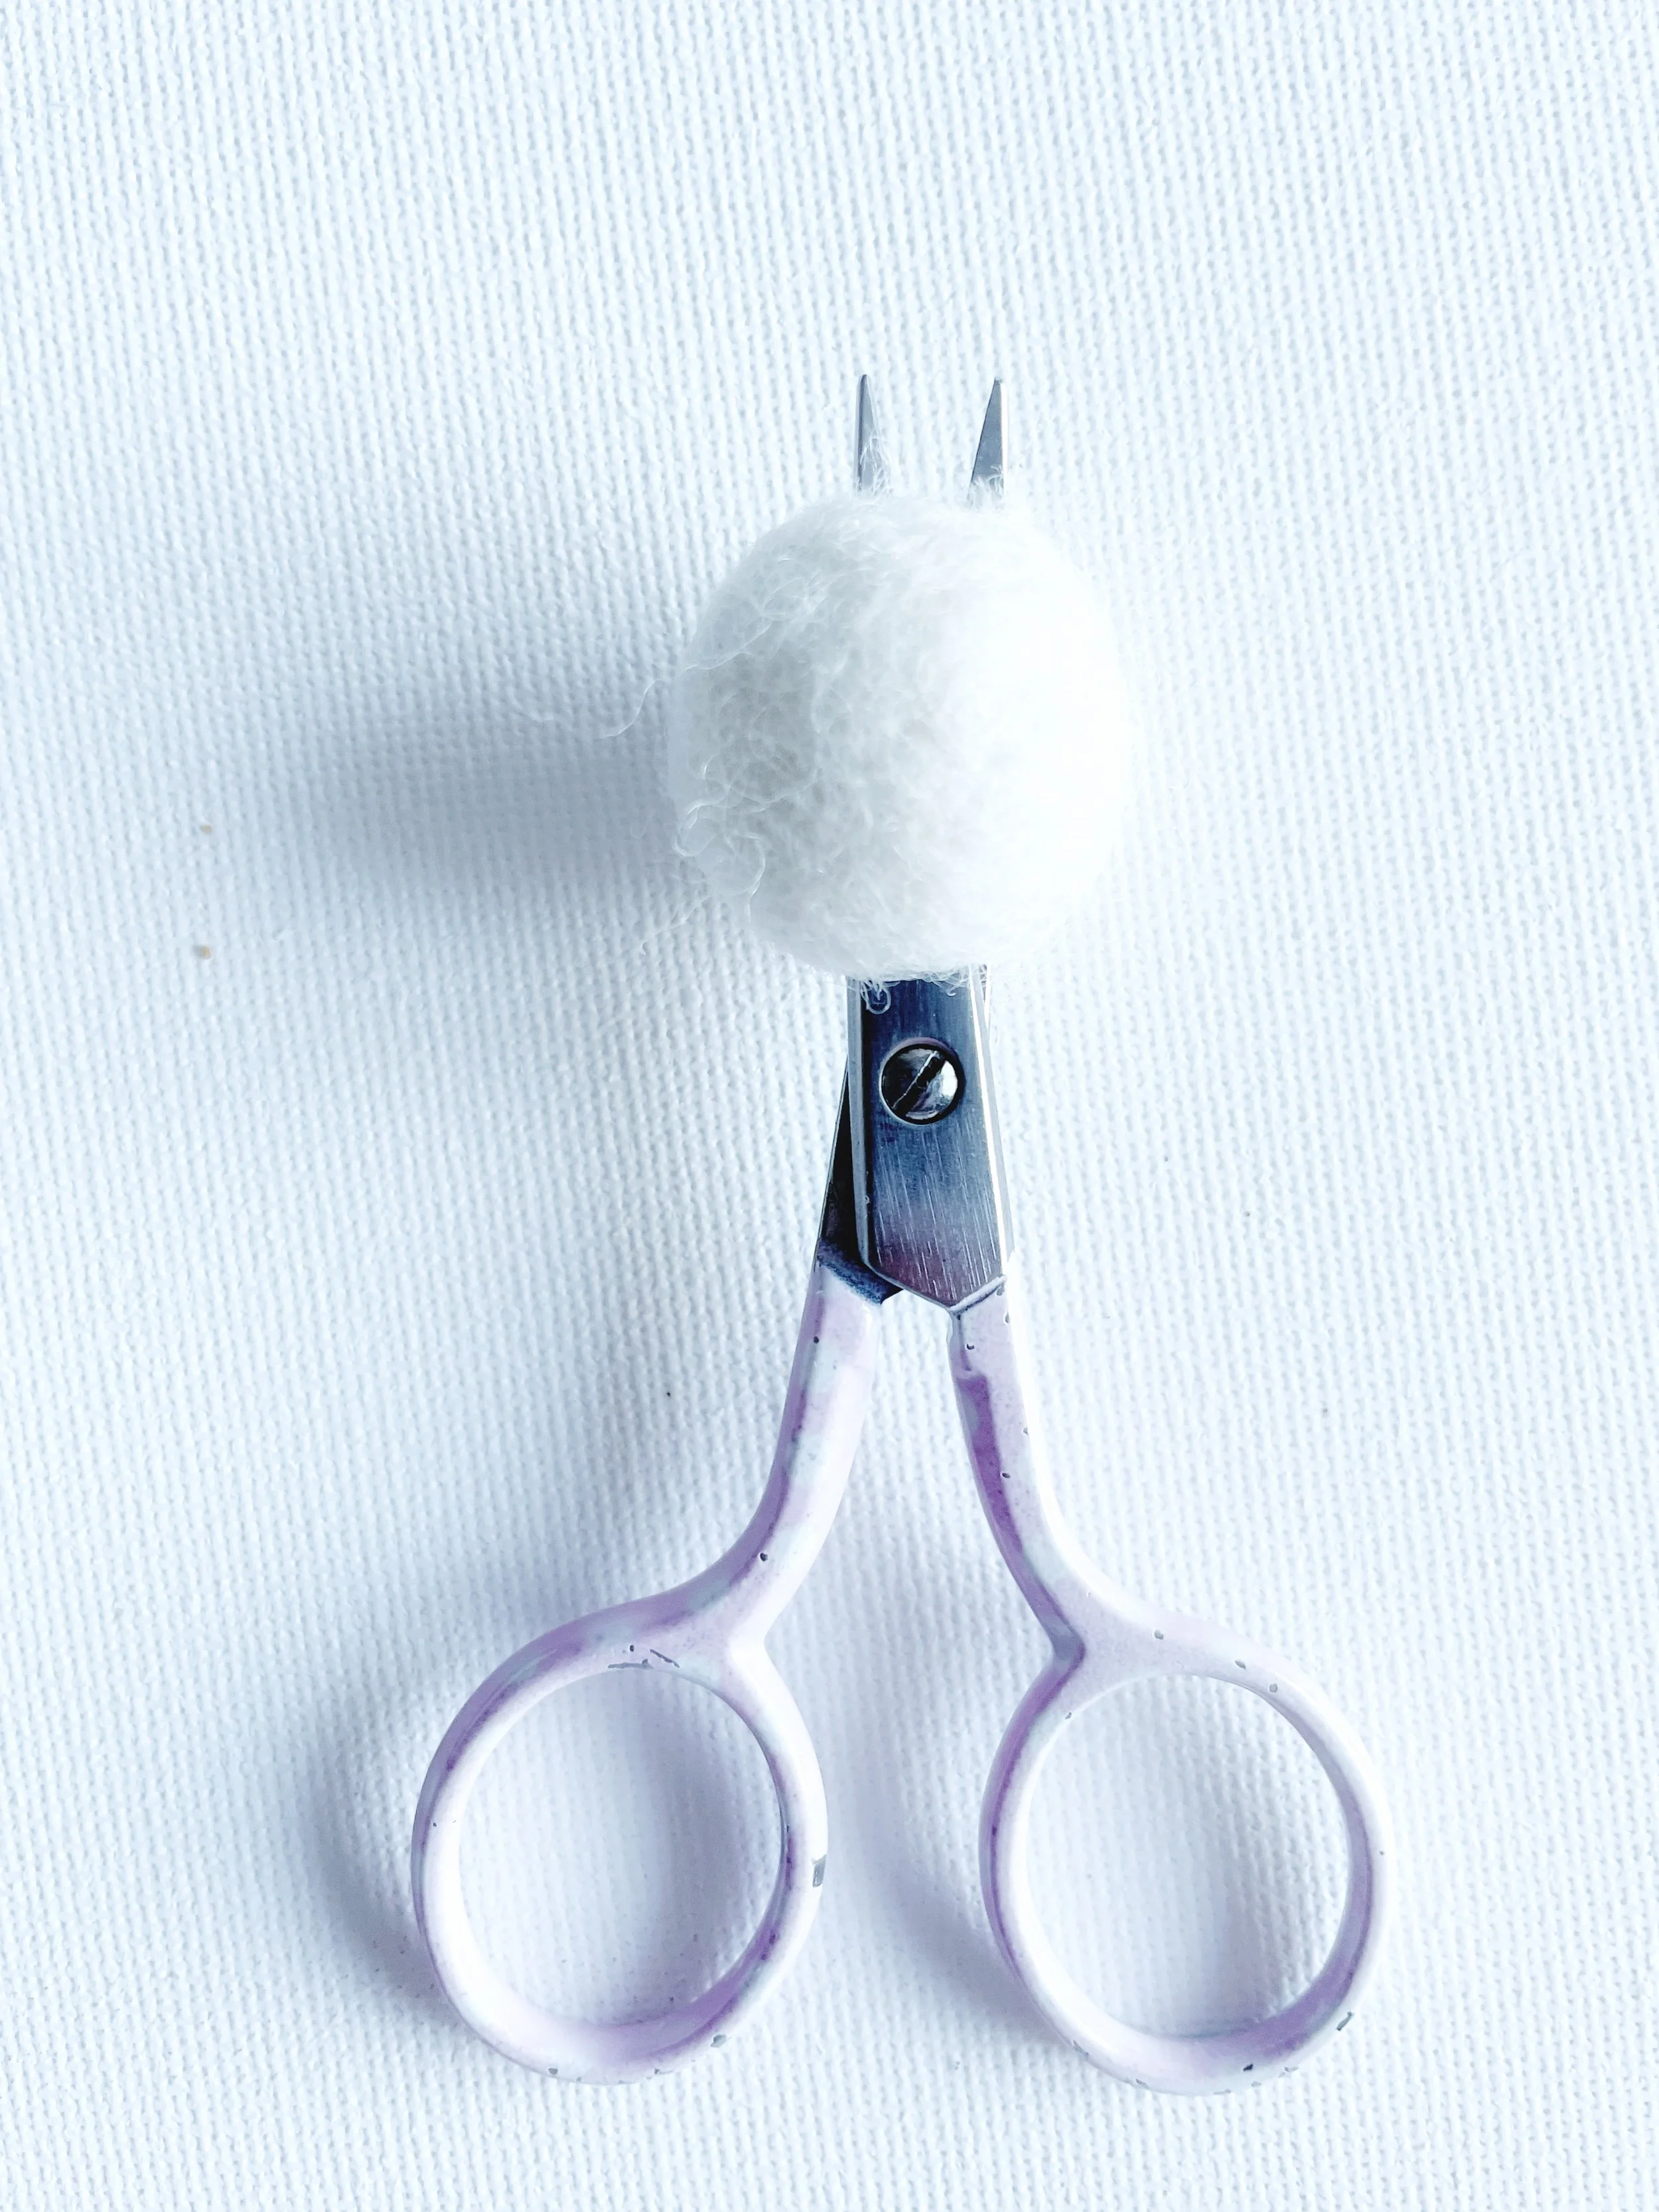
If you are using felt balls for your DIY nursery mobile we’re going to use one of them to cover the knot we have just made.
Take your scissors and snip into the centre of the felt ball until your scissors come out the other side.
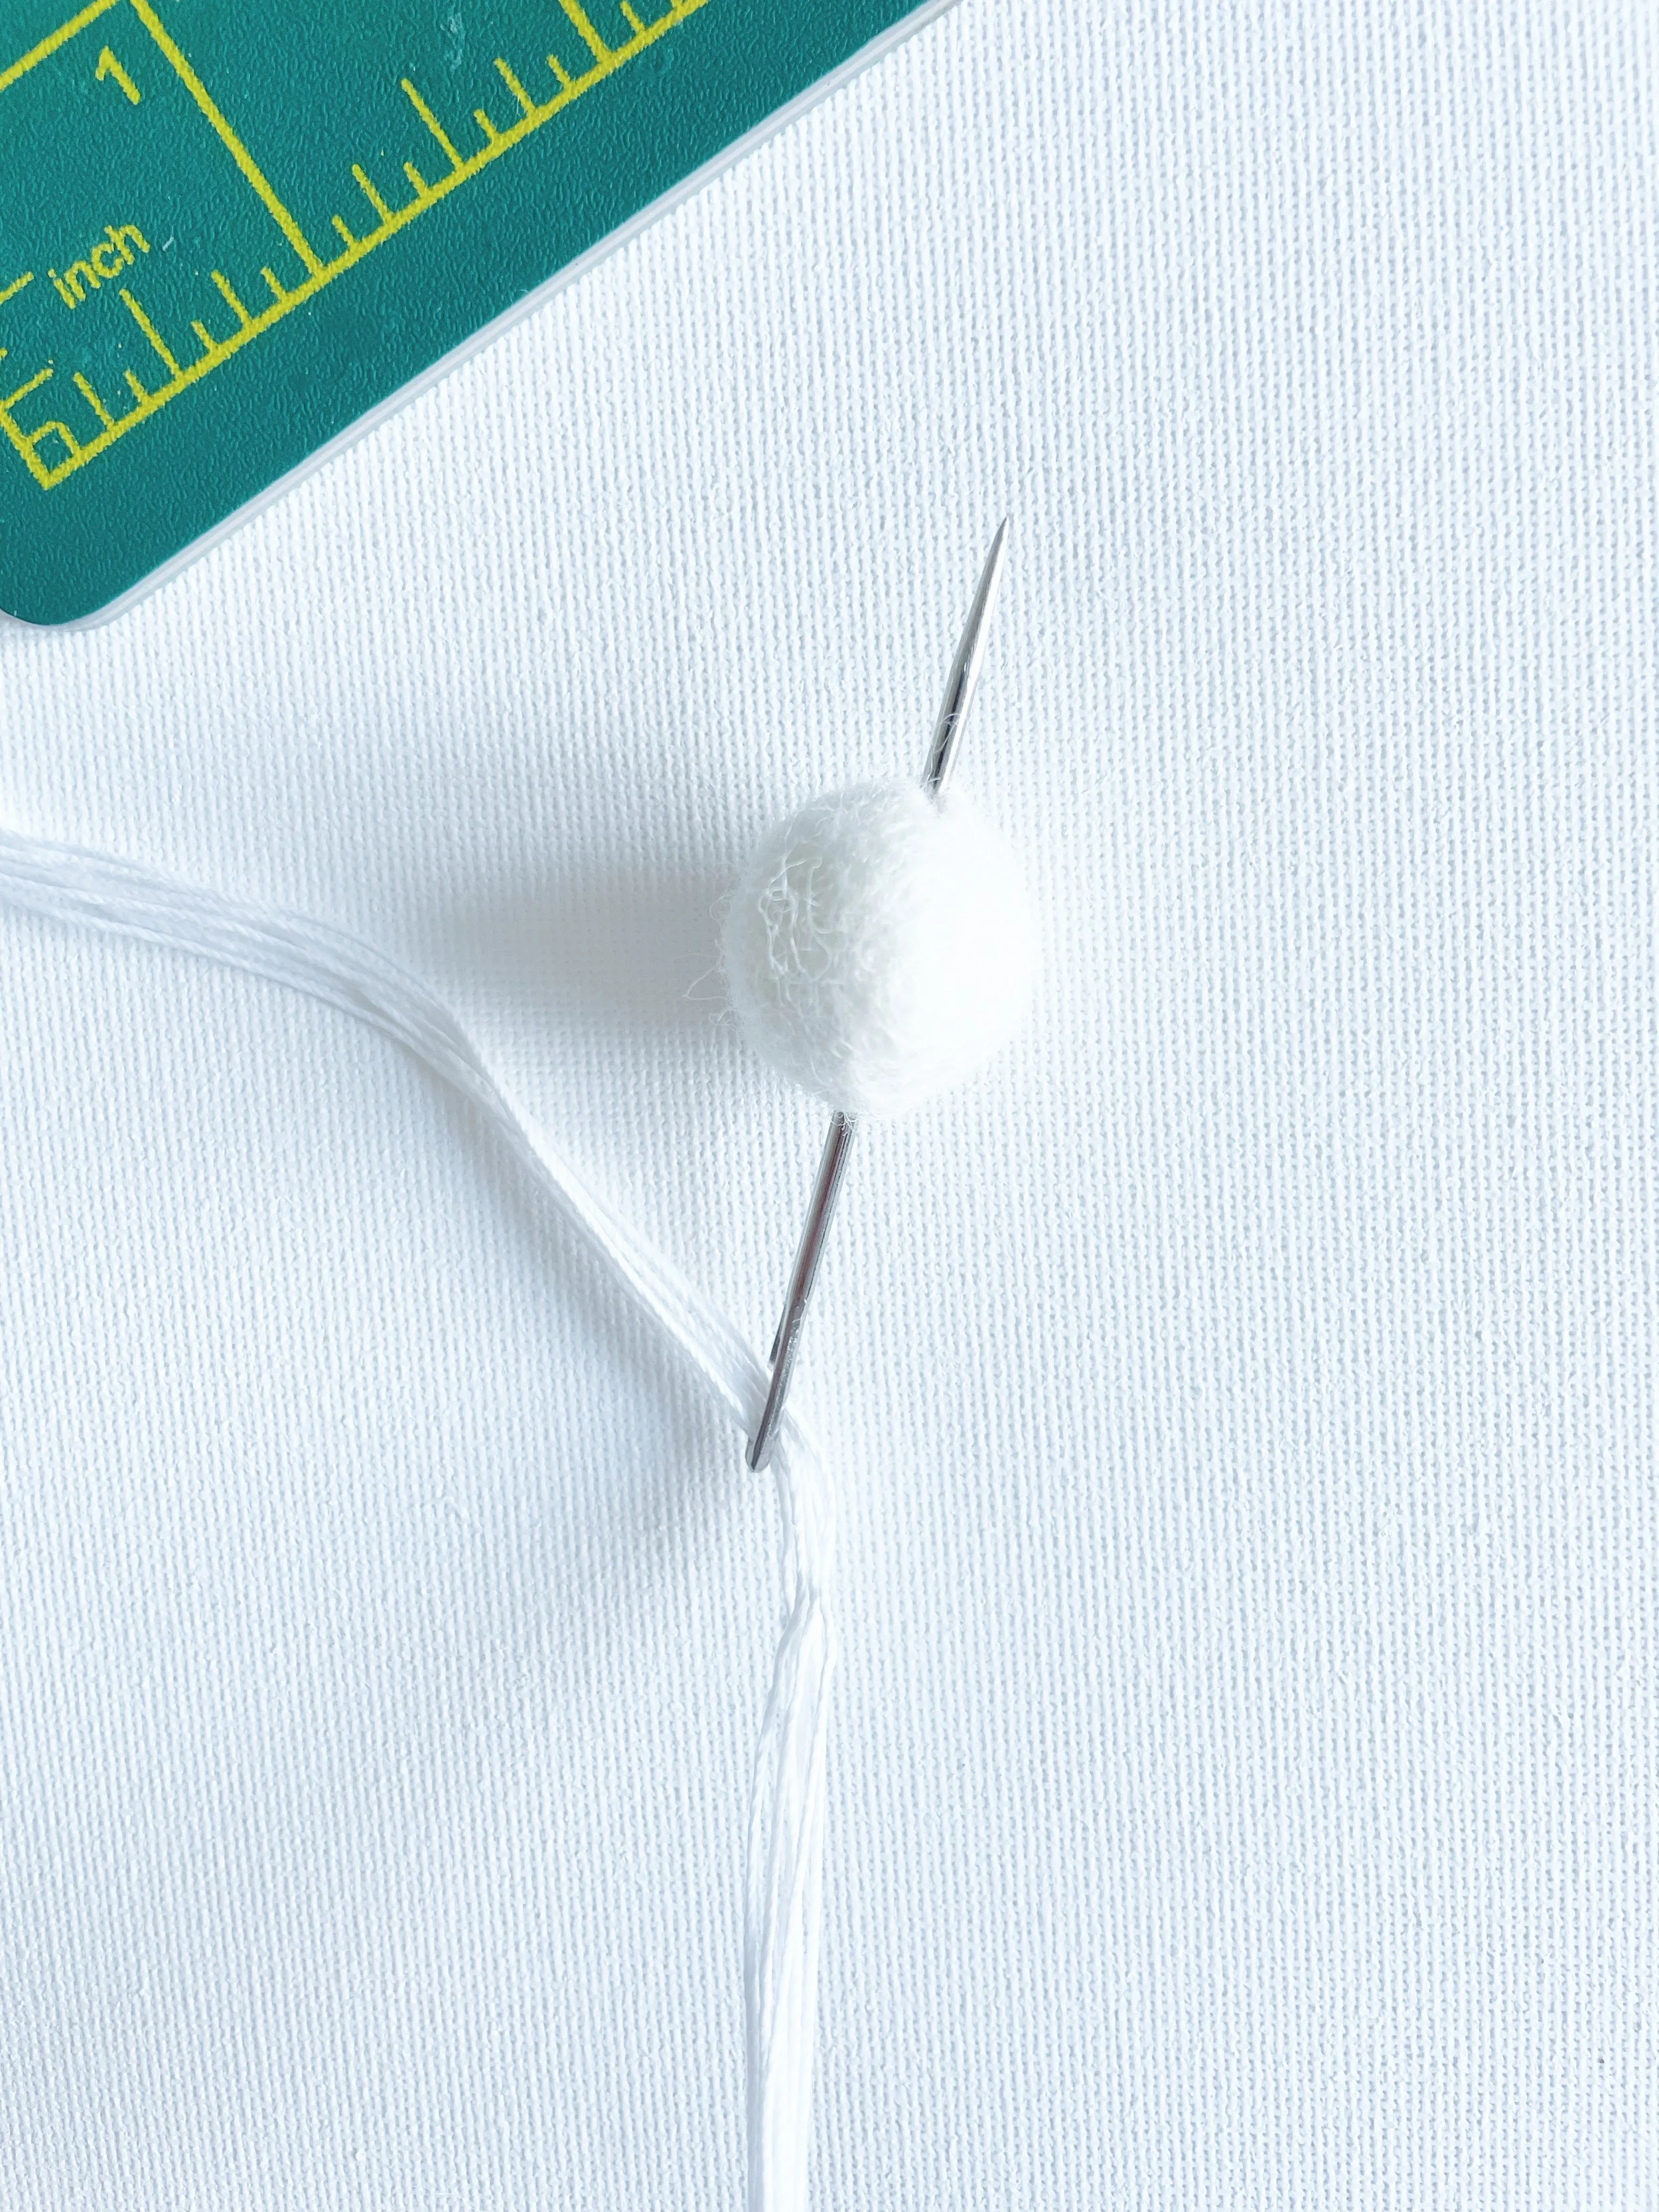
Thread all seven strands of string through your large needle. Then, use the needle to carefully slide the felt ball onto the strands.
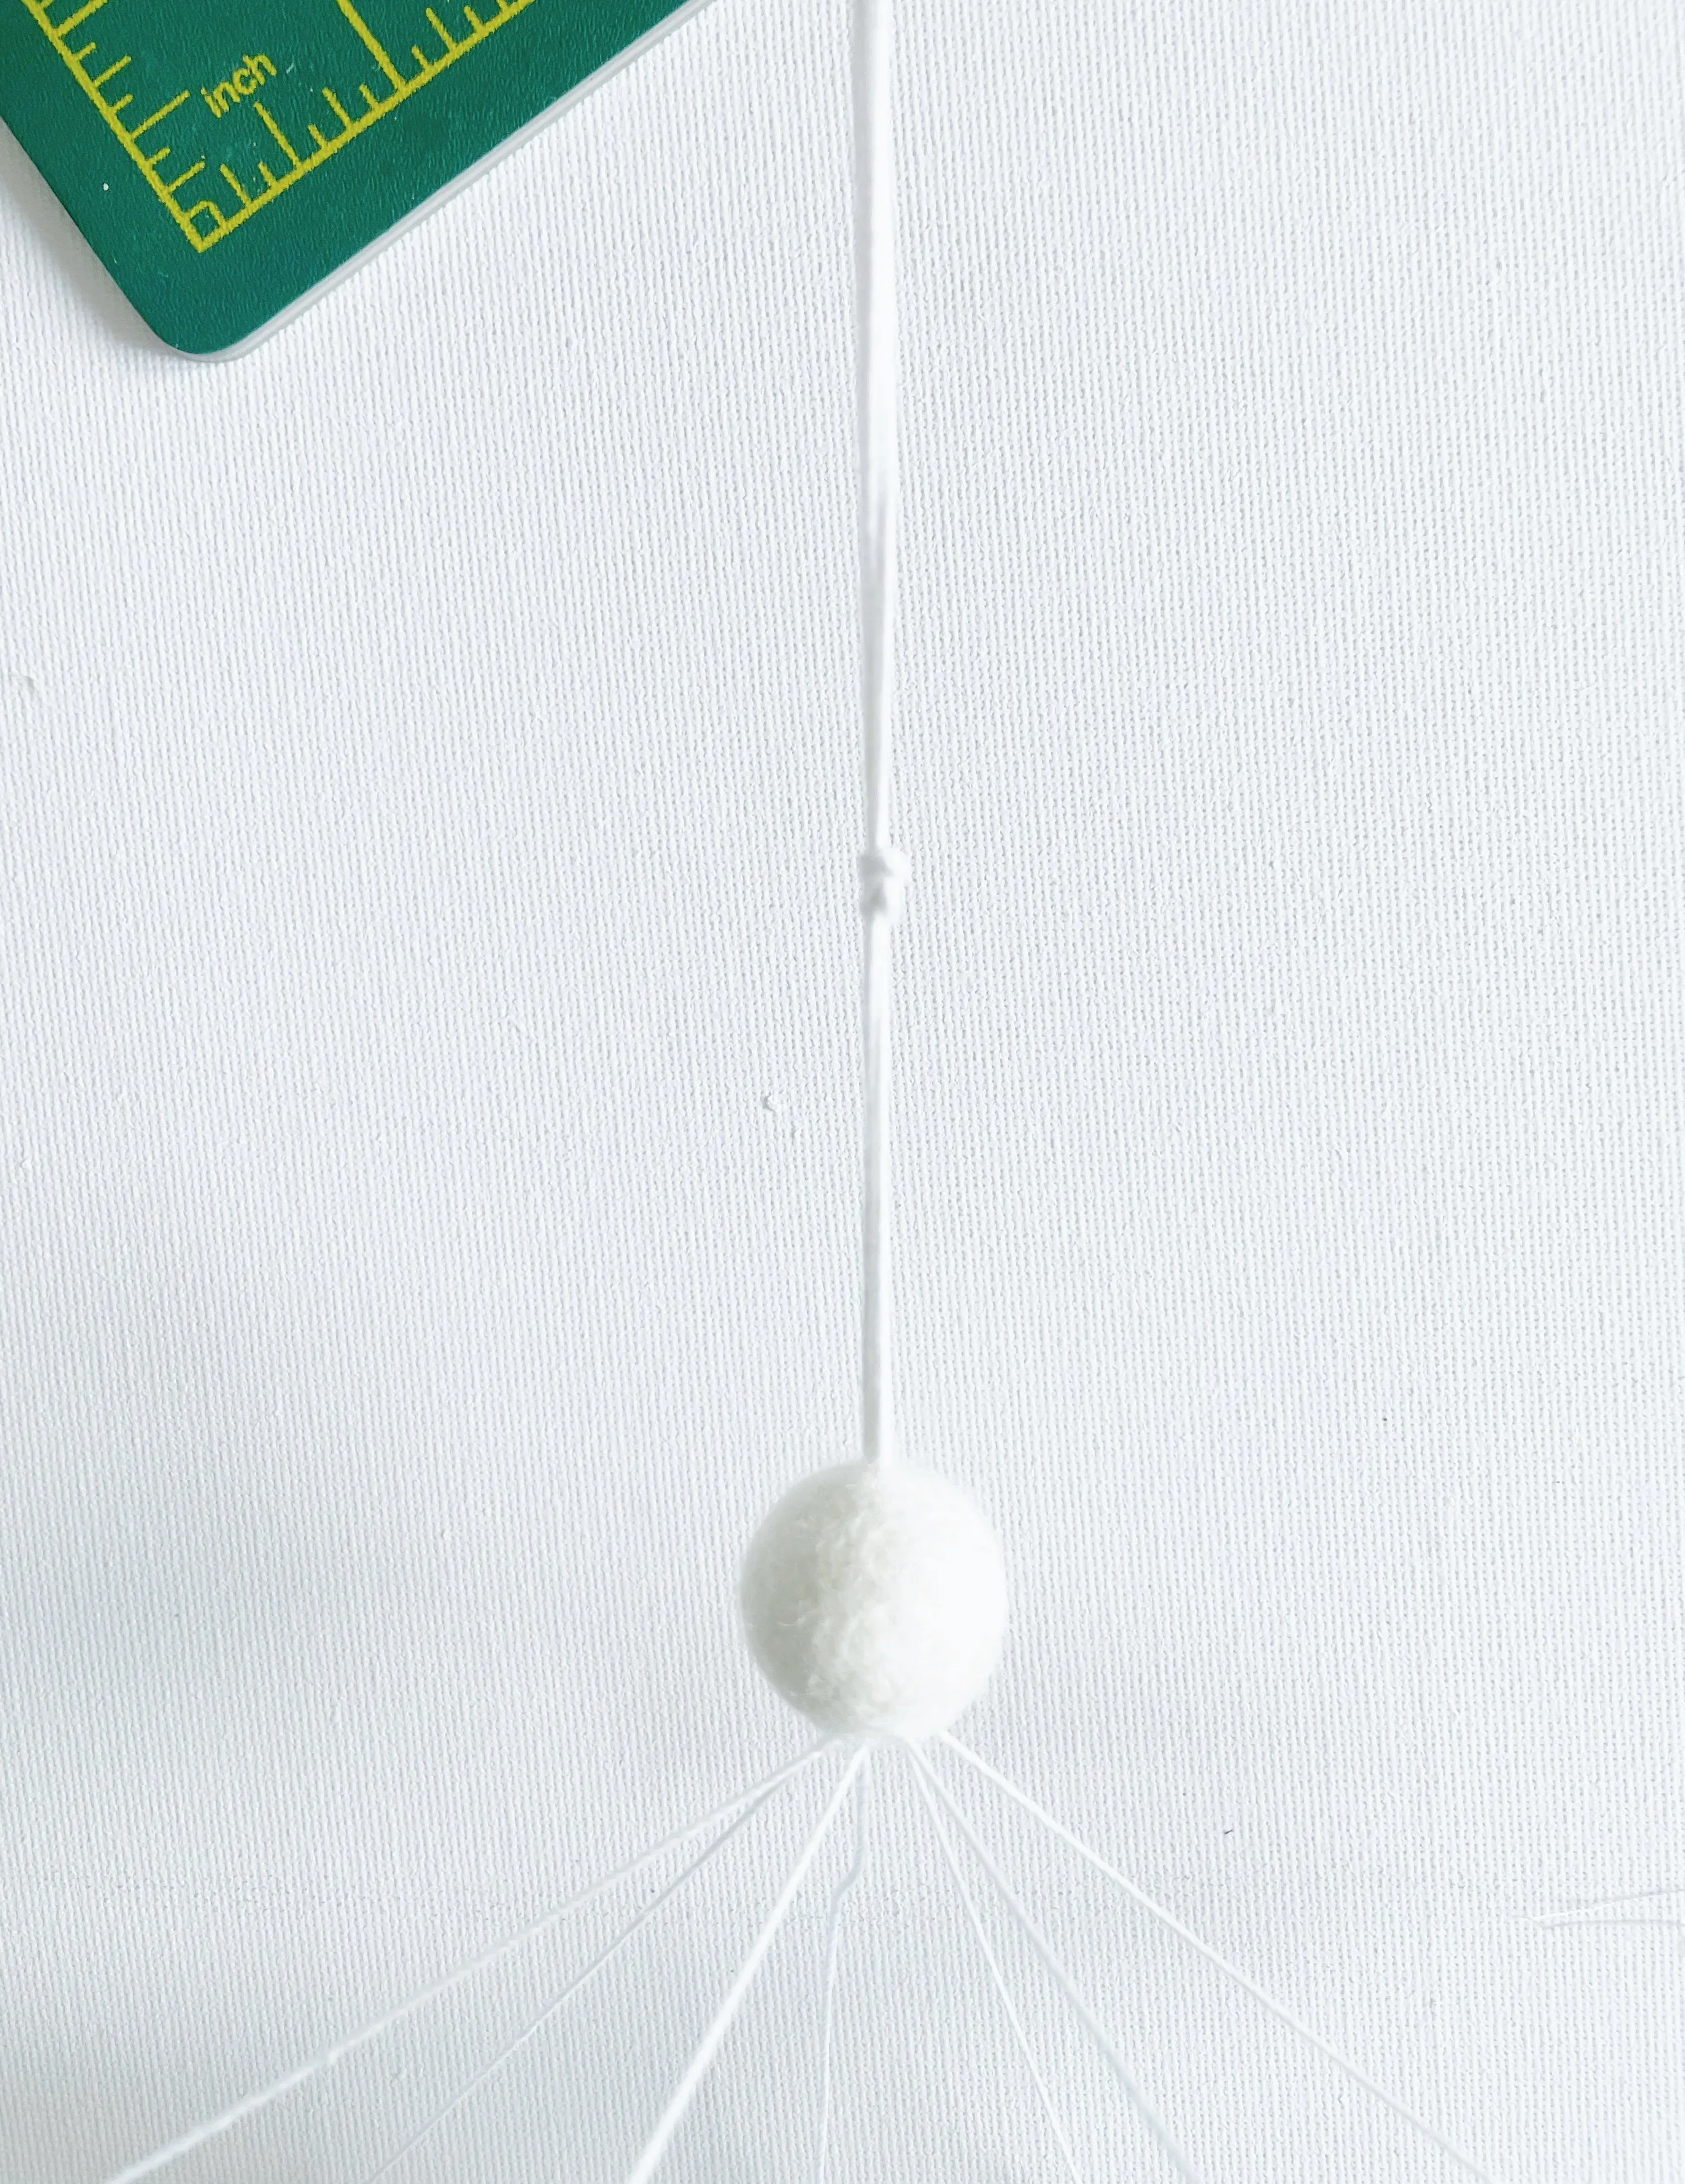
Push the felt ball down the thread until it completely covers the knot.
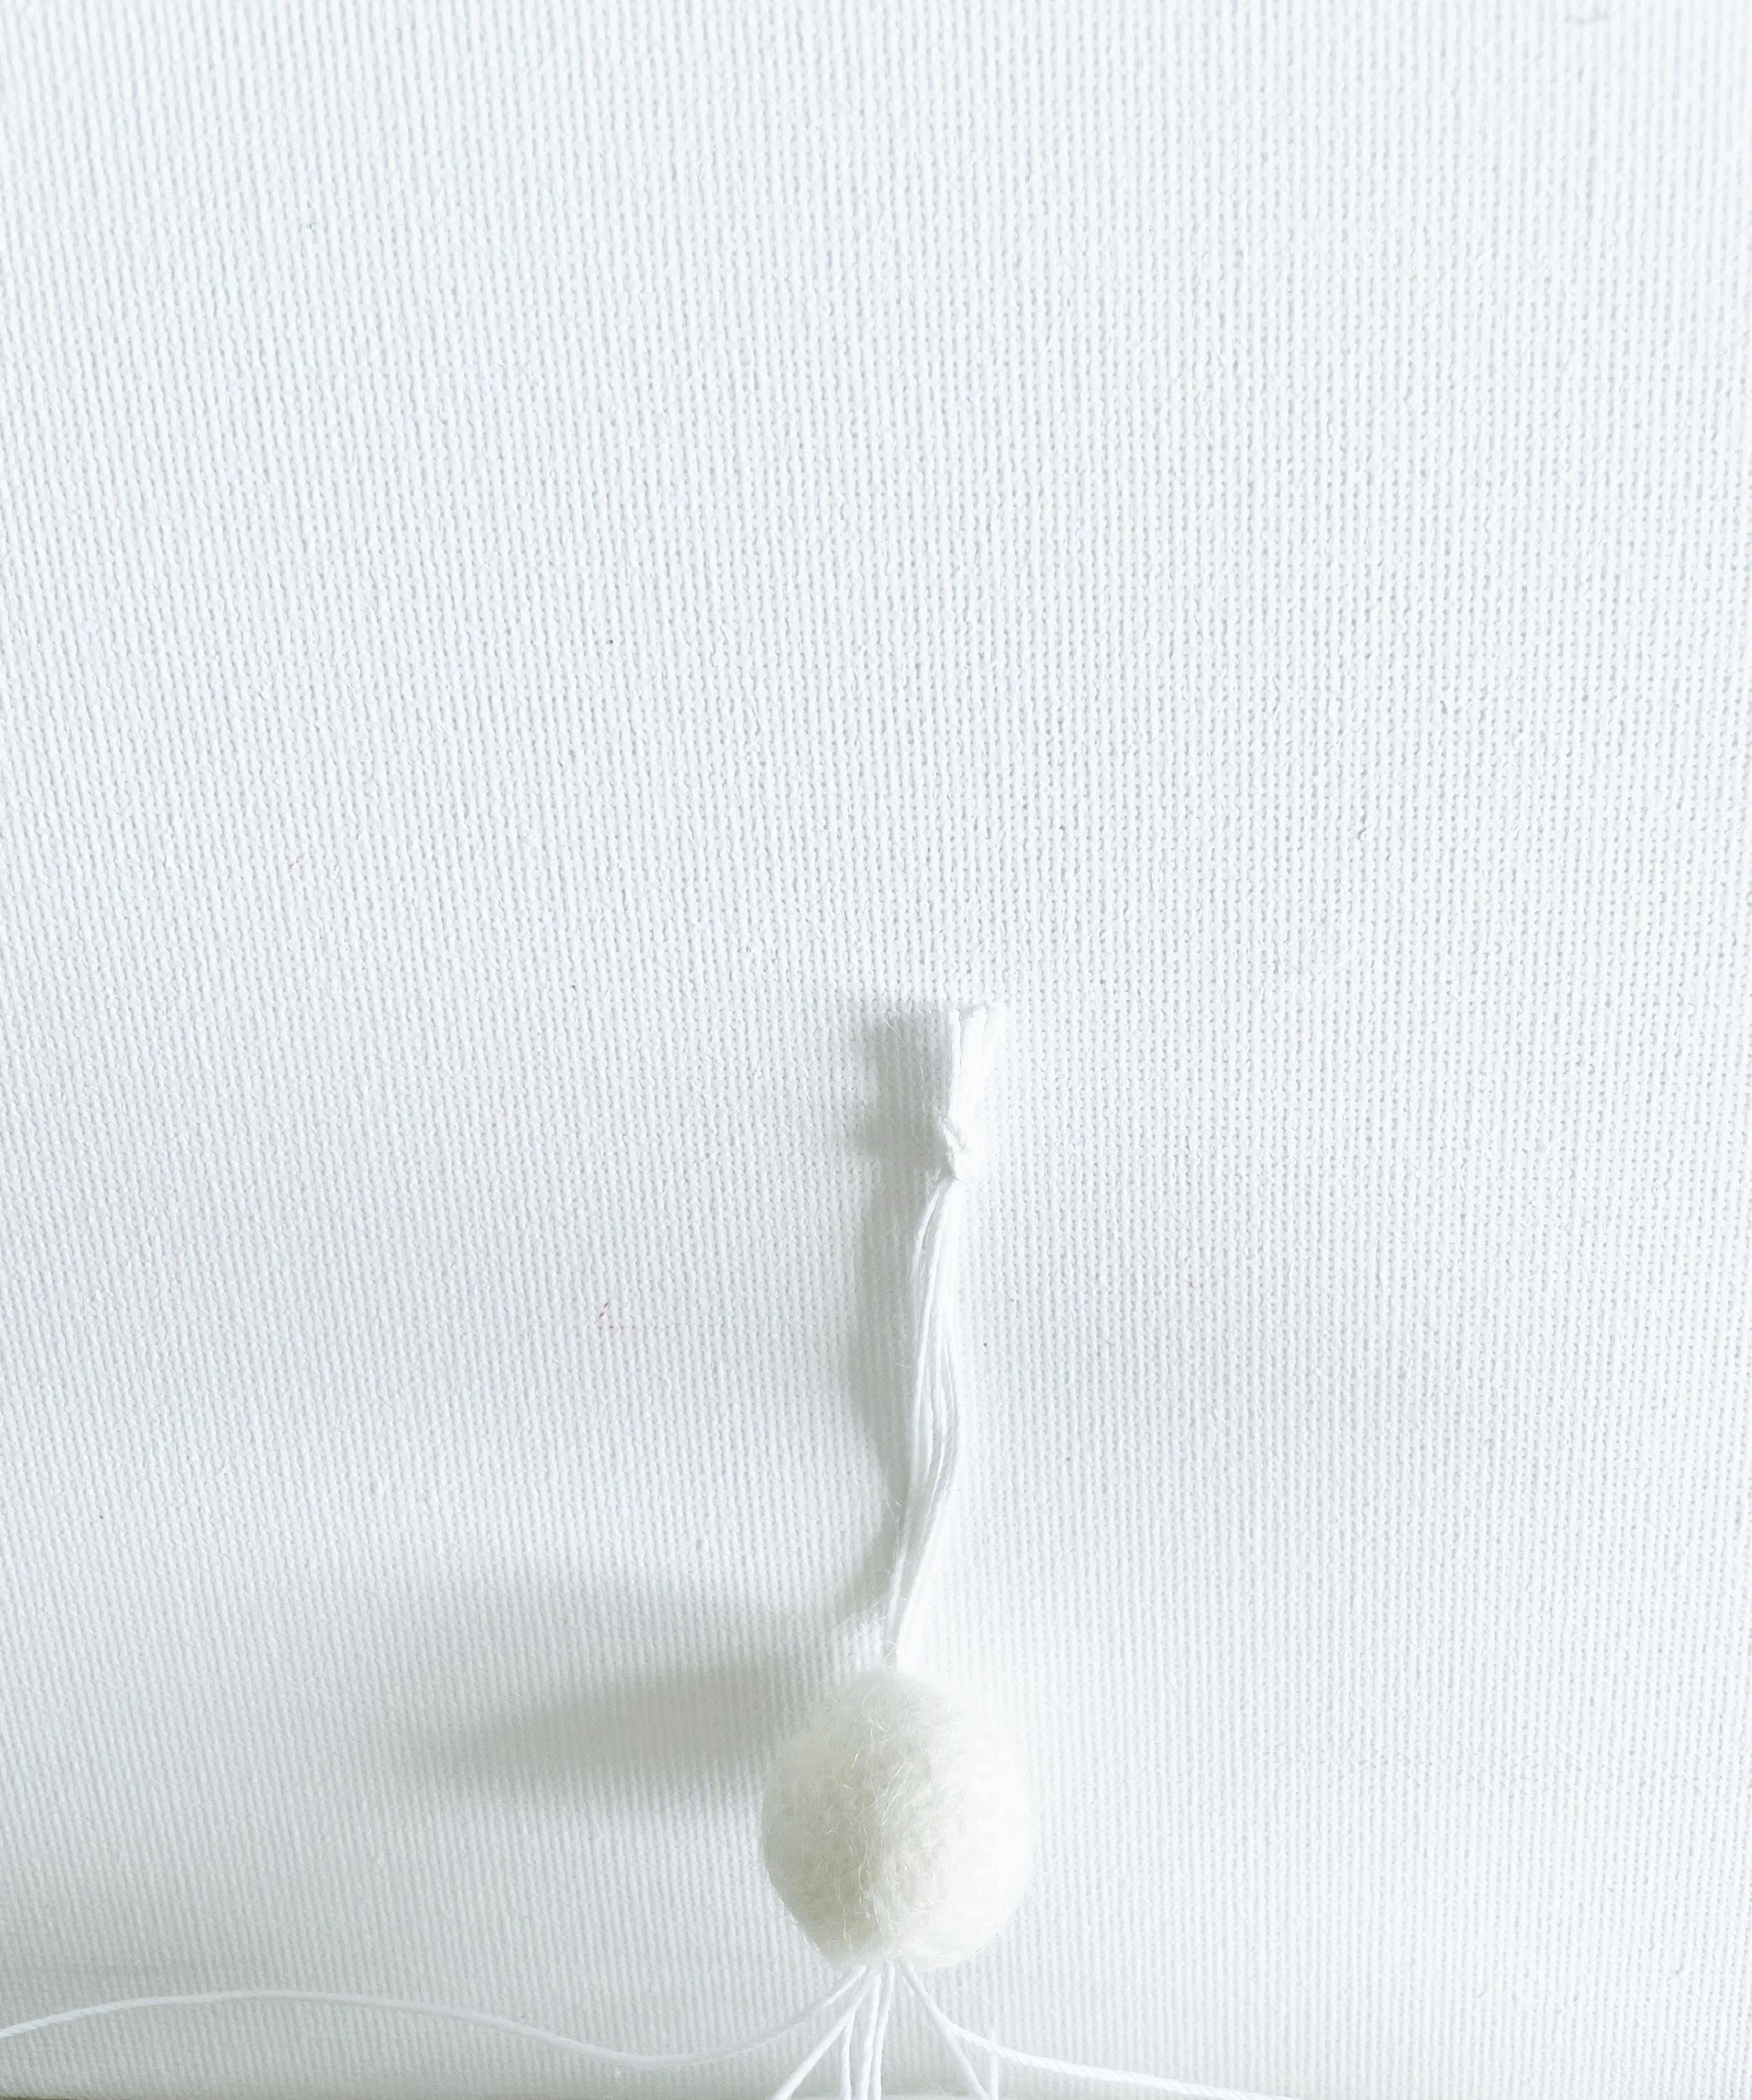
Make a second knot in the strands about 1 or 2 inches above the felt ball. It needs to be secure so make sure you pull it tightly.
Using your scissors cut off the excess thread above this knot. Be sure to leave a little extra thread above the knot as shown in the image above.
You now have a loop for hanging your nursery mobile.
Attach the clouds and felt balls…
We’re onto the final stage of making your DIY baby mobile; it’s time to attach the felt balls and clouds! Don’t worry, I’ll guide you through each step.
I’ll show you exactly how to secure everything nice and tightly using your needle.
When it comes to adding the clouds and felt balls, we’ll be staggering their positions so they don’t all line up at the same height. Think of it like a "one up, one down" pattern, this avoids the mobile looking cluttered and gives it a more professional and visually interesting finish.
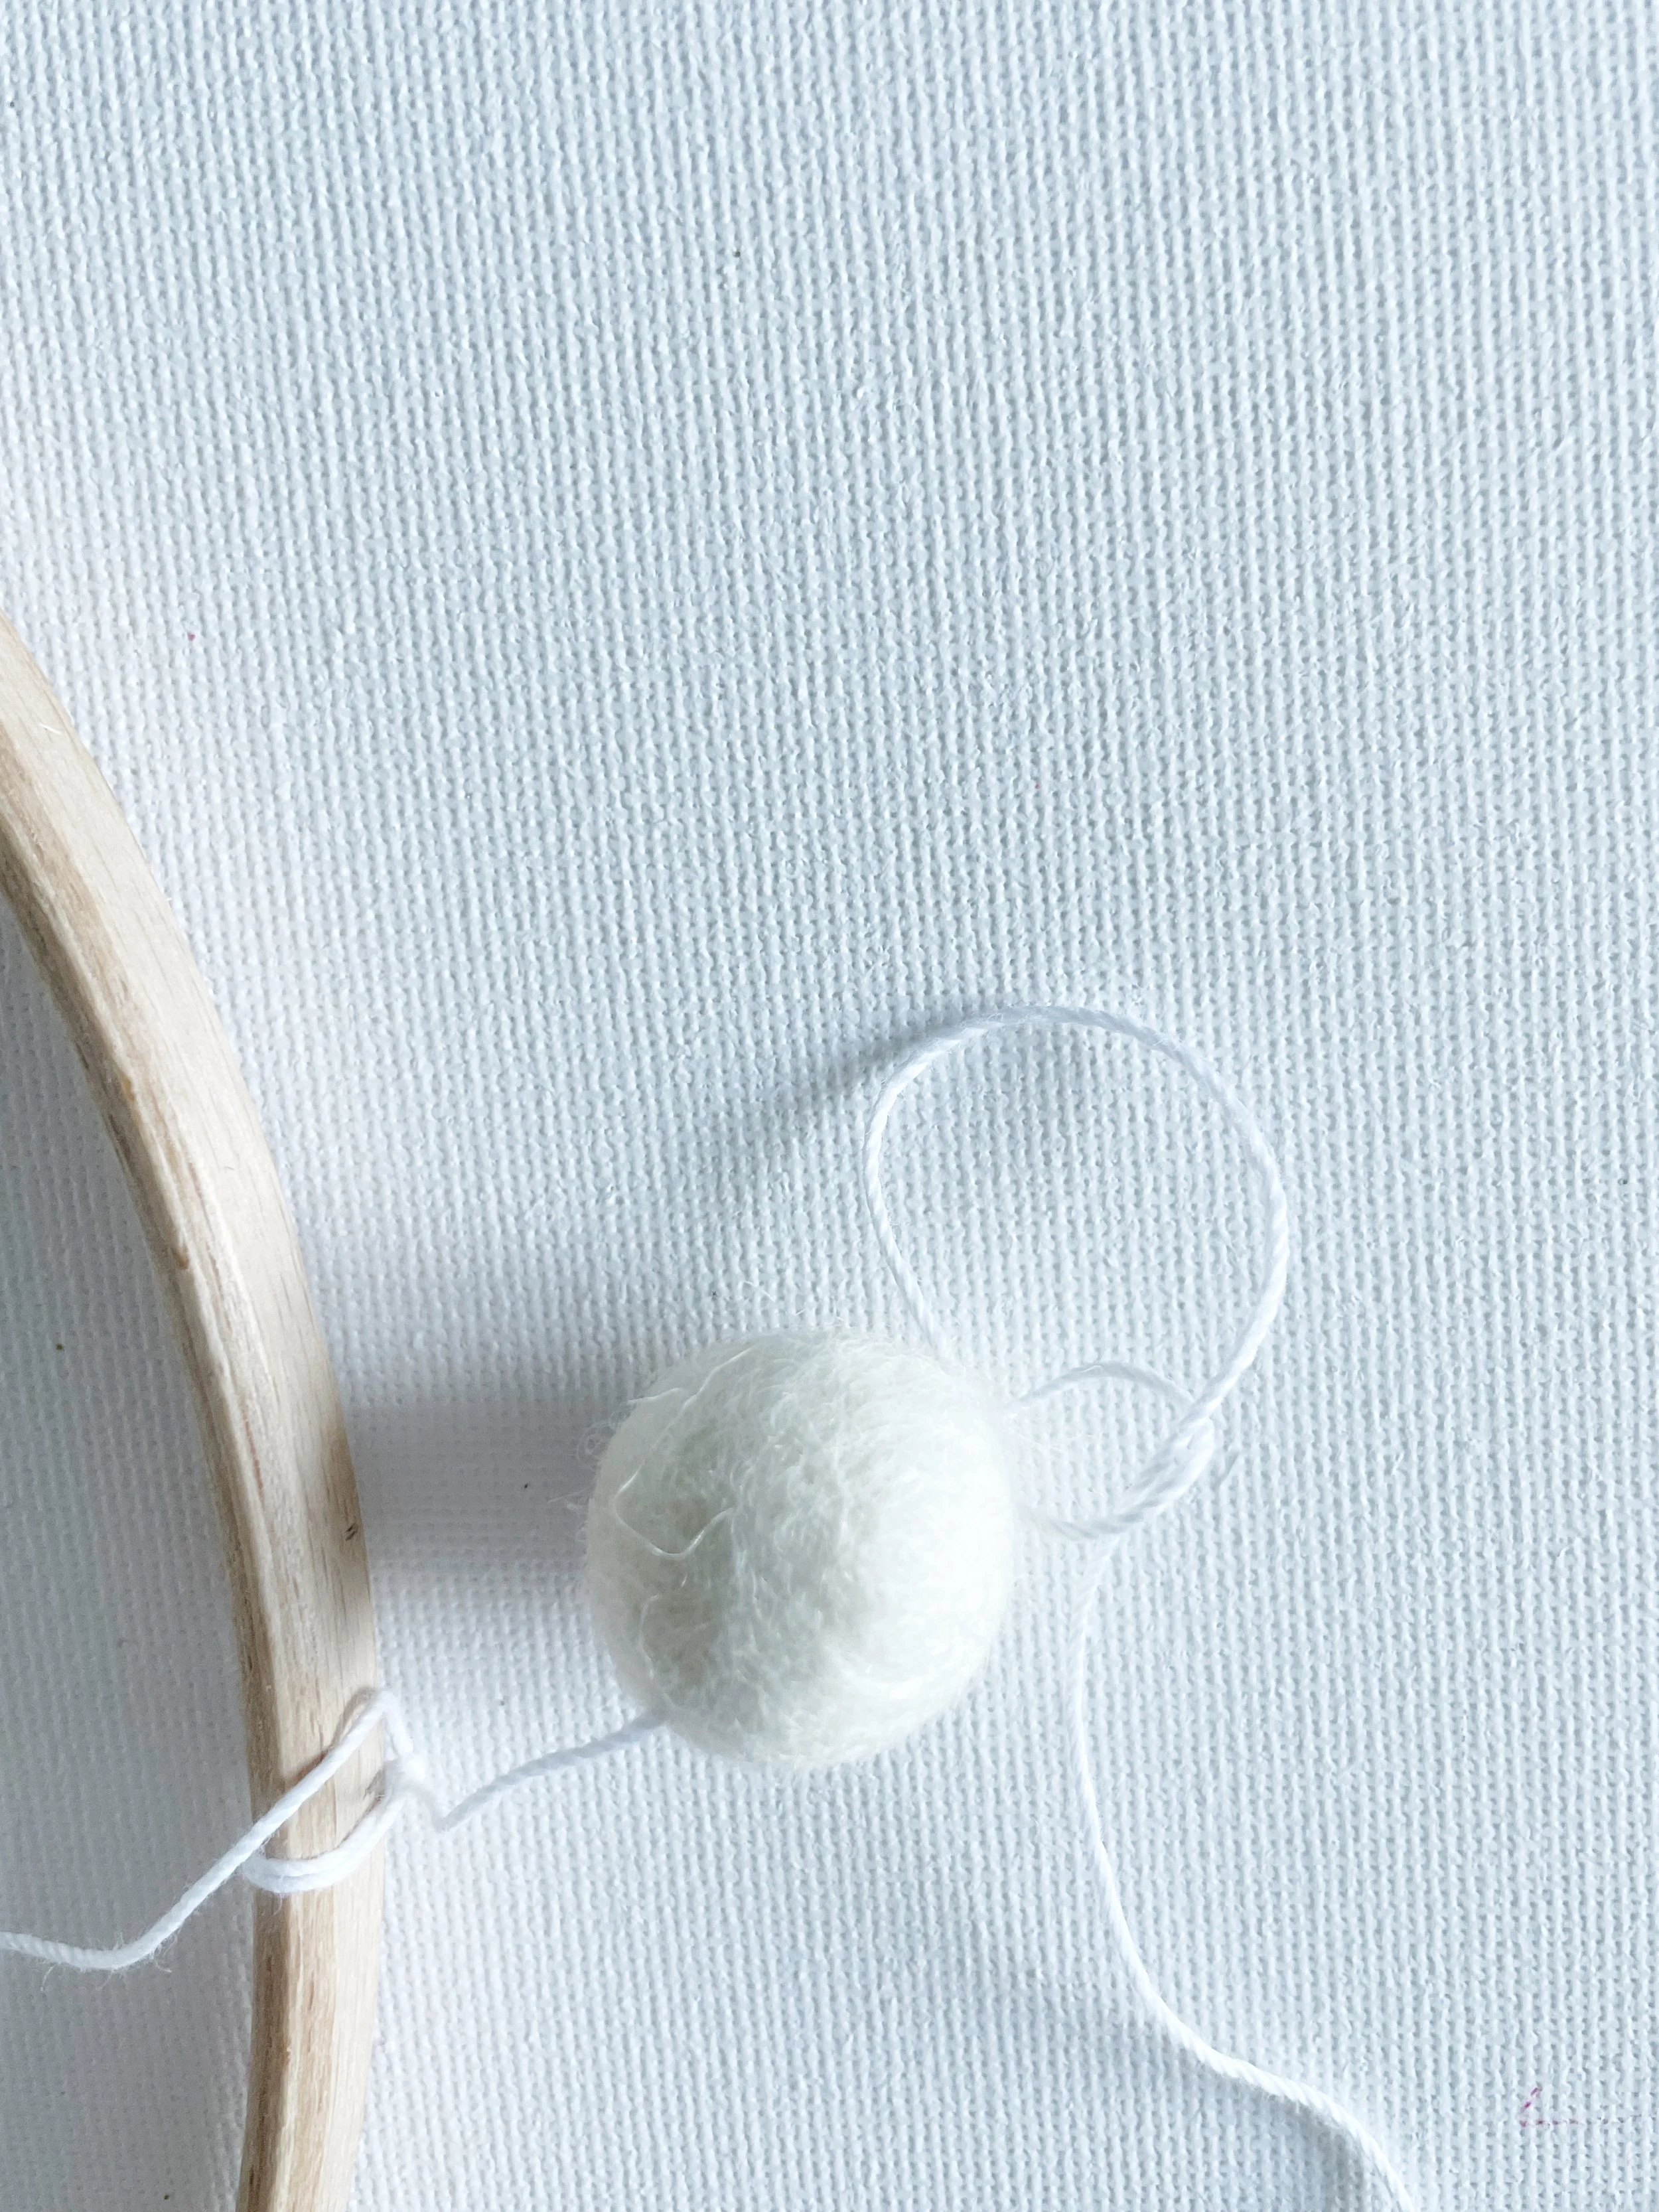
Let’s start by attaching the first felt ball (if you’re using one). Thread your large needle with one of the strands of string, then gently slide the felt ball onto the string. Position it so it sits 2.5 inches below the top of the beech ring. (You can refer to the picture above for a visual!).

Use the needle to secure the felt ball in place. Create a small loop with the string by sewing a small stitch at the base of the felt ball. Thread the needle through the loop and pull it tight to keep everything in position (see below).
Once the felt ball is secure it’s time to thread a cloud onto the same piece of string.
I’ve made so many mobiles, and let me tell you, at this stage, I’ve often felt like pulling my hair out! The culprit? Wonky clouds!
The fix? Find the centre of each cloud.
It’s super important to measure the centre point of each cloud and thread them at the exact (or close enough) spot. Otherwise, you’ll end up with clouds that just don’t hang right.
And trust me, if you’re anything like me, it’s so frustrating you’ll end up taking it apart and starting over... and over... and sometimes, over again!
So don’t guess this part — just measure them properly from the get-go.
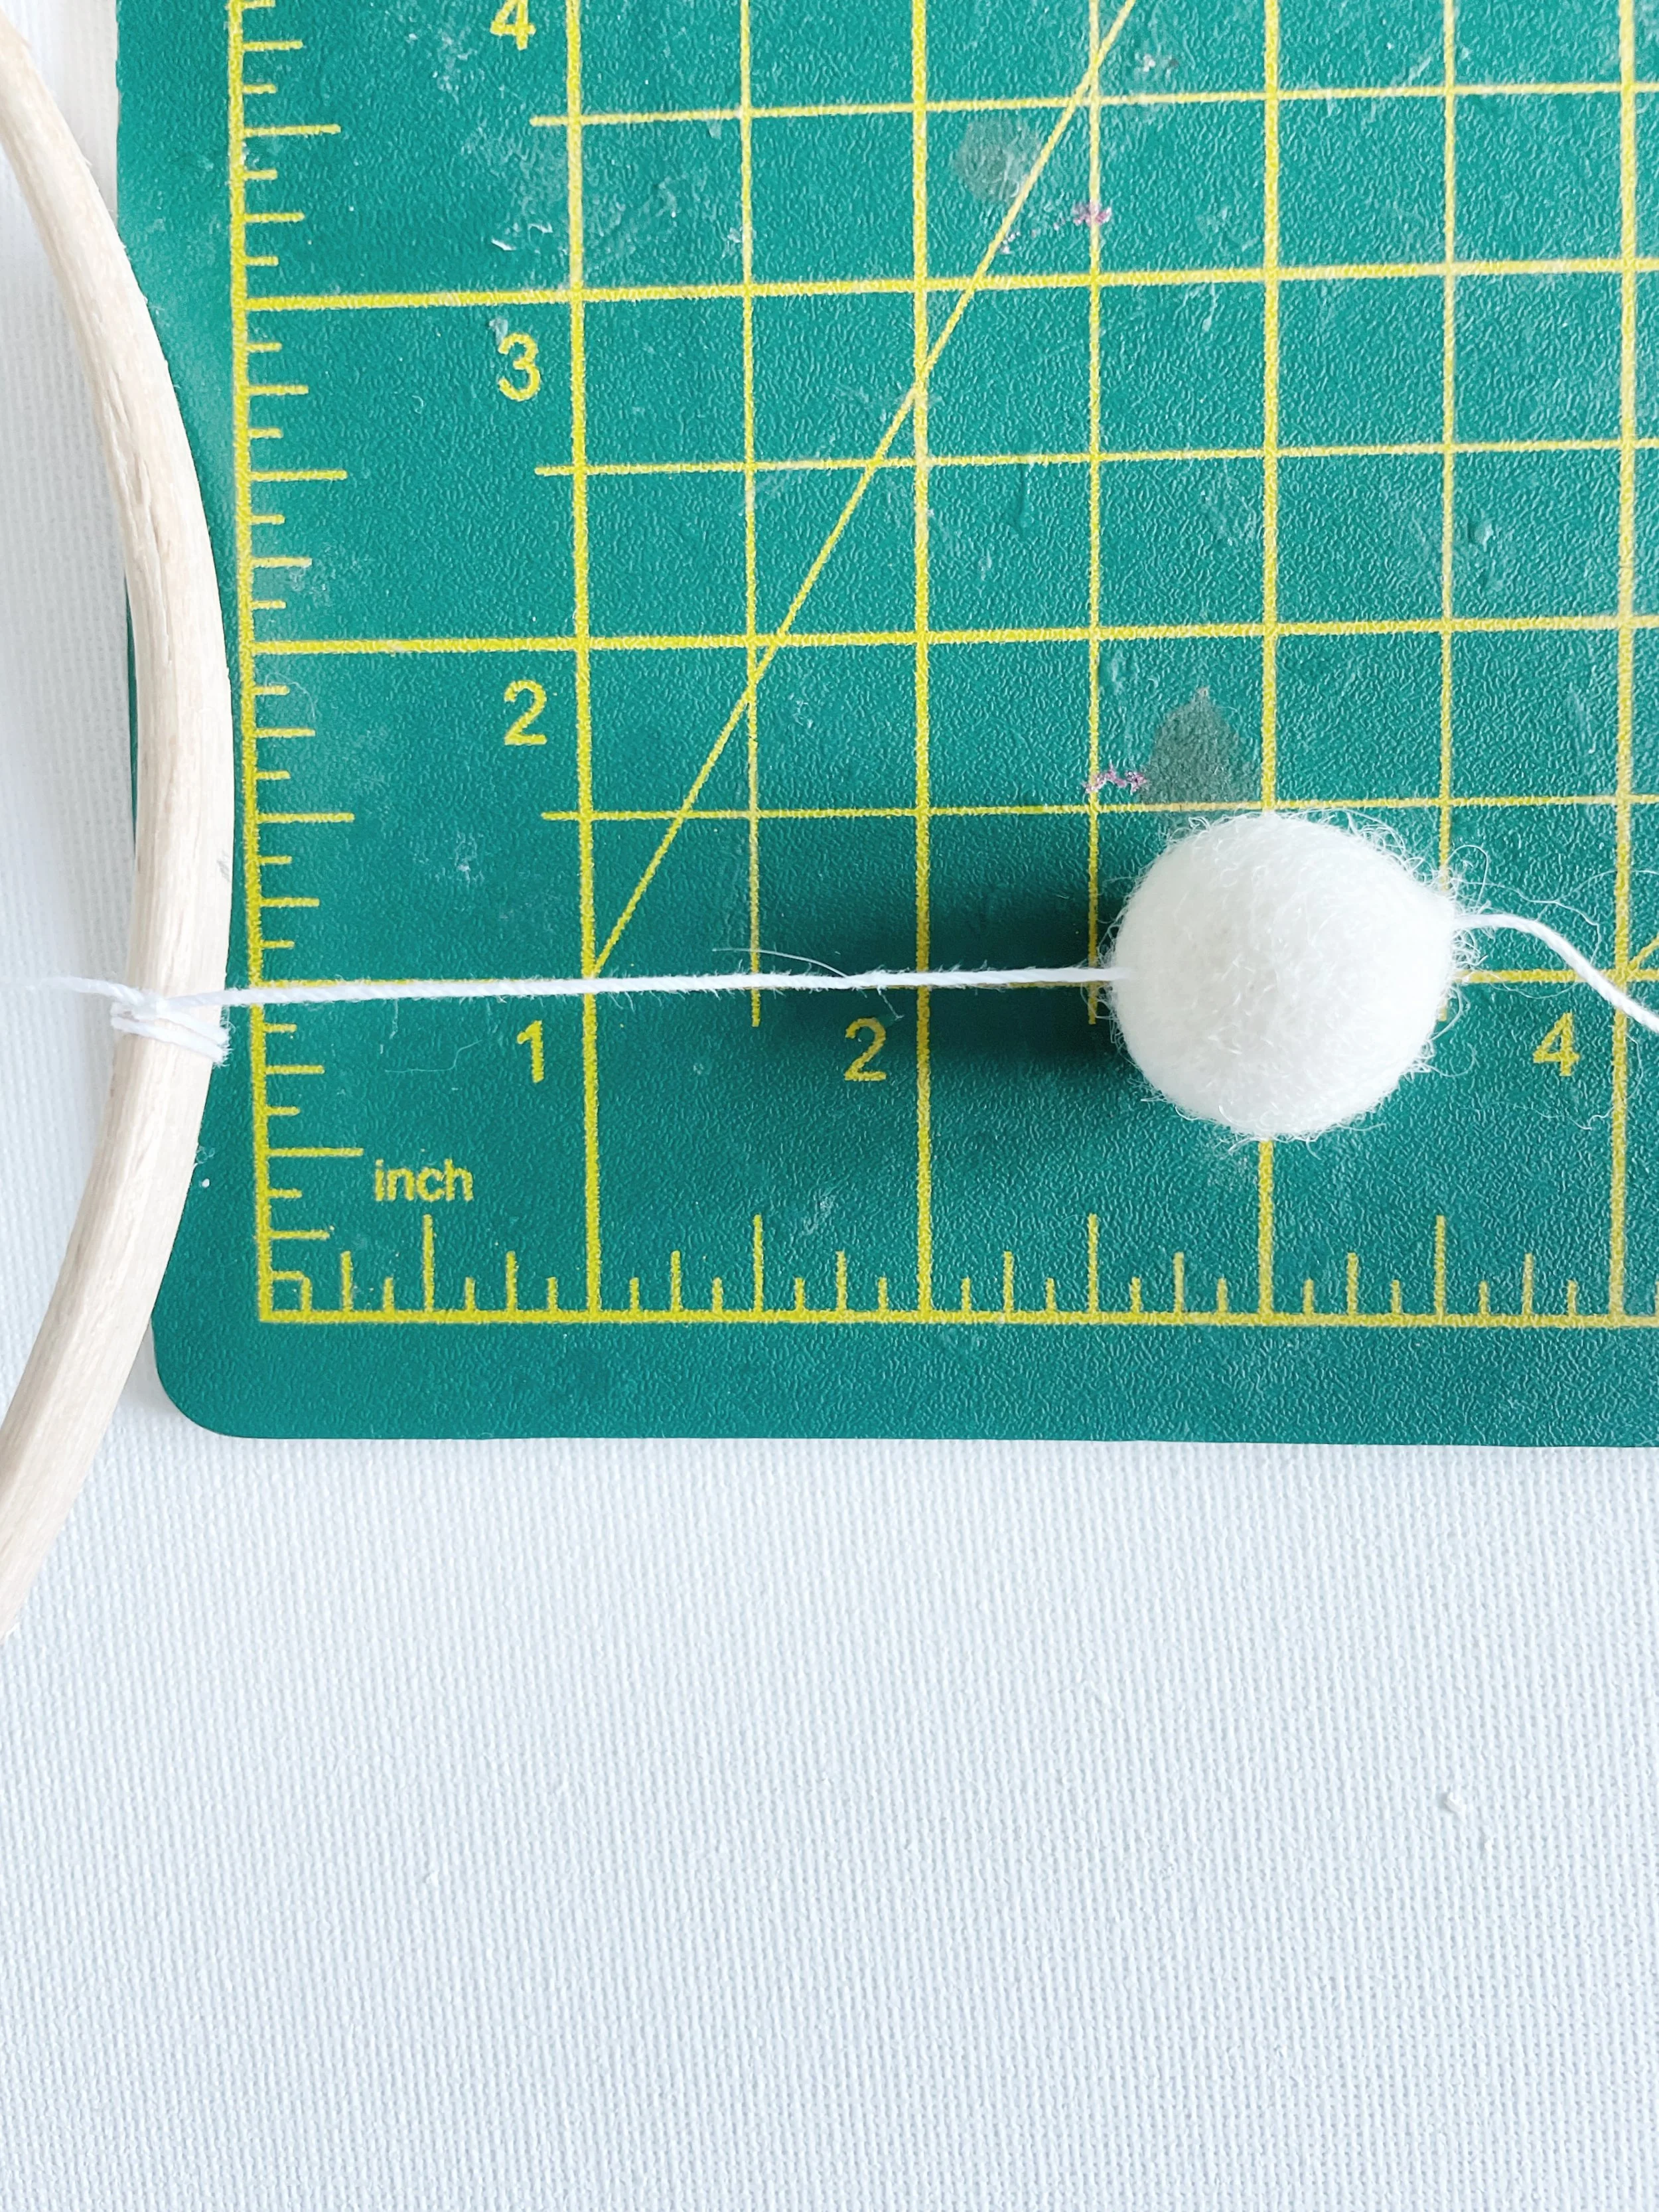
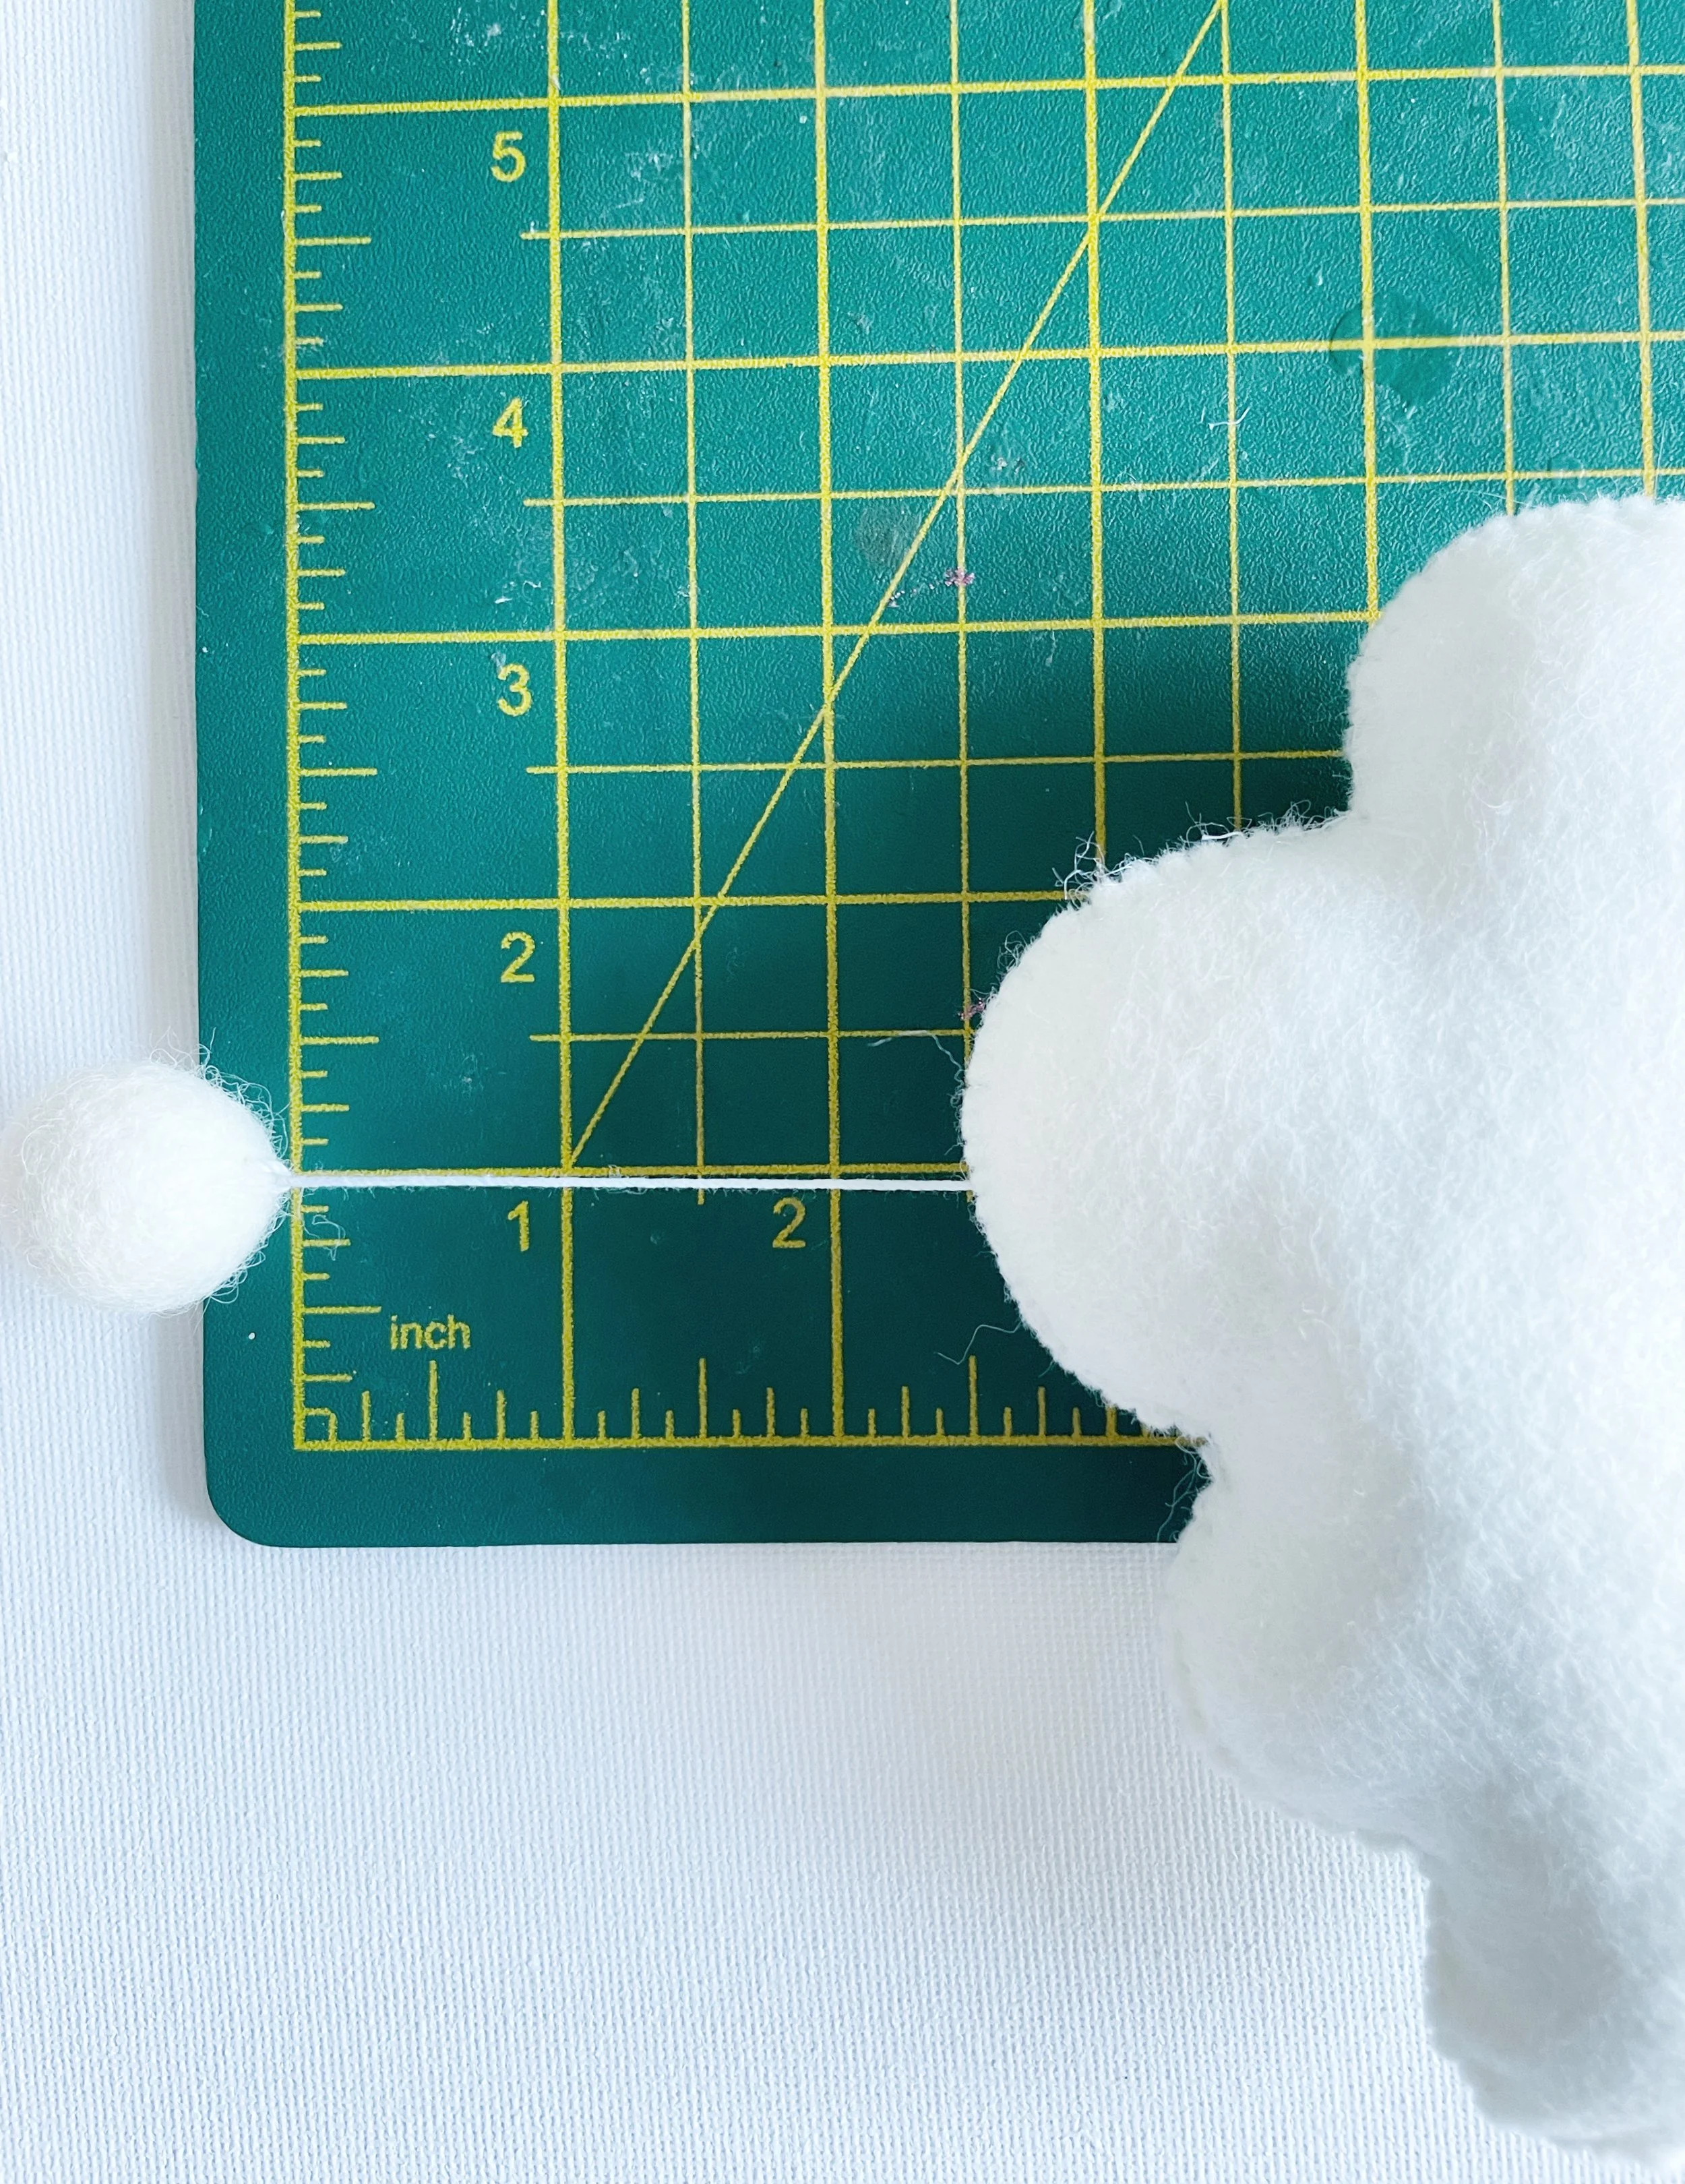
You can measure the cloud on a cutting mat to find the centre, or if you’re using a tape measure, that works too!
Using the large needle, carefully thread your cloud onto the string and position it so it hangs 2.5 inches below the base of the felt ball.
Secure the cloud in place by using your needle to sew a knot at the base, just like we did with the felt ball.
Don’t cut the string just yet, we’ll wait until the end to trim everything once we’re happy with how the finished mobile looks.
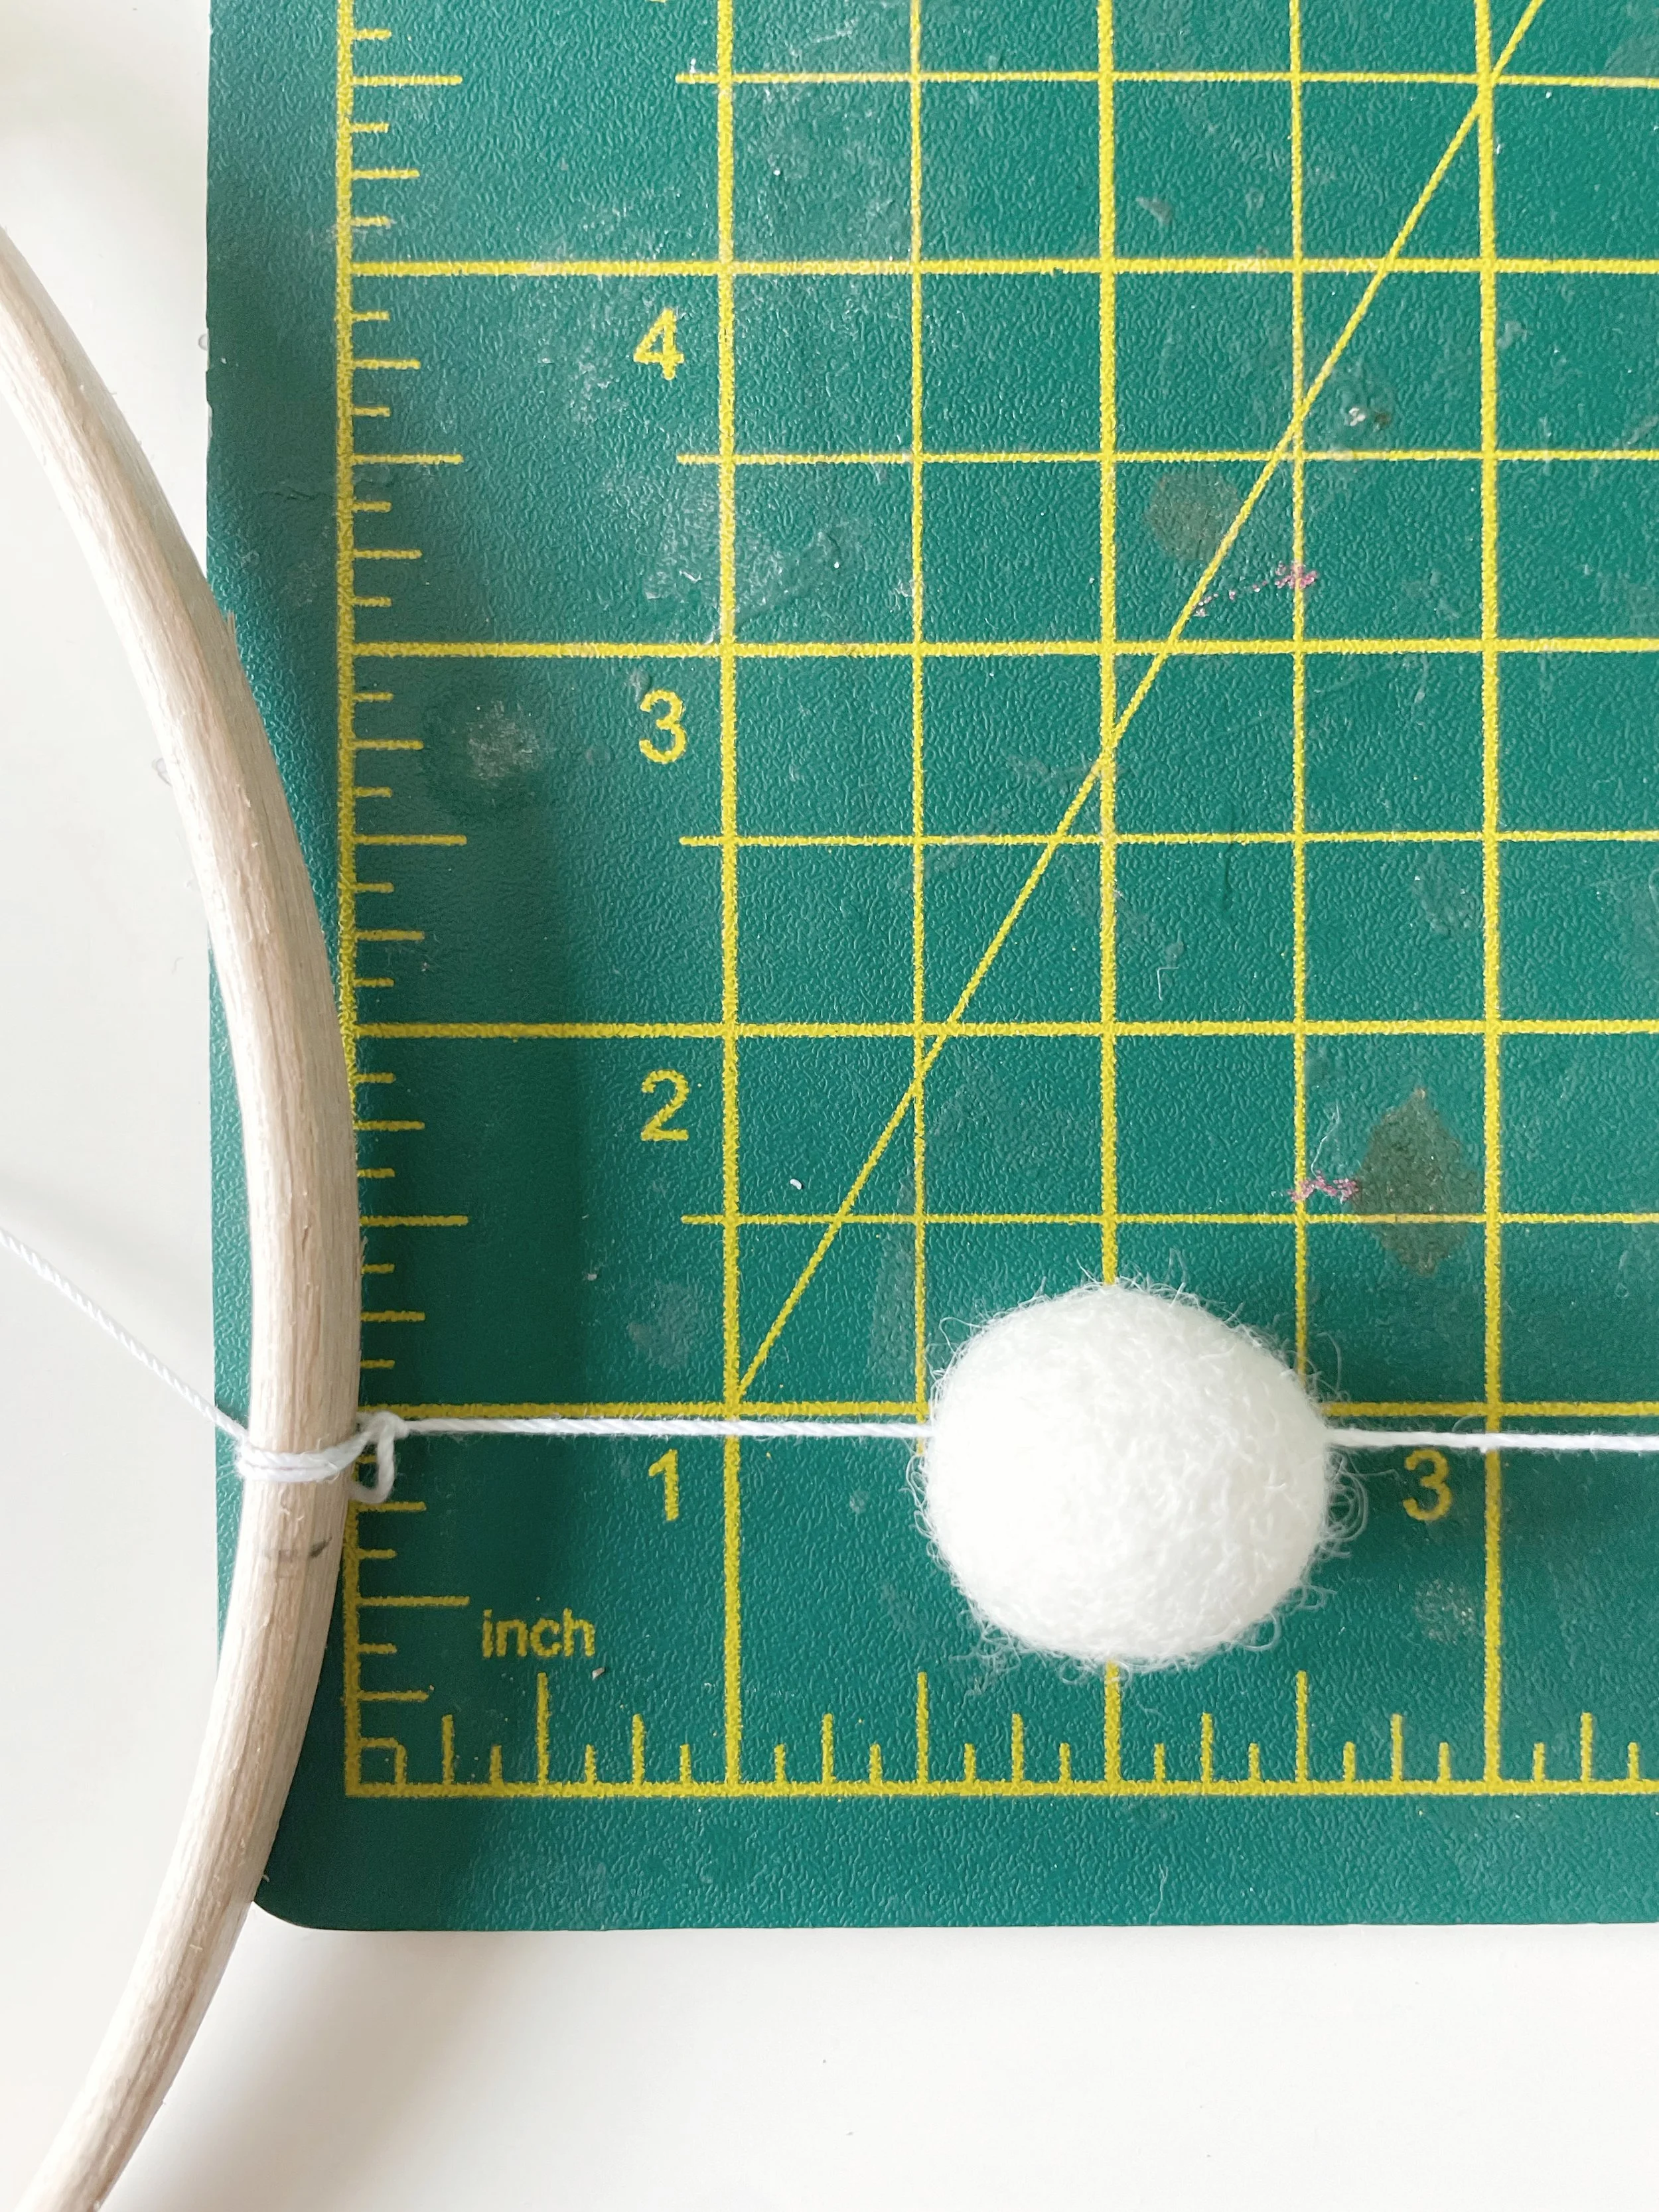
Grab the next piece of string. Thread a felt ball onto it and slide it down so it sits 1.5 inches below the beech ring (you can check the photo above for a visual).
Secure the felt ball in place by using your needle to tie a little knot.
Now, thread a cloud onto the string. Position it so it’s 2.5 inches below the felt ball you just added, and secure it with another knot.
For the third string, you’ll use the same measurement as the first, place the felt ball 2.5 inches down. For the fourth string, follow the second placing the felt ball 1.5 inches down.
Keep repeating this pattern, alternating the measurements as you go. This way, your pieces will be nicely staggered one up, one down, creating a lovely, balanced look.
Finally, it’s time to add the last cloud to the centre string. I don’t stick to a specific measurement for this one I secure it where I think it looks good.
I usually like to position it so the top of the cloud sits roughly in line with the beech ring (you can see what I mean in the picture below), but feel free to place it wherever looks best to you.
Once you're happy with the placement, grab an eraser and gently remove any pencil marks from the beech ring.

Now you can step back and see how your finished nursery mobile is coming together! If anything looks a little off, don’t worry, you can easily tweak it to get everything nicely balanced.
Use your needle to gently unpick any knots if you need to make adjustments. Once you’re happy with how it all looks, make sure to firmly secure each cloud in place, a double knot is a great idea for extra security.
When you’re ready, go ahead and trim the strings. Just be careful not to cut too close to the knot, or it might come undone.

And that’s it you’ve made your very own cloud nursery mobile!
I really hope you had as much fun making this DIY Nursery mobile as I did putting it together for you. If you enjoyed this baby mobile tutorial, be sure to check out the cloud garland tutorial too, it’s the perfect matching piece!
If you have any questions, tips, or just want to share how yours turned out, I’d absolutely love to hear from you, feel free to drop a comment below.
Sending lots of love, Karen x