
How to Make Felt Ball Letters
Brighten up any room (or person!) with felt ball letters, I’m totally obsessed with them! They’re not only super cute but also so easy to make.
In this DIY felt ball letter tutorial, I’ll walk you through each step to create your own. You’ll be making them in no time and having fun along the way!
They also make such thoughtful gifts. Seriously, who wouldn’t love getting something like this? Plus, making it yourself will definitely earn you some extra brownie points!
Ideas for using felt ball letters
Felt ball letters are super versatile too. You can hang them in a nursery, kids' bedroom, or playroom, but they’re not just for kids they look fabulous in any space.
Felt ball letters make stunning centre pieces so they’re perfect for so many occasions including:
Easter
Christening
Birthday
Valentine’s
Wedding Day
Baby Shower or Baby Reveal
New Baby gift
Halloween
The possibilities are endless when it comes to colour combinations. Whether you prefer fun and vibrant or calm and neutral tones, you’ll easily find the perfect match for your colour scheme.
Fillable letters also come in various sizes, so if you’re dreaming of a big, bold statement piece, you can totally make it happen!
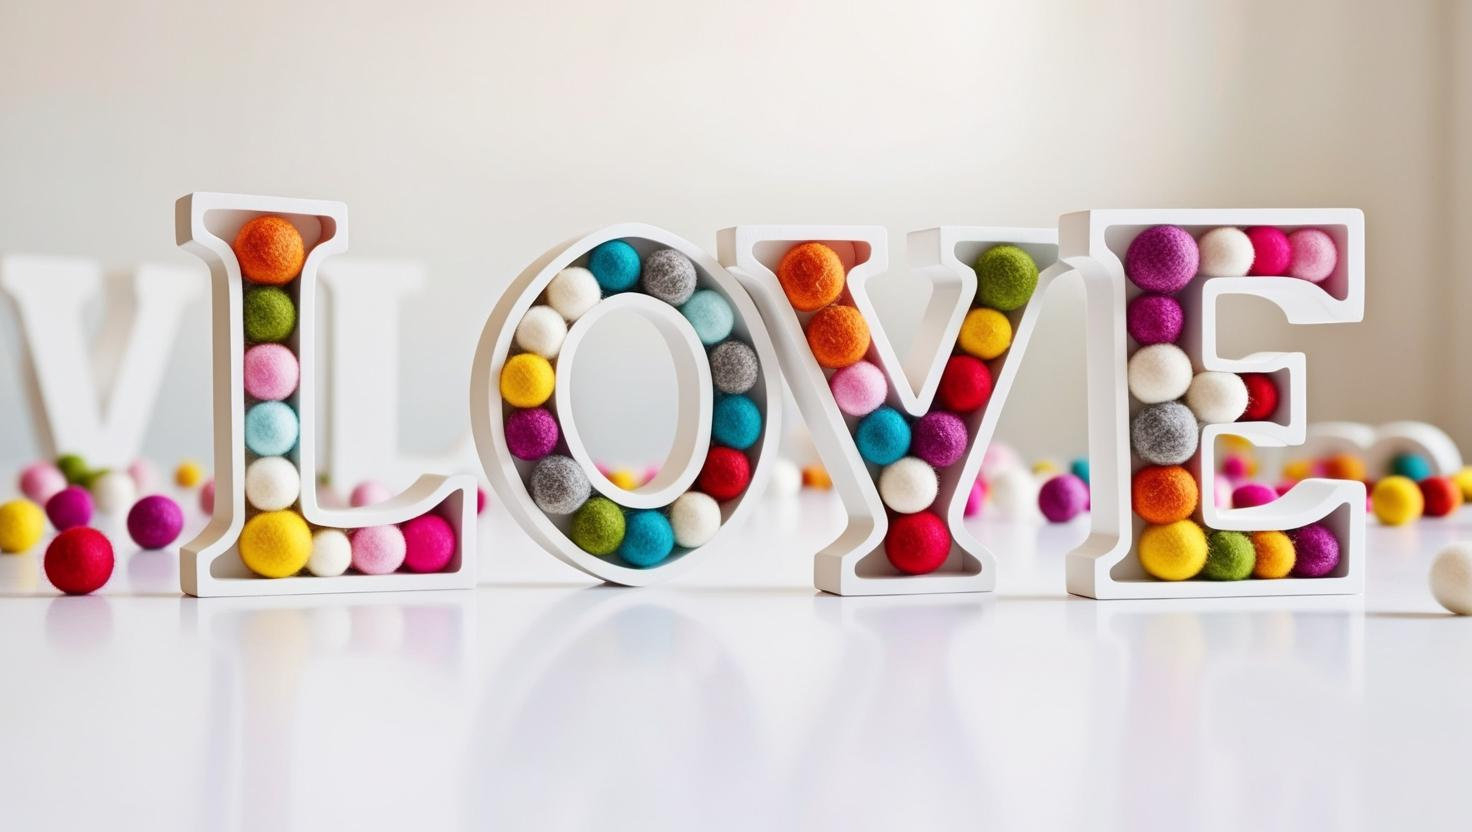
You can personalize single initials or even words to suit your space or special occasion. Here are a few ideas to inspire you:
NAME - Nursery or Child’s Room
PLAY - Playroom
LOVE - Valentine’s or living space
JOY - Christmas
HOME, FAMILY - Living Space
BOO - Halloween
The best part about fillable letters is that they’re, well, fillable! You can add anything you like inside them.
Tiny baubles are perfect for Christmas, and small mulberry flowers give a soft, elegant touch. You can even fill them with chocolates like Ferrero Rocher for a thoughtful and unique gift.
Want to add a bit of magic? Try adding fairy lights for that extra sparkle! Let your creativity run wild, who knows what fun ideas you’ll come up with!
Felt ball letters stand on their own, but if you’d like, you can also secure them to a wall with command strips or by adding a small hook.
Selling felt ball letters
Like all the ideas here on Flurraby, felt ball letters are perfect for making and selling! With endless themes and color combos to choose from, you’ll definitely have customers lining up for these unique creations.
If you’re planning to sell felt ball letters, why not offer your customers the option to add a matching felt ball garland? I’ve got a super simple tutorial for that right here: How to Make Felt Ball Garlands.
If you’re looking to sell your work, be sure to check out my beginner’s guide to pricing your handmade items. It’s trickier than you might think!
Now let’s get started…
What you need to make felt ball letters
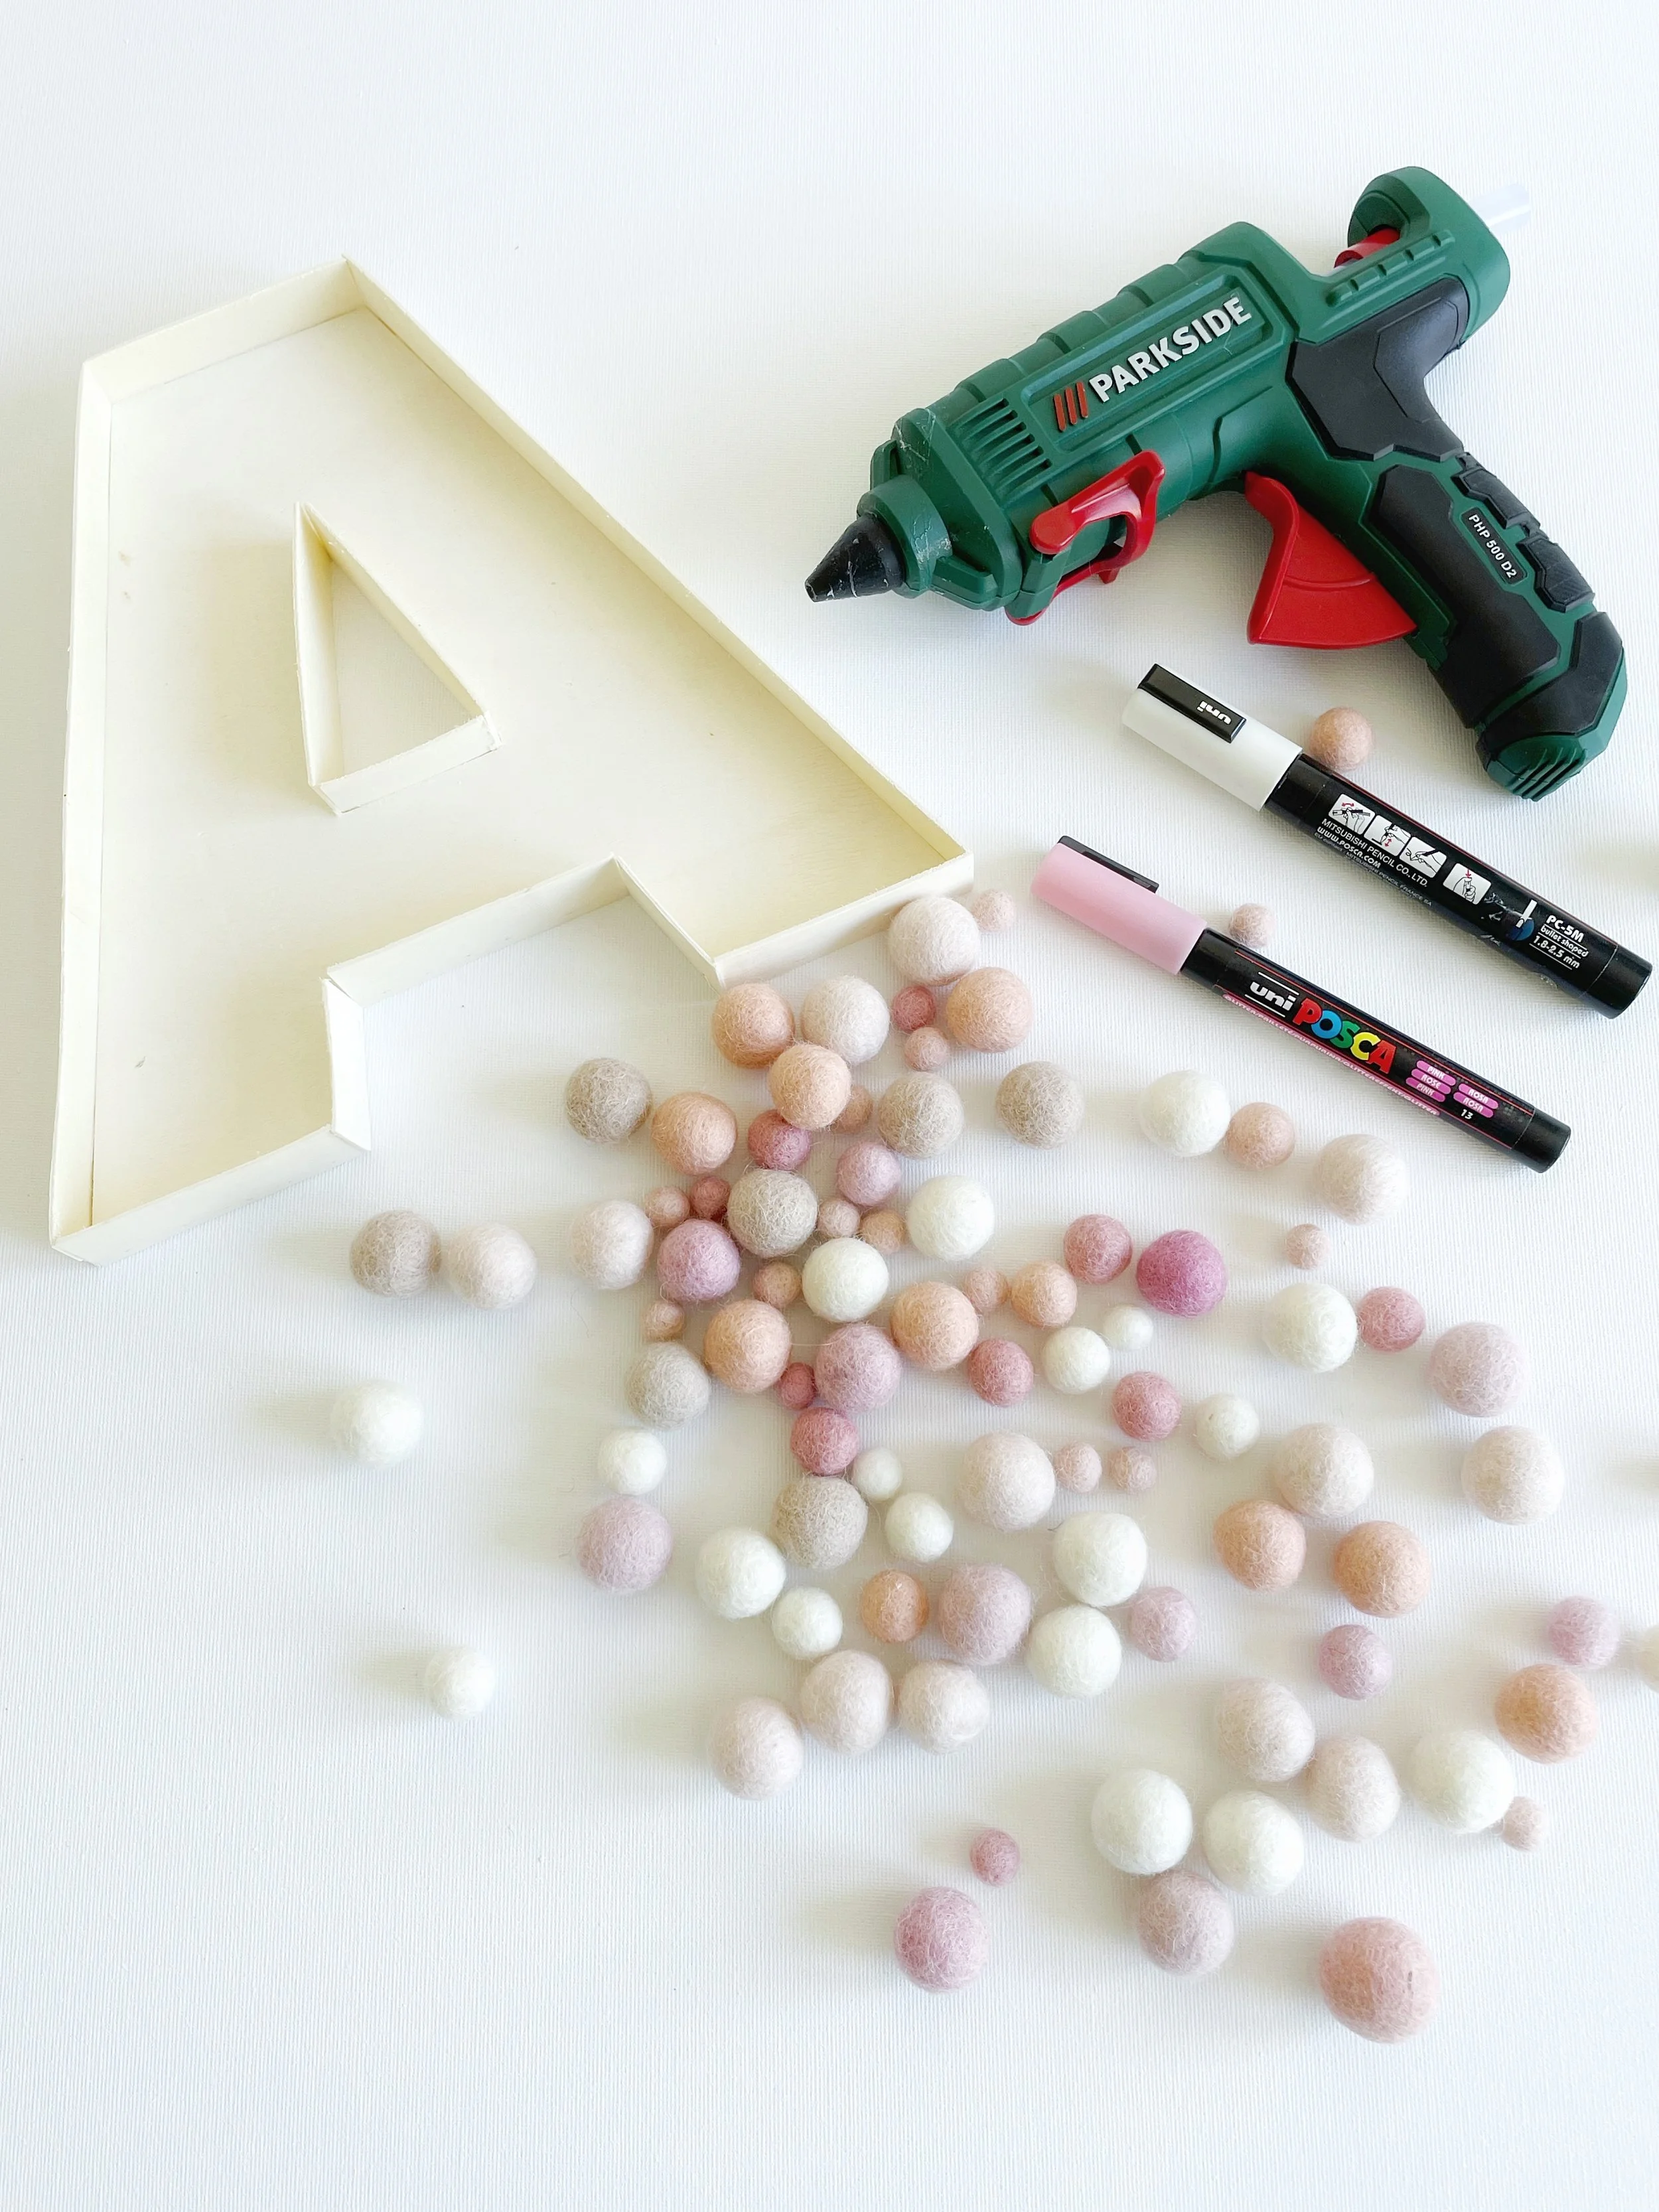
To make DIY felt ball letters you will need:
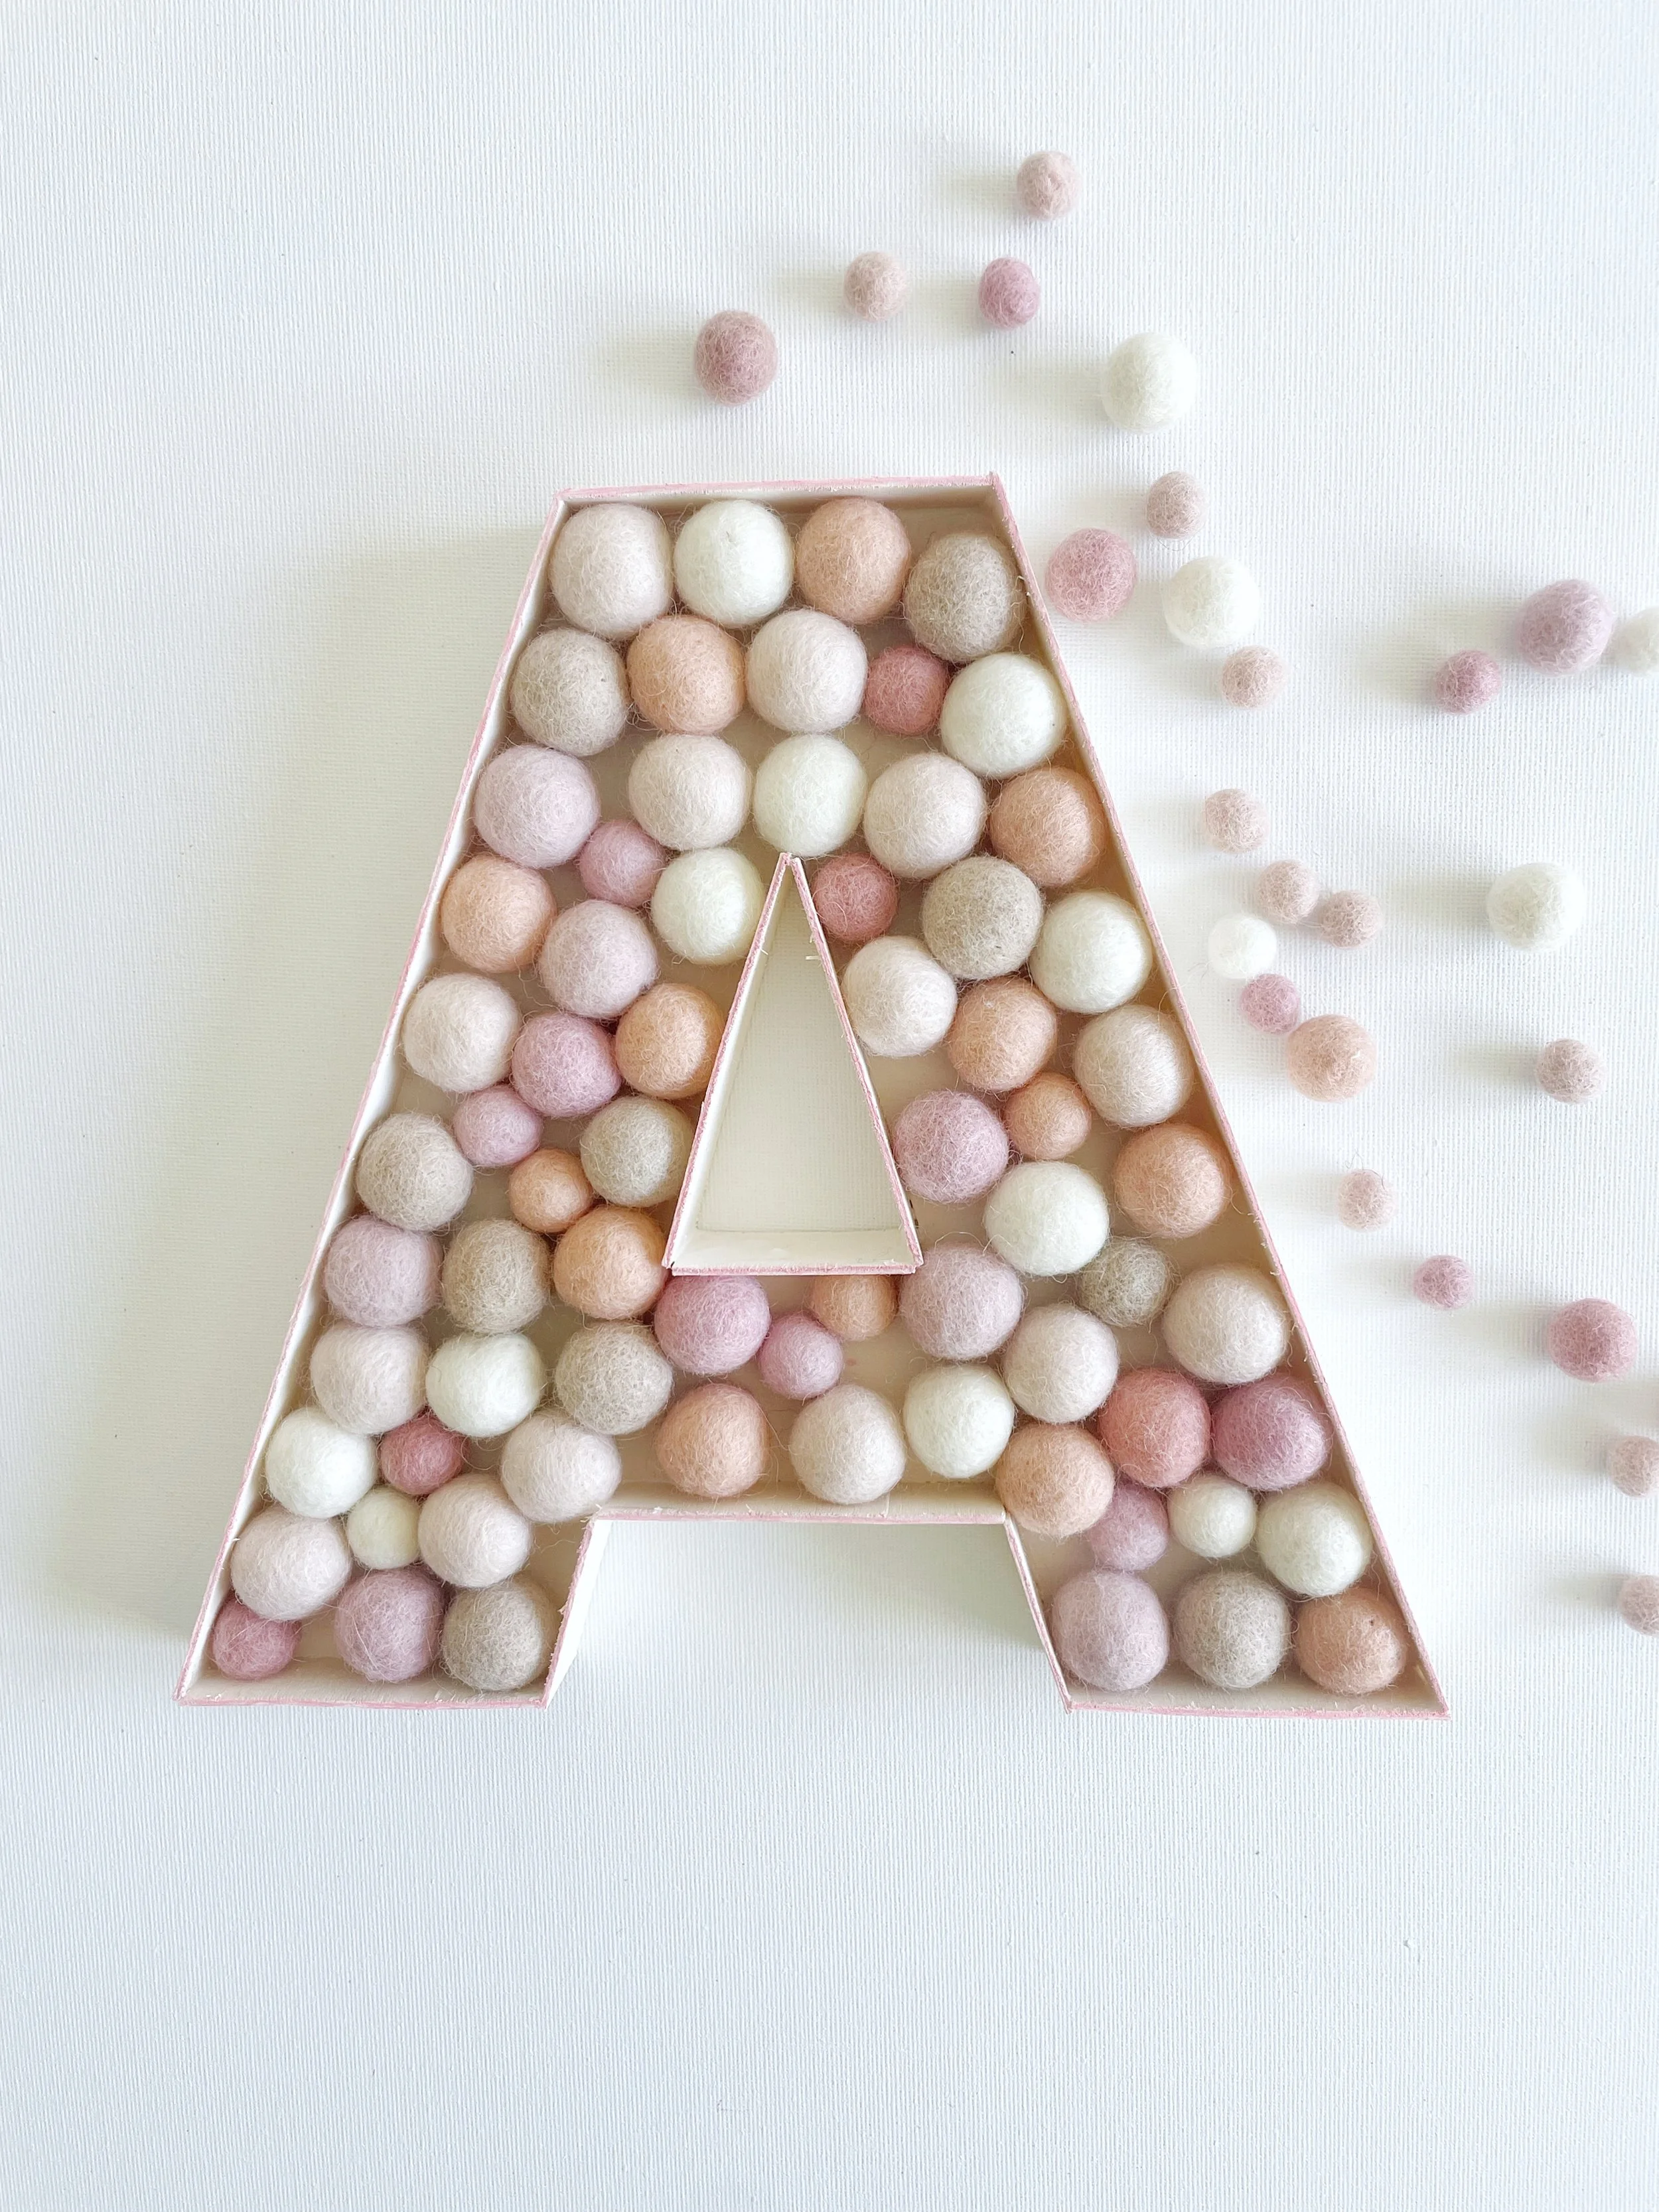
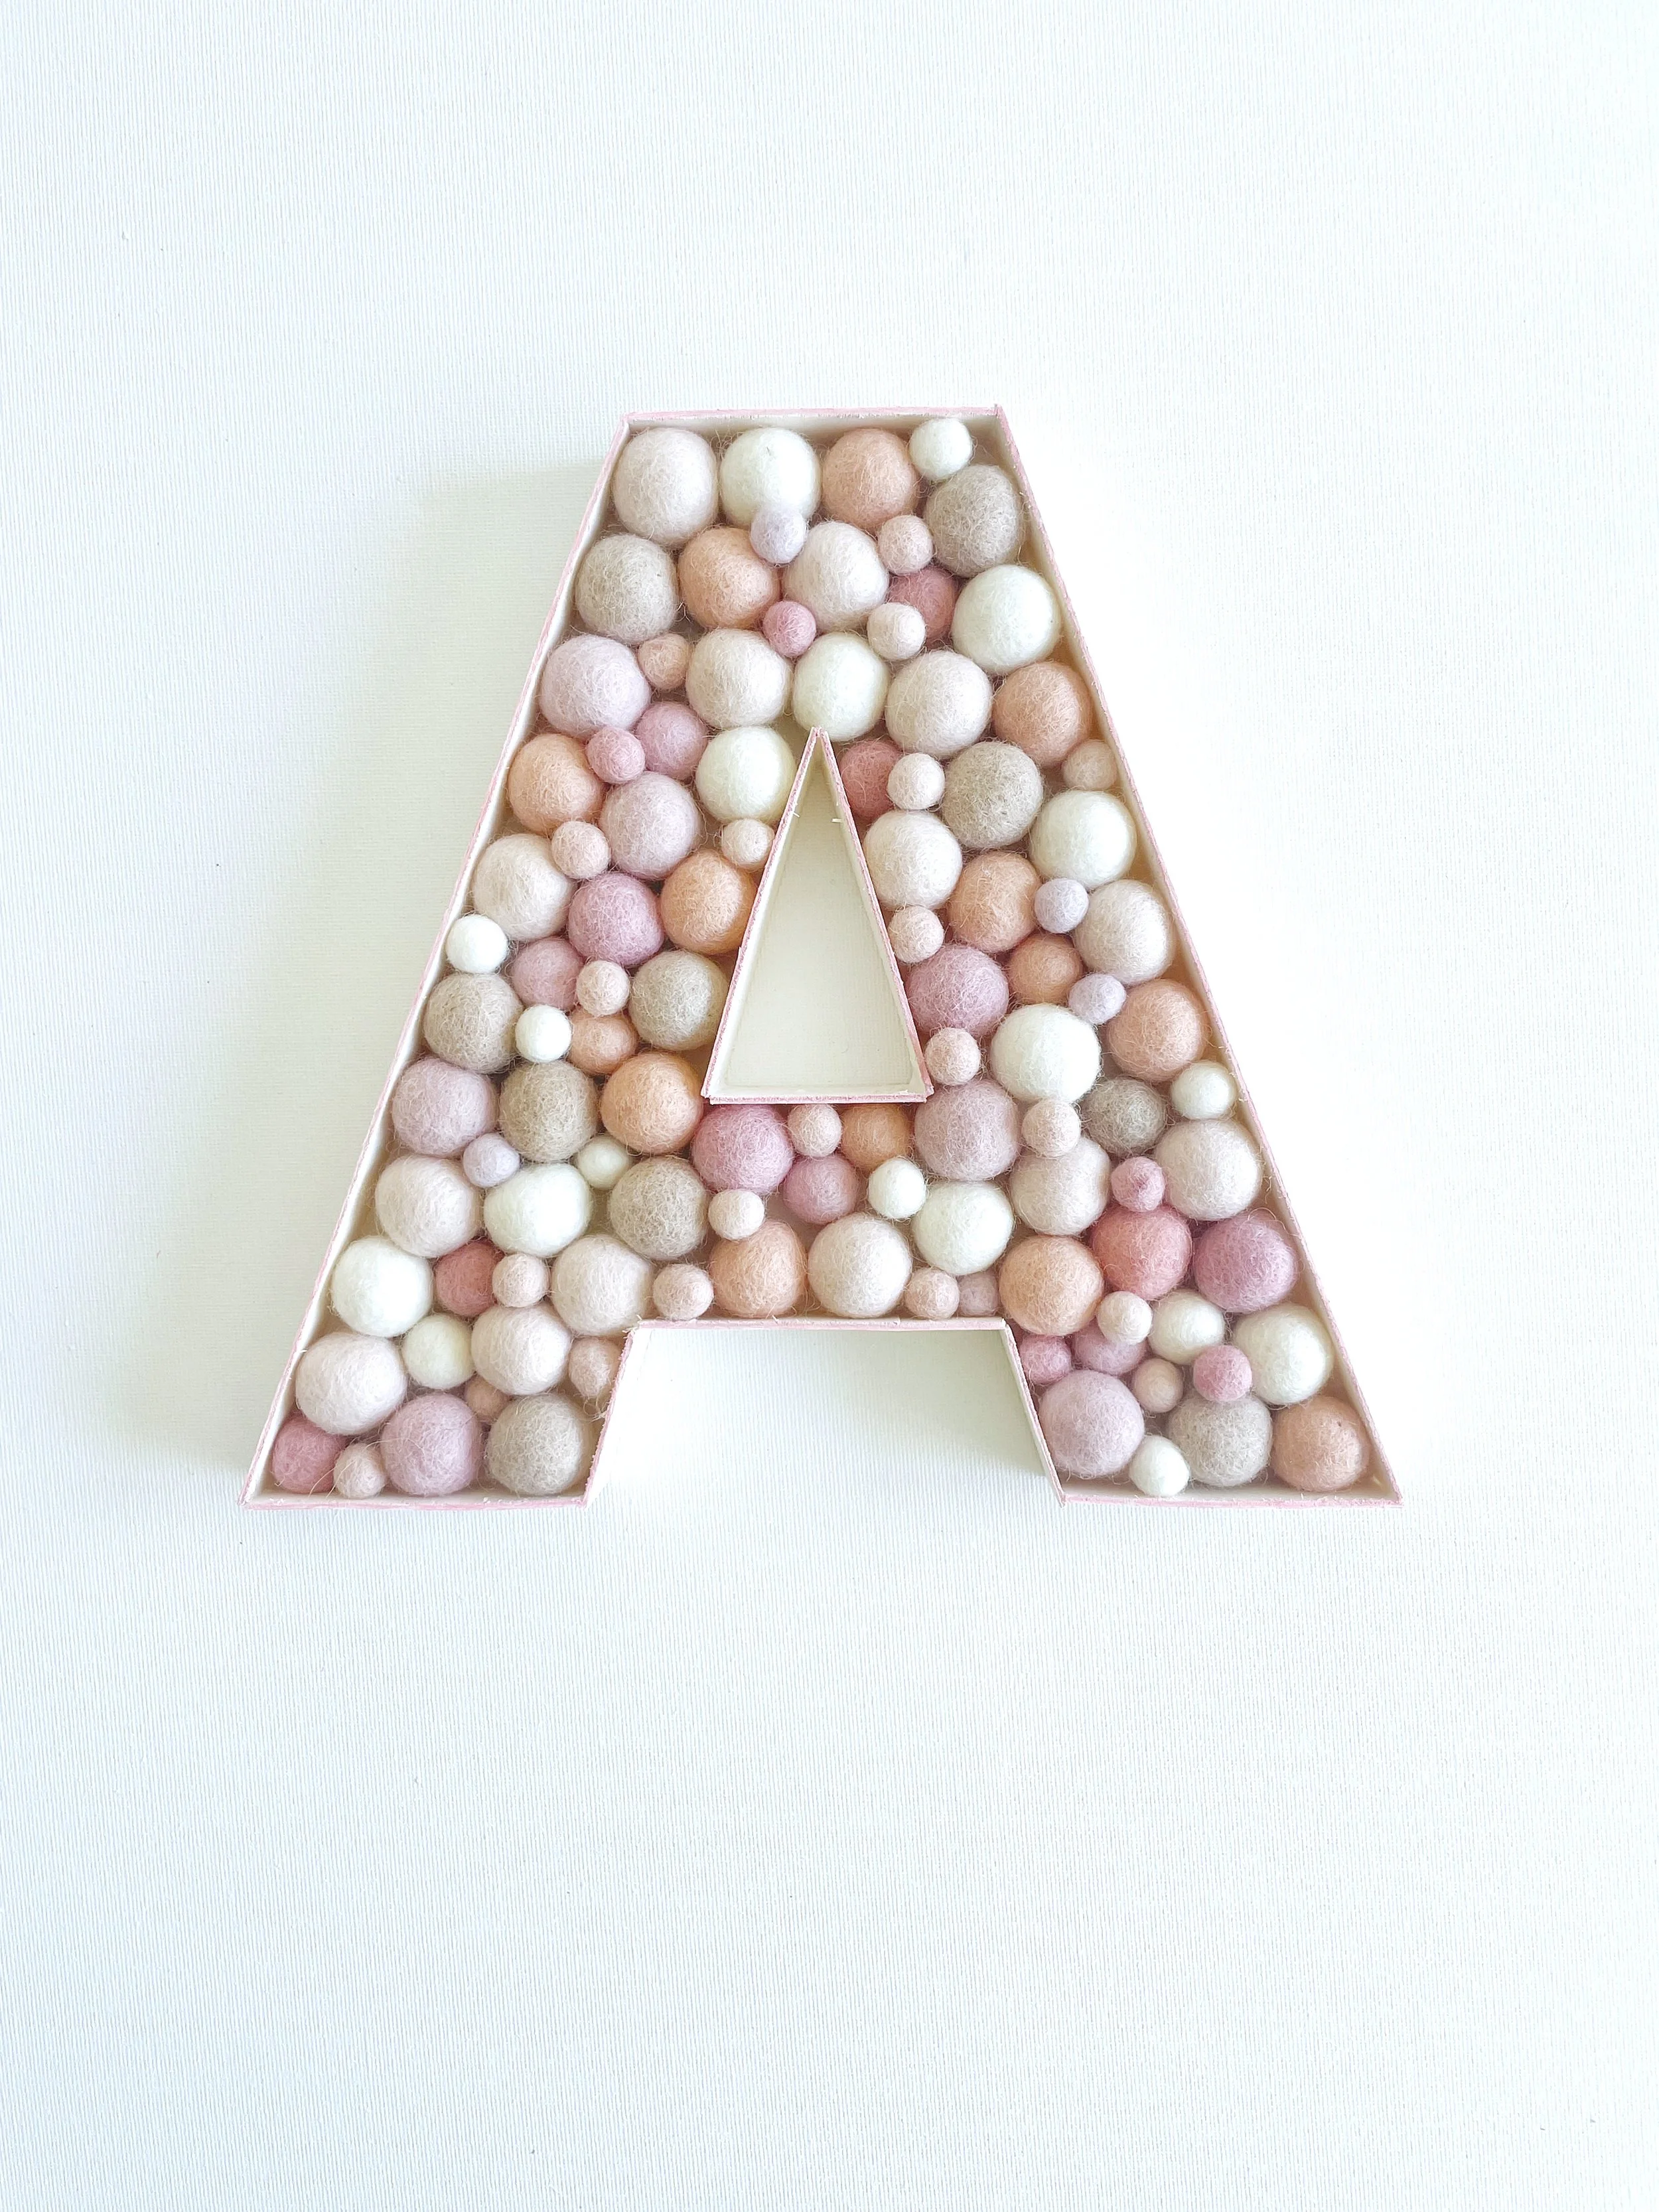
Wooden fillable letter(s) in your chosen size, I’ve used a 22cm letter.
Felt balls in your chosen size and colours. I have used three different sizes of felt ball (2cm,1.5cm &1cm) . If you prefer to use only one size of felt balls I recommend 2cm.
Glue gun. You can use craft glue if you like but I feel that a glue gun gives a more secure finish, especially if you’re using different sized felt balls.
Paint - this is optional but using paint can be a great way to customise your felt ball letters for a particular room or theme. For example you might want to use the same paint as your child’s bedroom.
*For this felt ball letter I have used Posca Pens but I would actually recommend using paint as it's much easier.
Let's make felt ball letters...
Paint

If you are painting your wooden letter do that first. You might want to give it more than one coat.
Make sure your letters are completely dry before starting to fill with felt balls. You don’t want any smudges.
Glue & fill

Now all that is left to do is fill the letter with your chosen felt balls. See, I told you it was easy!
I find it best to start by placing felt balls at the top of letter and work down.
To glue the felt balls in place add a small blob of hot glue to a felt ball and firmly place it inside the letter. Hold the felt ball for a few seconds to make sure it’s secure.
Repeat with next felt ball, and the next, and the next… (you get the picture!).
If your hot glue becomes too runny, try turning it off for a minute or so to allow the glue to cool a little.
Create texture
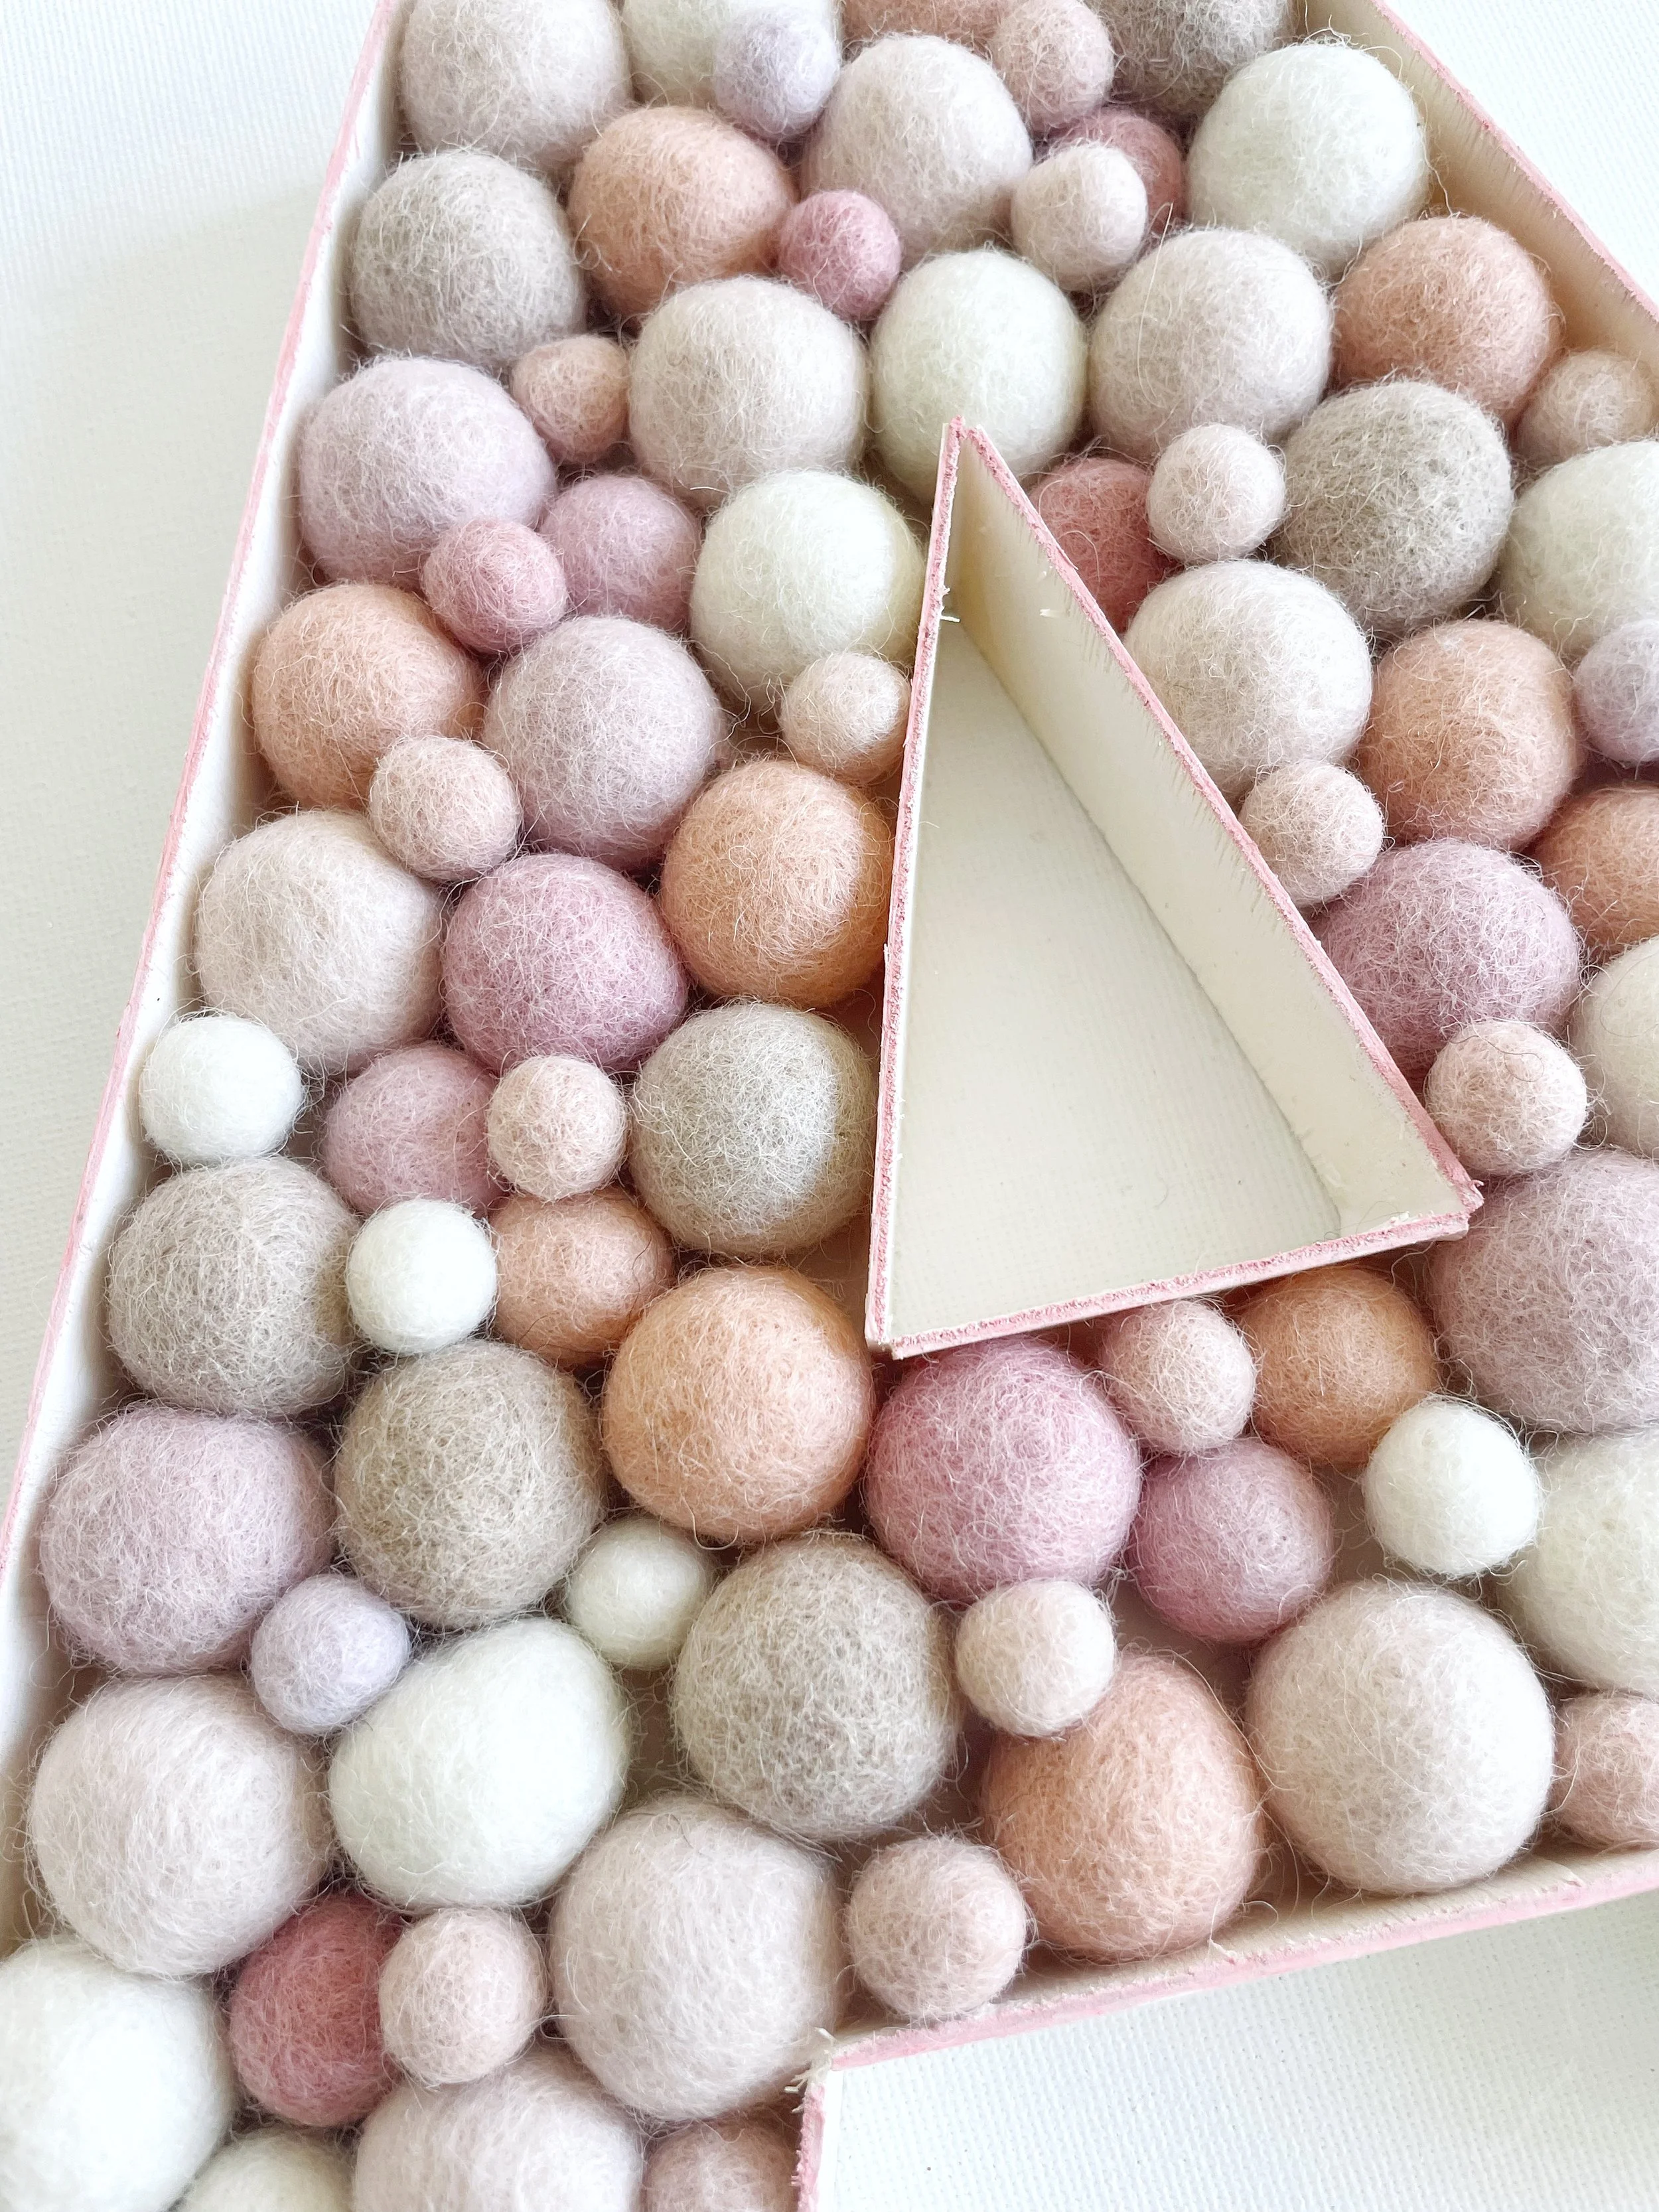
I like to use the two larger sized felt balls to start with (2cm &1.5cm).
As you glue the larger felt balls into the letter you will find that small gaps appear. I use the tiny felt balls (1cm) to fill in those gaps.
I find that using three different sized felt balls creates a more textured and interesting design. But If you prefer the clean look of uniform rows of felt balls then I recommend using only the larger sized felt ball (2cm).
Continue to glue the felt balls into the fillable letter until your design is complete and you’re happy with the result.
And there you have it, a beautiful felt ball letter made by your own hands! I hope it brings you as much joy as it did me to create it.
I truly hope you enjoyed this DIY felt ball letters tutorial. If you have any questions, thoughts, or tips to share, please leave them below, I’d absolutely love to hear from you!
Much love, Karen x