
DIY Fluffy Cloud Garland

In this tutorial, I’m excited to show you how to create a beautiful DIY fluffy cloud garland, perfect for a nursery, kids’ bedroom, or playroom! Making your own room decor is such an easy win: it looks amazing and saves you money.
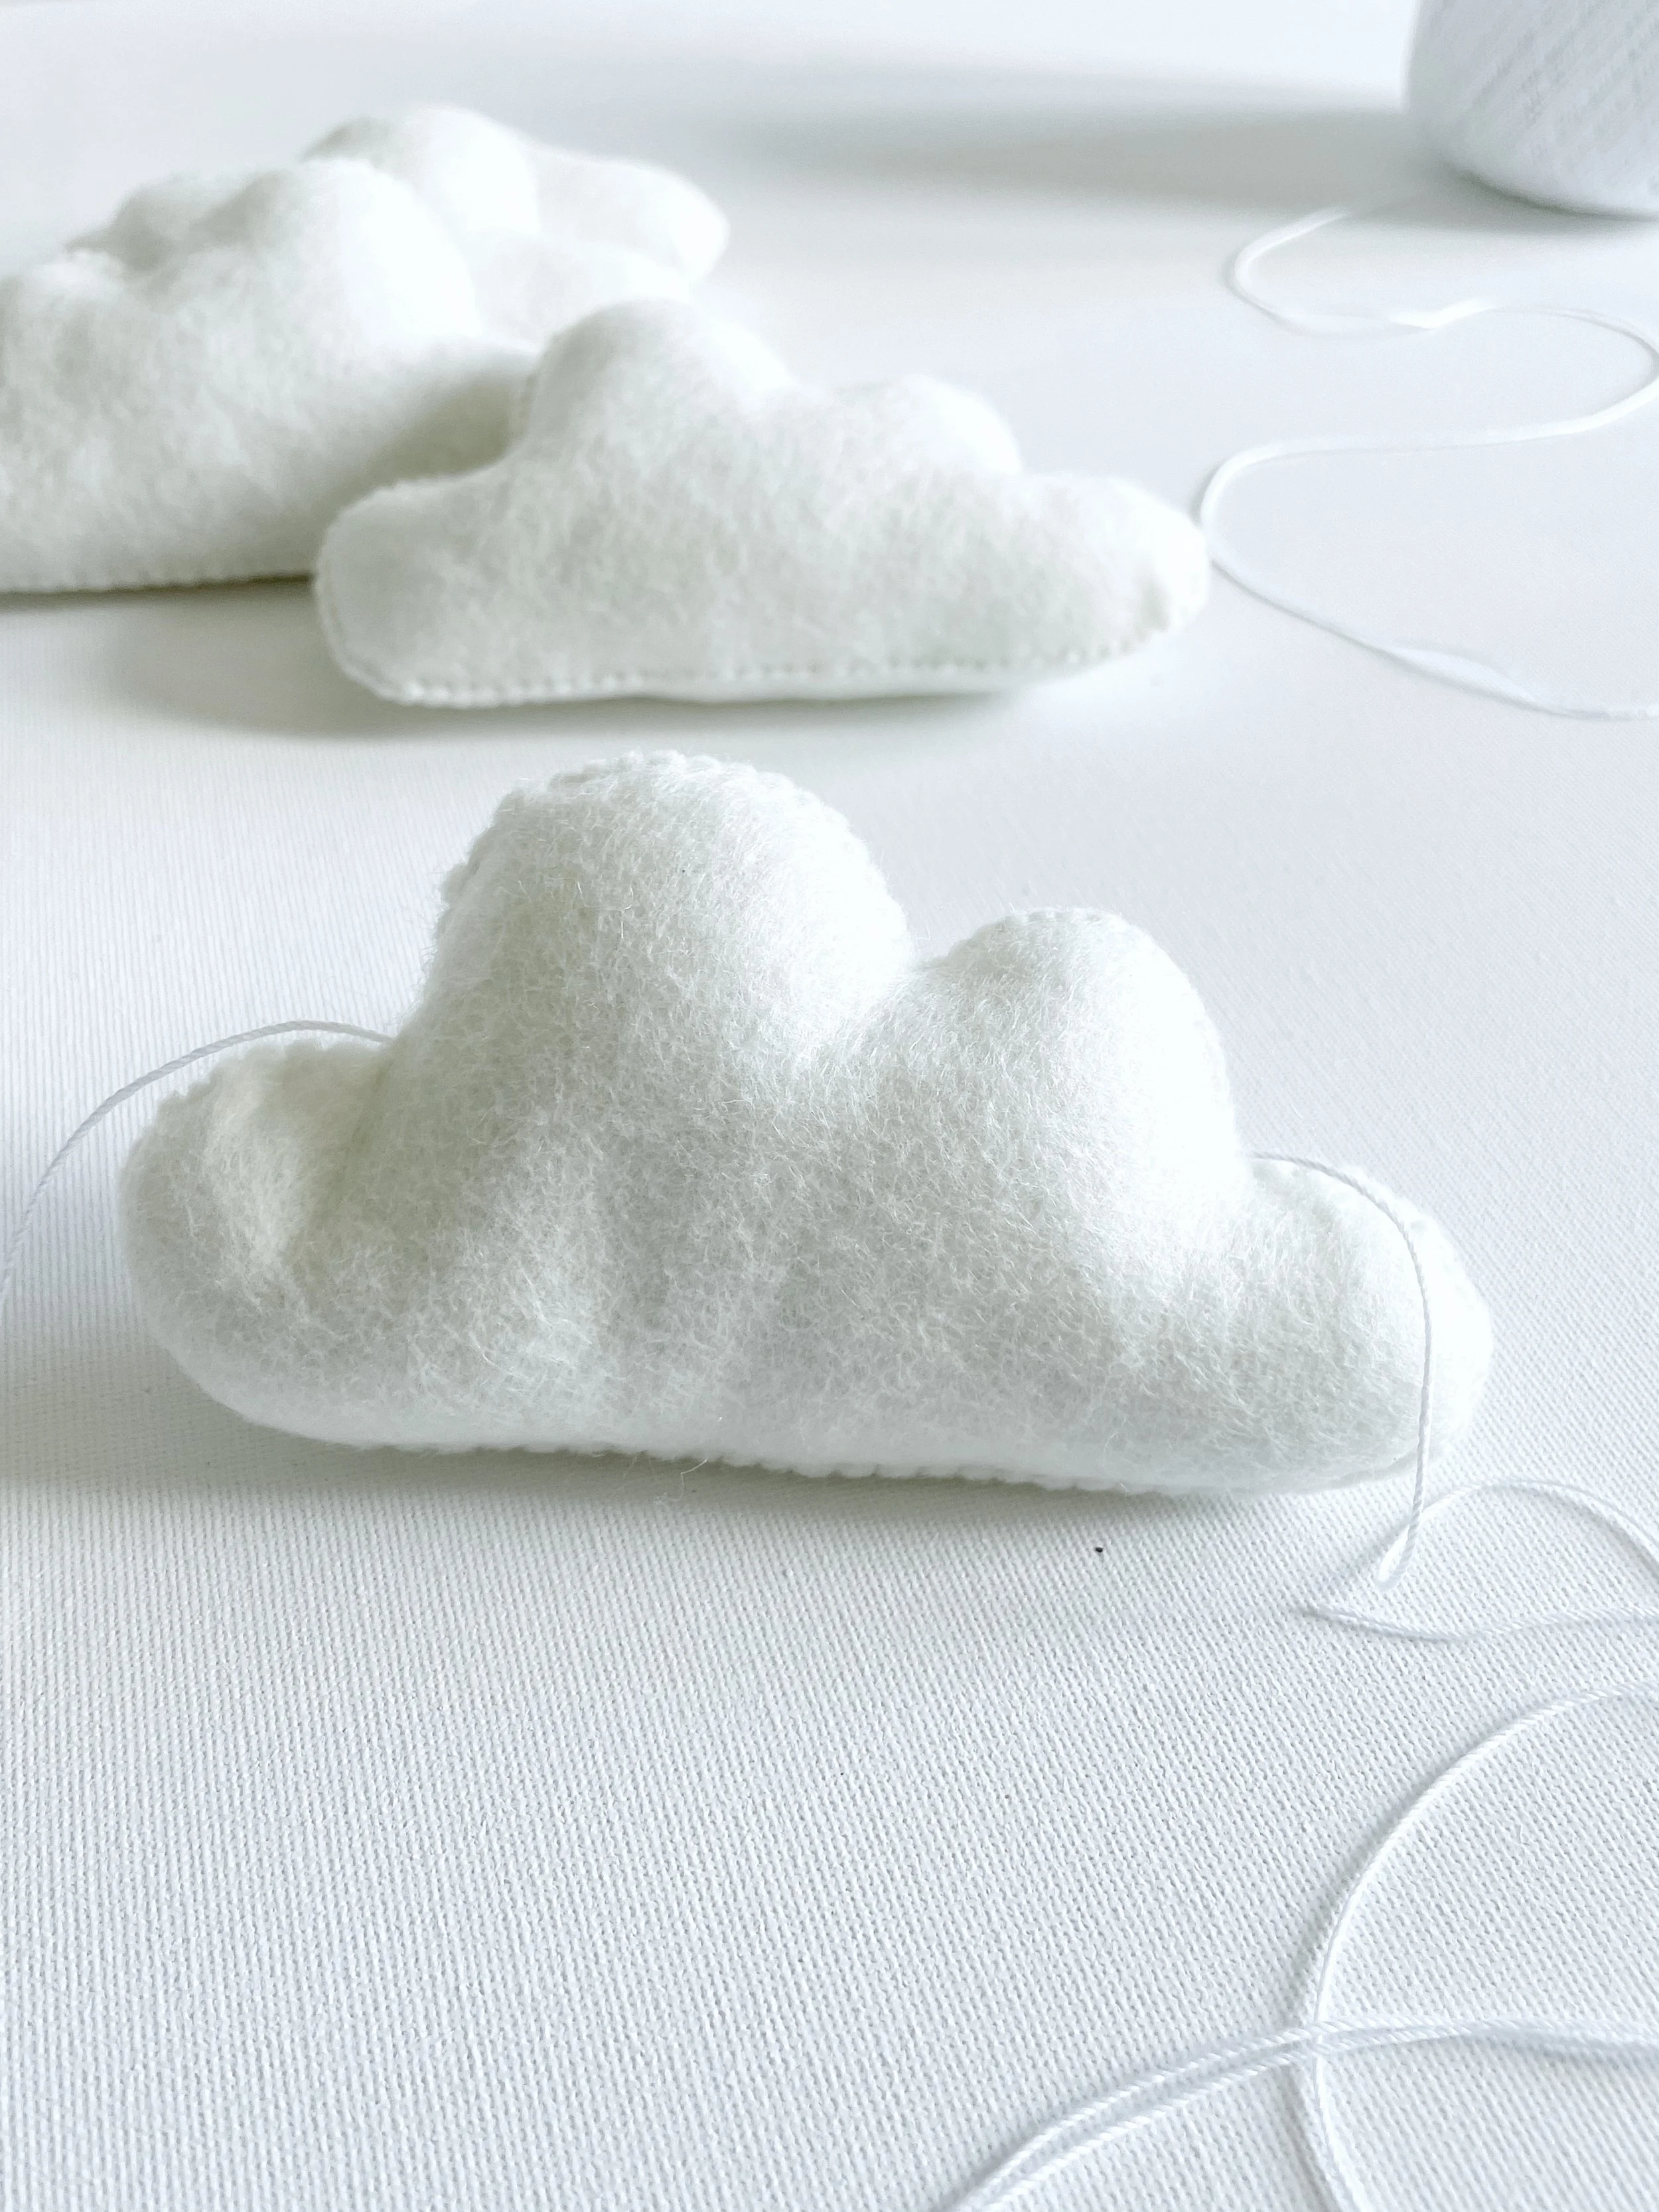
You’re going to fall in love with how this simple, minimalist garland transforms your space. The soft little ivory clouds add the dreamiest, most peaceful vibe, it’s so calming to look at.
Whether you’re styling a modern nursery or leaning toward a more classic look, this gender-neutral garland fits right in with any decor style.
And if you’re making it as a gift (seriously, how sweet are you?!), you can relax knowing it’ll look beautiful in any child’s room, no matter the theme or color palette.
I made my garland with a soft ivory felt, but feel free to get creative! Mix in some pastel blue or pink, or keep it neutral with soft beige or grey, whatever suits your style.
If you’re putting together a nursery, you might also want to make a matching cloud mobile, I’ve got a tutorial for that too: DIY Nursery Mobile!
In this step-by-step guide, I’ll walk you through everything carefully, so you can create your own dreamy cloud garland and hang it with pride.
And remember: there’s no rush! Taking your time and enjoying the creative process is part of the magic. Handmade projects are good for the soul.
I always recommend reading through the tutorial once or twice before you dive in it’ll help everything feel much more doable, especially if you’re new to crafting.
Once you finish your first cloud garland, you’ll see just how fun (and a little addictive!) it is, you’ll be making these for every kid you know before you know it!I
Selling handmade garlands…
Once you start making your own kids' room decor, don’t be surprised if you catch the bug and want to start selling it too! Garlands are always a big hit not just with parents, but with anyone looking for a sweet, thoughtful gift.
That’s why kids' room garlands can be a fantastic addition to your shop or even the perfect way to kickstart a brand-new handmade business!
Sticking with gender-neutral colors can make it easier for your customers to say “yes,” but offering a variety of colors and shapes is a great way to appeal to lots of different tastes.
A smart way to boost your sales? Offer this matching Nursery Mobile as an upsell or even bundle it with the garland at a discounted price to make it even more irresistible!
If you’re thinking of selling garlands, felt ball garlands are another amazing option to add to your collection. I’ll show you how to make them here: DIY Felt Ball Garlands.
And if you’re planning to sell your creations, make sure you check out my super-helpful Beginner’s Guide to Pricing Your Handmade Items . Trust me, pricing can be trickier than it seems when you’re just getting started.
Pin it to Pinterest and read it later.

You might also want to peek at Make It, List It, Sell It!, where I walk you through the best beginner-friendly places to start selling your handmade goods.
What you will need to make a cloud garland…
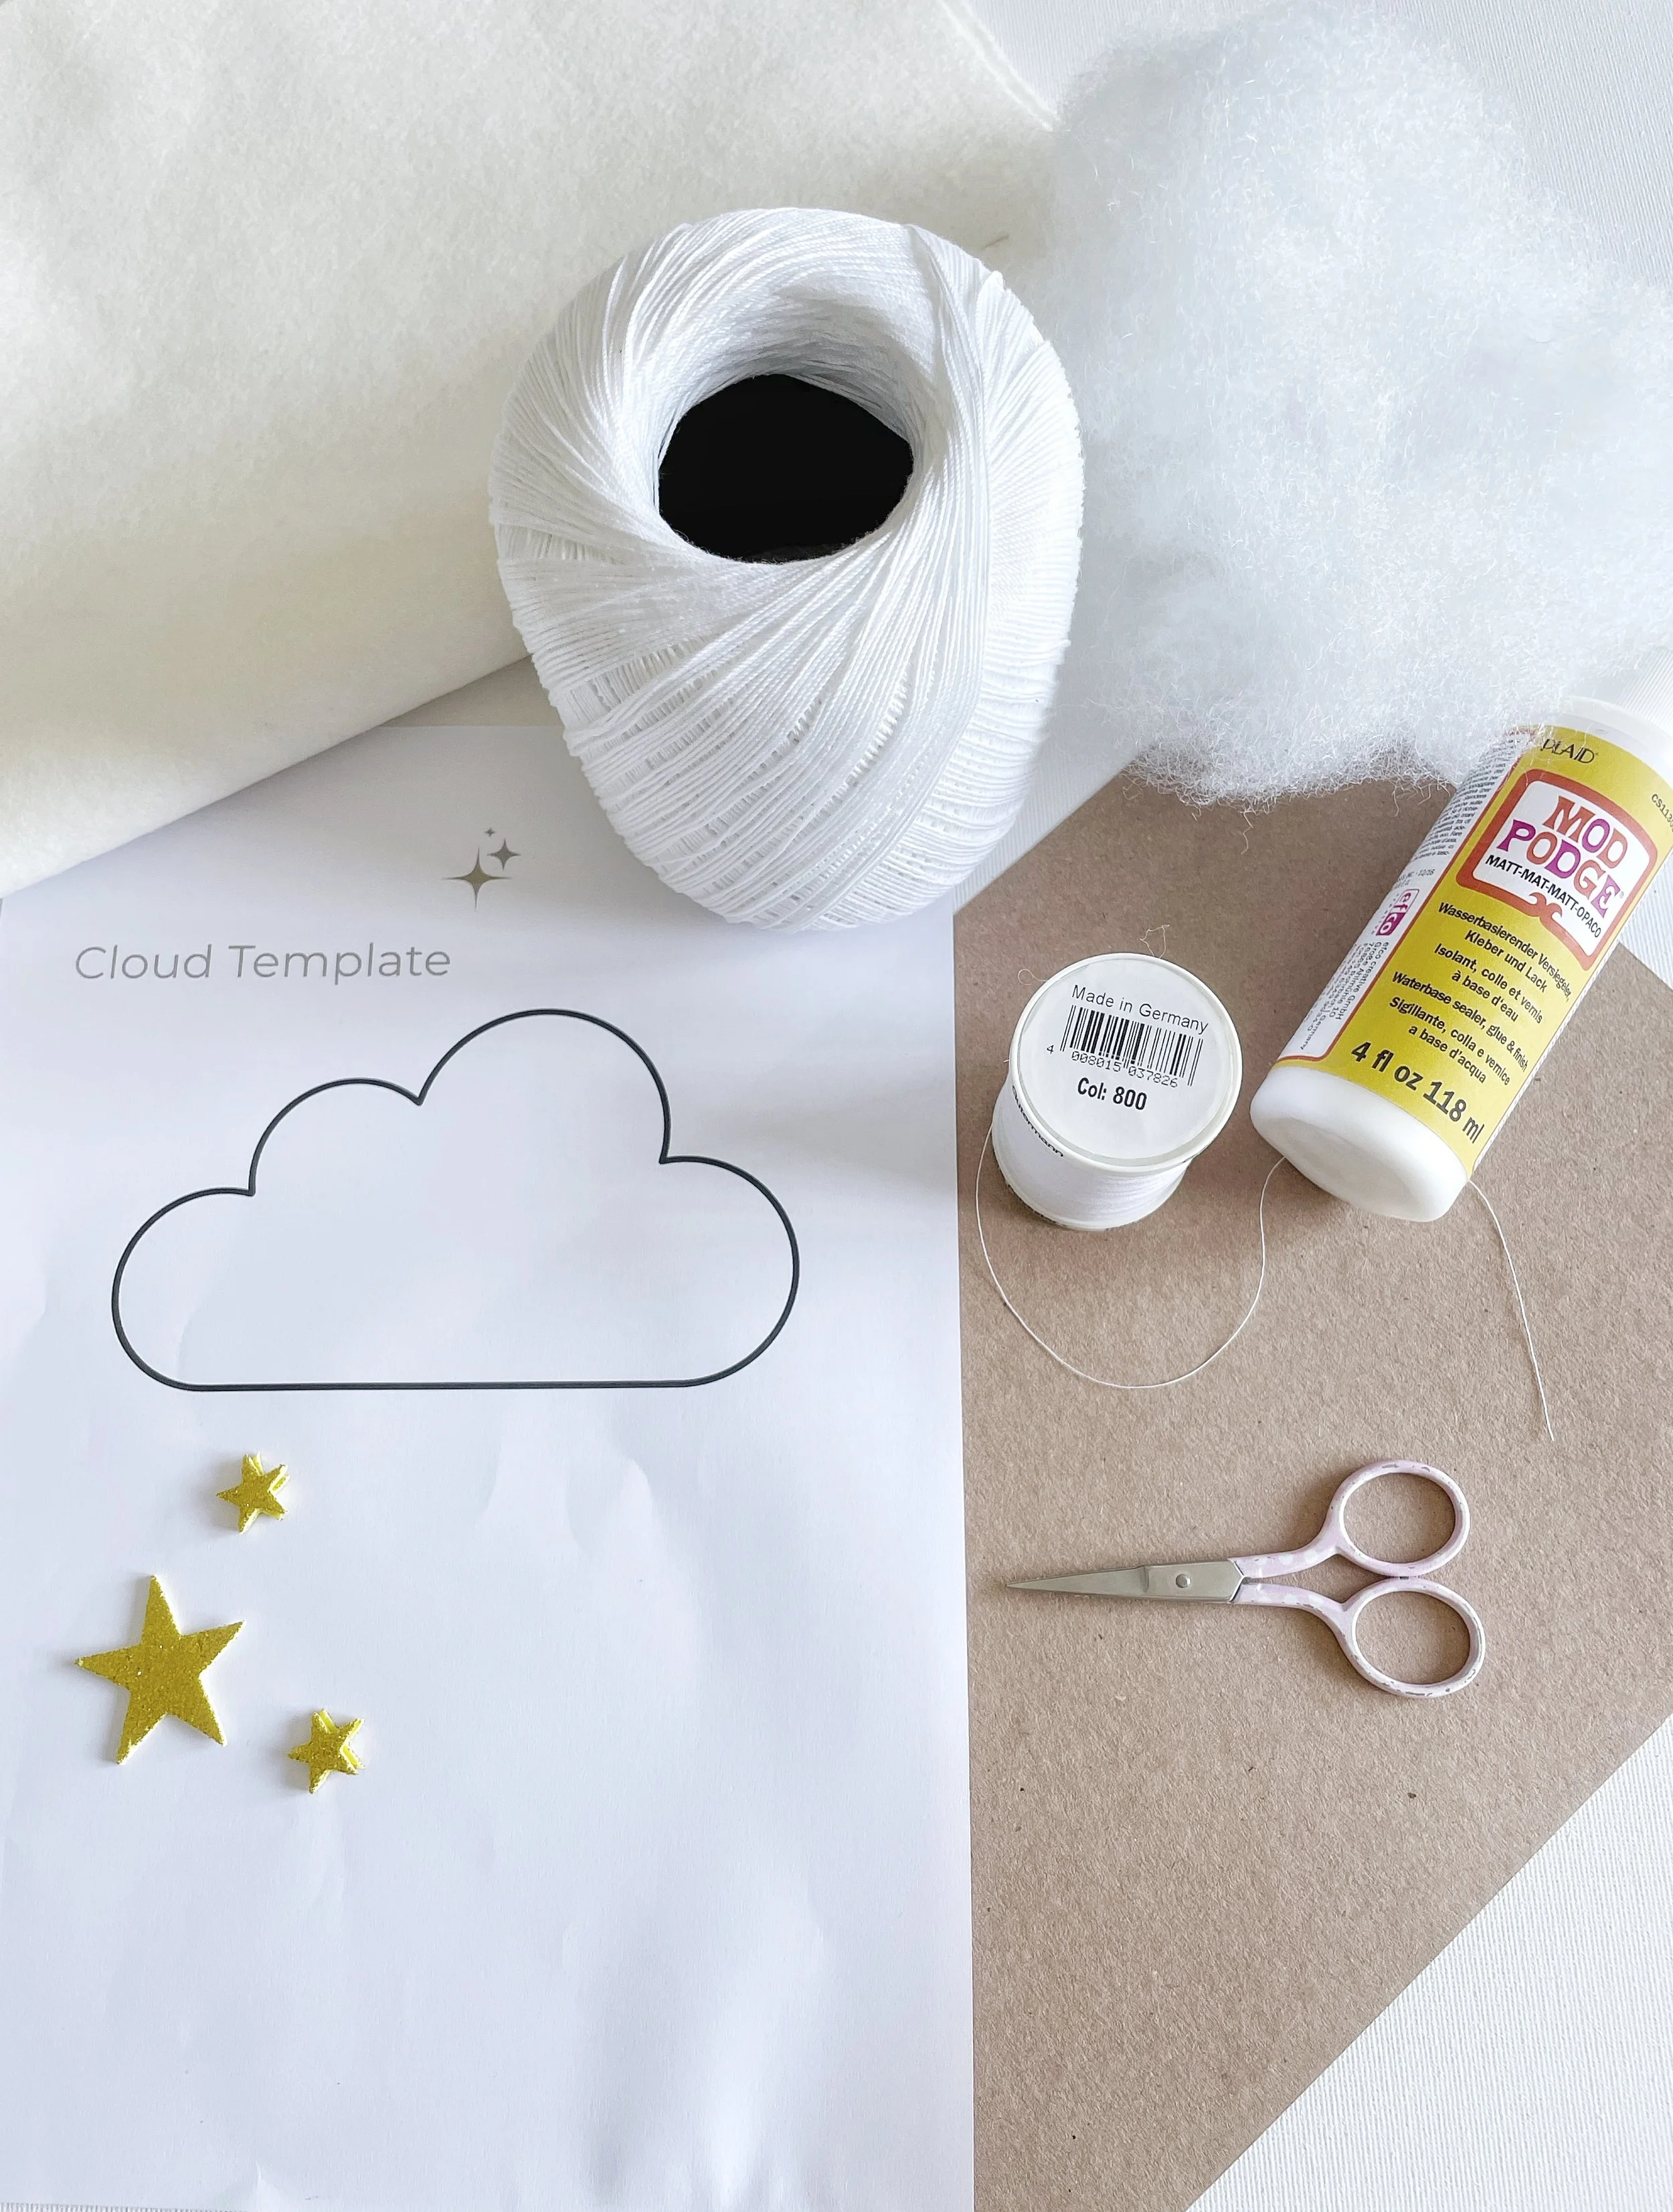
To make the DIY cloud garland You will need the following :
Cloud template
Flurraby-Cloud-Template-1Download
Wool felt - I've chosen white but you can choose any colour that matches your colour scheme.
Sewing thread in the same colour as the wool felt you have chosen. I recommend Gutterman threads, they never snap or fray and are easy to thread.
Hollowfibre stuffing - choose one that conforms to fire, safety and quality standards .
Sewing Needles - two sizes of needle. Regular for sewing and thicker needle for threading the clouds.
Cotton thread - I like crochet thread size 10
glue - any glue will do it doesn't have to be Modge Podge
cardboard (old amazon envelopes are perfect!)
scissors - sharp enough to easily cut through fabric
Wooden chopstick or something similar to help push the stuffing into the clouds.
Create your Cloud Template...
Cut around the cloud sewing template and glue it to your piece of cardboard.
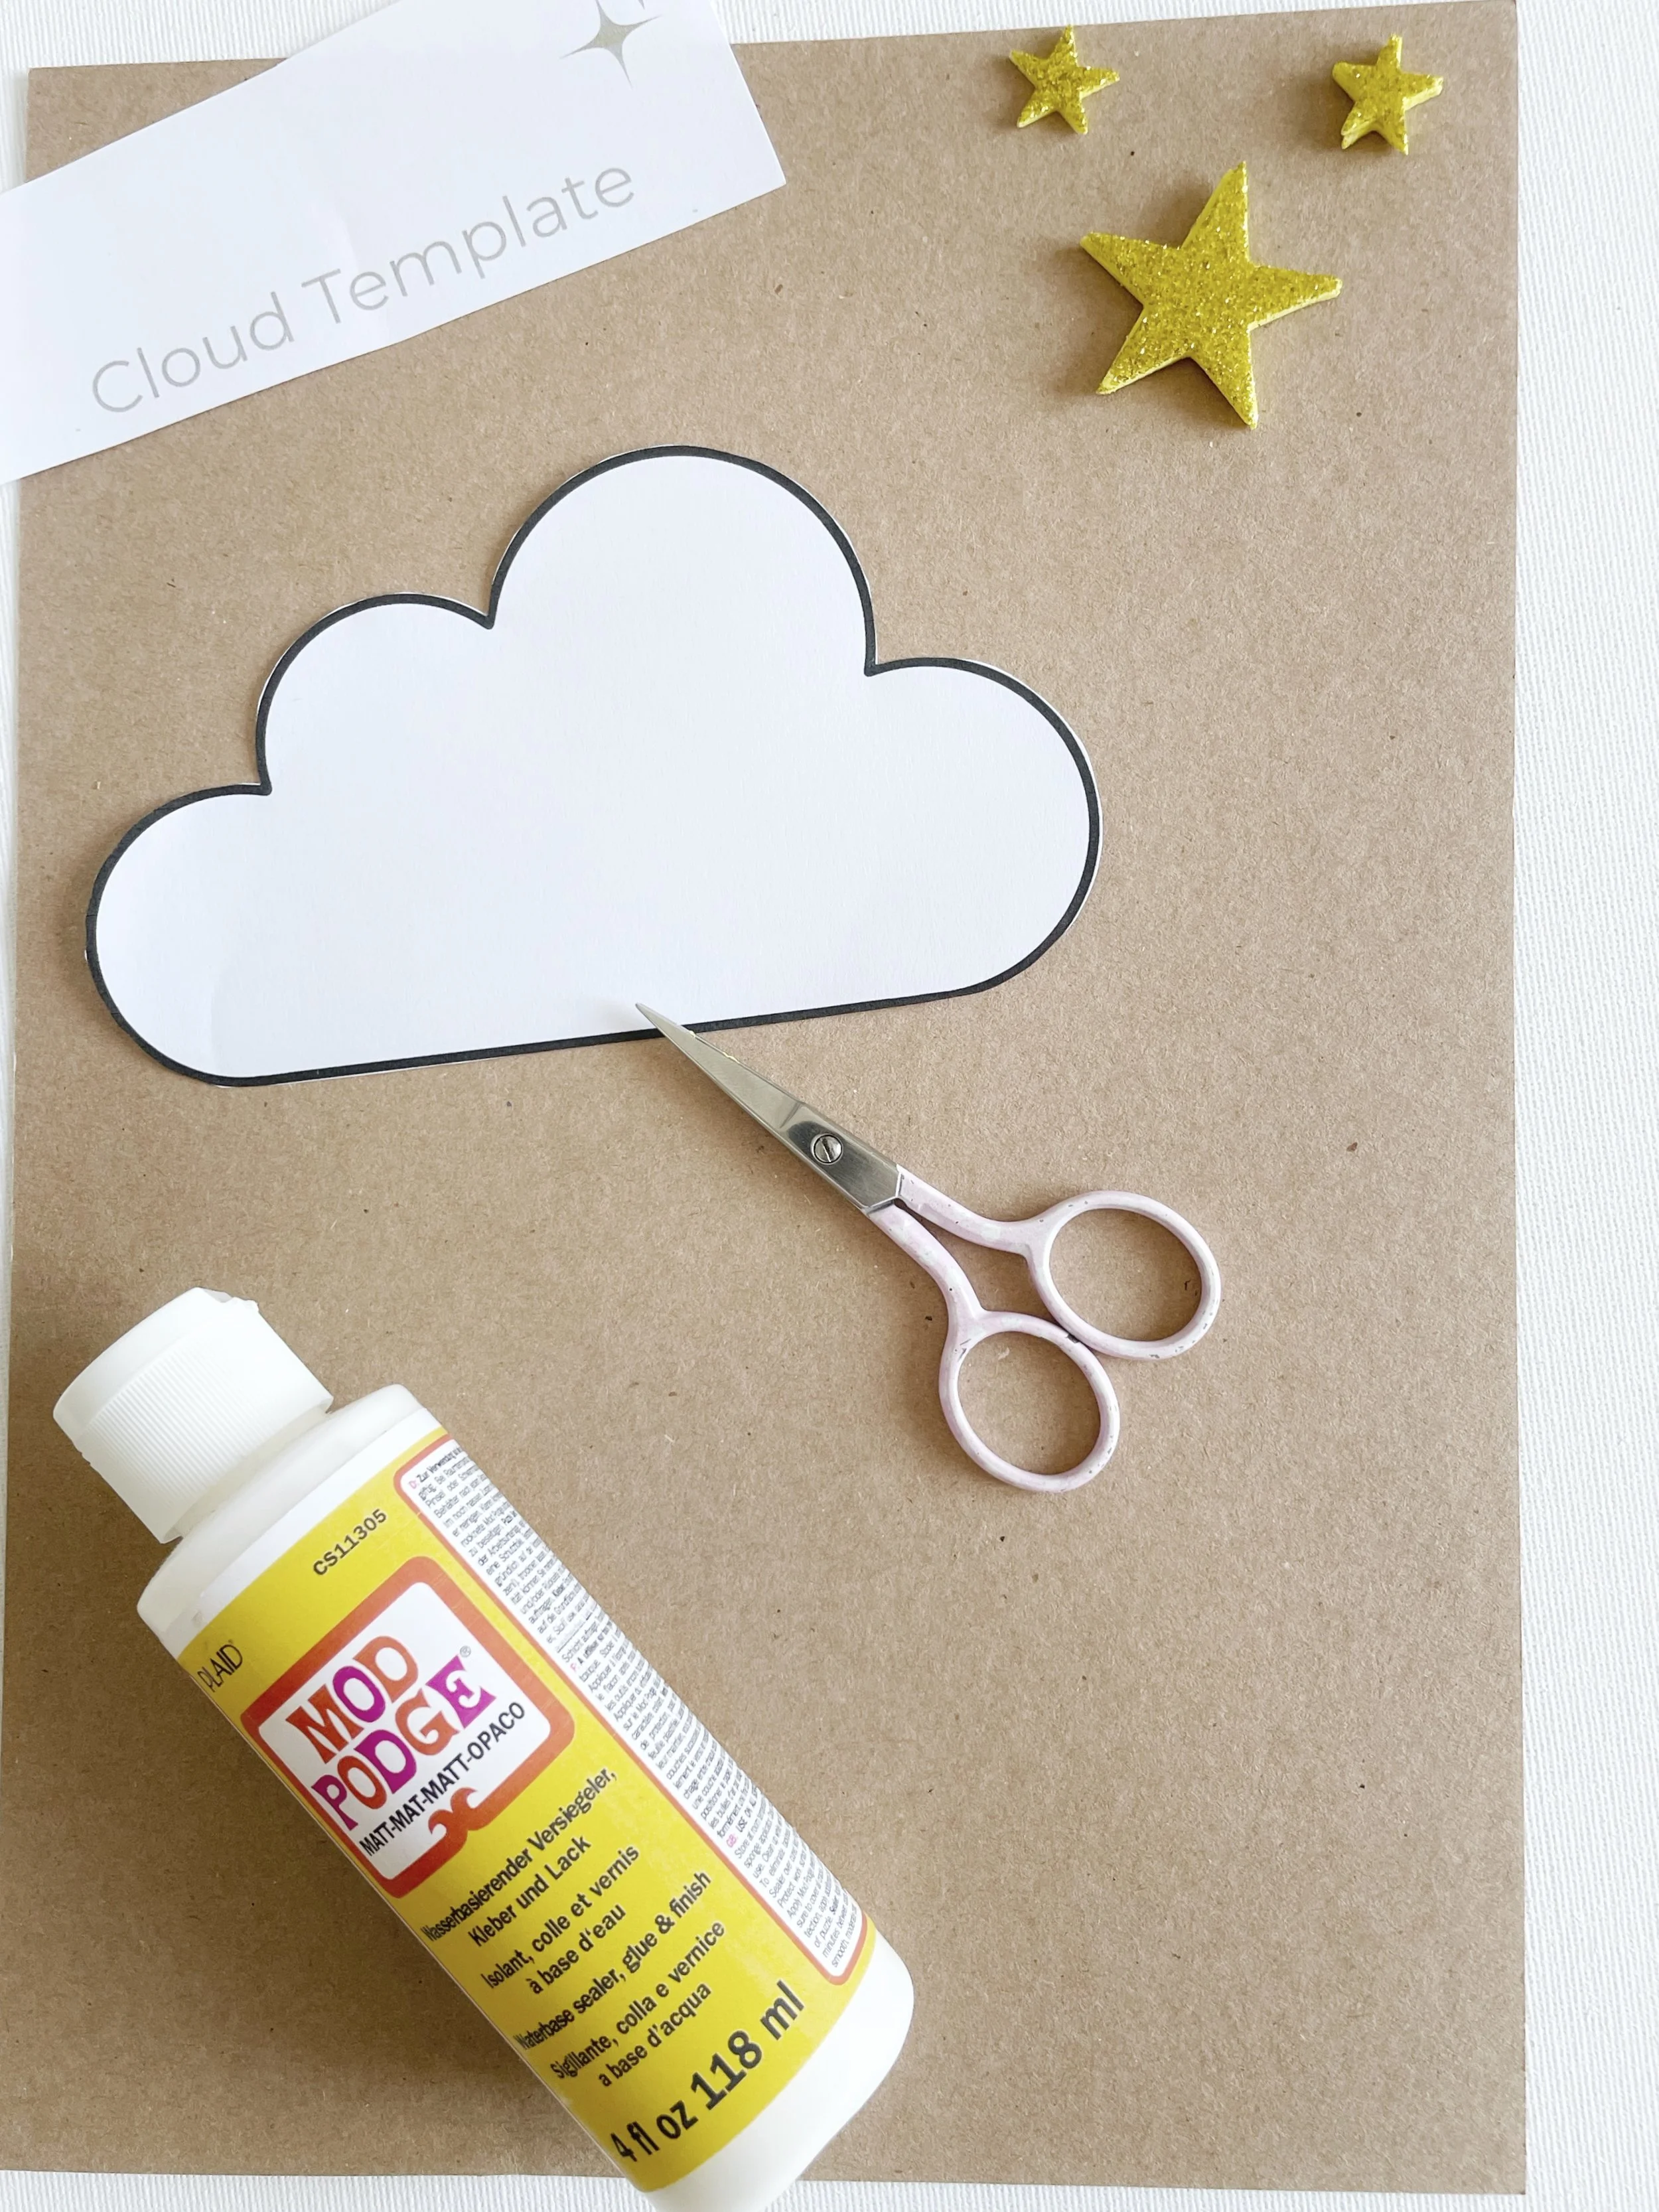
Once the glue has dried, cut around the template. You can also use this handy template to make this gorgeous Cloud Nursery Mobile
Draw clouds onto fabric...

Neatly fold your wool felt in half so that you have two layers of wool felt to work with. For best results, give the felt a quick iron to remove any creases.
Place the cloud template on the top layer of the wool felt. Use your pen to draw around the template.
Draw the amount of clouds that you would like your garland to have. I find that odd numbers look best.
Use your scissors to cut carefully around the cloud shapes. Cut through both layers of wool felt.
Turn over cloud that has been marked with pen. Any pen marks will now be on the inside of each cloud. This will ensure that no pen marks are visible on your finished garland.
Sew your Clouds...
Now it's time to sew the clouds. Don't worry if you're completely new to sewing. I have shown two types of stitch below.
Choose the stitch that you feel most confident attempting. The running stitch is the easiest and requires very little skill.
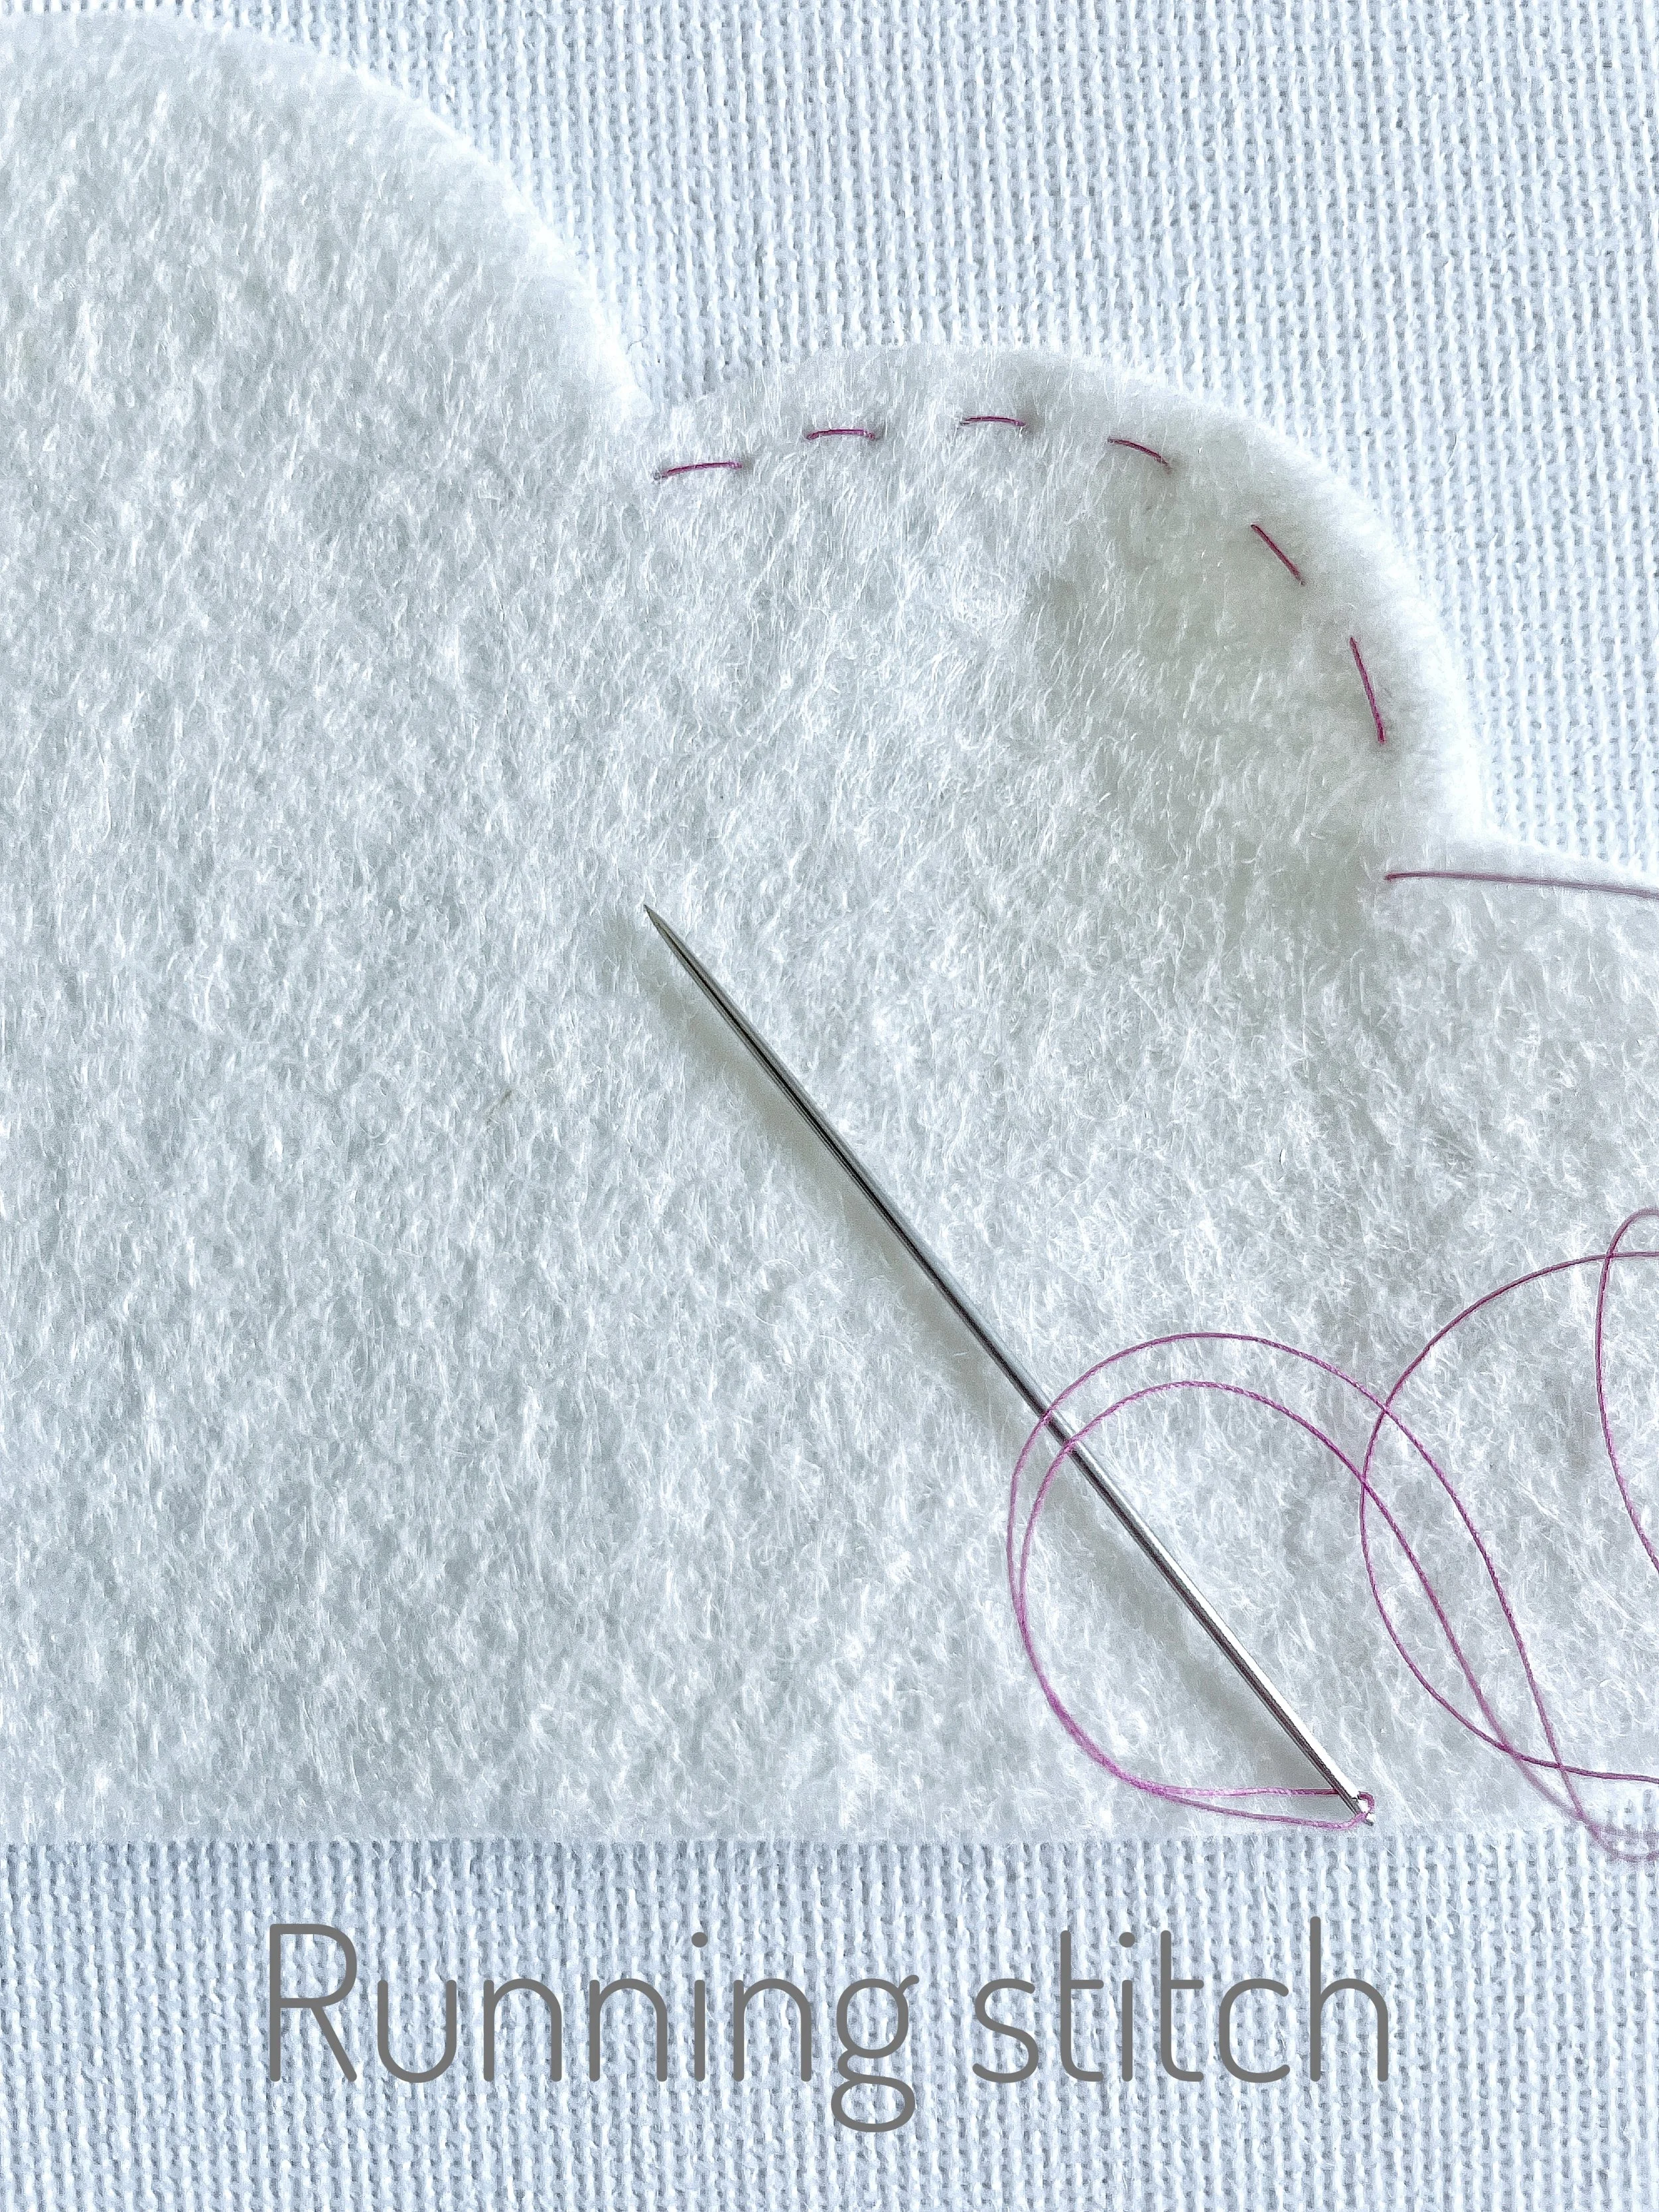
I have used pink thread to show what the stitch should look like but obviously you will be using matching thread.
Rather than give full instructions for each stitch I thought it would be much clearer and easier for you to learn from a YouTube tutorial. This running stitch tutorial from Red Ted Art is Fantastic. You can watch it here: Running stitch tutorial.
If you are more confident at sewing, the blanket stitch is perfect for this garland.
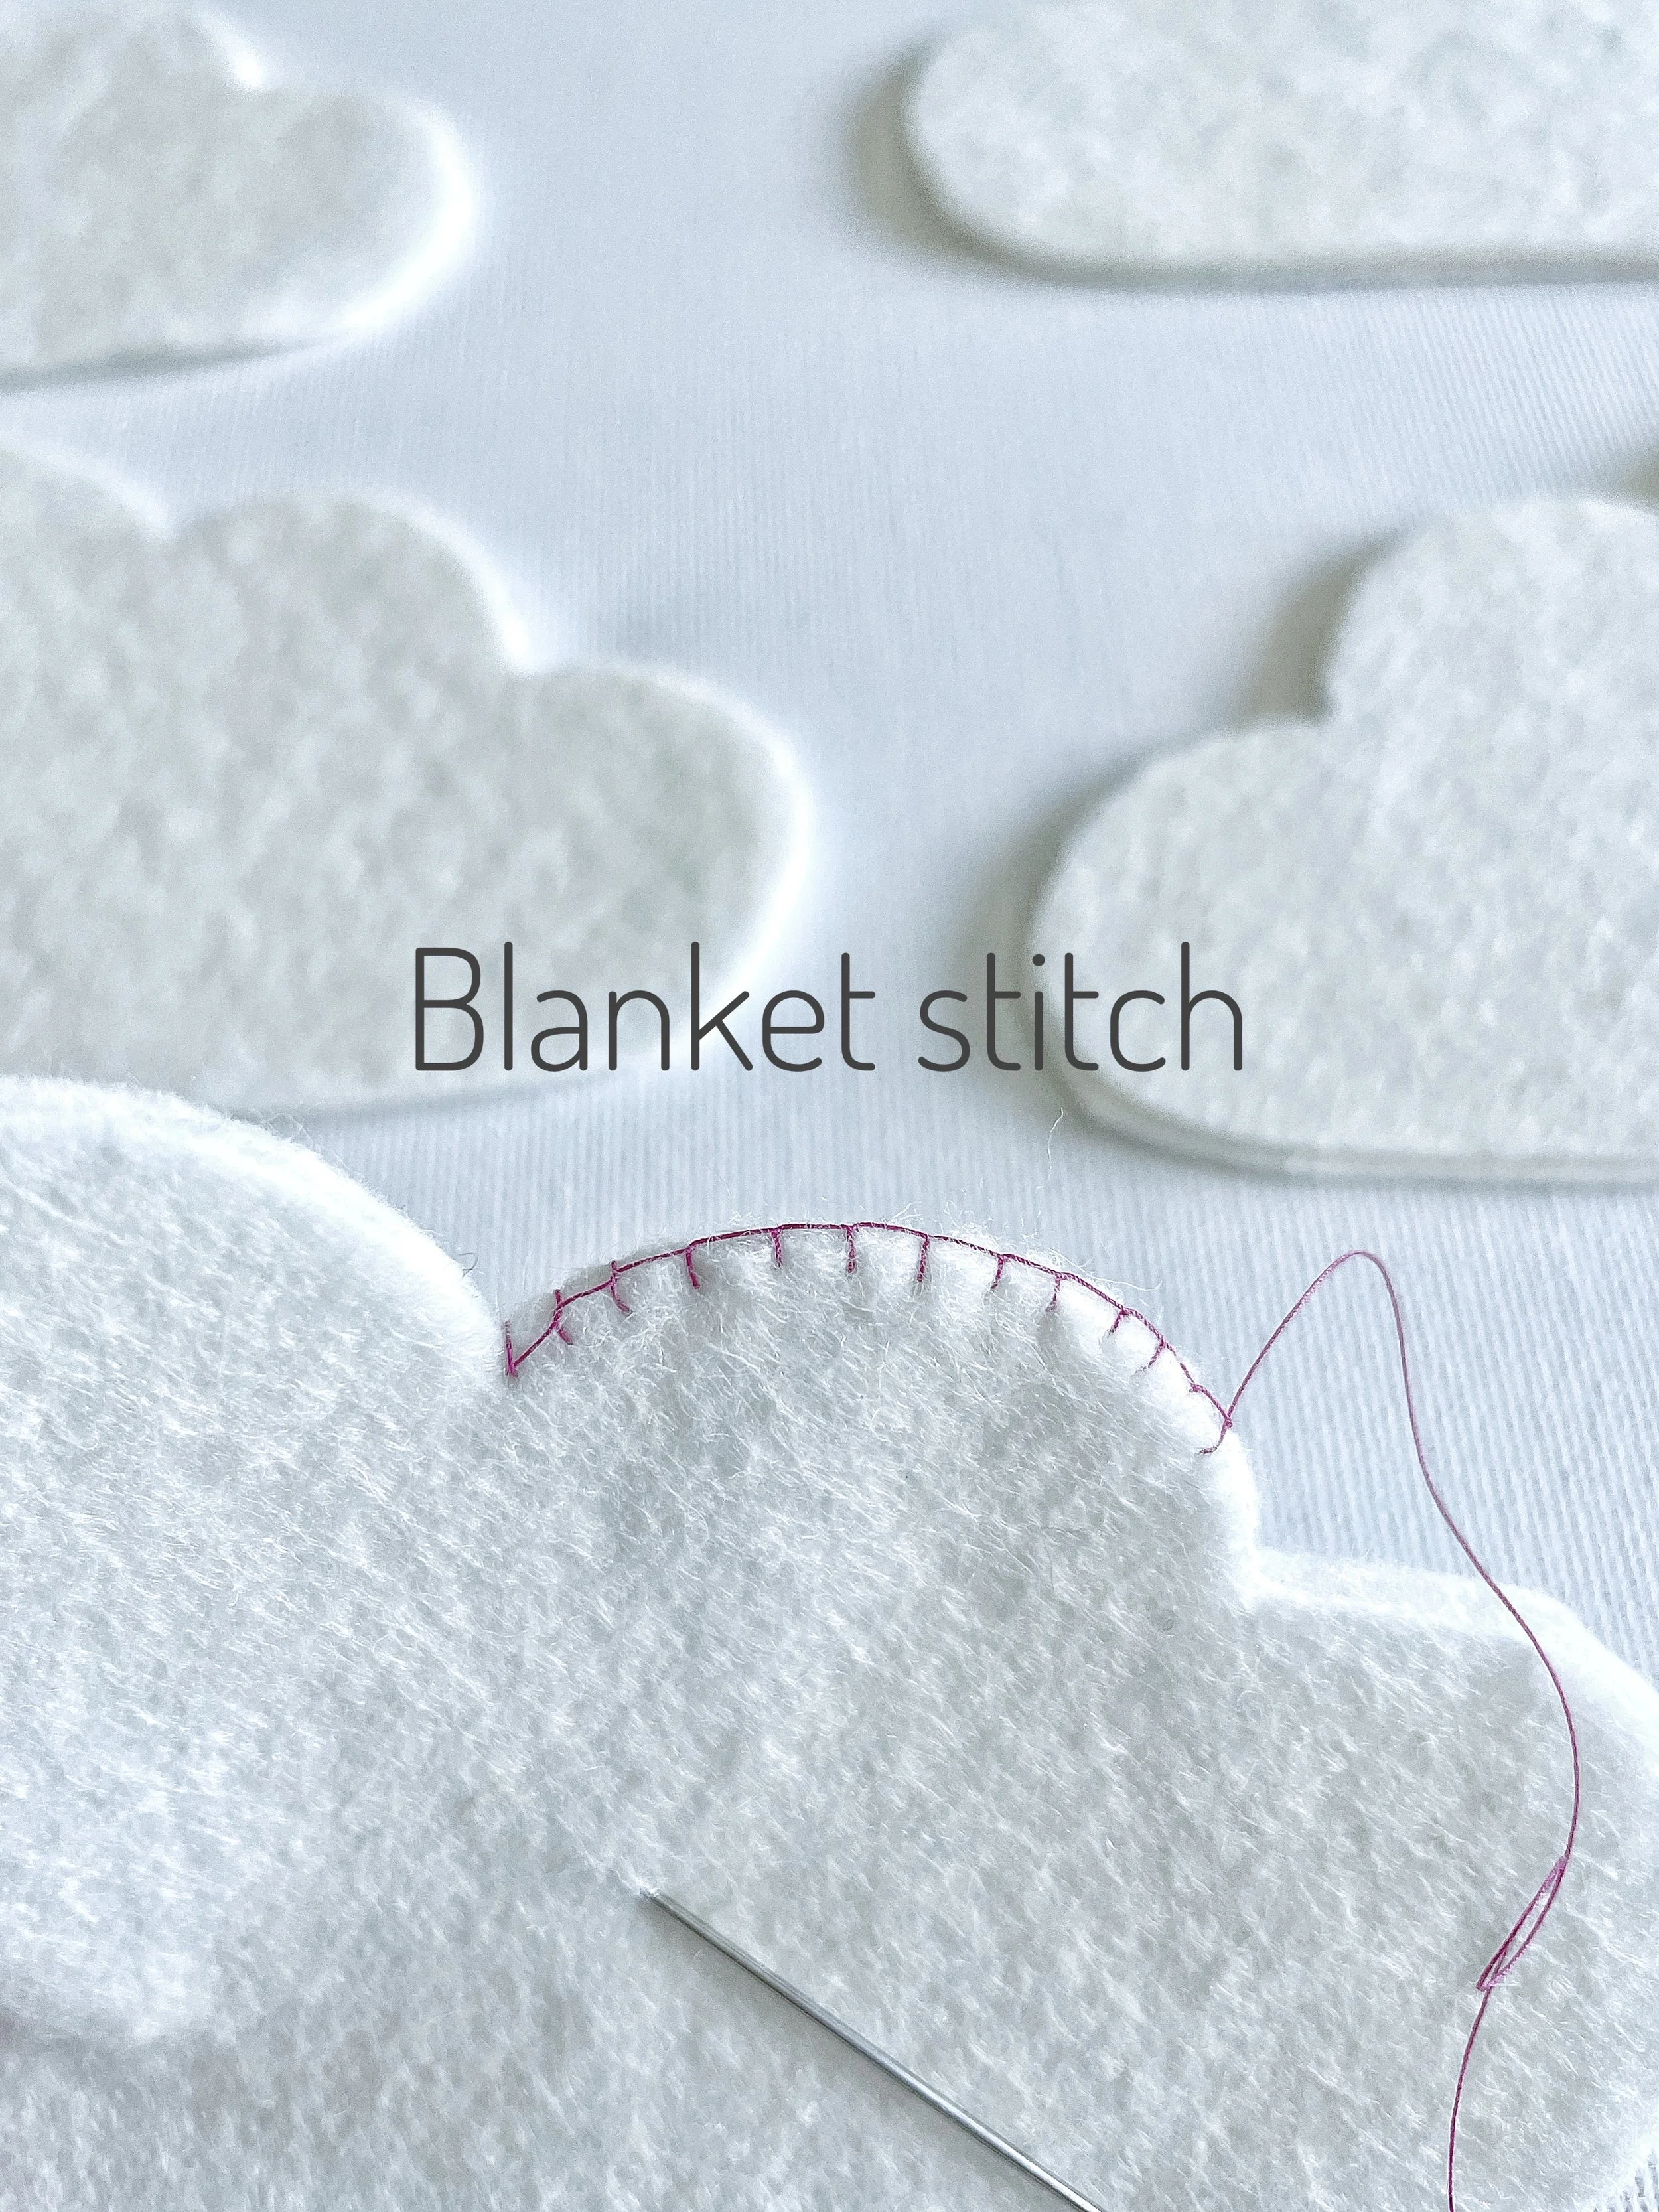
I have added a link to another fantastic tutorial by Red Ted Art for those of you that would like to learn this stitch. You can watch it here: Blanket stitch tutorial
Now it's time to sew your clouds.
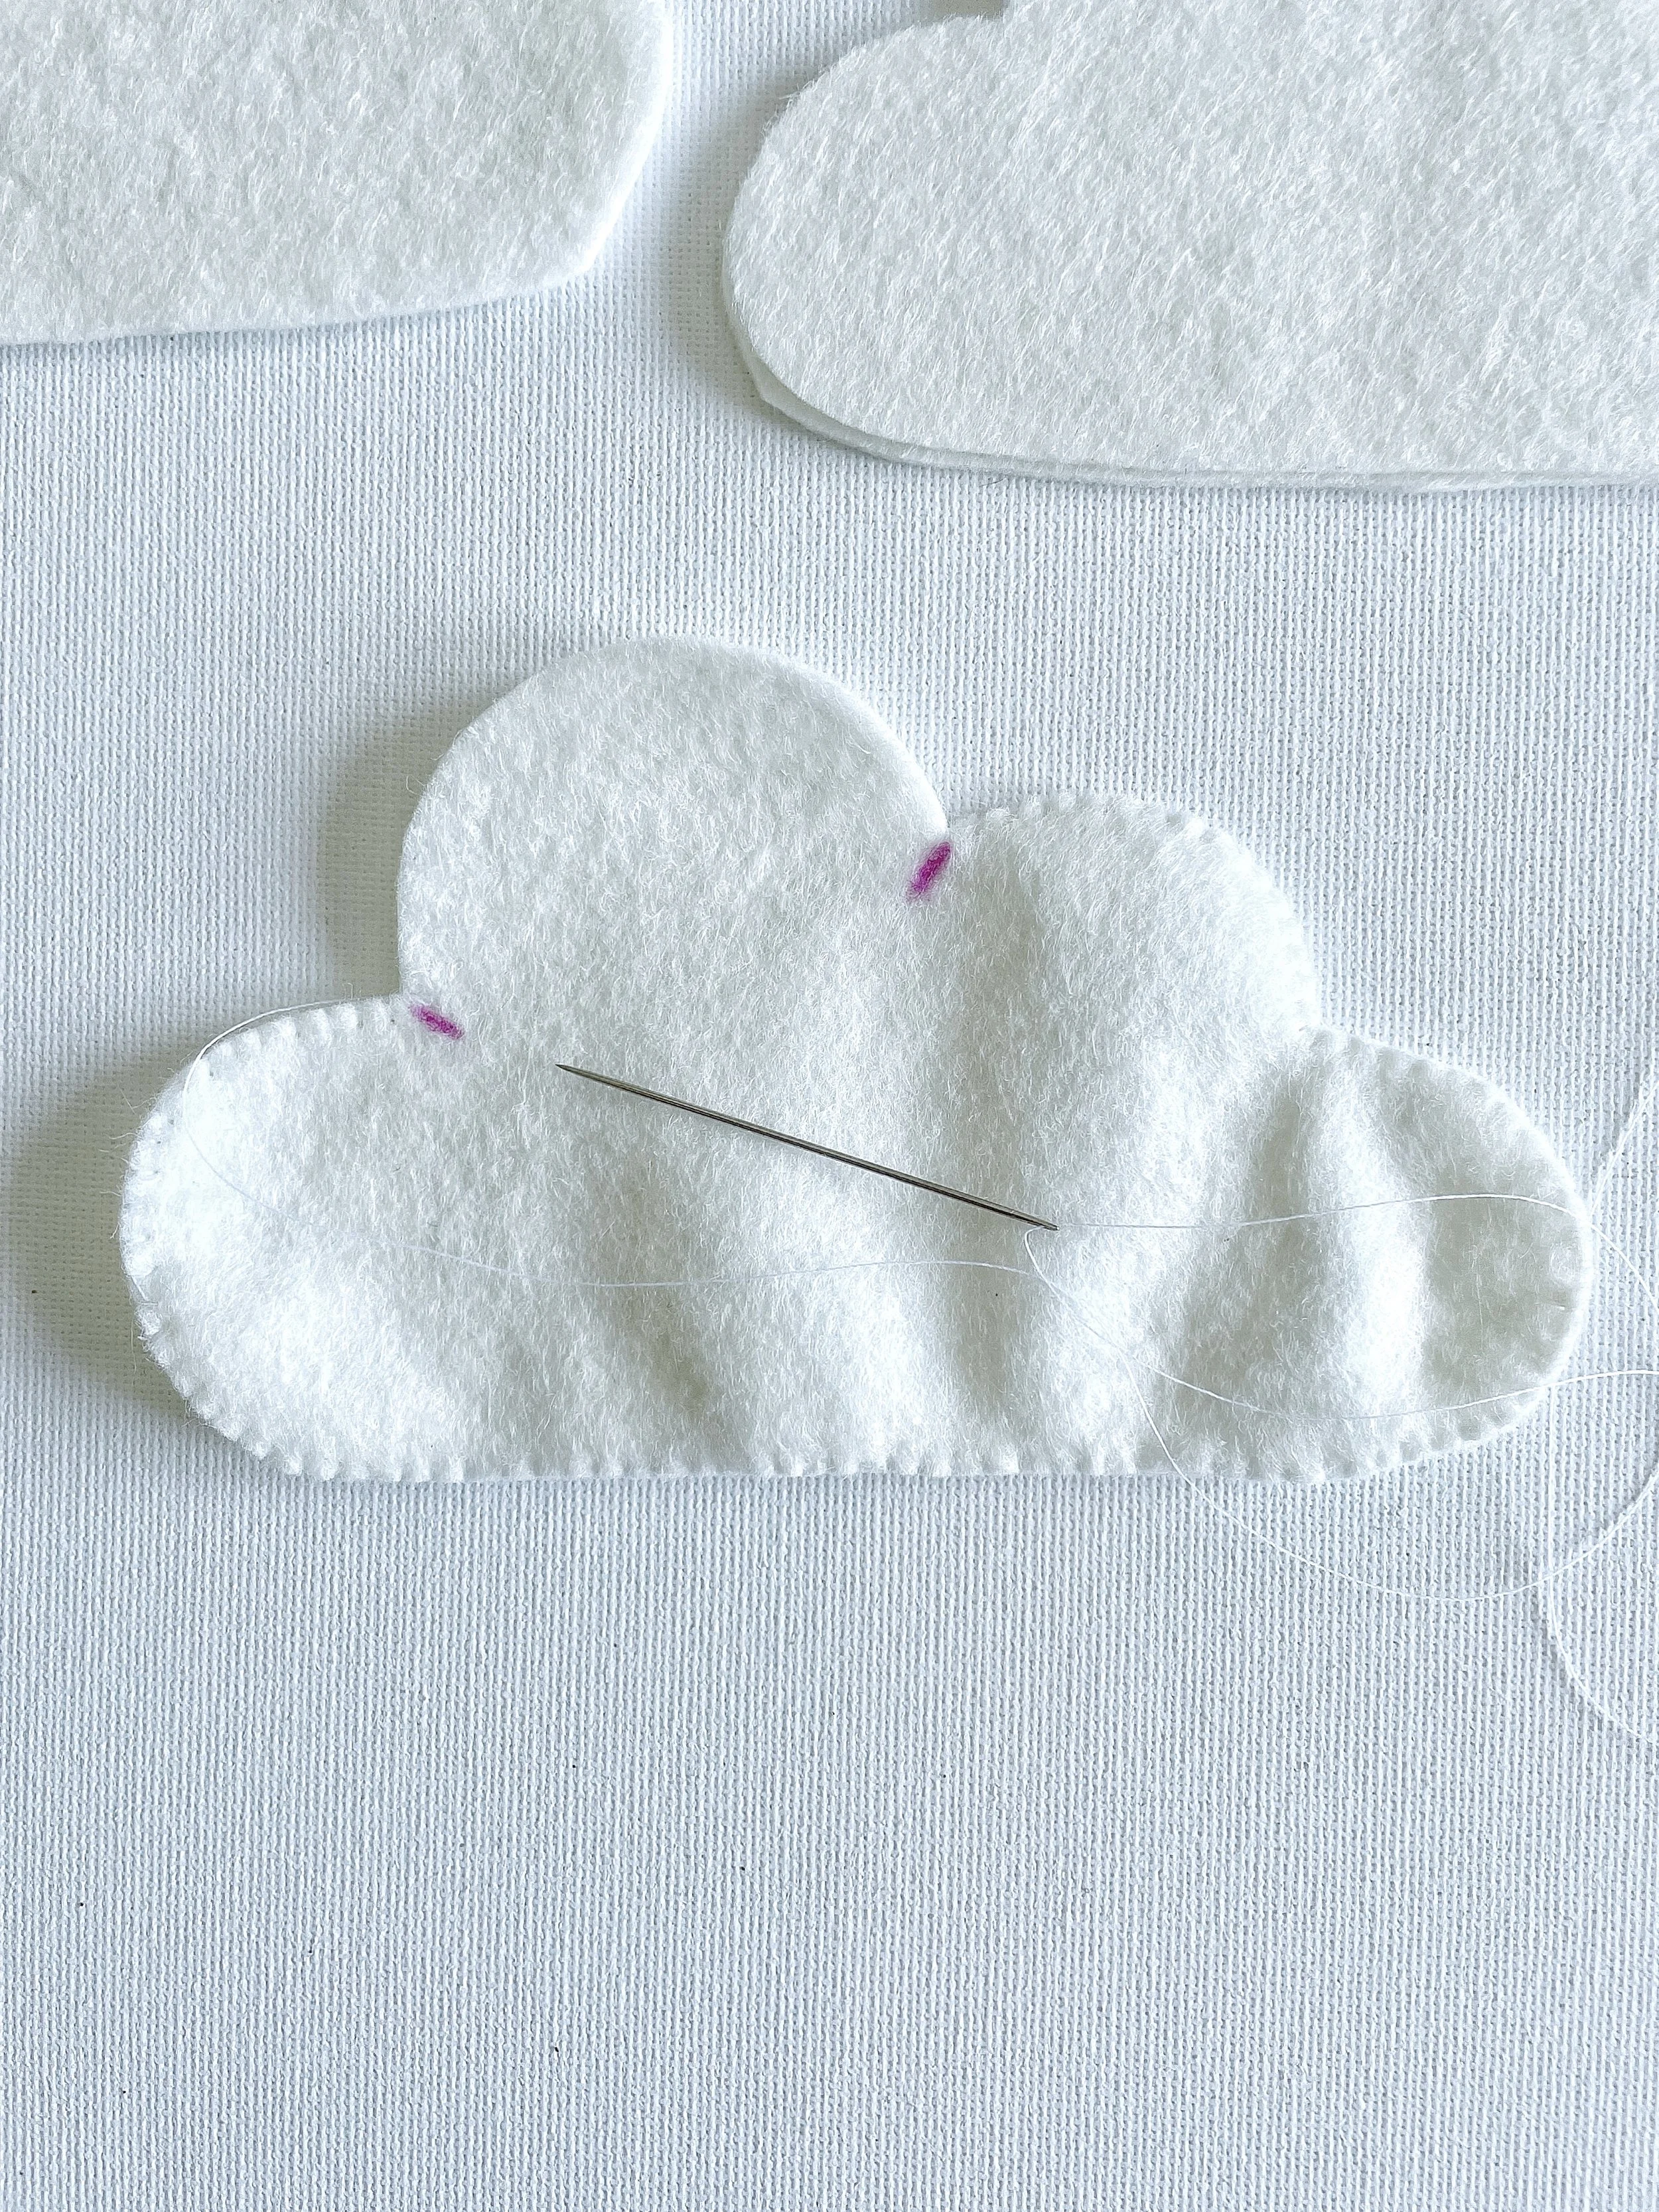
Leave a gap at the top of each cloud (shown below).
You will use this gap to add the stuffing to your cloud.
Stuff your clouds...
Take a small amount of stuffing, using a wooden chopstick (or something similar) gently push the stuffing into the gap at the top of the cloud.
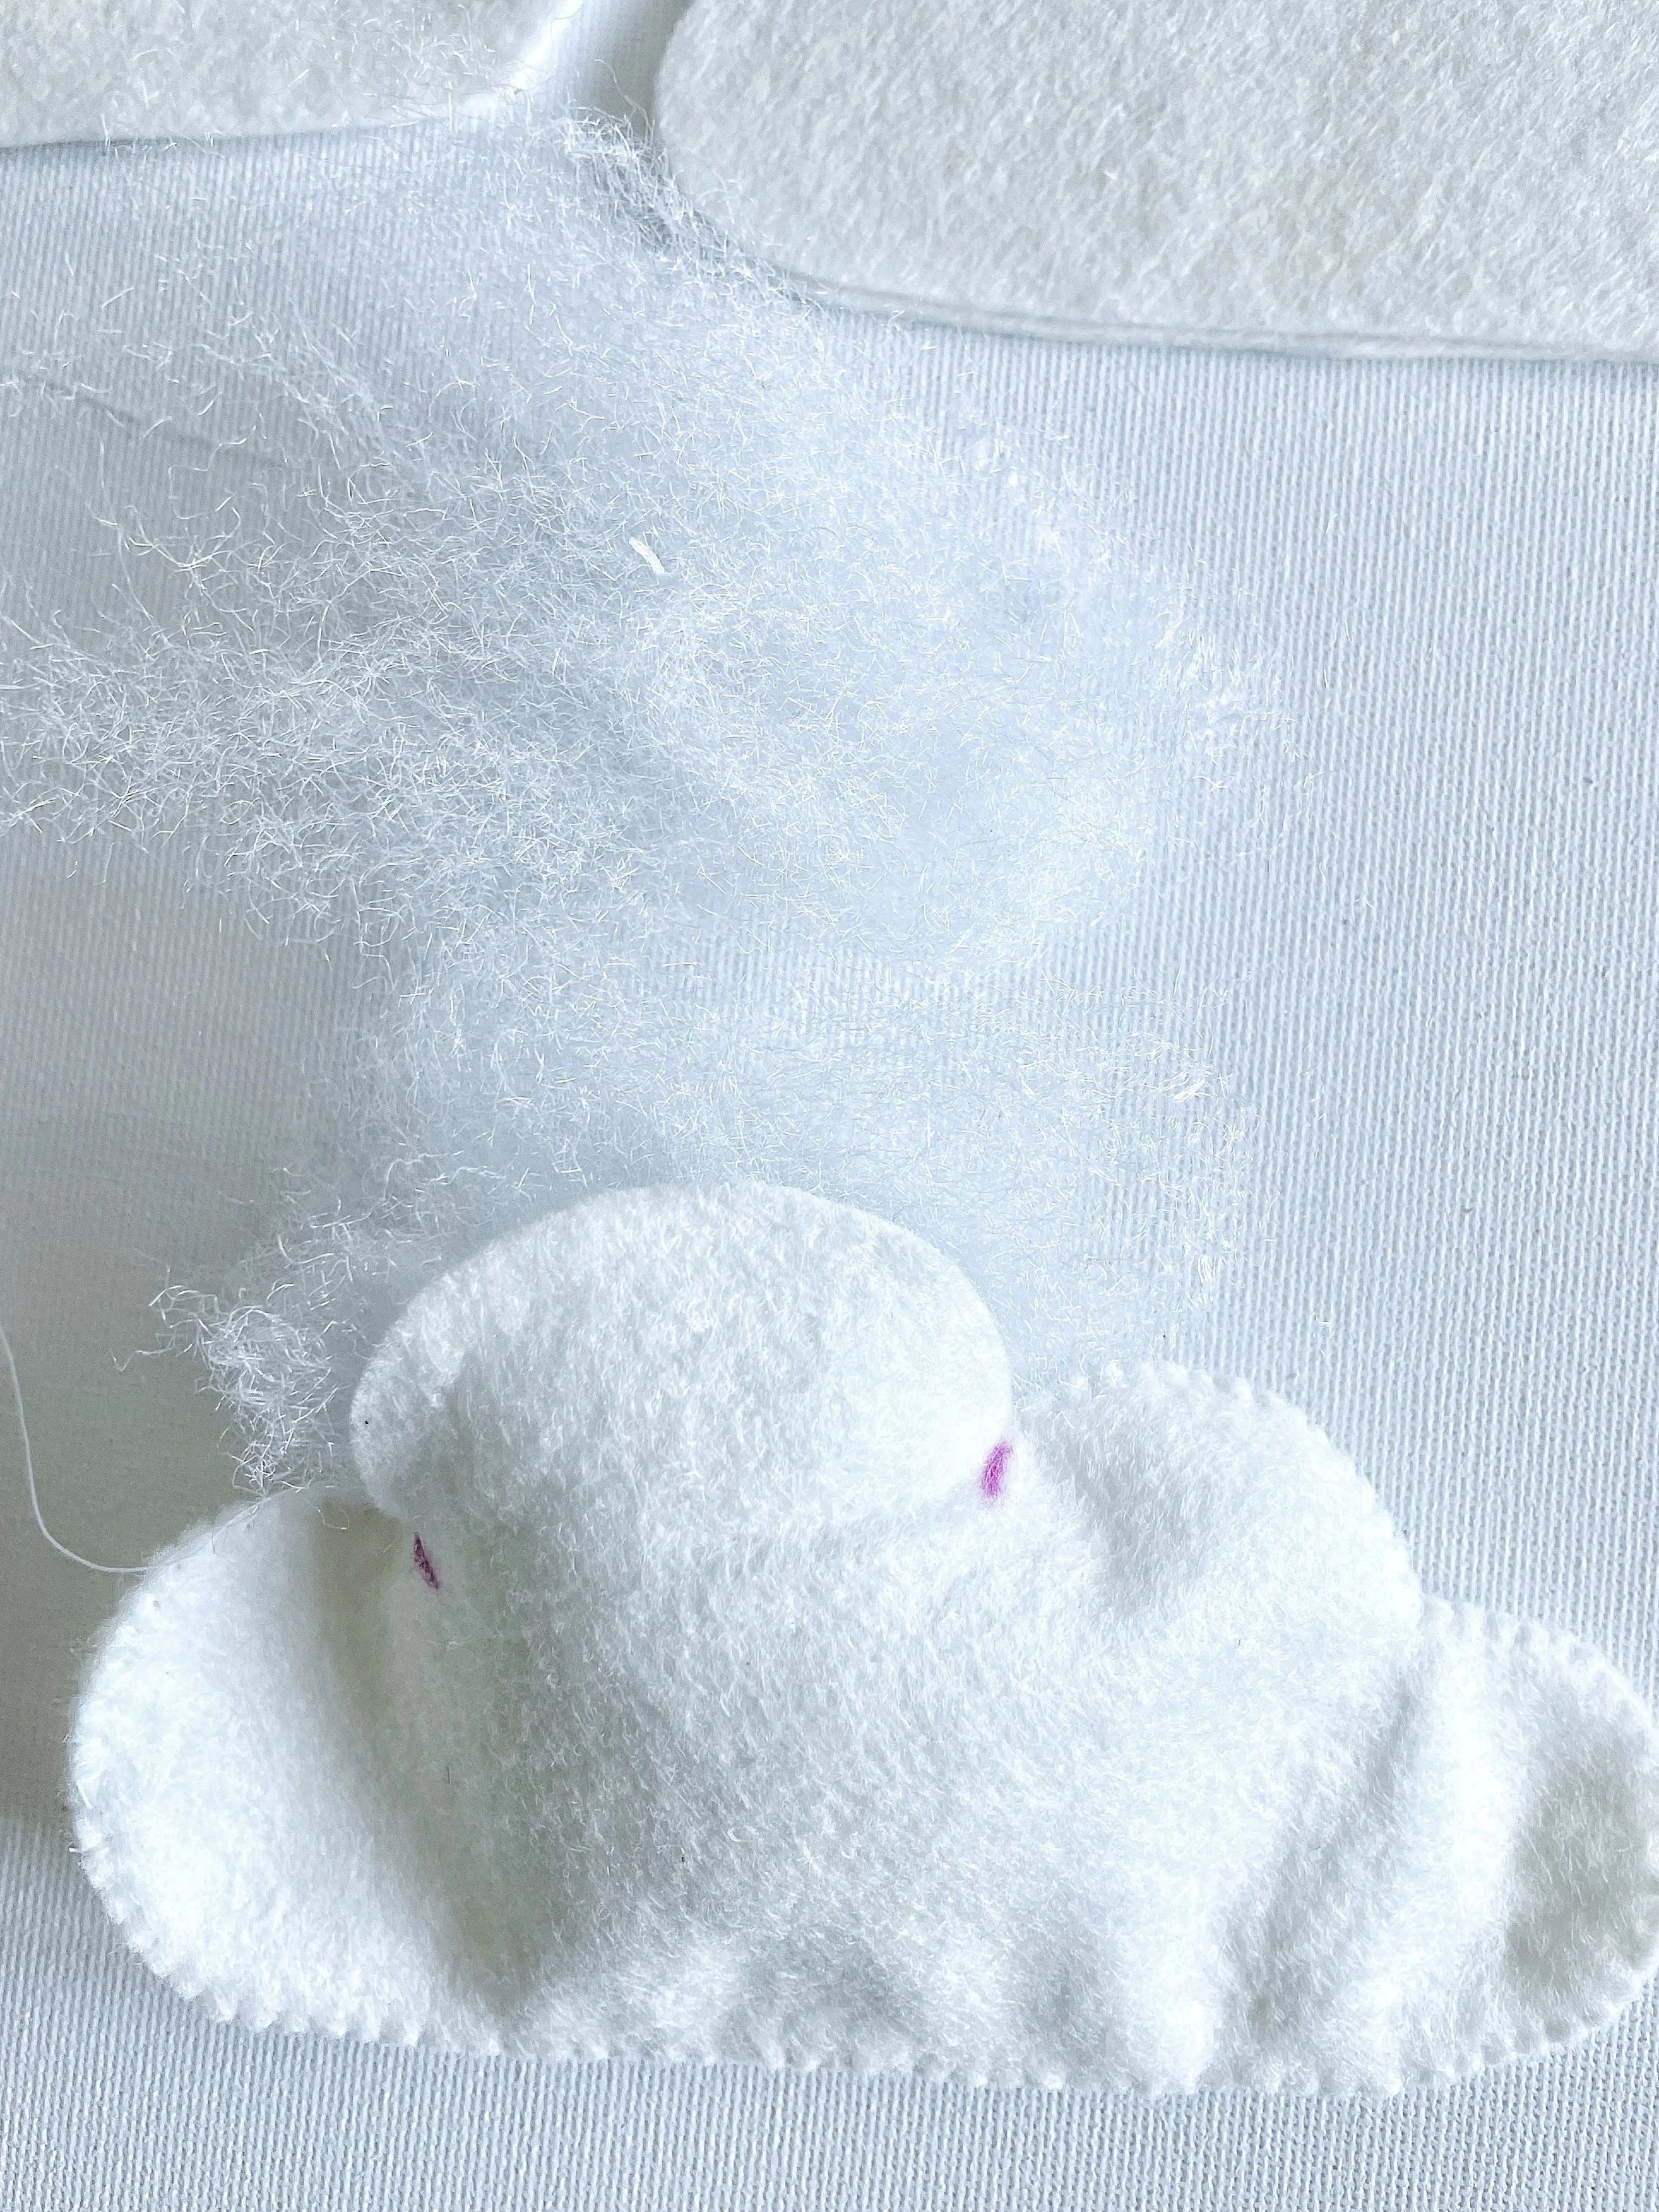
Using your chopstick gently push the stuffing to the bottom edges of cloud. Be careful! It's easy to damage the stitching with your chopstick if you are too rough.
Continue to add the stuffing until the cloud is nicely stuffed. You're aiming for soft, plushy clouds.
Be careful not to overfill the cloud as this will cause the stitching to gape or snap.
Sew up the gap at the top of cloud. Add the last bit of stuffing before the final stitches are added. Repeat until all of the clouds are sewn.
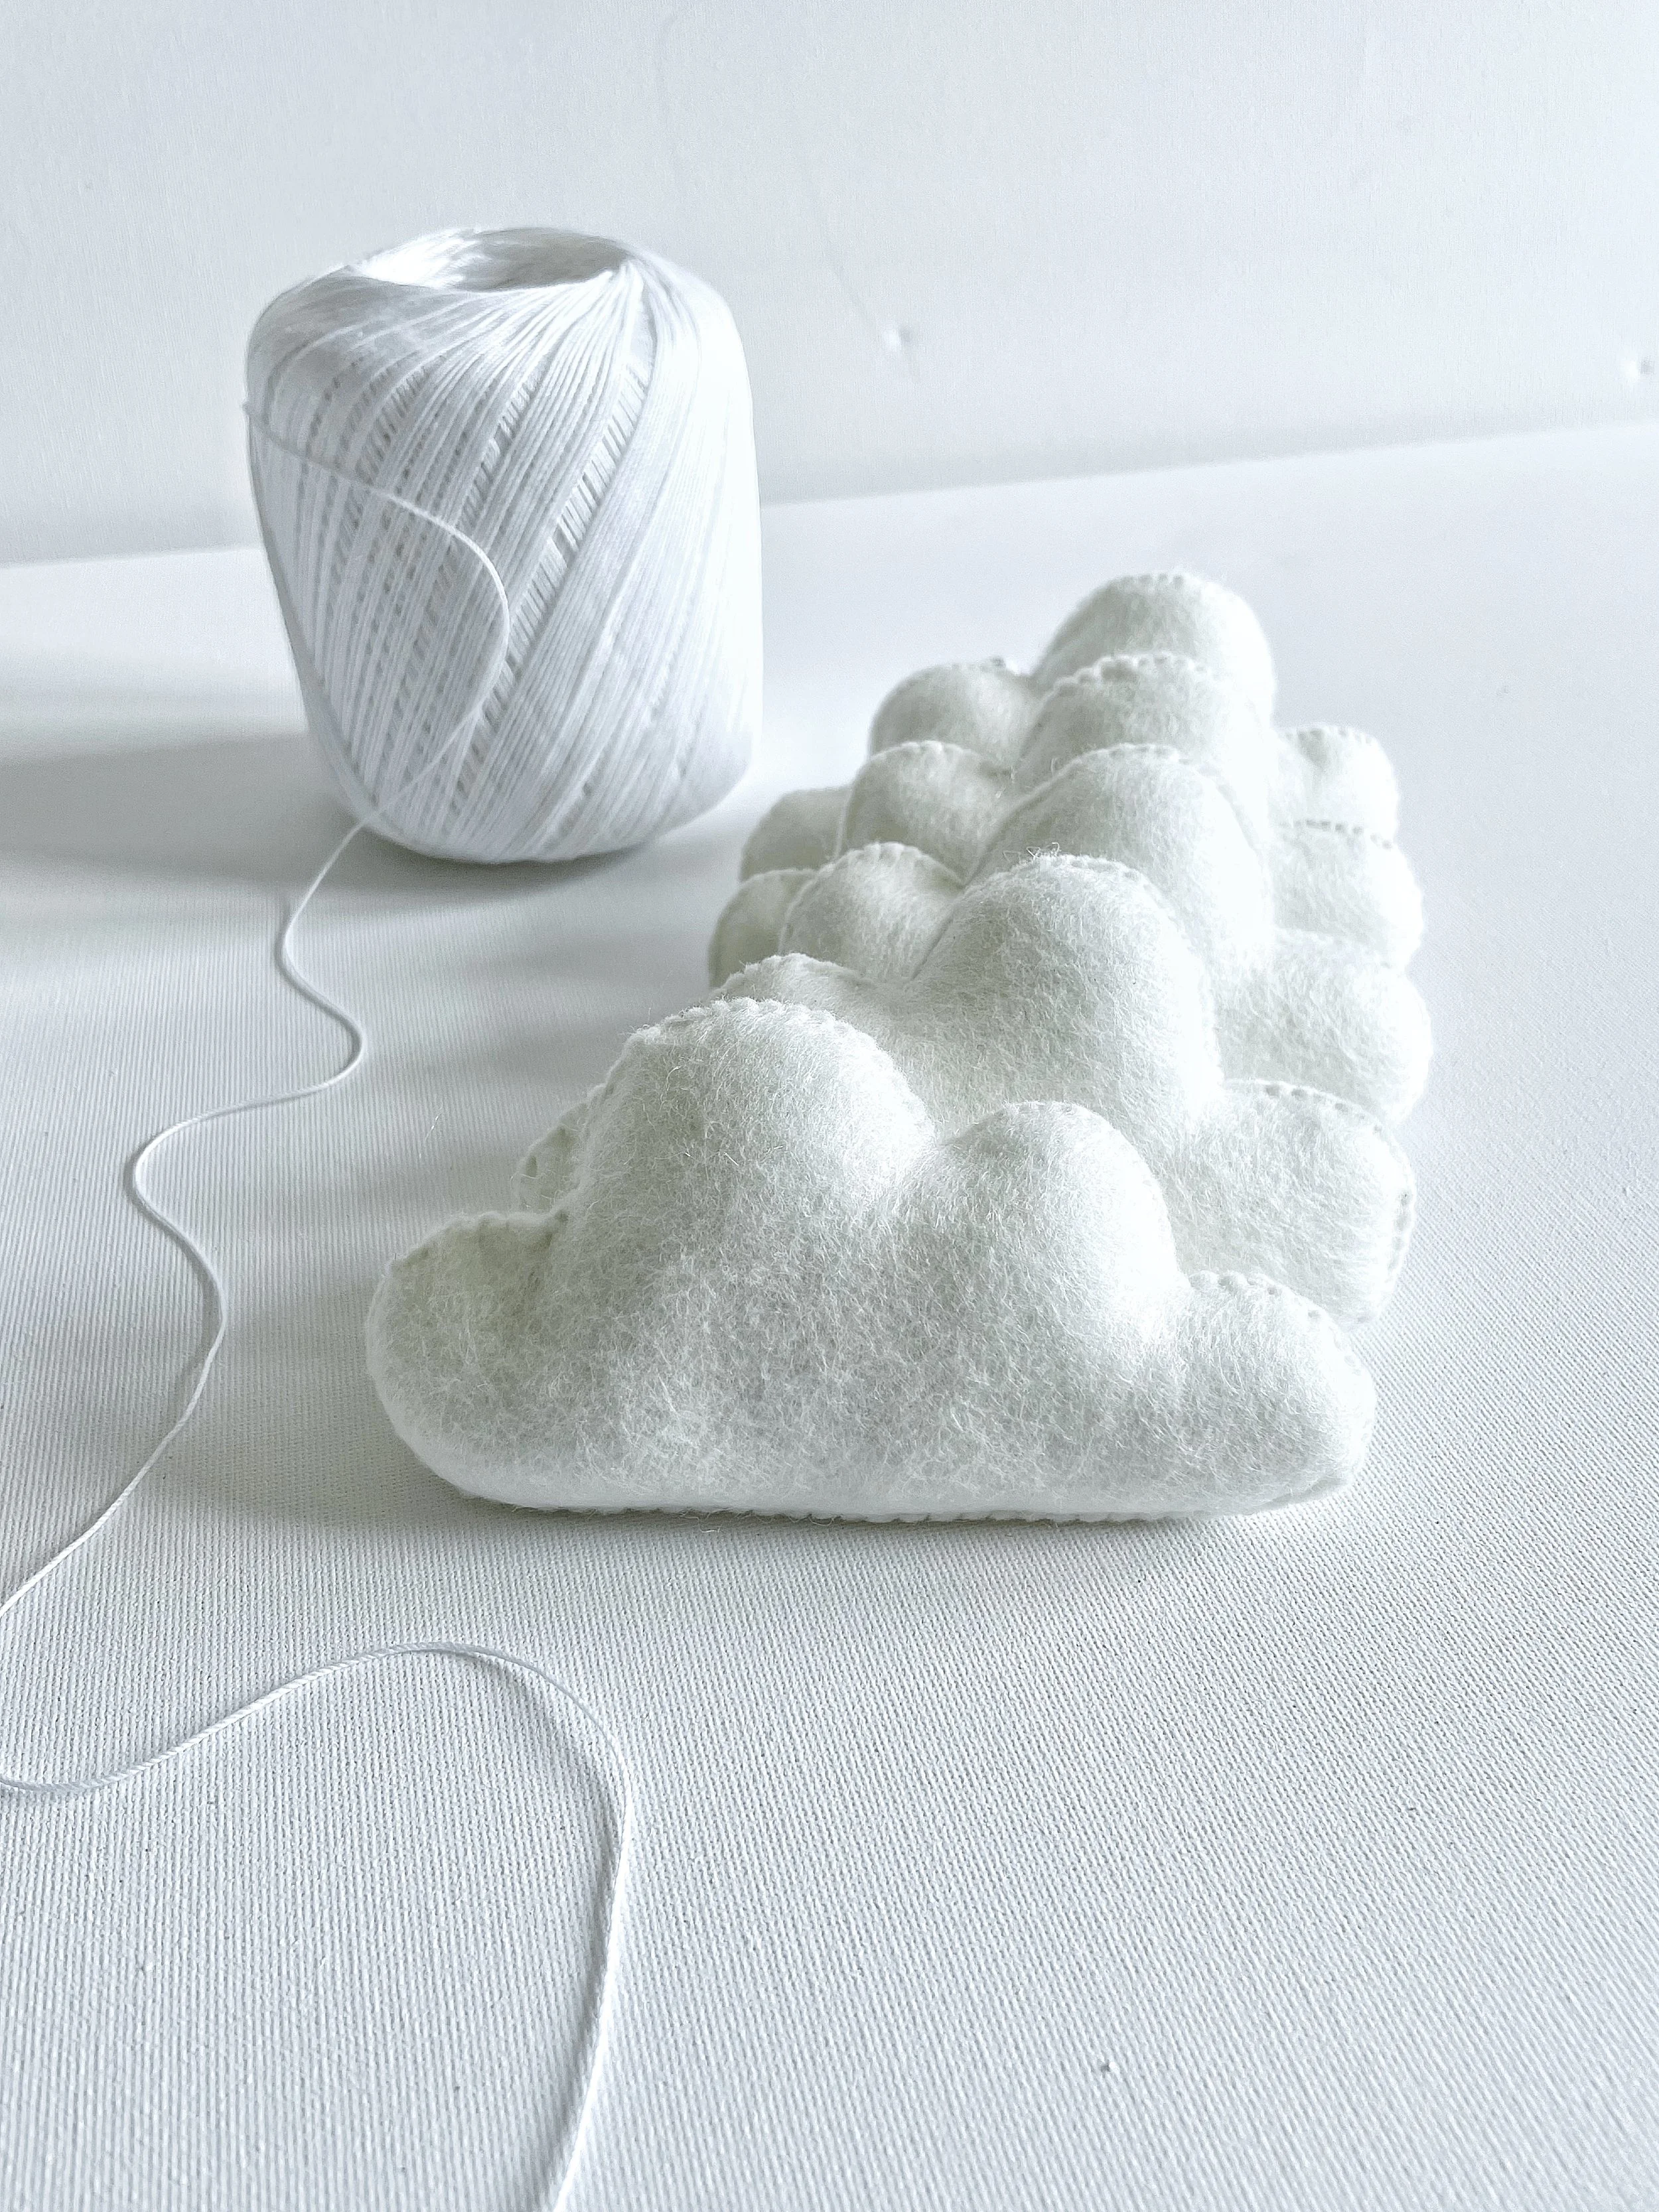
Thread the clouds...
First, decide how long you’d like your garland to be. This will depend on how many clouds you’re using and how much space (if any) you want between each one.
I personally like to leave about a 3-inch gap between my clouds, but you can go smaller or bigger whatever feels right for your design!
Once you’ve decided, measure and cut your thread. Don’t forget to add an extra 8 inches to your measurement so you’ll have enough to tie a hanging loop at each end. I always find it’s better to cut a bit more than you think you’ll need, you can always trim it down later.
One of the best things about this garland is that the clouds can slide along the string, so you can easily adjust the spacing until it looks just right.
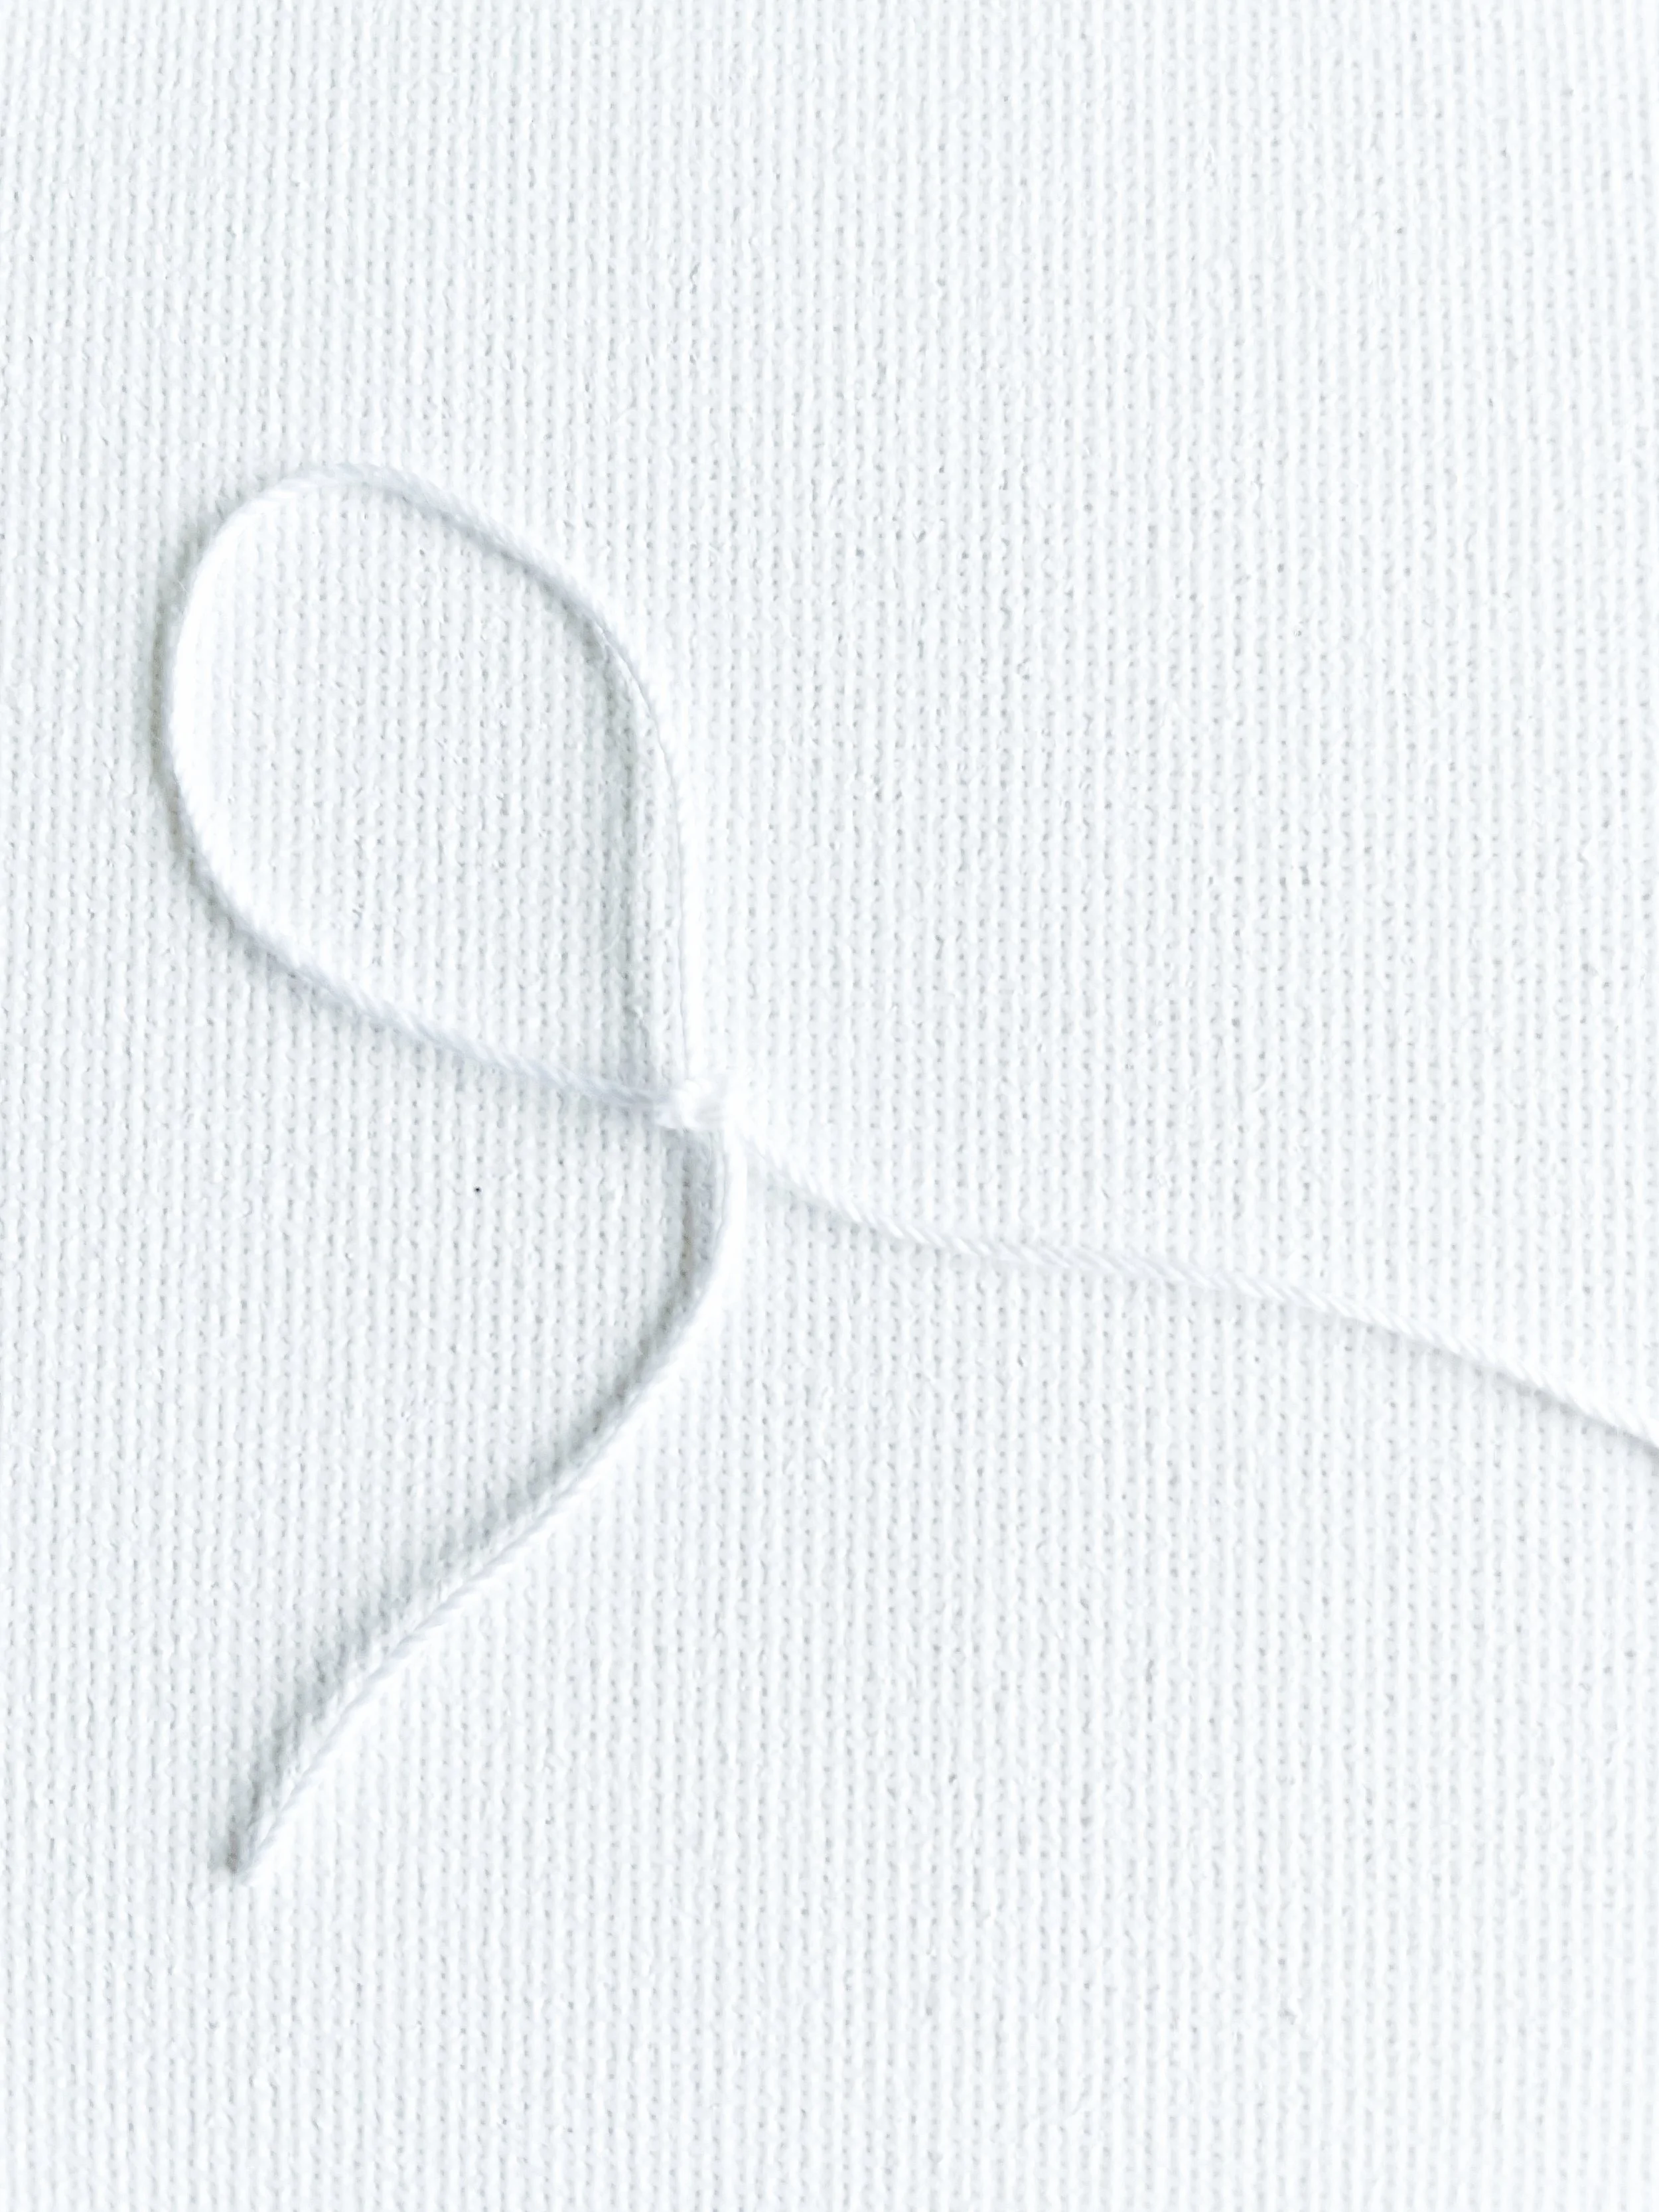
Start by tying a loop at one end of your thread.
Then, thread the other end through a large needle.
Use your needle to carefully thread each cloud onto the string. (Check the picture below to see the best spot to insert the needle, threading them all the same way will give you that perfect, balanced look.)

Once you have added all your clouds, tie a loop at the other end of the thread.

And that’s it! You’ve made a beautiful fluffy cloud garland, ready to hang, gift, or even sell. Enjoy every second of it!
I really hope you had as much fun making this DIY cloud garland as I did putting it together for you. If you enjoyed this tutorial, be sure to check out the DIY Cloud Nursery Mobile too, it’s the perfect matching piece!
If you have any questions, tips, or just want to share how yours turned out, I’d absolutely love to hear from you, feel free to drop a comment below.
Sending lots of love, Karen x