
DIY Pom Pom lampshade

I’m going to show you how to make your own pom pom lampshade, and the best part? Not only is it super simple to make, it looks amazing too!
If you’re looking to make your own kids’ room décor Pom pom lampshades could be answer. They’re a sweet and stylish addition to any nursery or child’s room.
There are endless colours to choose from, so you can really let your creativity shine!
You can keep things soft and gentle with shades of blues, pinks, or yellows, or how about a mix of pastel colours like the one featured in this tutorial.
Want something more playful? Bright, bold colours are perfect for kids' rooms or playrooms and add a fun pop of personality!
But pom pom lampshades aren’t just for kids’ rooms they can add a fun, eye-catching touch to any space.
You can add bold, bright colours for a playful look, or go for neutral tones or soft greys for something a bit more elegant.
Try white felt balls on a black lampshade, or black on gold for a chic contrast, the possibilities are endless, so don’t be afraid to get creative and make it your own!
Selling pom pom lampshades
Pom pom lampshades could be a fantastic addition to your store, they’re eye-catching, easy to make, and customers love them. It’s a win-win!
You can make your customers happy by offering custom options so they get something that perfectly matches their style and fits right in with their colour scheme.
Kids' room décor is always a hit, and if you're thinking about selling your creations, pom pom lampshades are a charming addition to your lineup.
They're perfect for nurseries, bedrooms, and playrooms. Soft and neutral or fun, colourful and full of personality? The options are endless.
Why not offer a matching felt ball garland too? I’ll show you how to make one here: DIY felt ball garland.
Or create coordinating felt ball curtain tie-backs, there’s a tutorial for that as well! DIY Felt ball tie-backs
And if you’re thinking about selling your handmade creations, don’t miss my Beginner’s Guide to pricing your handmade items. Pricing can be trickier than it seems when you’re starting out, but I’ve got you covered.
What size felt balls?
Felt balls come in a variety of sizes, and as most of them are bought online it can be tricky to know what size is the right one for your project.
To make things easier, I’ve shown the most commonly used sizes in the felt ball size guide below.
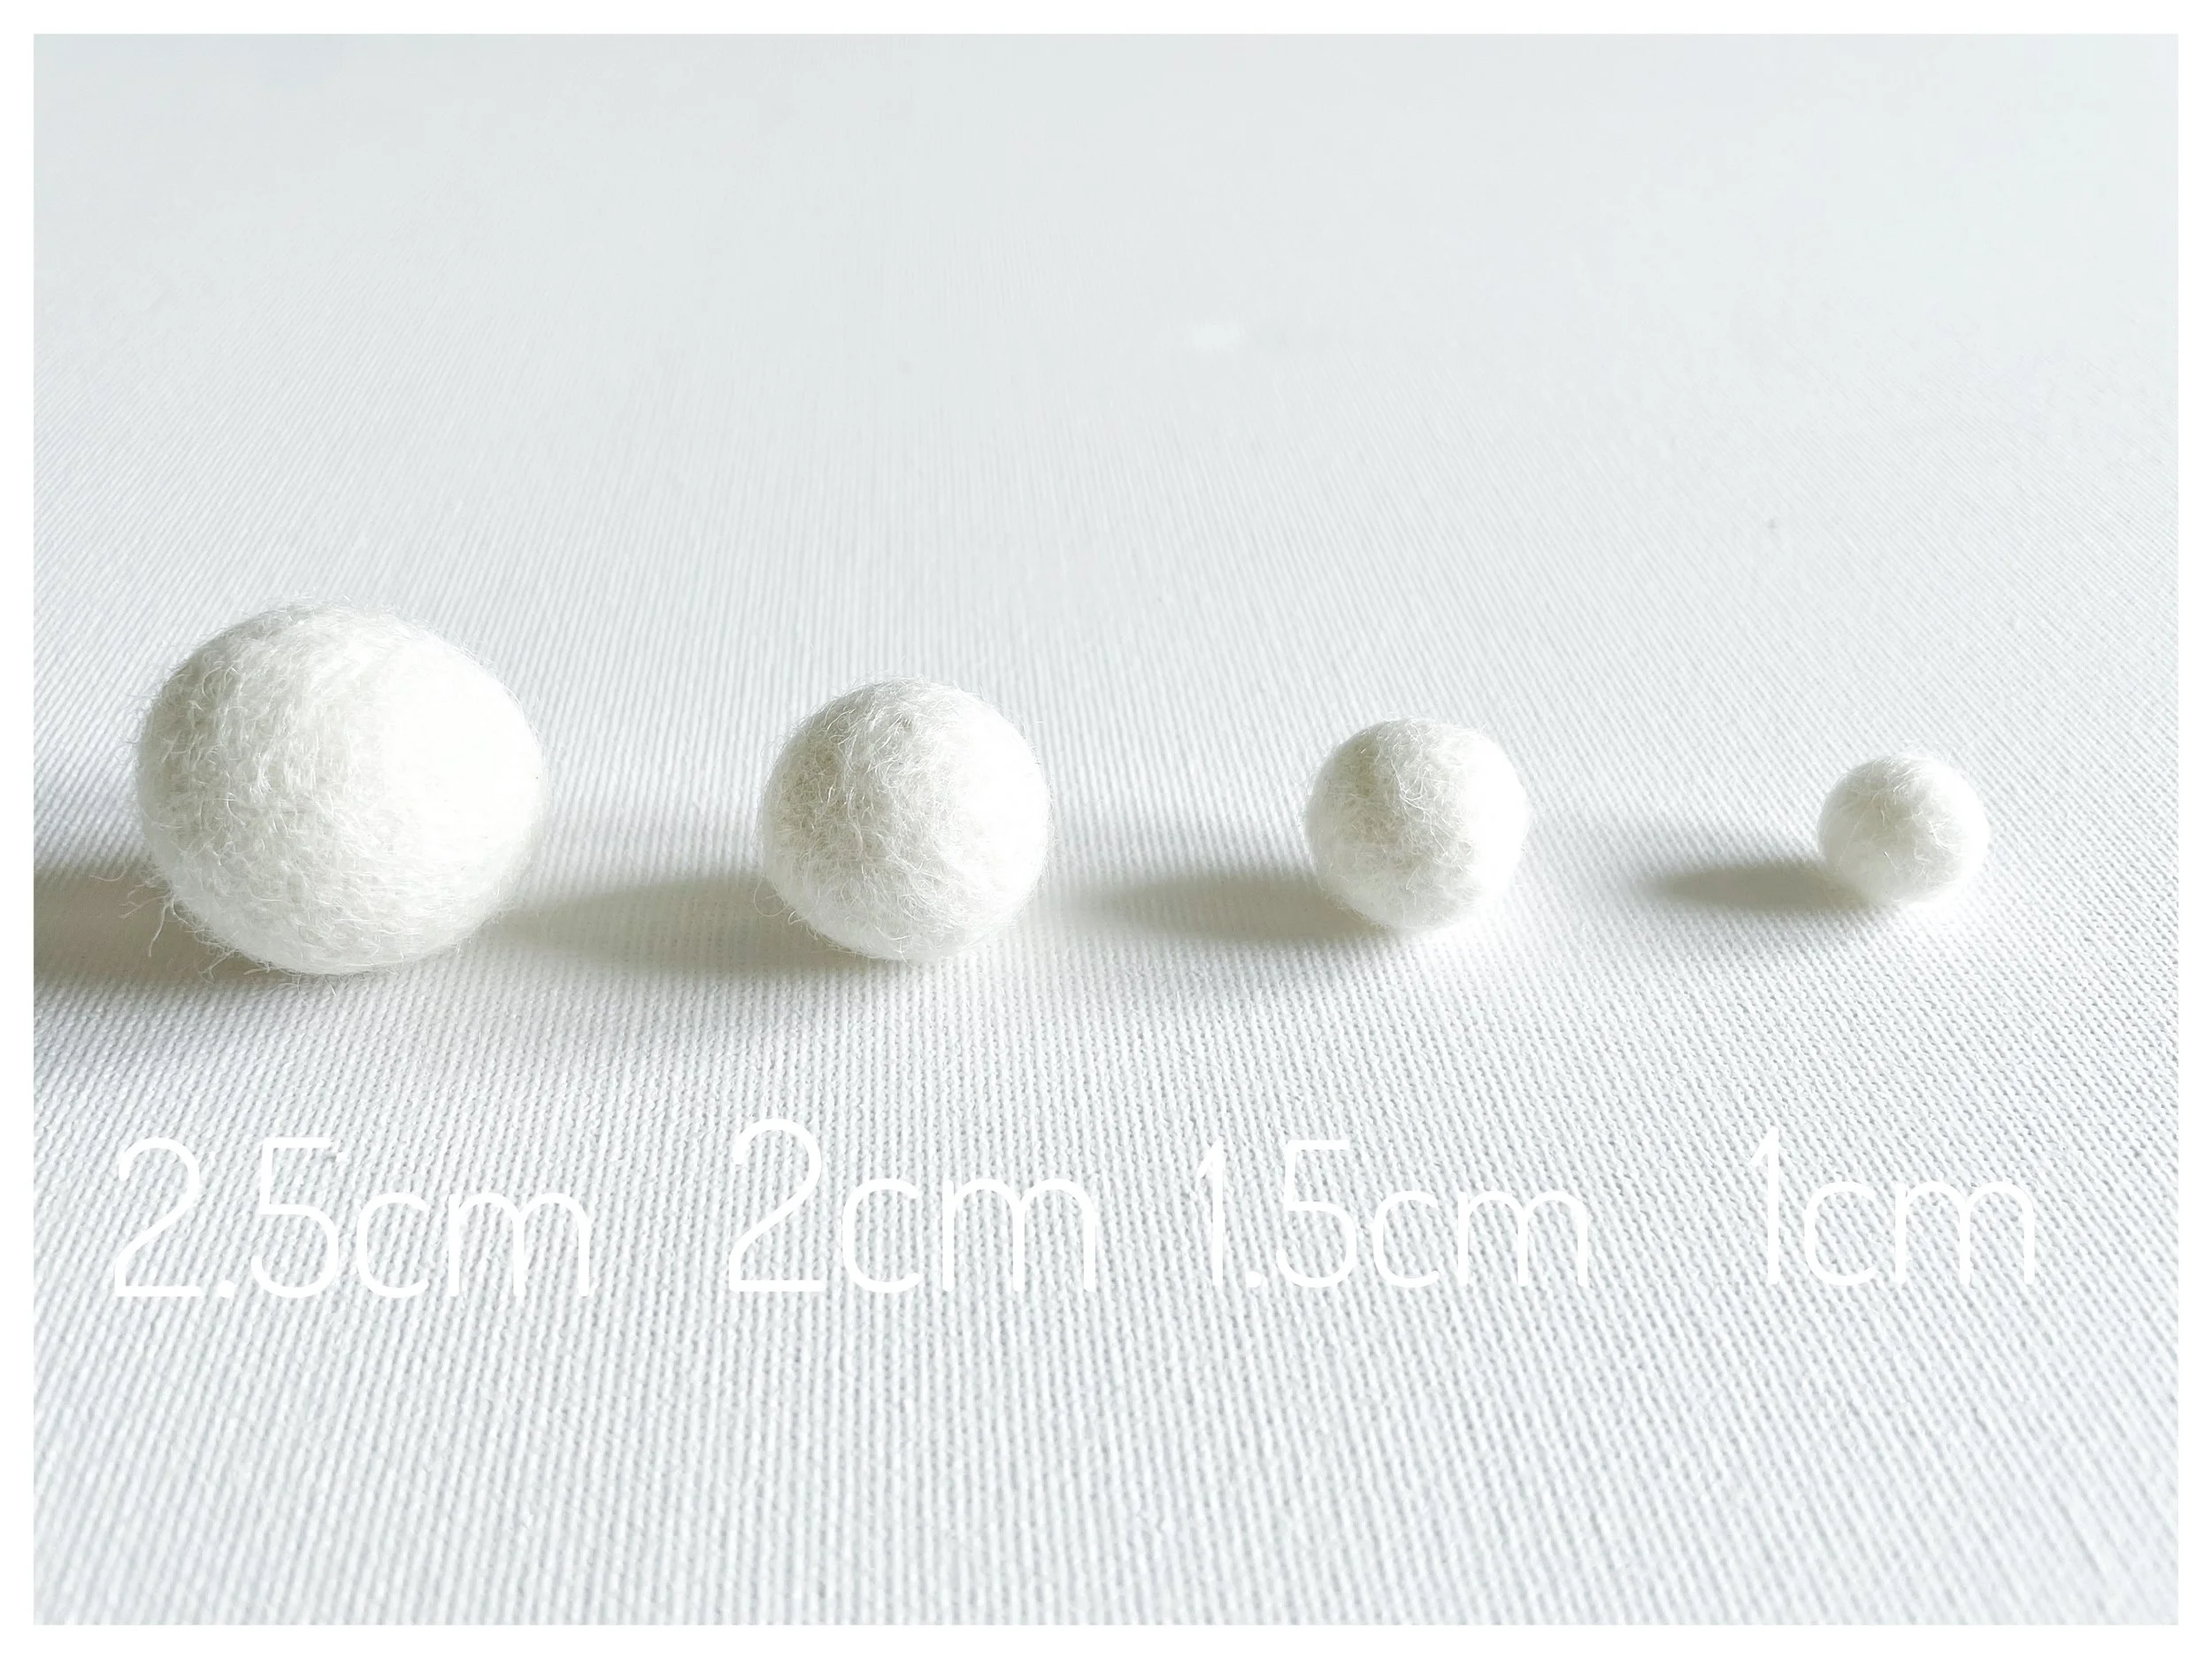
For my lampshade, I used 1cm felt balls, they’re dainty, sweet and they work perfectly!
What you need to make a pom pom lampshade…
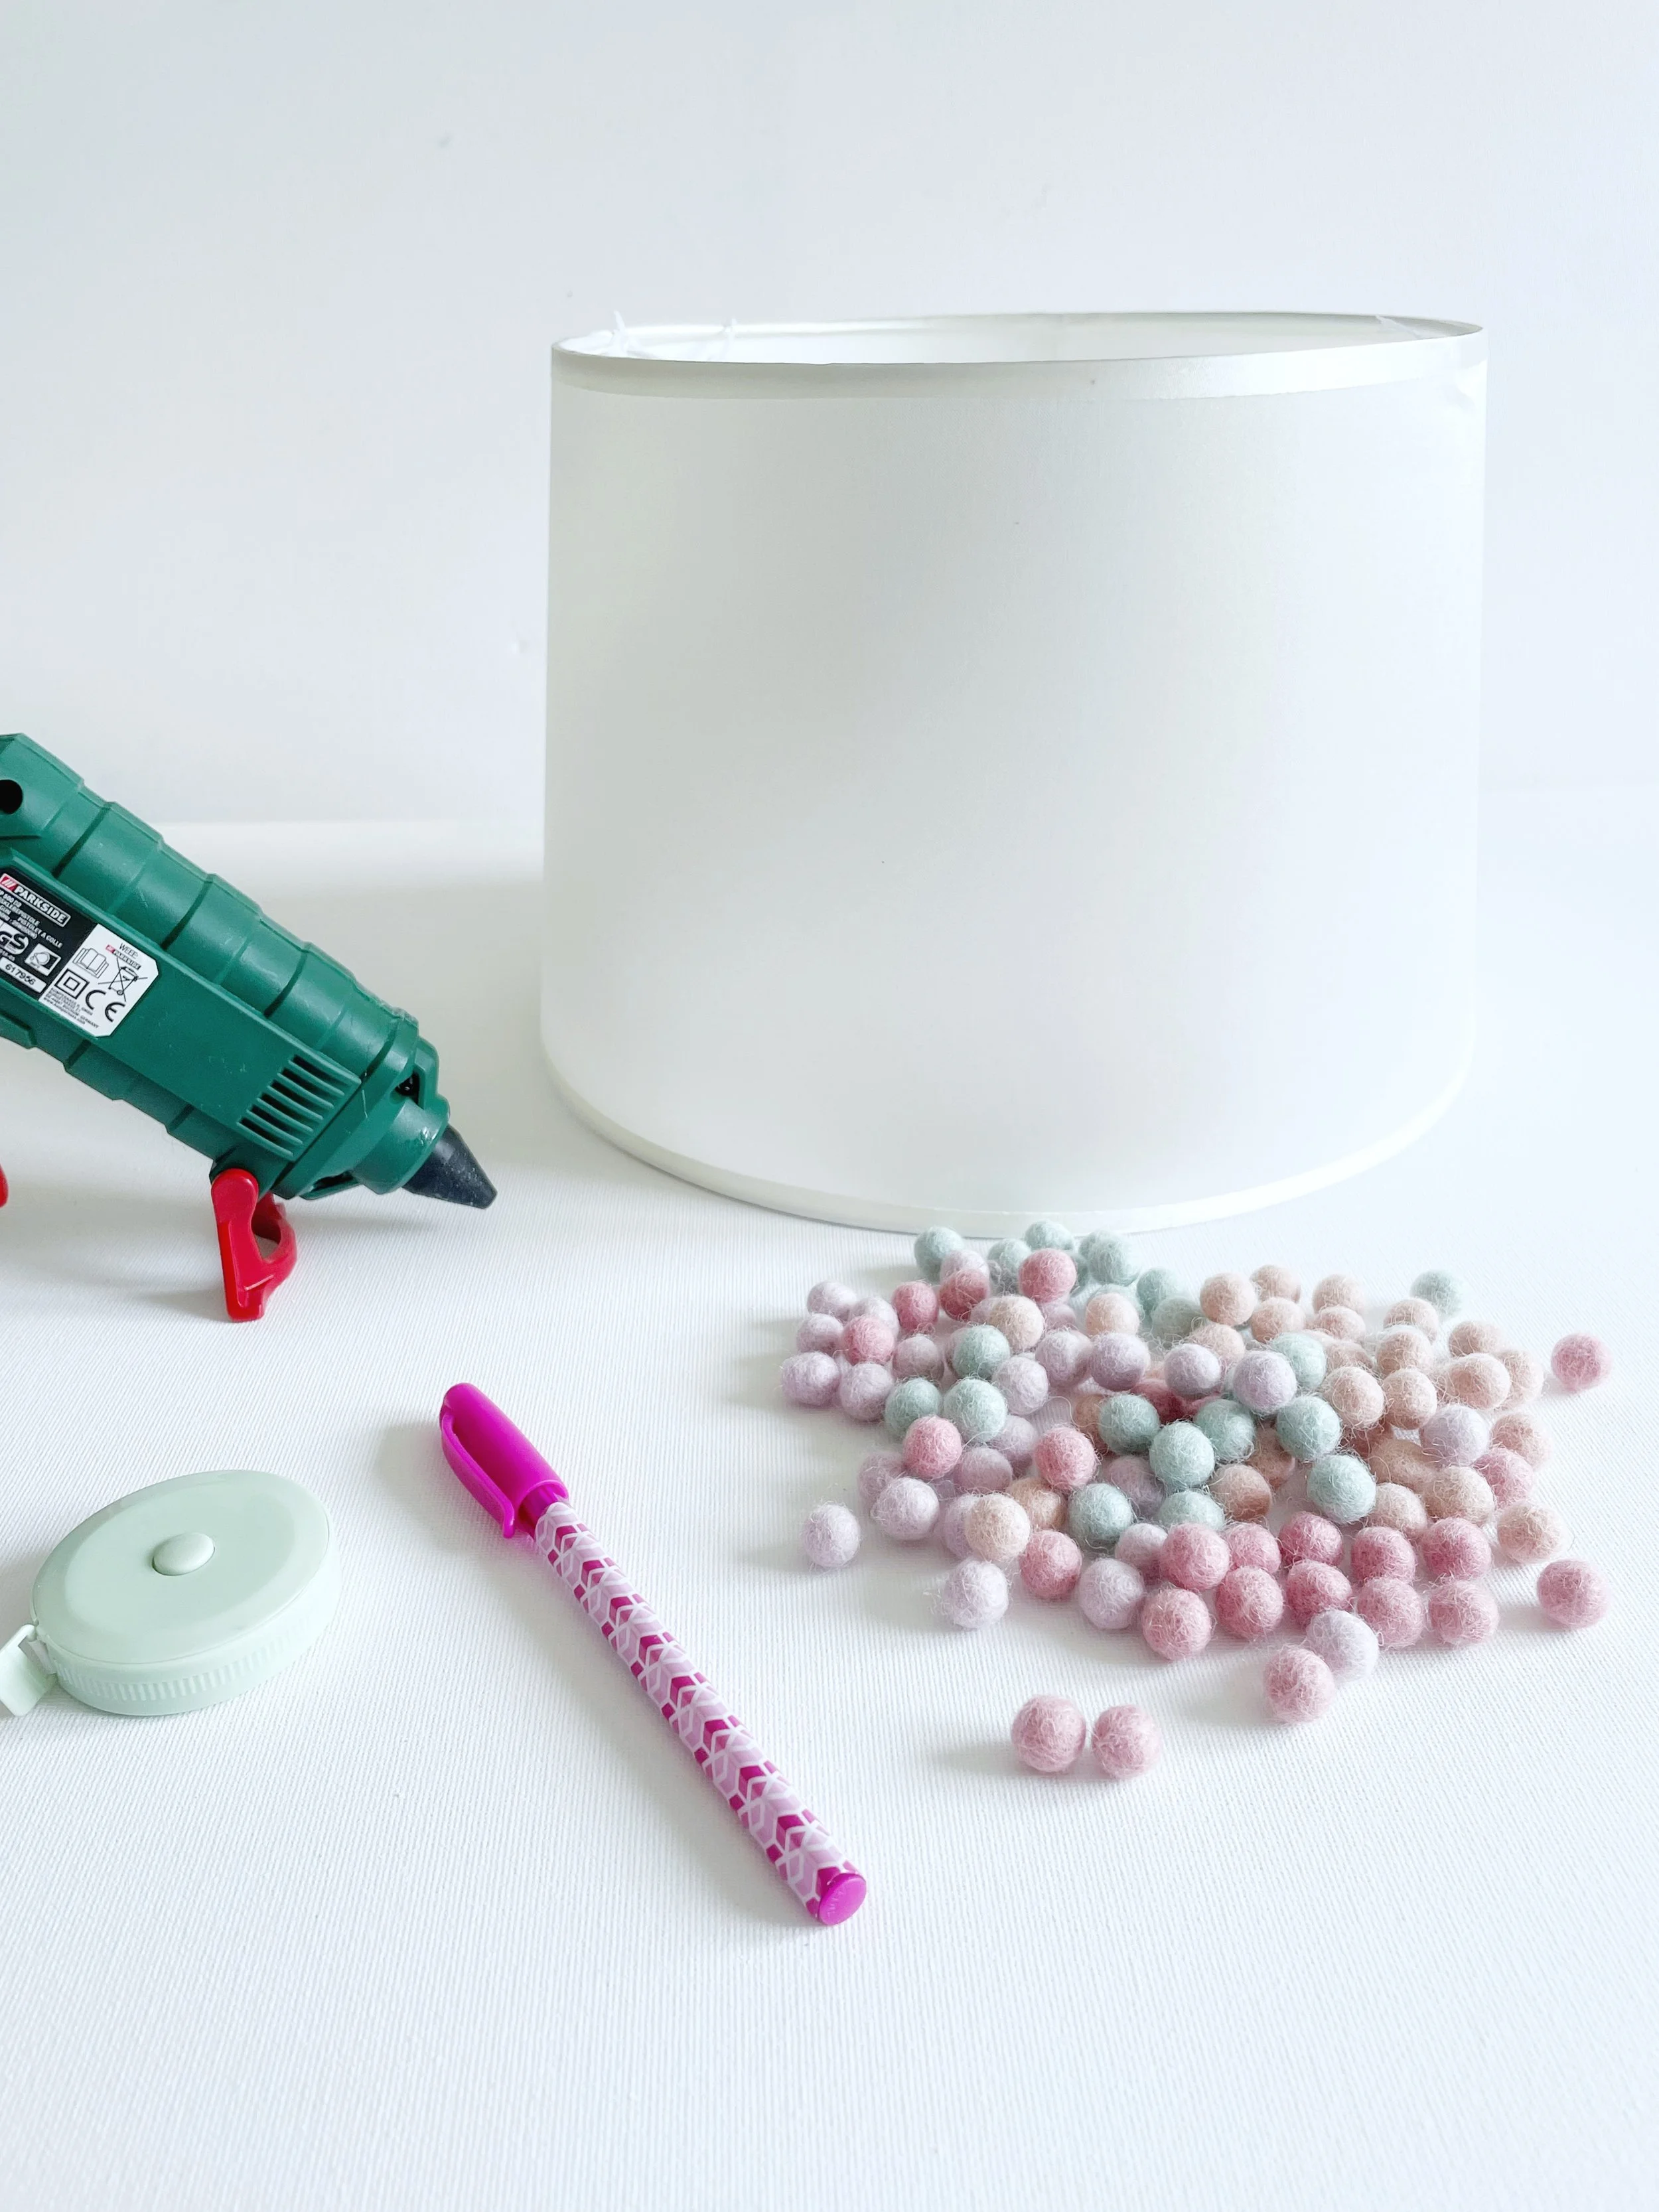
To make this DIY pom pom lampshade you will need the following:
Lampshade - in your chosen size and colour
Felt balls - in the colours and size you love.
I personally like using 1cm felt balls for this project, they work beautifully. But feel free to go with whatever size gives you the look you're after.
How many you'll need really depends on the size of your lampshade (we’ll chat more about that shortly).
As a general guide, my 28.5cm diameter shade used about 35 felt balls. If you pick up a pack of 100 just to be safe, they’re super affordable and any extras are perfect for lots of Flurraby craft tutorials !
A tape measure
A pencil to lightly mark the lampshade.
I used a bright pink pen here just to clearly show where to mark your lampshade—but I wouldn’t actually recommend doing the same!
Try something light and easy to remove instead. If you have invisible ink, even better!
Glue gun
Before you get started...
It’s a good idea to read through all the instructions first, just so you have a clear picture of what to do before you dive in.
Let's make a pom pom lampshade...
Now for the trickiest part, but don’t worry, I’ll carefully guide you through every step and the photos will help walk you through it too!
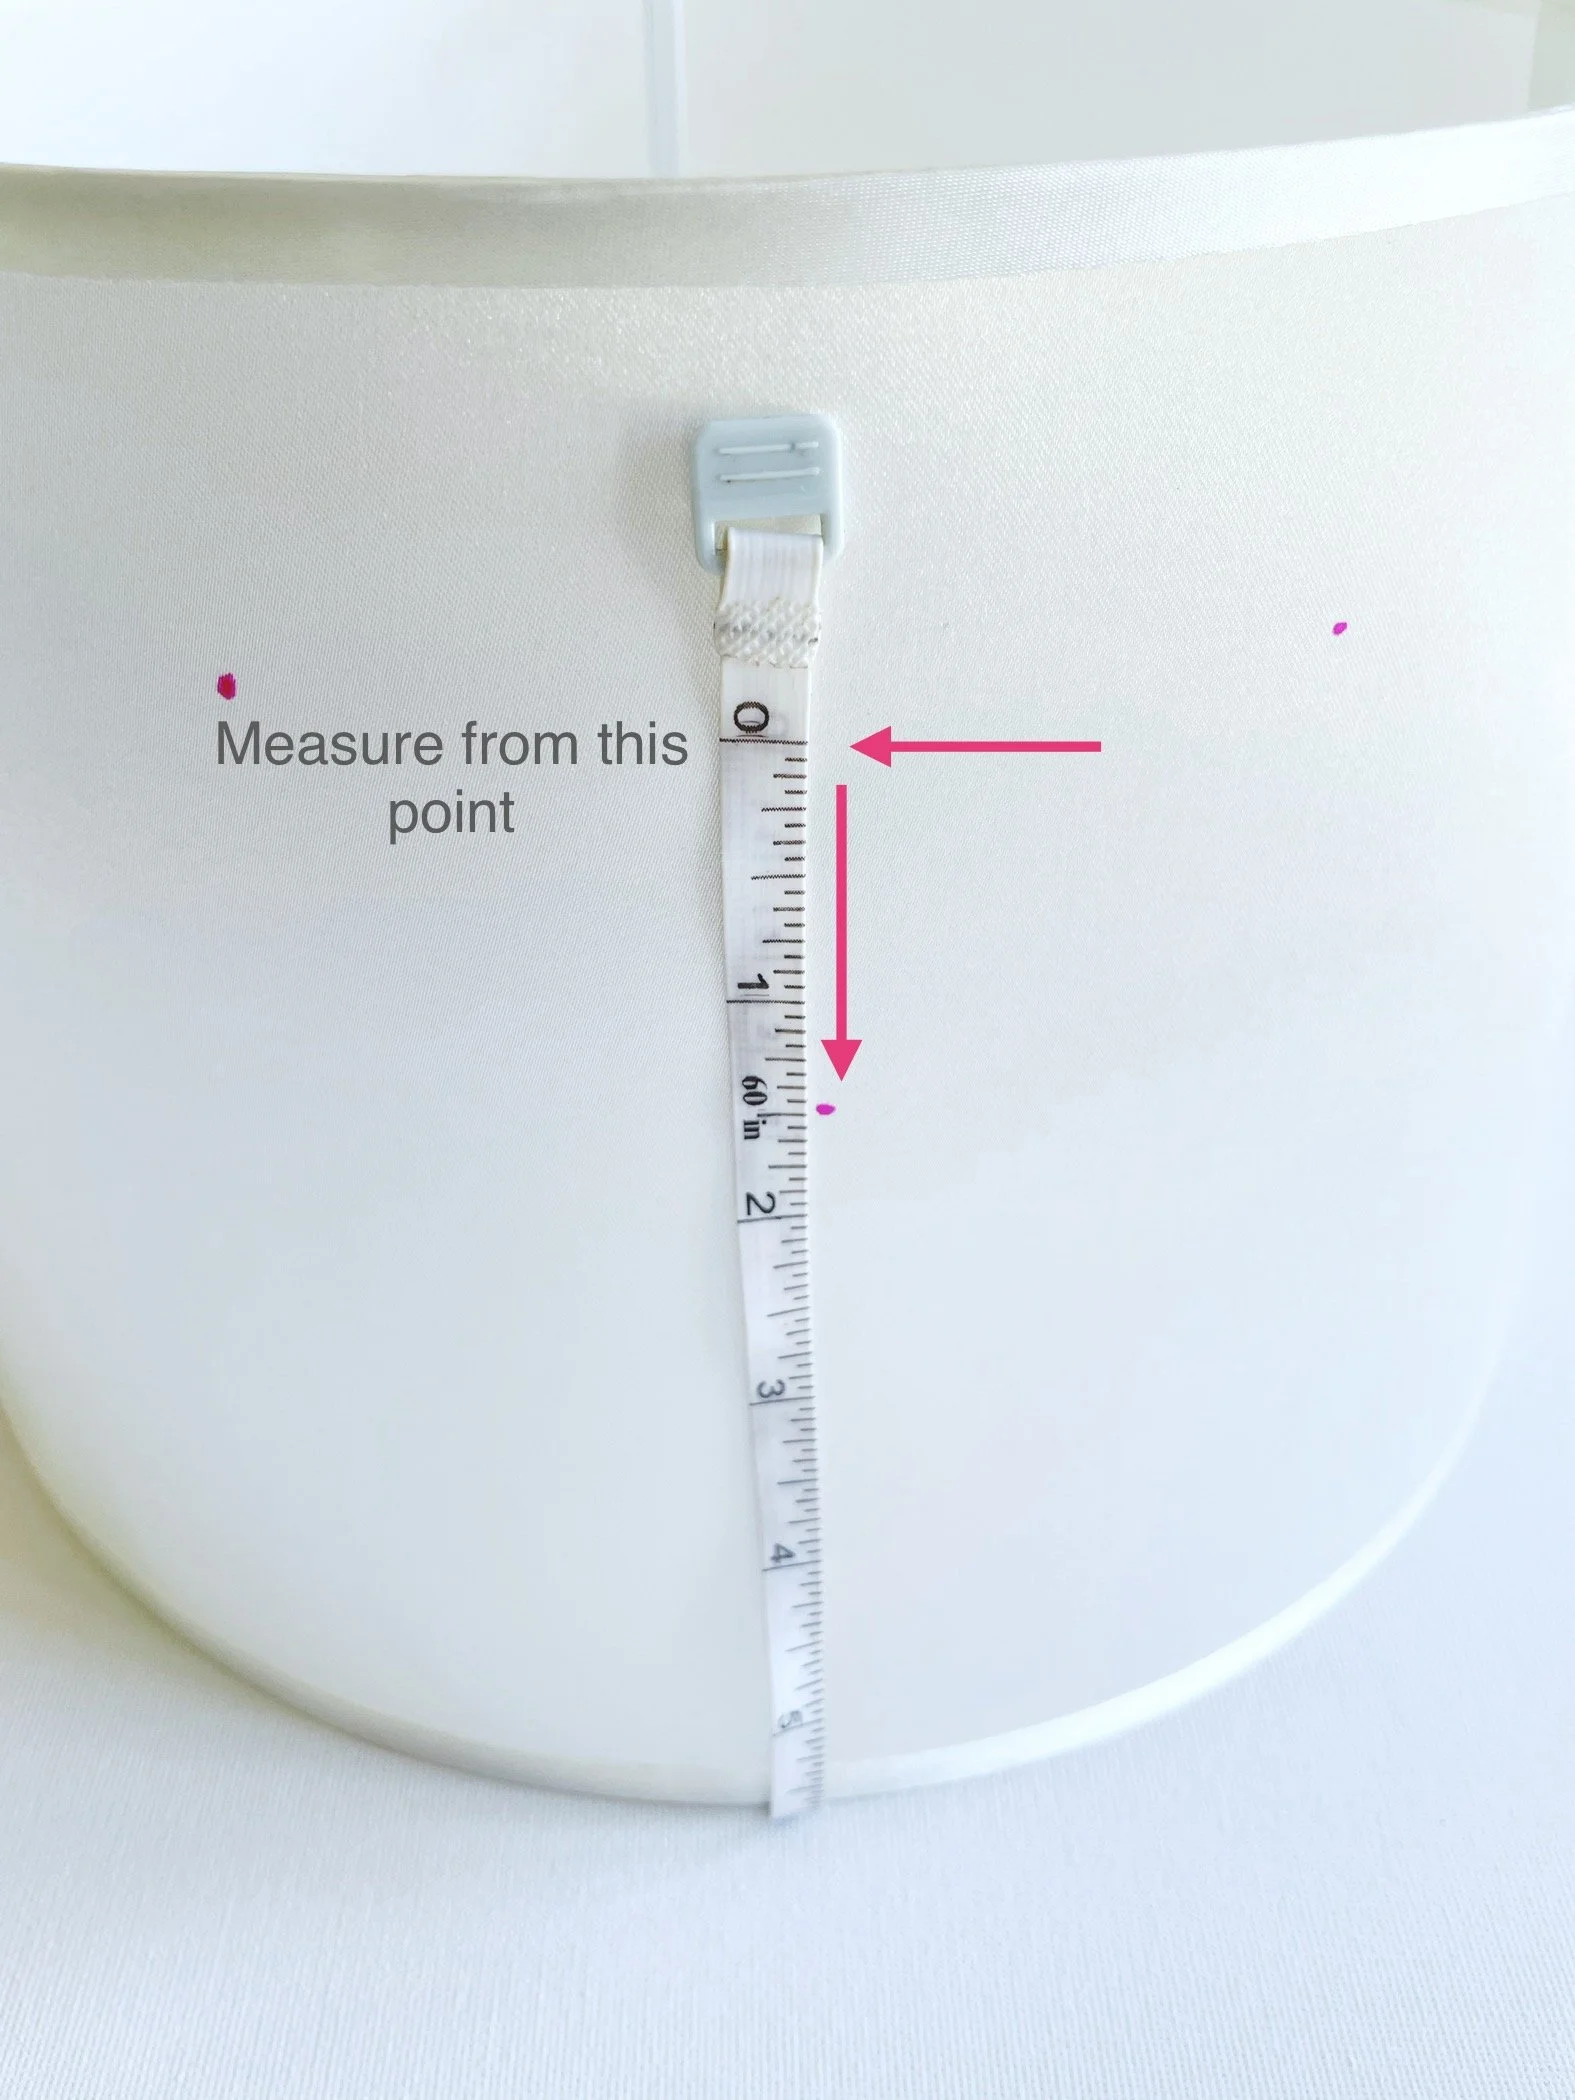
Grab your pencil and tape measure it’s time to map out where your felt balls will go.
You’ll be measuring and marking evenly spaced points around the circumference of your lampshade. These marks will guide the placement of your felt balls.
Once you’ve finished marking, simply count the dots to figure out how many felt balls you’ll need.
I recommend adding at least 20 extra felt balls to this amount, just in case you decide to fill in a bit more later. It’s always good to have a few spare for tweaking or future crafts!
When it comes to spacing, I find that gaps of around 3 to 4 inches work well. Too close together and it can look crowded; too far apart and it may feel a bit sparse.
Find the sweet spot that works for you.
Try to avoid placing dots in straight vertical lines, unless that’s the look you’re going for. For a more scattered, natural effect, stagger the rows so that no dot sits directly beneath the one above it.
To figure out the best spacing for your lampshade, divide the circumference by either 3 or 4, and go with whichever gives you the neatest result.
Unless you’re someone who loves precise measurements (unlike me!), it doesn’t have to be exact, just round to the nearest 3 or 4 inches, it will still give you a lovely finish.
And remember, you can always add more felt balls at the end if you feel it needs a little something extra.
I personally love the look of leaving a 1.5-inch border at both the top and bottom of the lampshade free of felt balls, it gives a clean, neat finish. But this is your creation, so feel free to do what feels right to you!
*Just a quick note: in the steps that follow, I use 4-inch spacing as my example. If you’re working with 3-inch spacing, simply swap out any mention of 4 inches with 3 inches, and 2 inches with 1.5 inches.
The 1.5-inch starting point and row spacing can stay the same it works beautifully with any layout.
Marking your lampshade...
Let’s get started with your first row of markings.

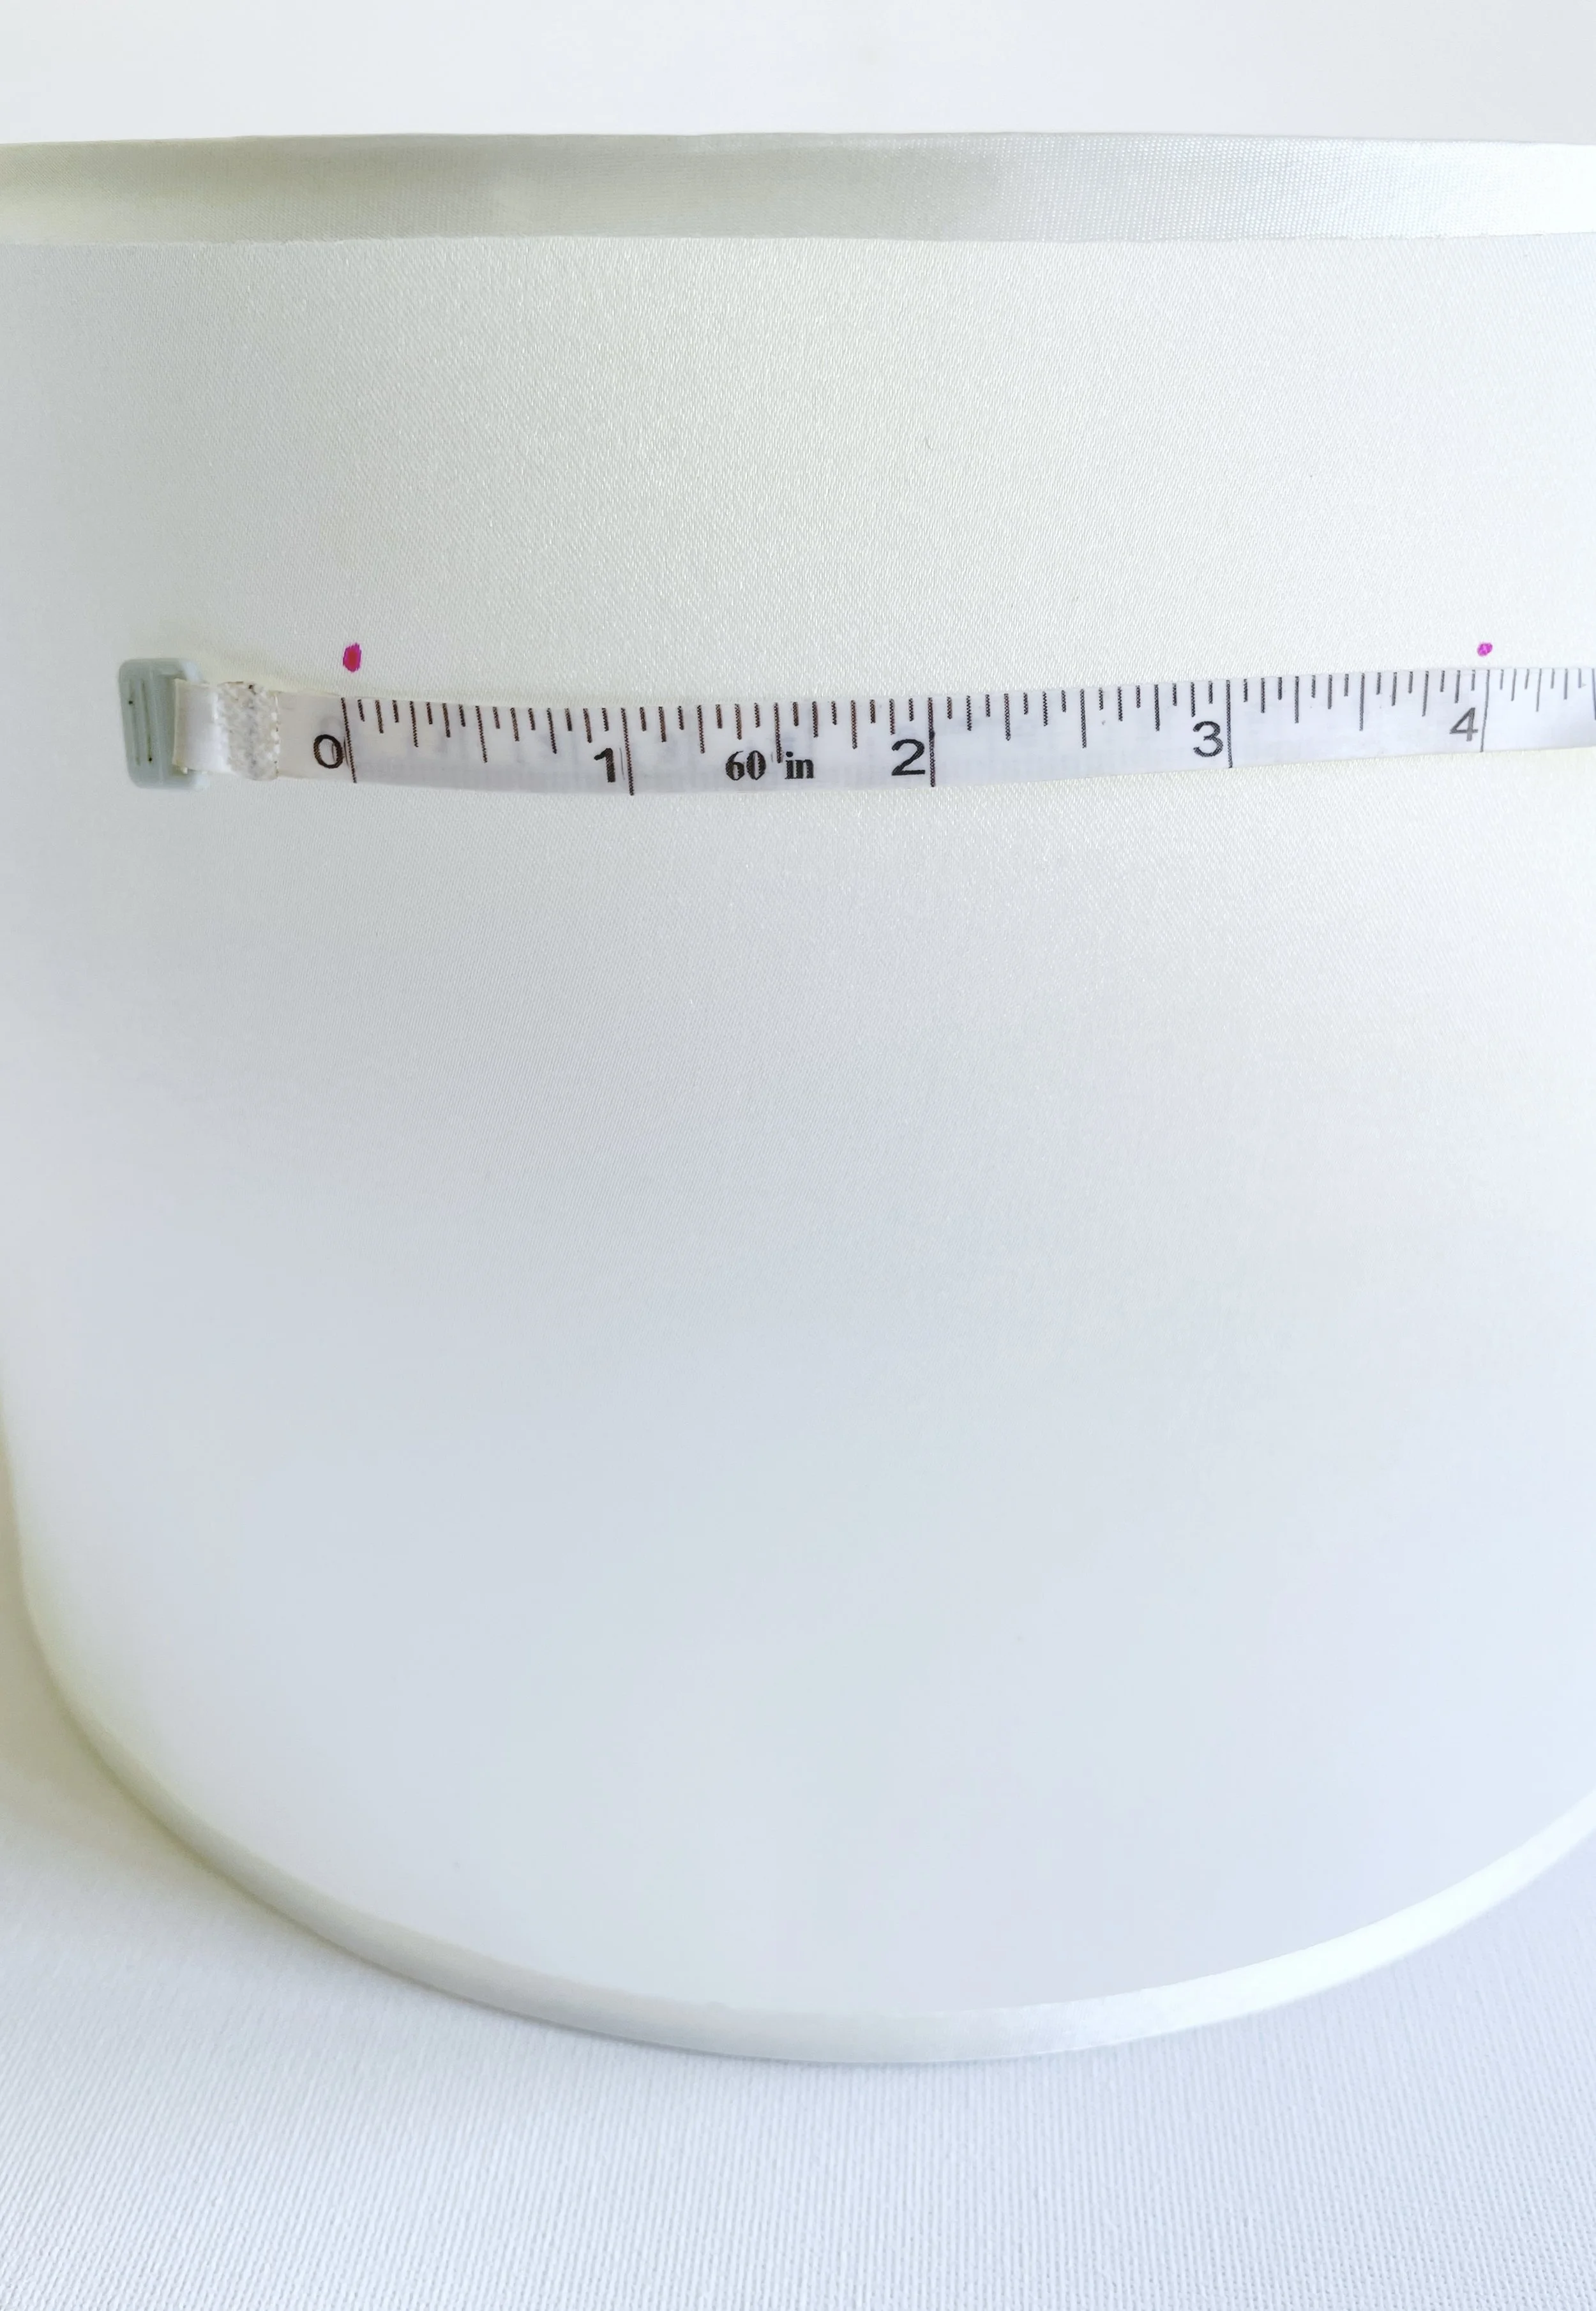
Begin by placing your tape measure vertically at the top edge of the lampshade. Measure 1.5 inches down and make your first light pencil mark, this will be your starting point.
Next, using that dot as your guide, position your tape measure horizontally and measure 4 inches across. Make a second pencil dot at that point.
Now double-check that your second dot is also 1.5 inches from the top by measuring vertically again. If it’s slightly off, just adjust it it’s all part of the process!
Repeat this step: from your second dot, measure another 4 inches along horizontally and mark the next spot. Again, check that it lines up 1.5 inches from the top.
Continue this way all around the lampshade until you’ve completed your first row of evenly spaced marks.
Second Row...
Now it’s time to start the second row.
Start by placing your tape measure on one of the dots from the first row and measure 2 inches along, this is your halfway point between the first-row dots.
Don’t mark the lampshade here; it’s just a guide.
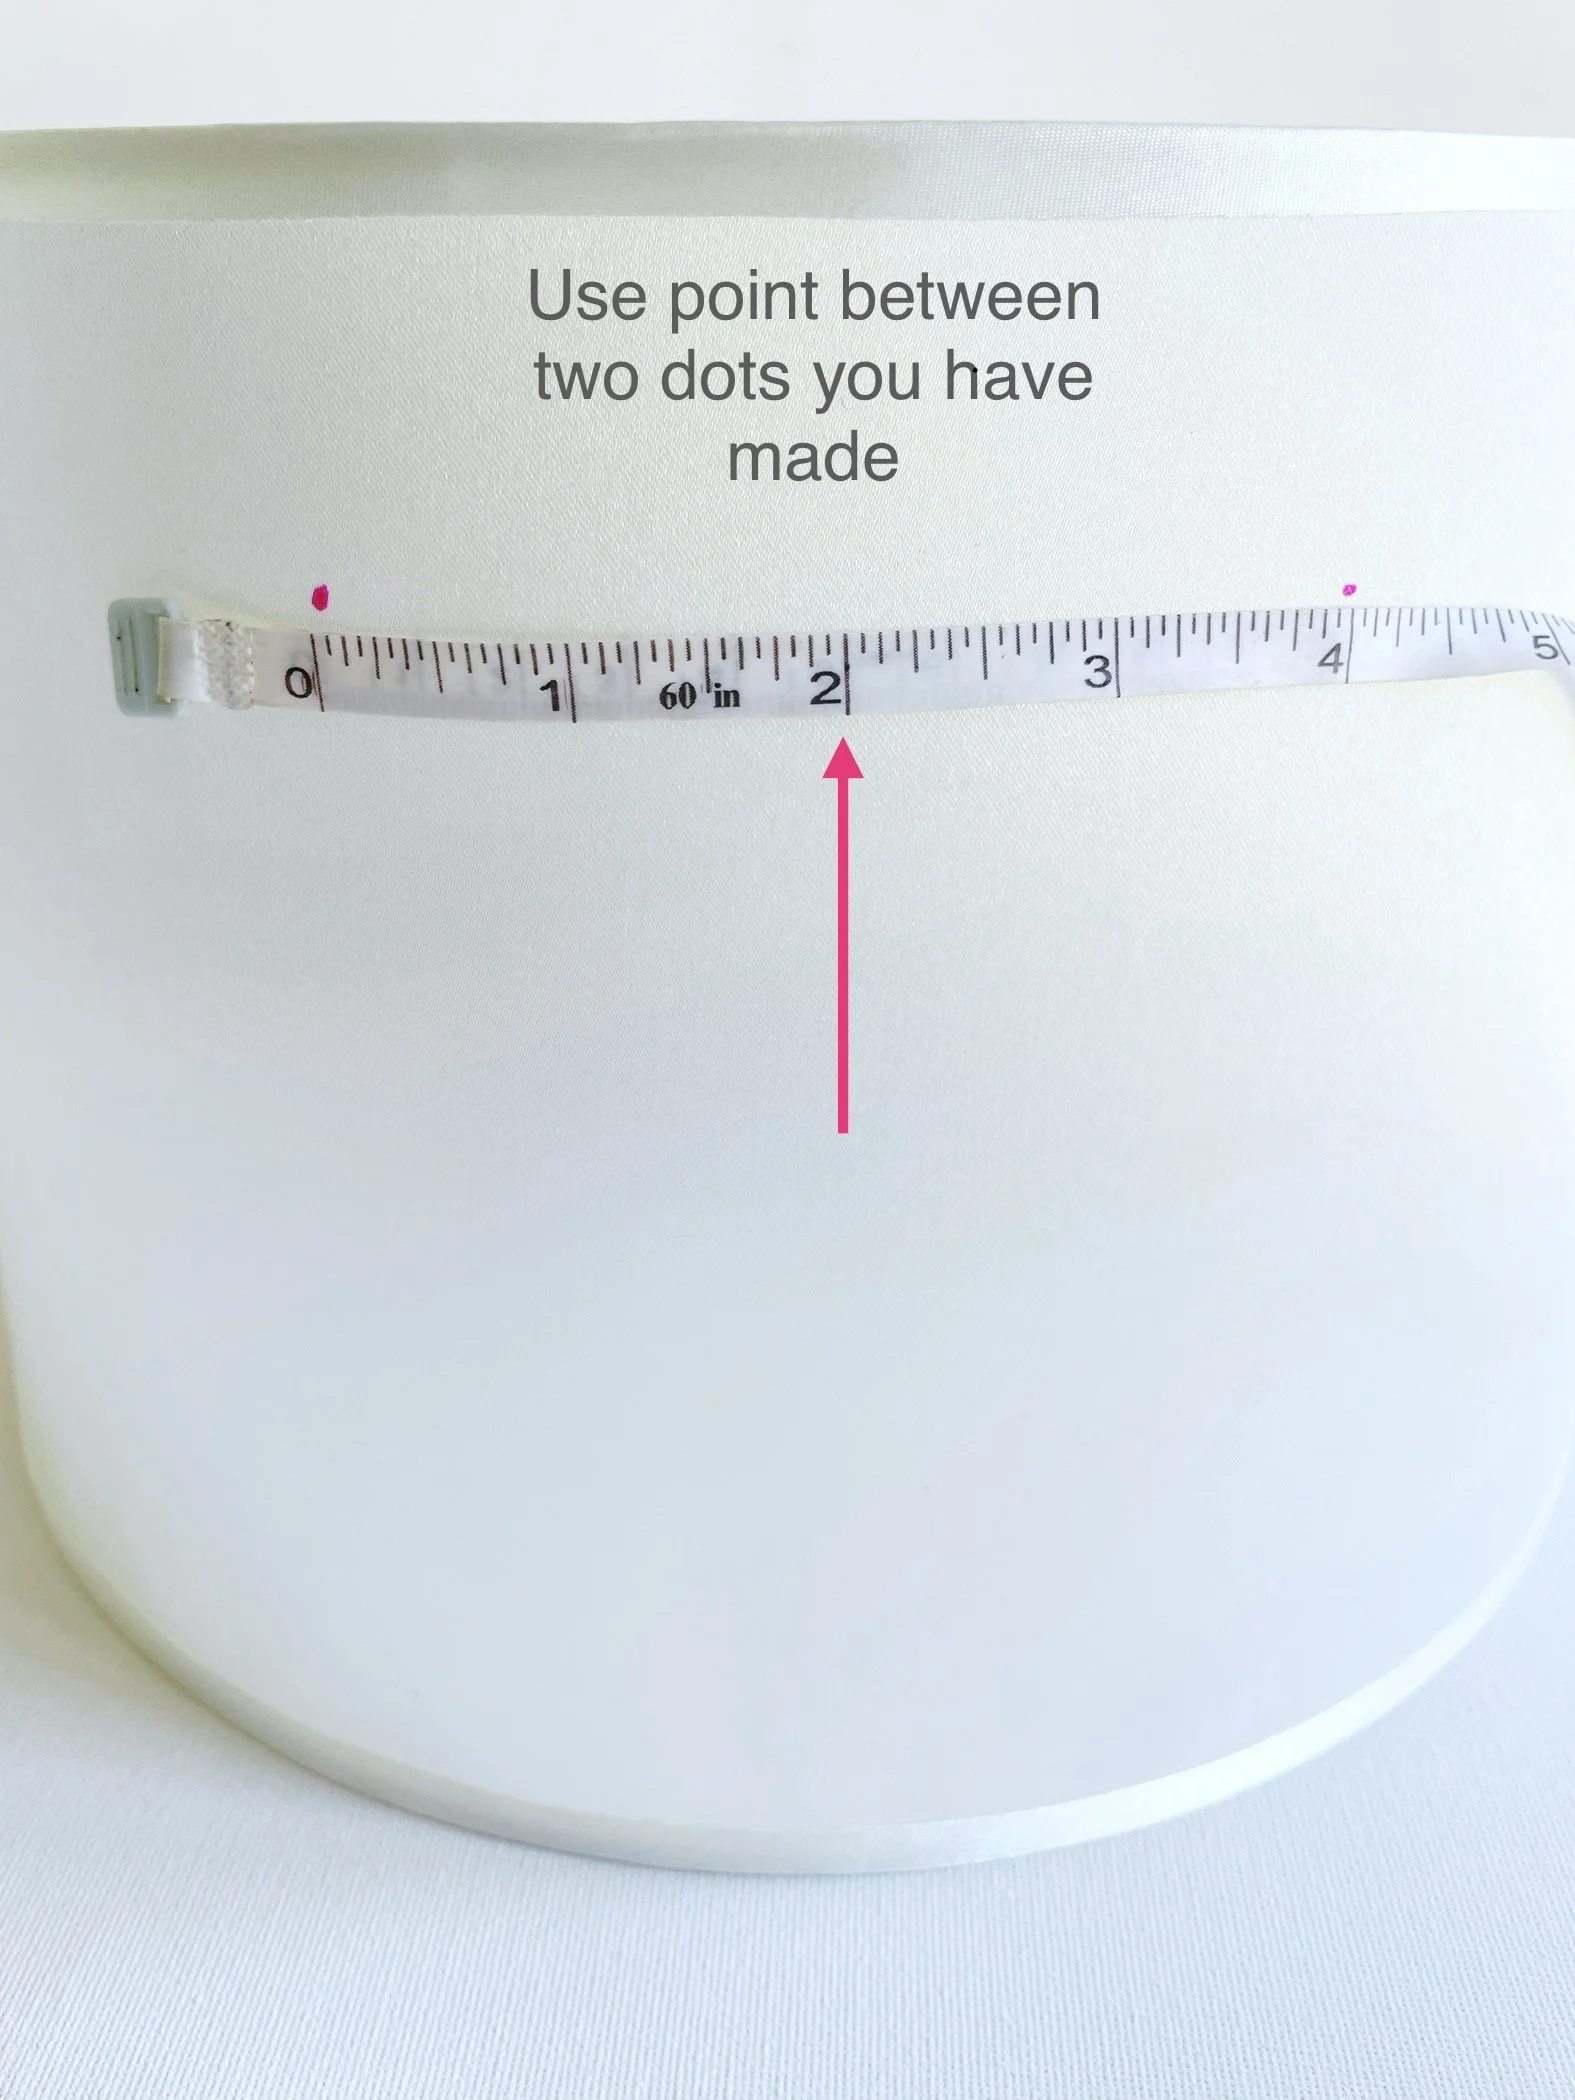
Do not mark the lampshade
From that halfway point, measure 1.5 inches down vertically and make a pencil dot there.
This new dot should fall nicely between the dots above it, creating a staggered look not in line with any from the first row.
Now, using this new dot as your starting point, measure 4 inches across horizontally and mark your next dot. Keep going around the shade, measuring 4 inches between each one, and always staying 1.5 inches below the first row or 3 inches from the top edge of the lampshade.
You’ll start to see the staggered pattern forming, which adds a beautiful, playful look to your finished piece.
Third Row...
To begin the next row, follow the same steps you used for the row above. Use one of the dots from the second row as your starting guide. From that dot, measure 2 inches across; just be sure not to mark the lampshade here.
Now, holding your tape measure vertically, measure 1.5 inches down from that point and make a small pencil dot on the shade. Then, measure 4 inches across from this new dot and mark the next one.
Keep checking you are staying 1.5 inches below the first row or 4.5 inches from the top edge of the lampshade.
Keep going like this until the row is finished.
As I mentioned earlier, I like to leave about 1.5 inches of space at the bottom of the shade. So, if you're following along with this example, you might find you've now finished marking your shade.
If not, just continue with the same method until your lampshade is fully marked and ready for the next step.
Applying the felt balls...
Phew, well done! The trickiest part is behind you, and now it’s smooth sailing.
Go ahead and switch on your glue gun. Once it’s heated and ready, add a small dot of hot glue to a felt ball and gently press it onto the first pencil mark. Hold it there for a few seconds so it sticks firmly.
Keep going, one dot at a time, until each pencil mark has a felt ball in place.
If your glue gun gets a little too runny, try switching it off for a minute to let the glue cool down slightly—that usually does the trick!
Once all the dots are covered, step back and take a look.
You might spot a few little gaps where you’d like to add an extra felt ball or two, feel free to do that until everything looks just right and you're happy with the final look.
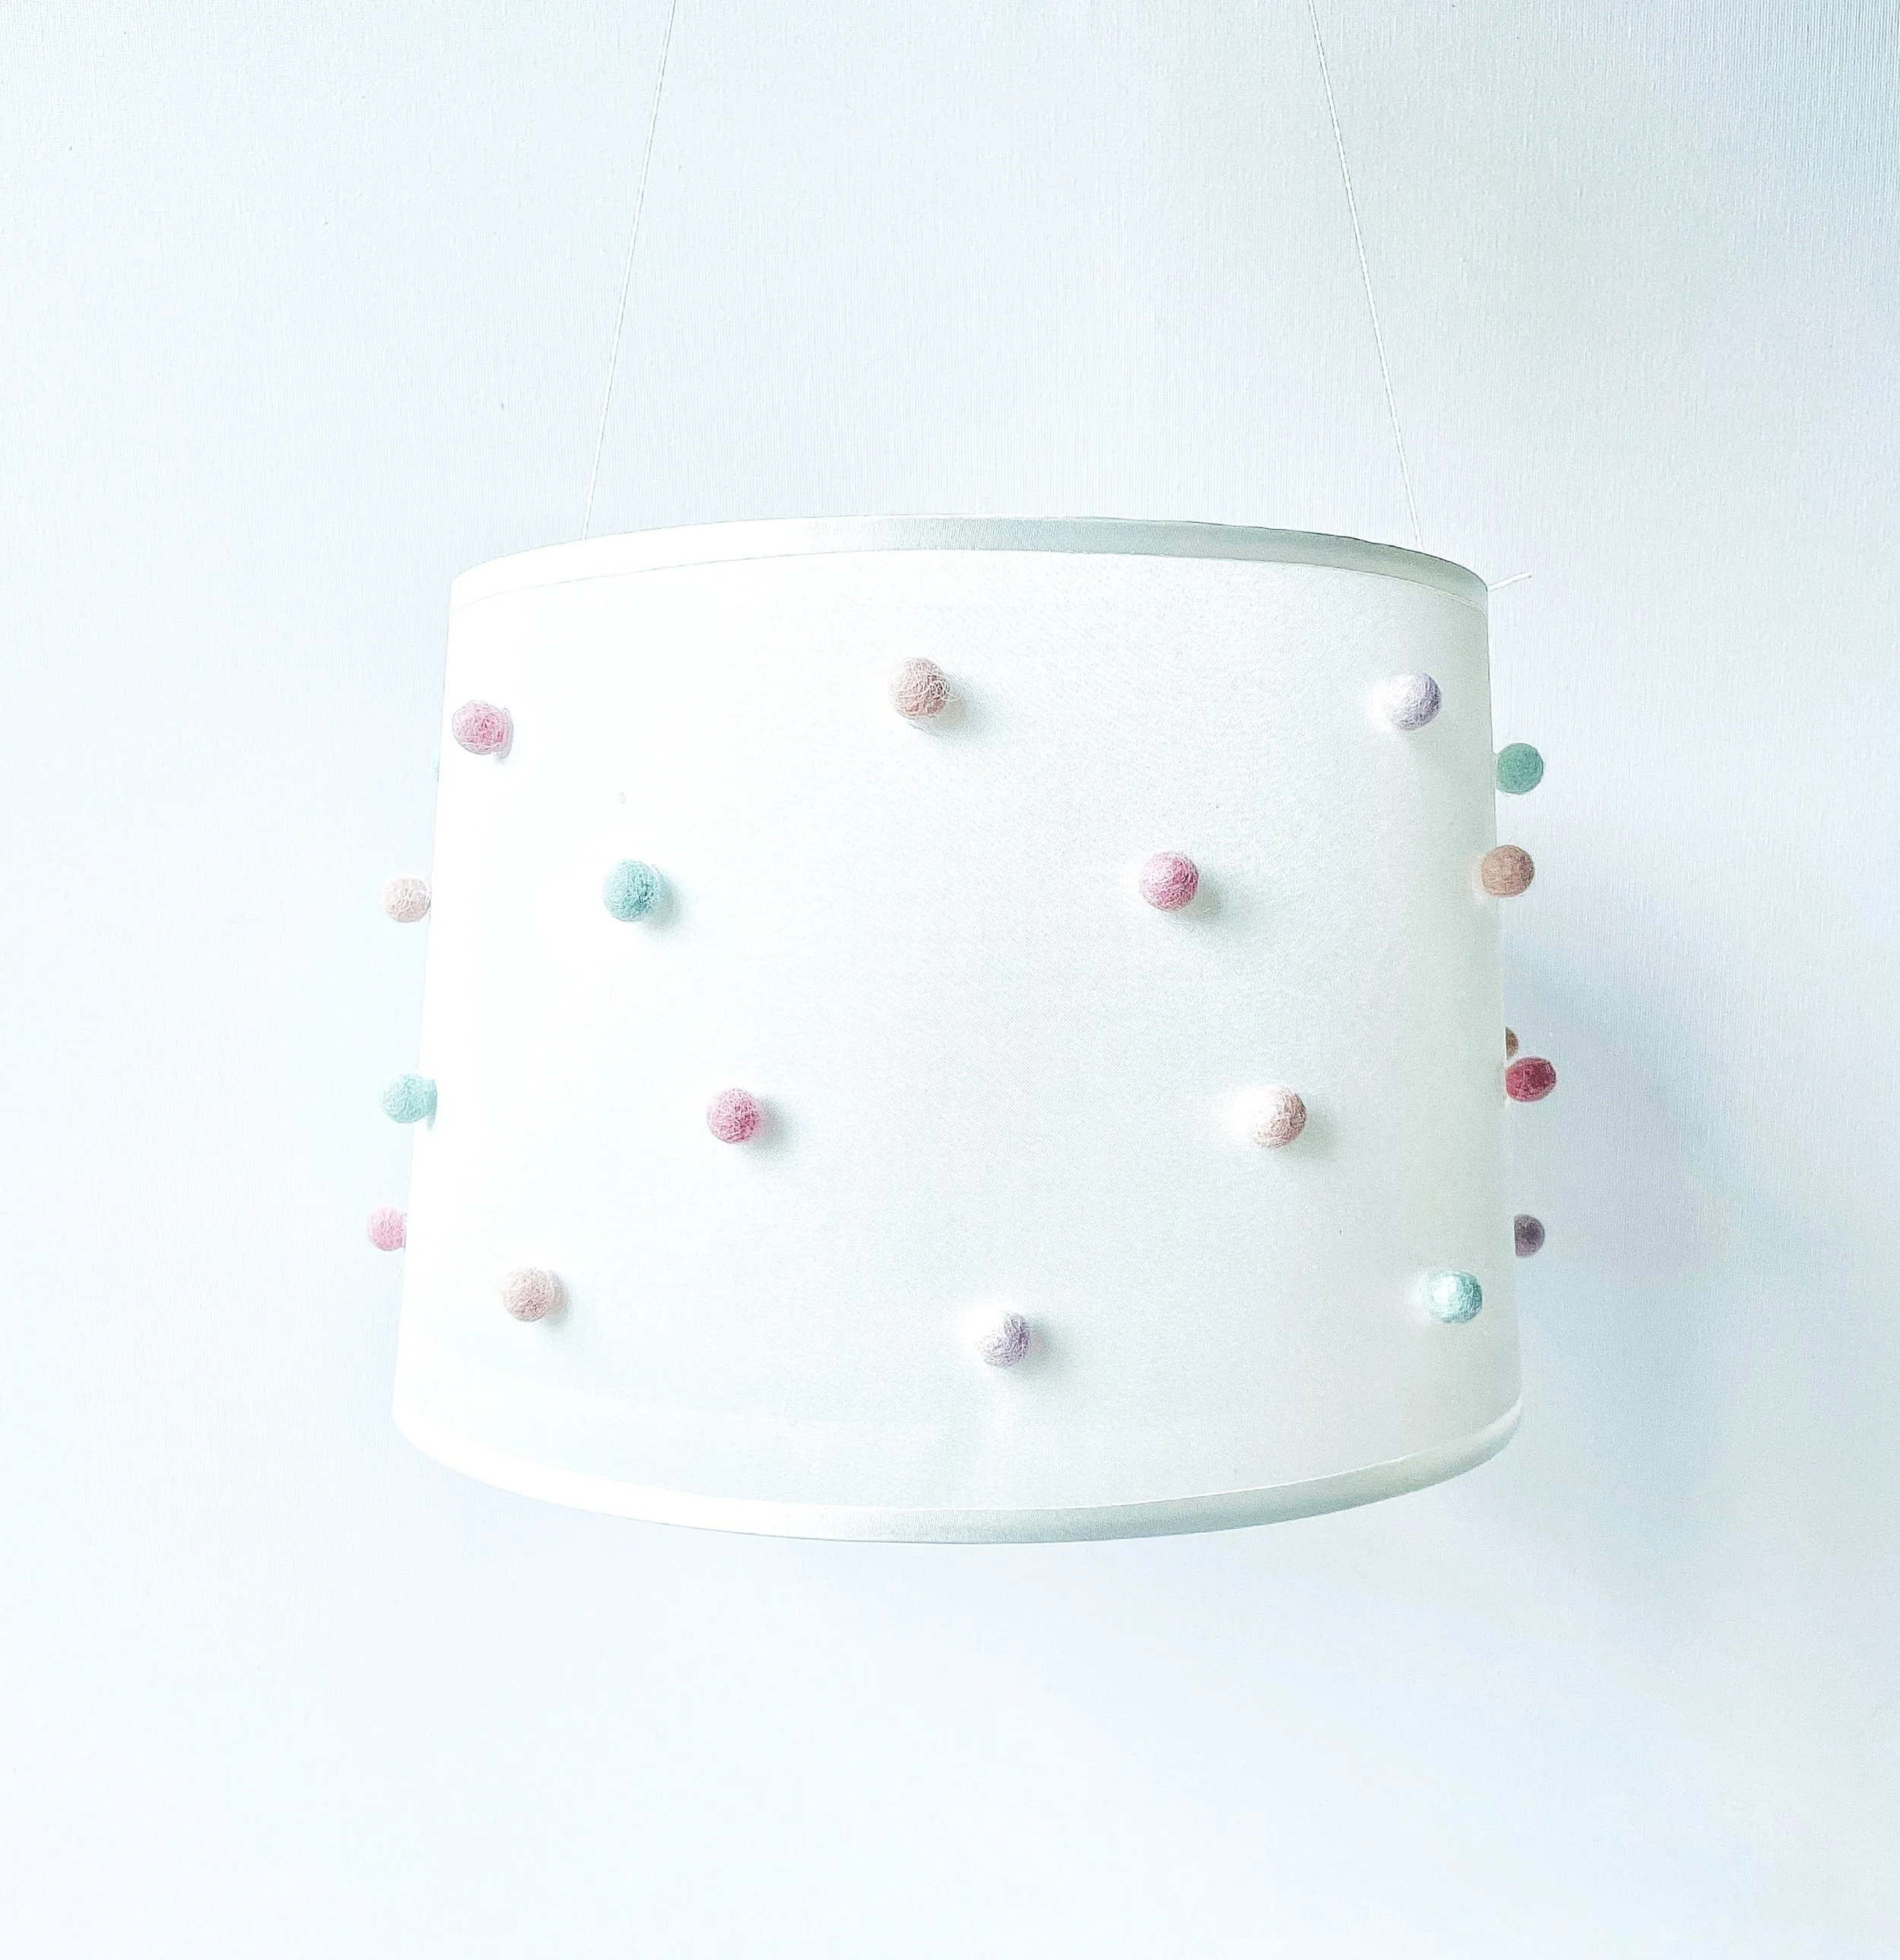
You’ve completed your lampshade...
And there you have it, I told you it was easy!
You’ve now created a gorgeous pom pom lampshade, perfect to hang up, give as a thoughtful gift, or even sell.
Be proud of what you’ve made, enjoy every bit of it! x
I really hope you’ve enjoyed making your DIY pom pom lampshade!
If you have any questions, tips, or helpful thoughts to share, feel free to leave them in the comments, I’d truly love to hear from you.