
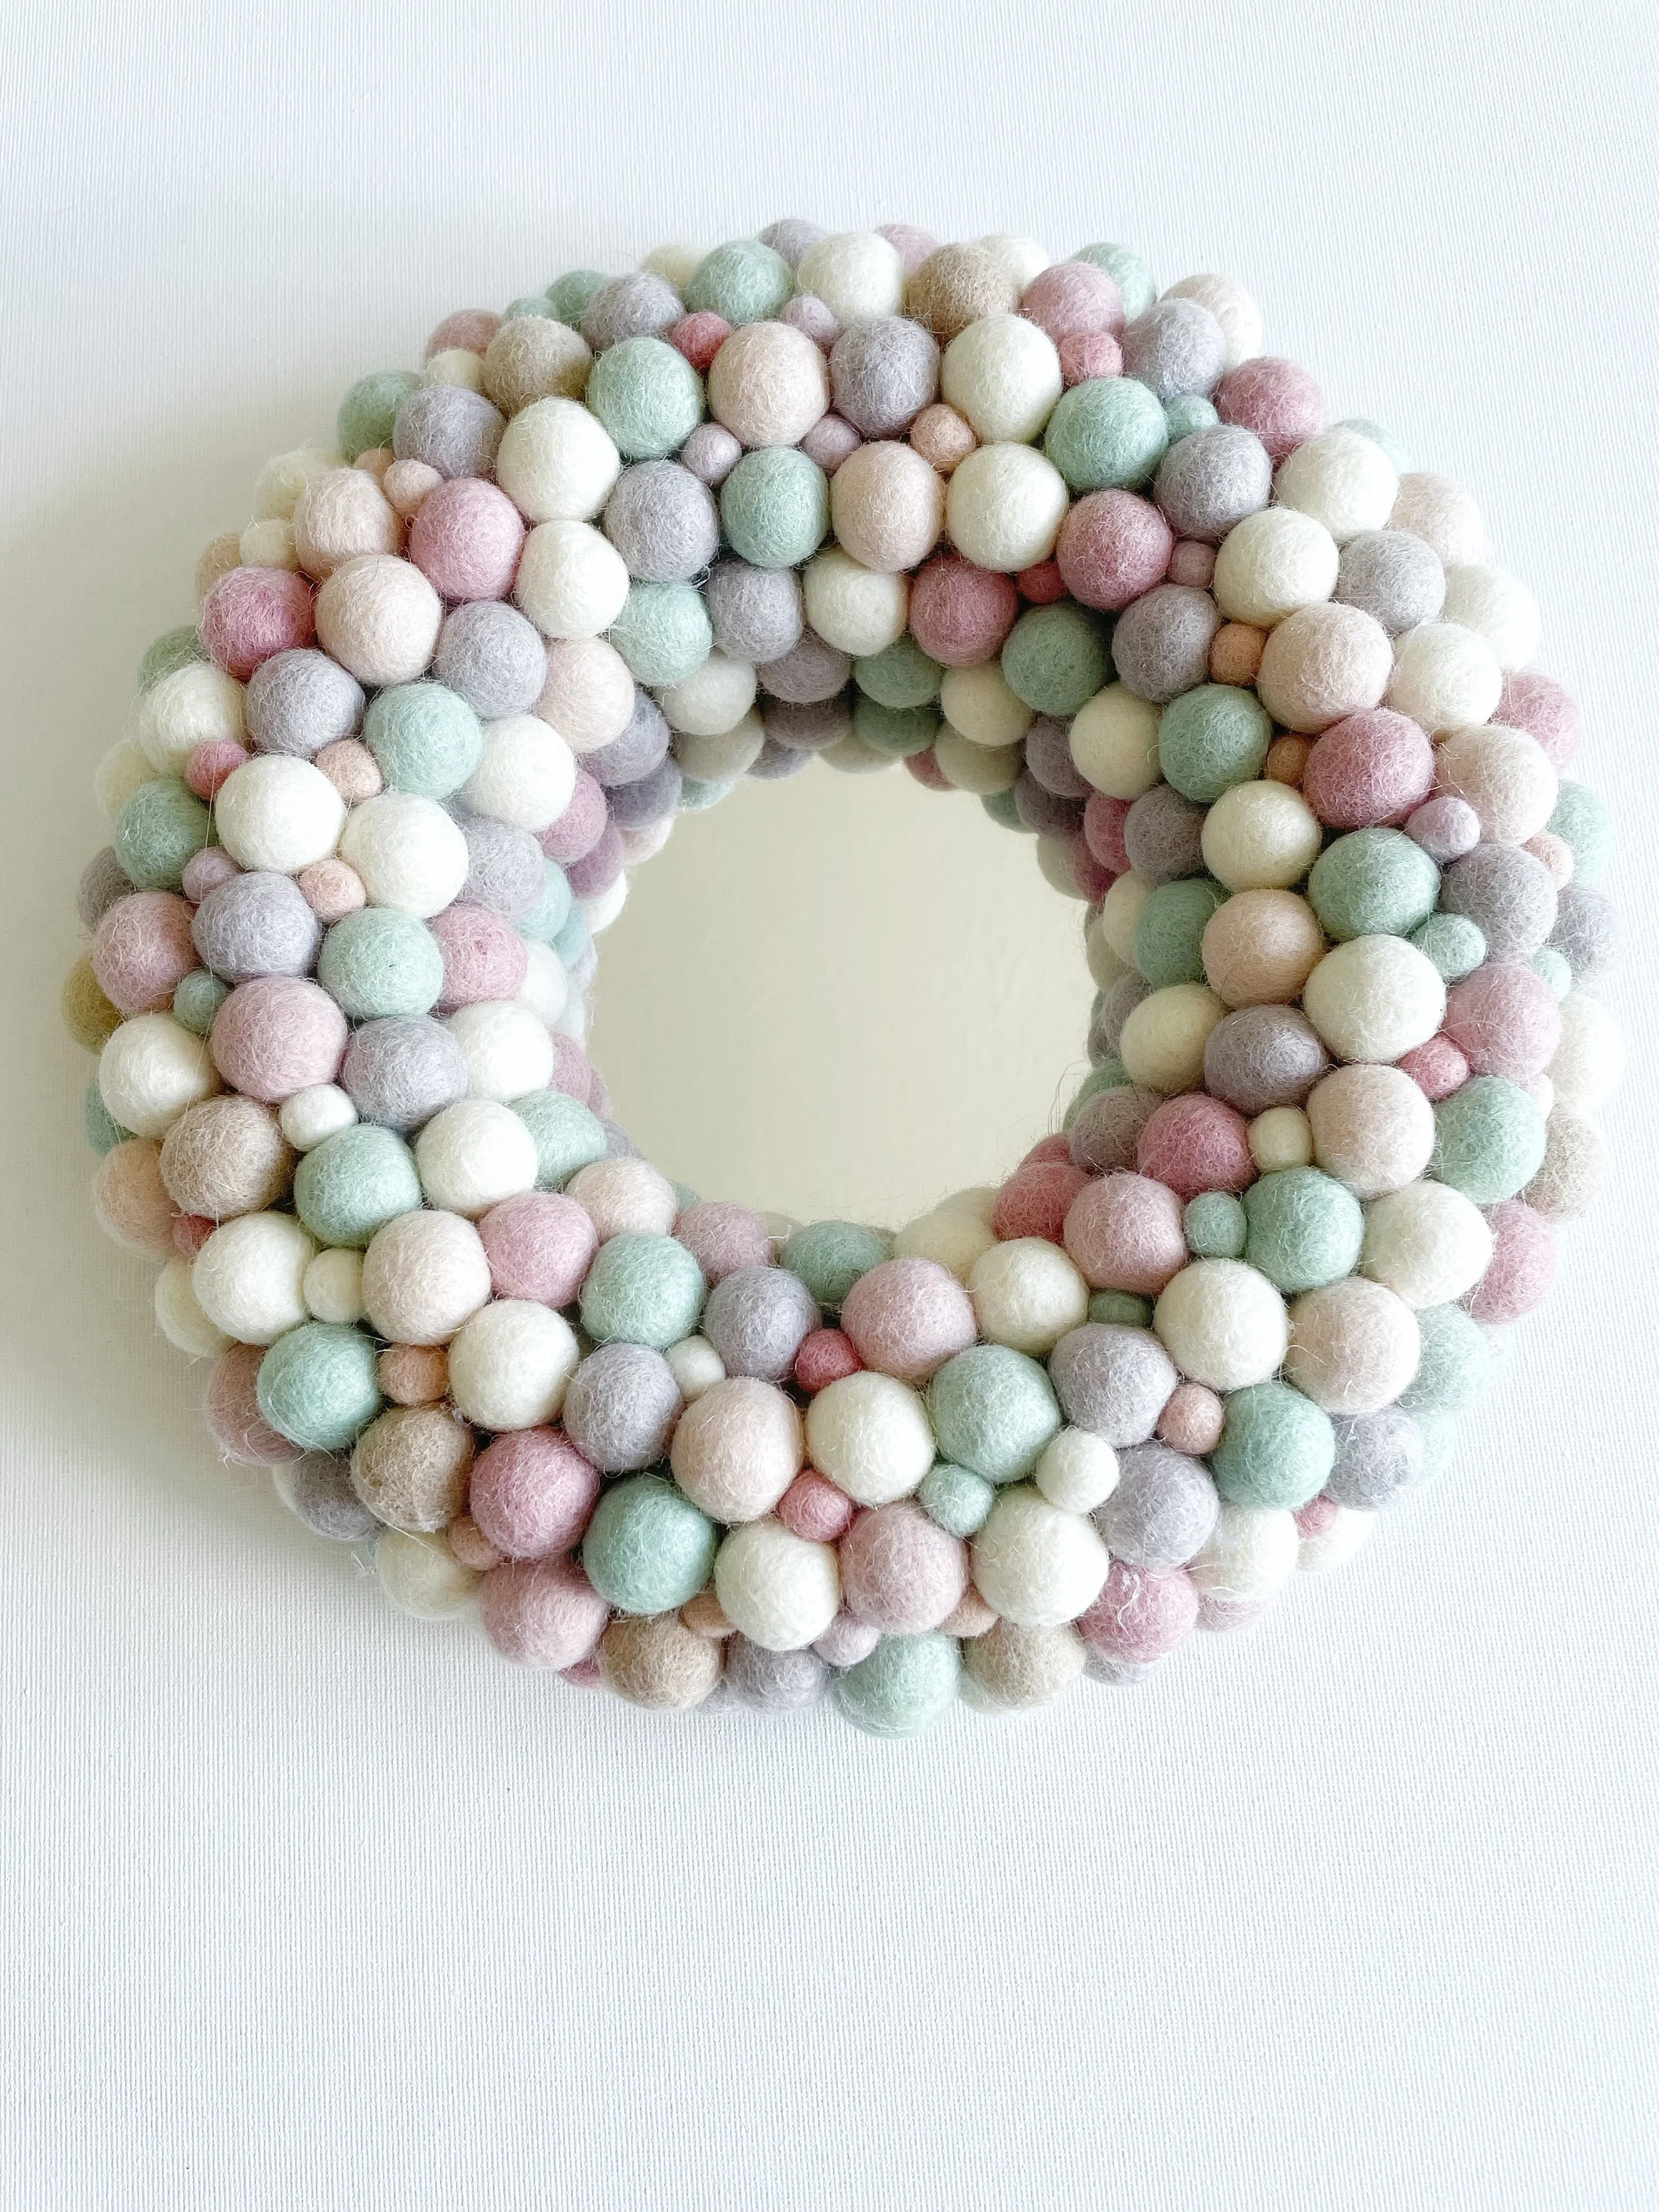
DIY Felt Ball Wreath Mirror
Follow this easy step-by-step tutorial to create your very own DIY felt ball wreath!
Felt ball wreaths are soft, plush, and add a lovely pop of charm to any space. They’re super simple to make, which makes them a perfect project for beginners.
While it’s certainly not the cheapest craft project, making it yourself will definitely save you money compared to buying one pre-made.
Plus it’s something you’ll treasure and reuse for years to come.
One of the best parts of making your own felt ball wreath? You get to choose your own colours, so you can create a wreath that perfectly matches your decor or special occasion.
You can make a bold statement with bright, cheerful colours or keep things soft and soothing with neutral tones. It’s completely up to you!
Felt ball wreaths look adorable in children’s rooms or playrooms, and they’re a lovely way to create your own nursery décor. They also make thoughtful, handmade gifts for a new baby or baby shower.
Hang it on an interior door, a wall, or even display it on a shelf, there are so many ways to enjoy it!
And if you have an old mirror that you’d like to give a fun new look, Just grab your glue gun and some felt balls to add a colourful border to the frame.
Voilà. Hello, brand-new mirror!
Ideas for DIY felt ball wreath…
If you're making a classic felt ball wreath, why not have a little fun with seasonal themes? The holidays are a great time to get creative.
There are lots of felt shapes to choose from. Here are a few festive ideas to inspire you!
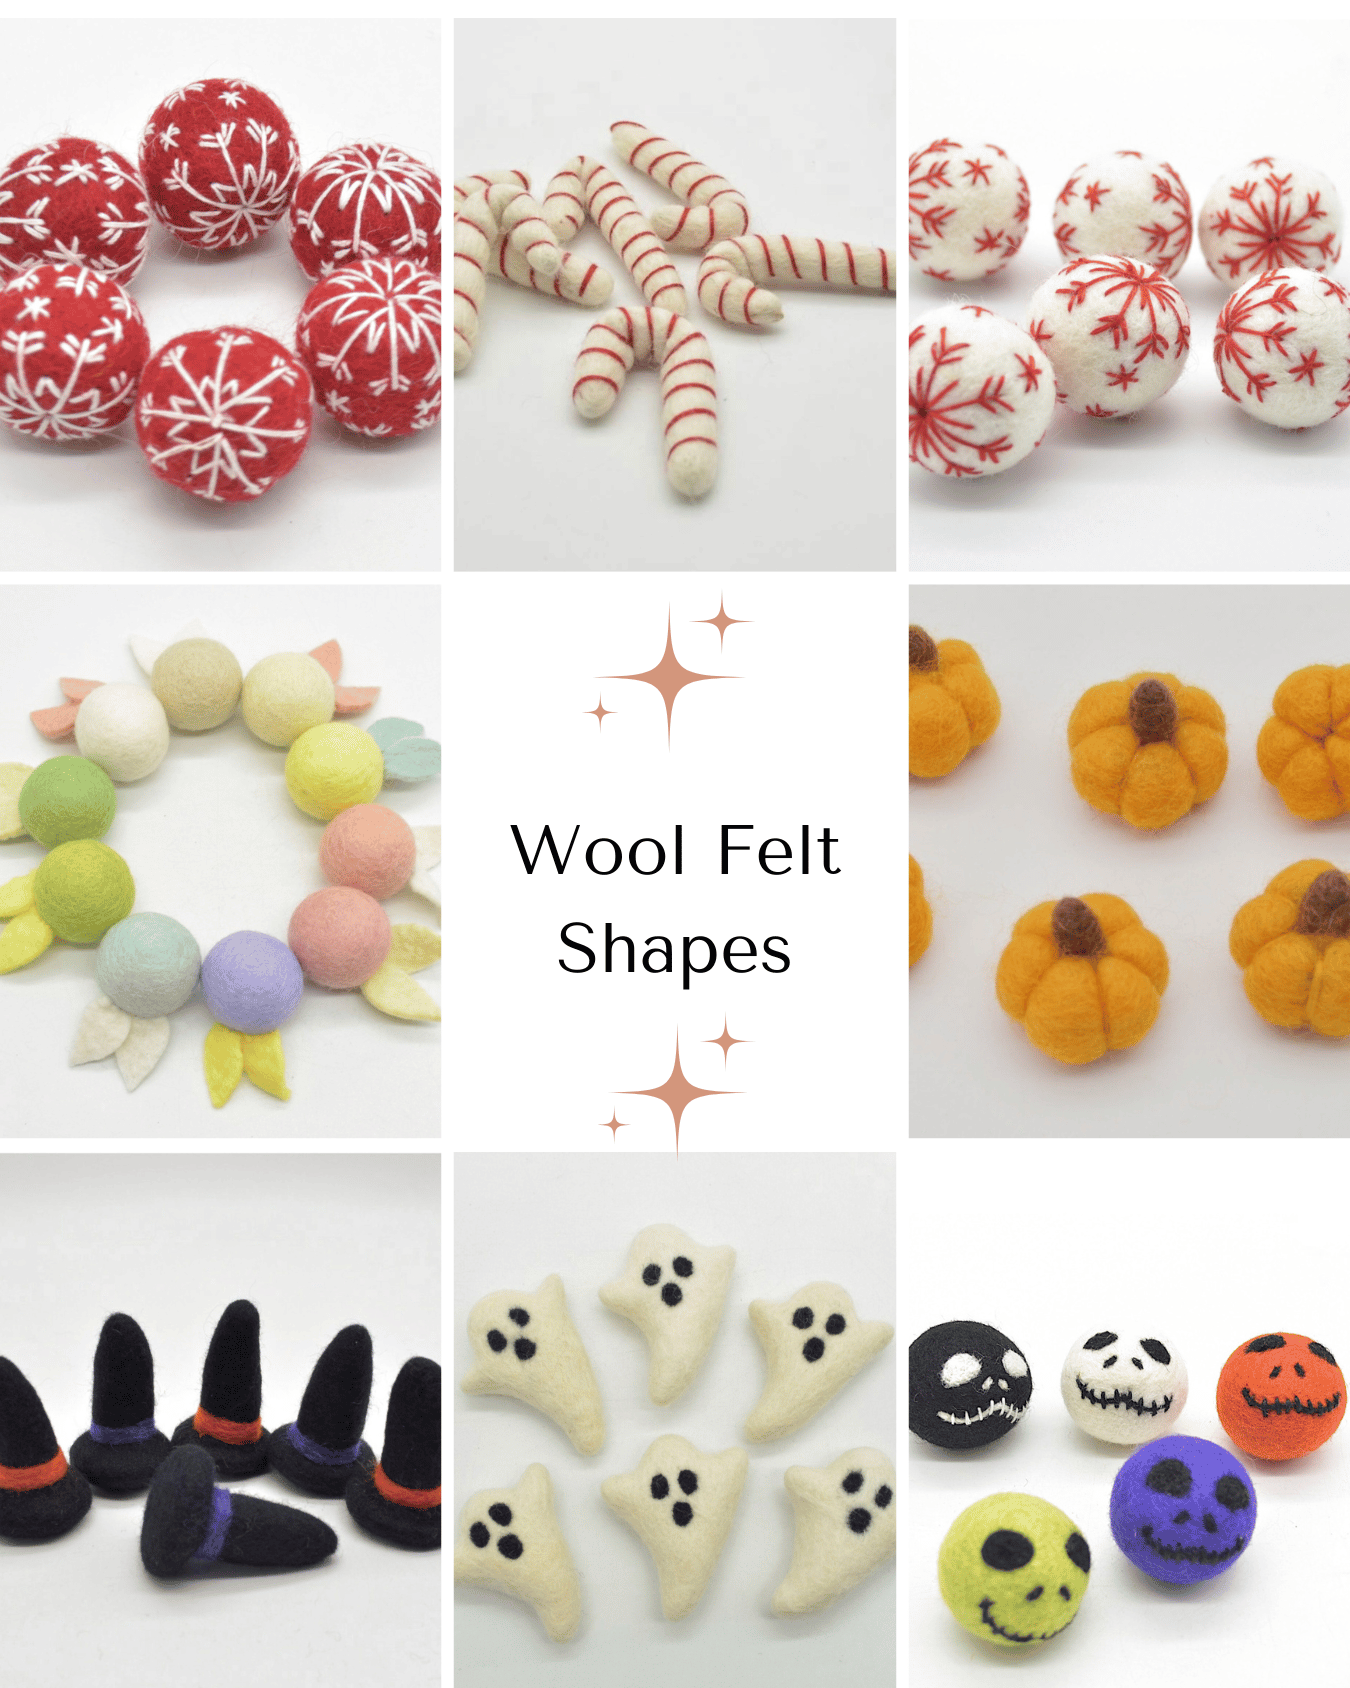
Christmas - Christmas patterned felt balls and festive colours. You can also add candy cane or peppermint felt shapes.
Easter - bunnies and eggs
Halloween - witches hats, ghosts, skeleton faces
Autumn/Fall - seasonal colours, pumpkin felt shapes
I’ve seen some lovely festive felt ball wreaths placed flat and used as table centrepieces, they look so charming!
You can pop a small vase of flowers in the centre or even a faux candle for a cozy touch.
Selling felt ball wreaths
Felt ball wreaths can be a lovely addition to your shop, especially when you tap into seasonal and holiday themes.
You may want to use soft, elegant colours for a timeless look, or go with bright, playful tones that are perfect for kids' rooms and playrooms.
You can even offer custom colour options so customers can match their existing décor, always a nice personal touch!
Another great idea is to sell DIY kits, so customers can enjoy making their own felt ball wreaths. There are so many fun possibilities!
If you’re planning to sell felt ball wreaths, why not offer your customers the option to add a matching felt ball garland? I’ve got a super simple tutorial for that right here: How to Make Felt Ball Garlands.
If you’re looking to sell your creations, be sure to check out my beginner’s guide to pricing your handmade items. Pricing your products can be trickier than you might think!I
And if you're wondering where to start selling your creations, be sure to check out my guide to the best places to sell handmade items. I've rounded up some great options to help you get started!
Let’s Make a felt ball wreath!
This DIY felt ball wreath tutorial is a bit of a two-in-one! You can choose to make a wreath with a mirror in the centre for a fun twist, or keep it simple and go with a classic felt ball wreath it’s totally up to you.
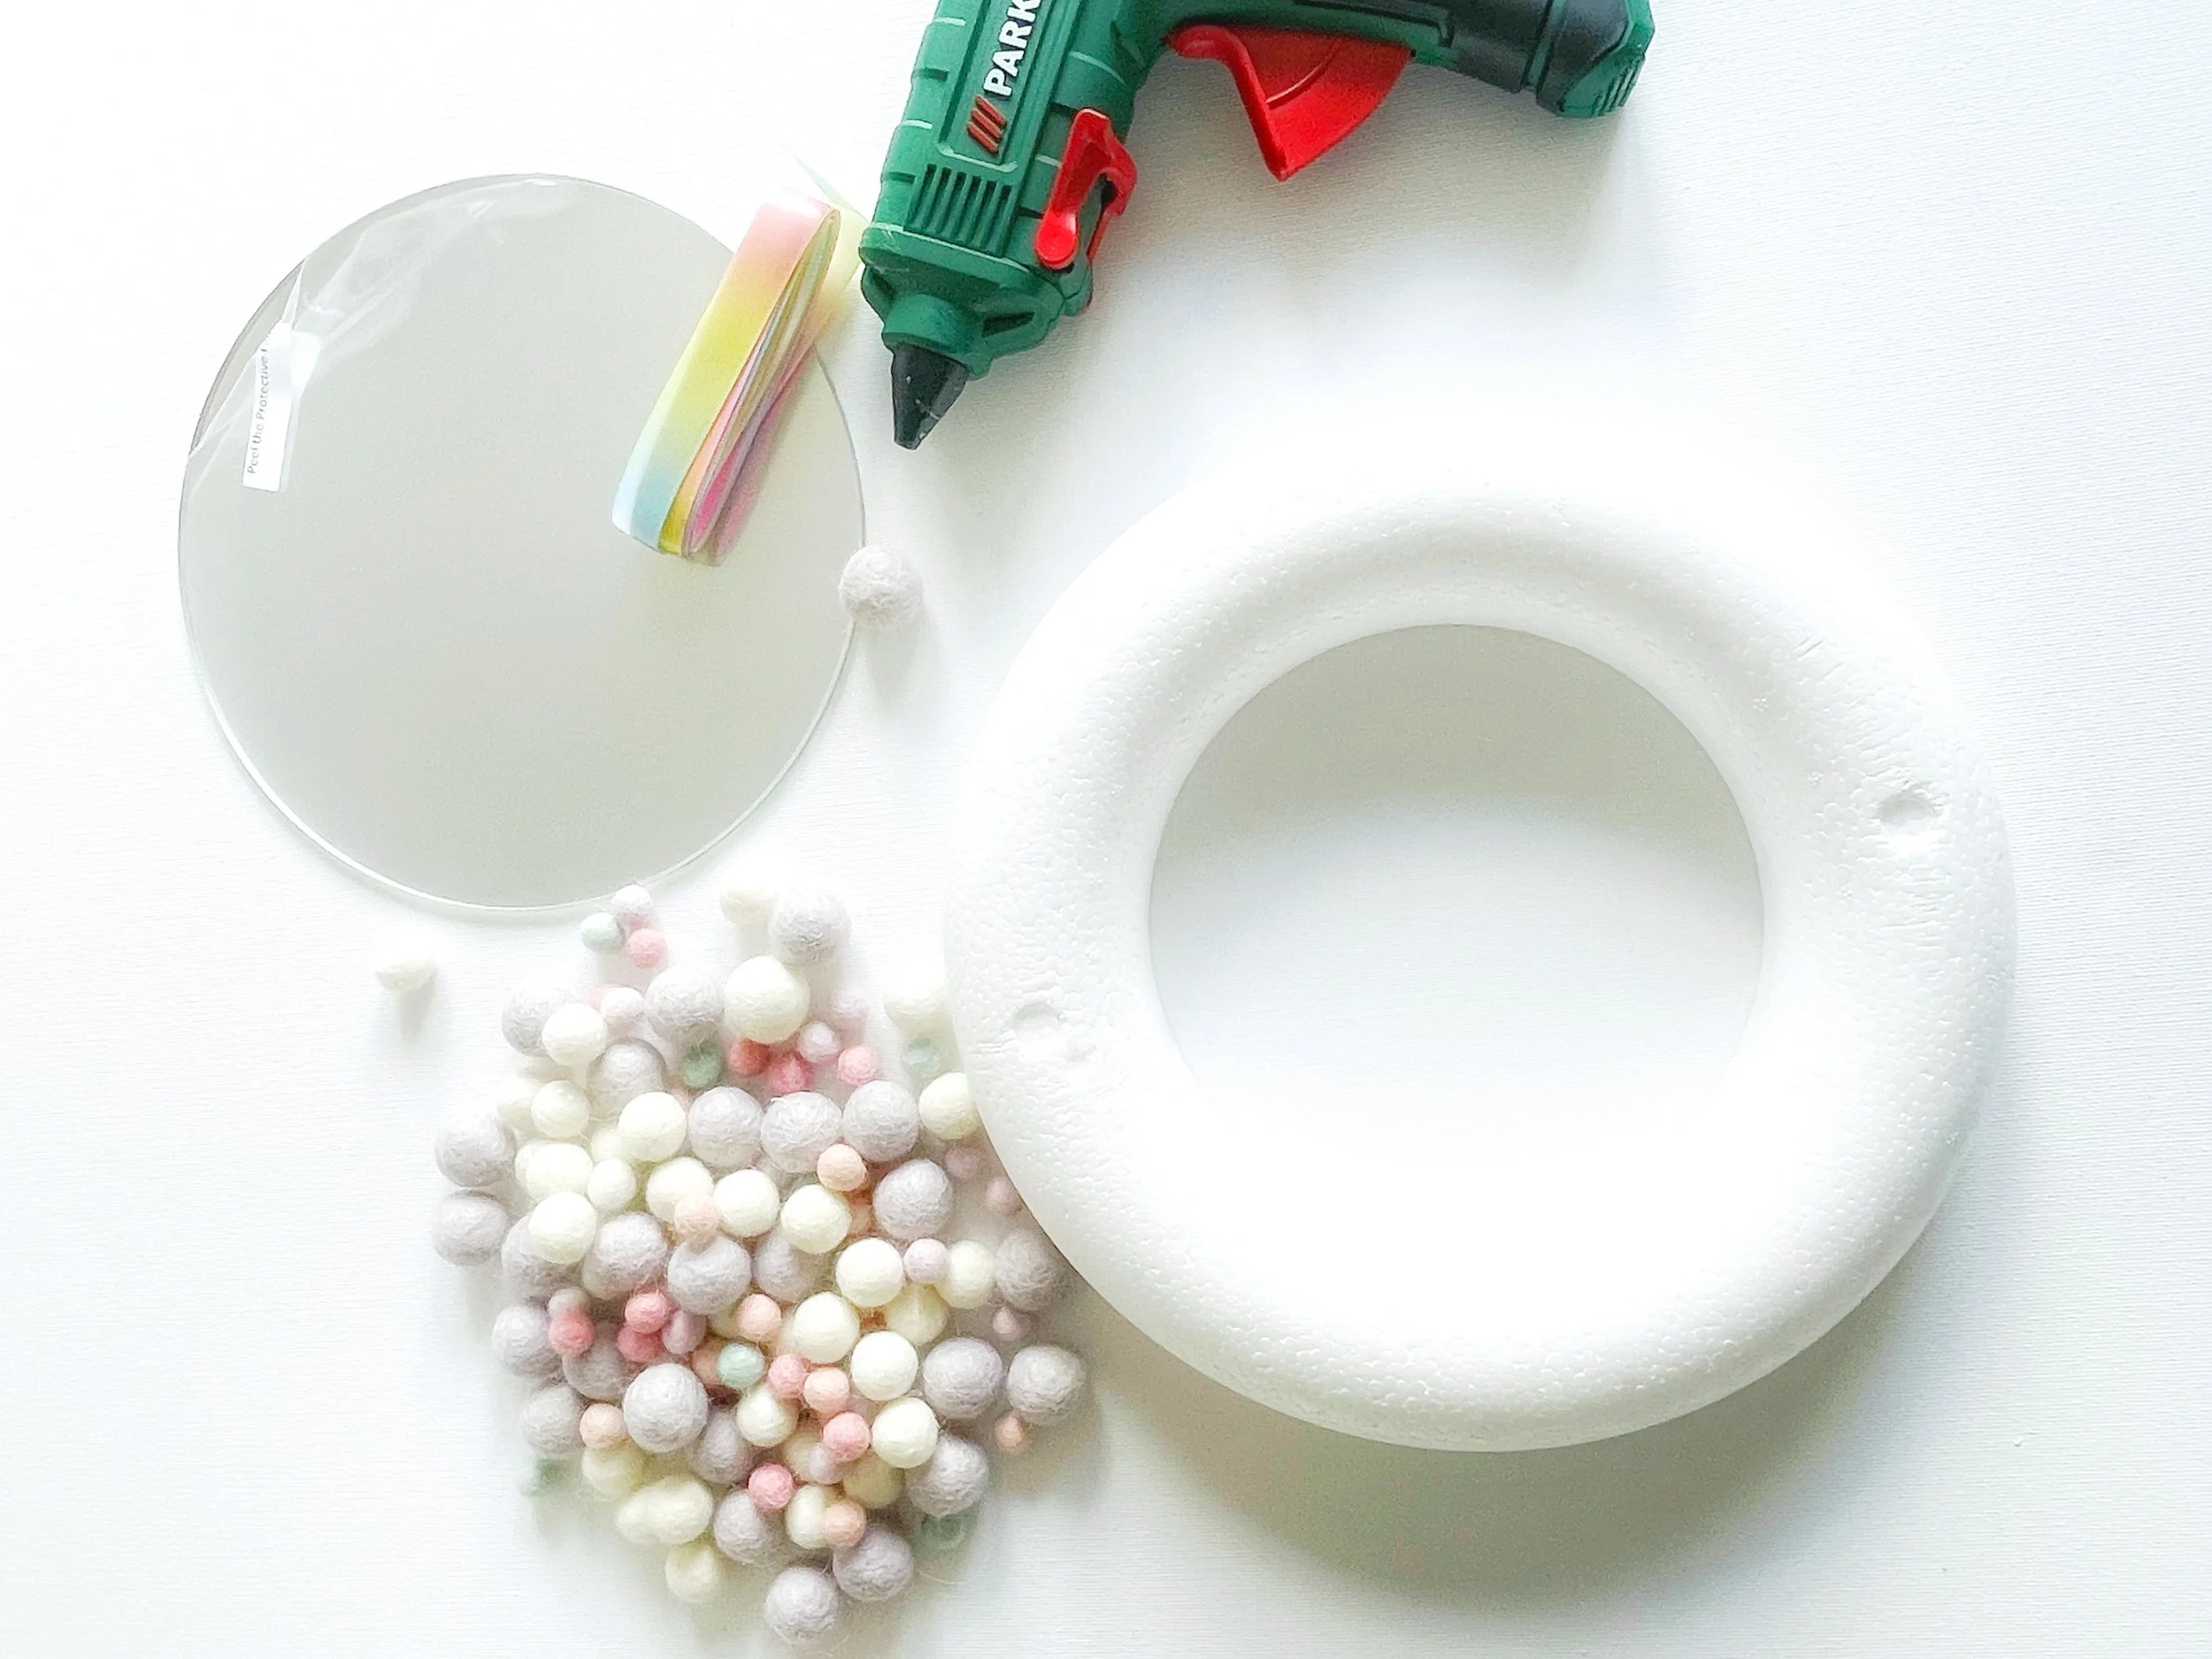
What you will need…
Felt balls - lots of them! I love mixing 2cm and 1cm felt balls. The smaller ones are perfect for filling in little gaps and give a lovely textured look.
But go with whatever style you prefer! As a rough guide, I used around 270 of the 2cm balls and 120 of the 1cm ones.
Polystyrene half ring - I used a 25cm ring, but feel free to choose the size that suits your project best.
Glue gun
Mirror - I went with a 20cm frameless acrylic mirror (3mm thick) with a self-adhesive back. It's a great, safe option, especially for a child’s bedroom or playroom.
Ribbon - You’ll only need about 10 inches for hanging your finished piece.
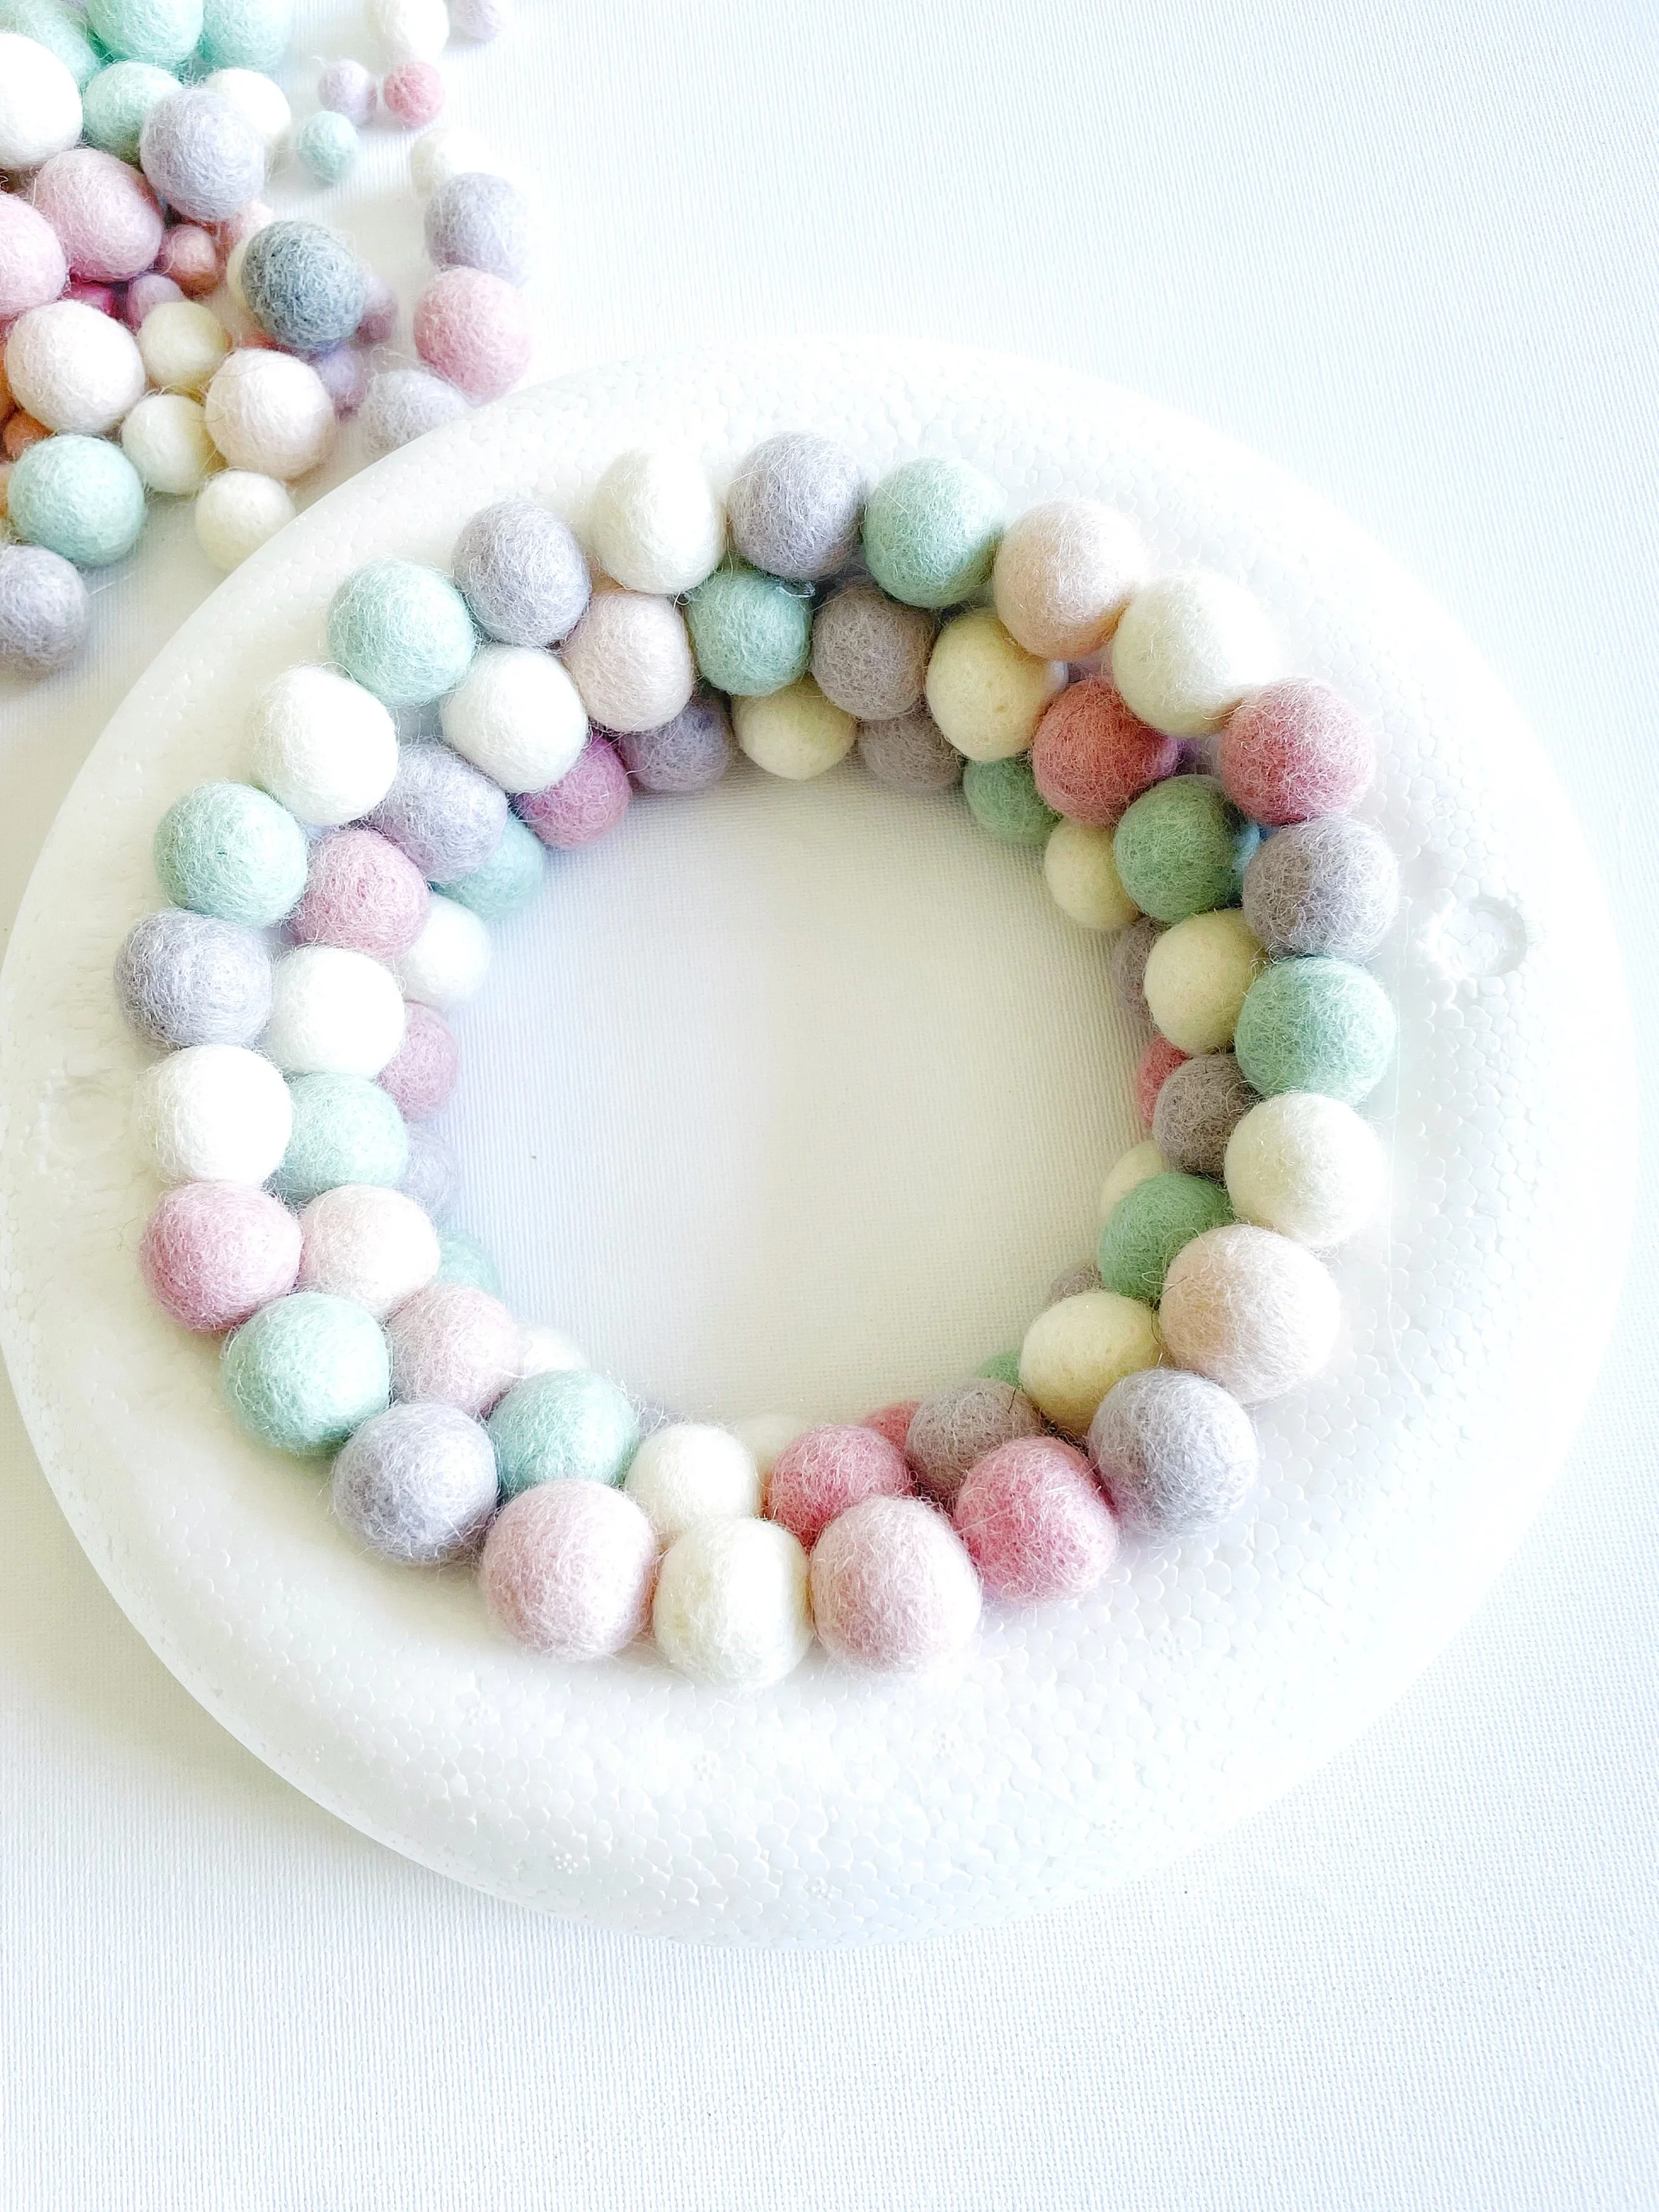
Glue the felt balls onto the ring…
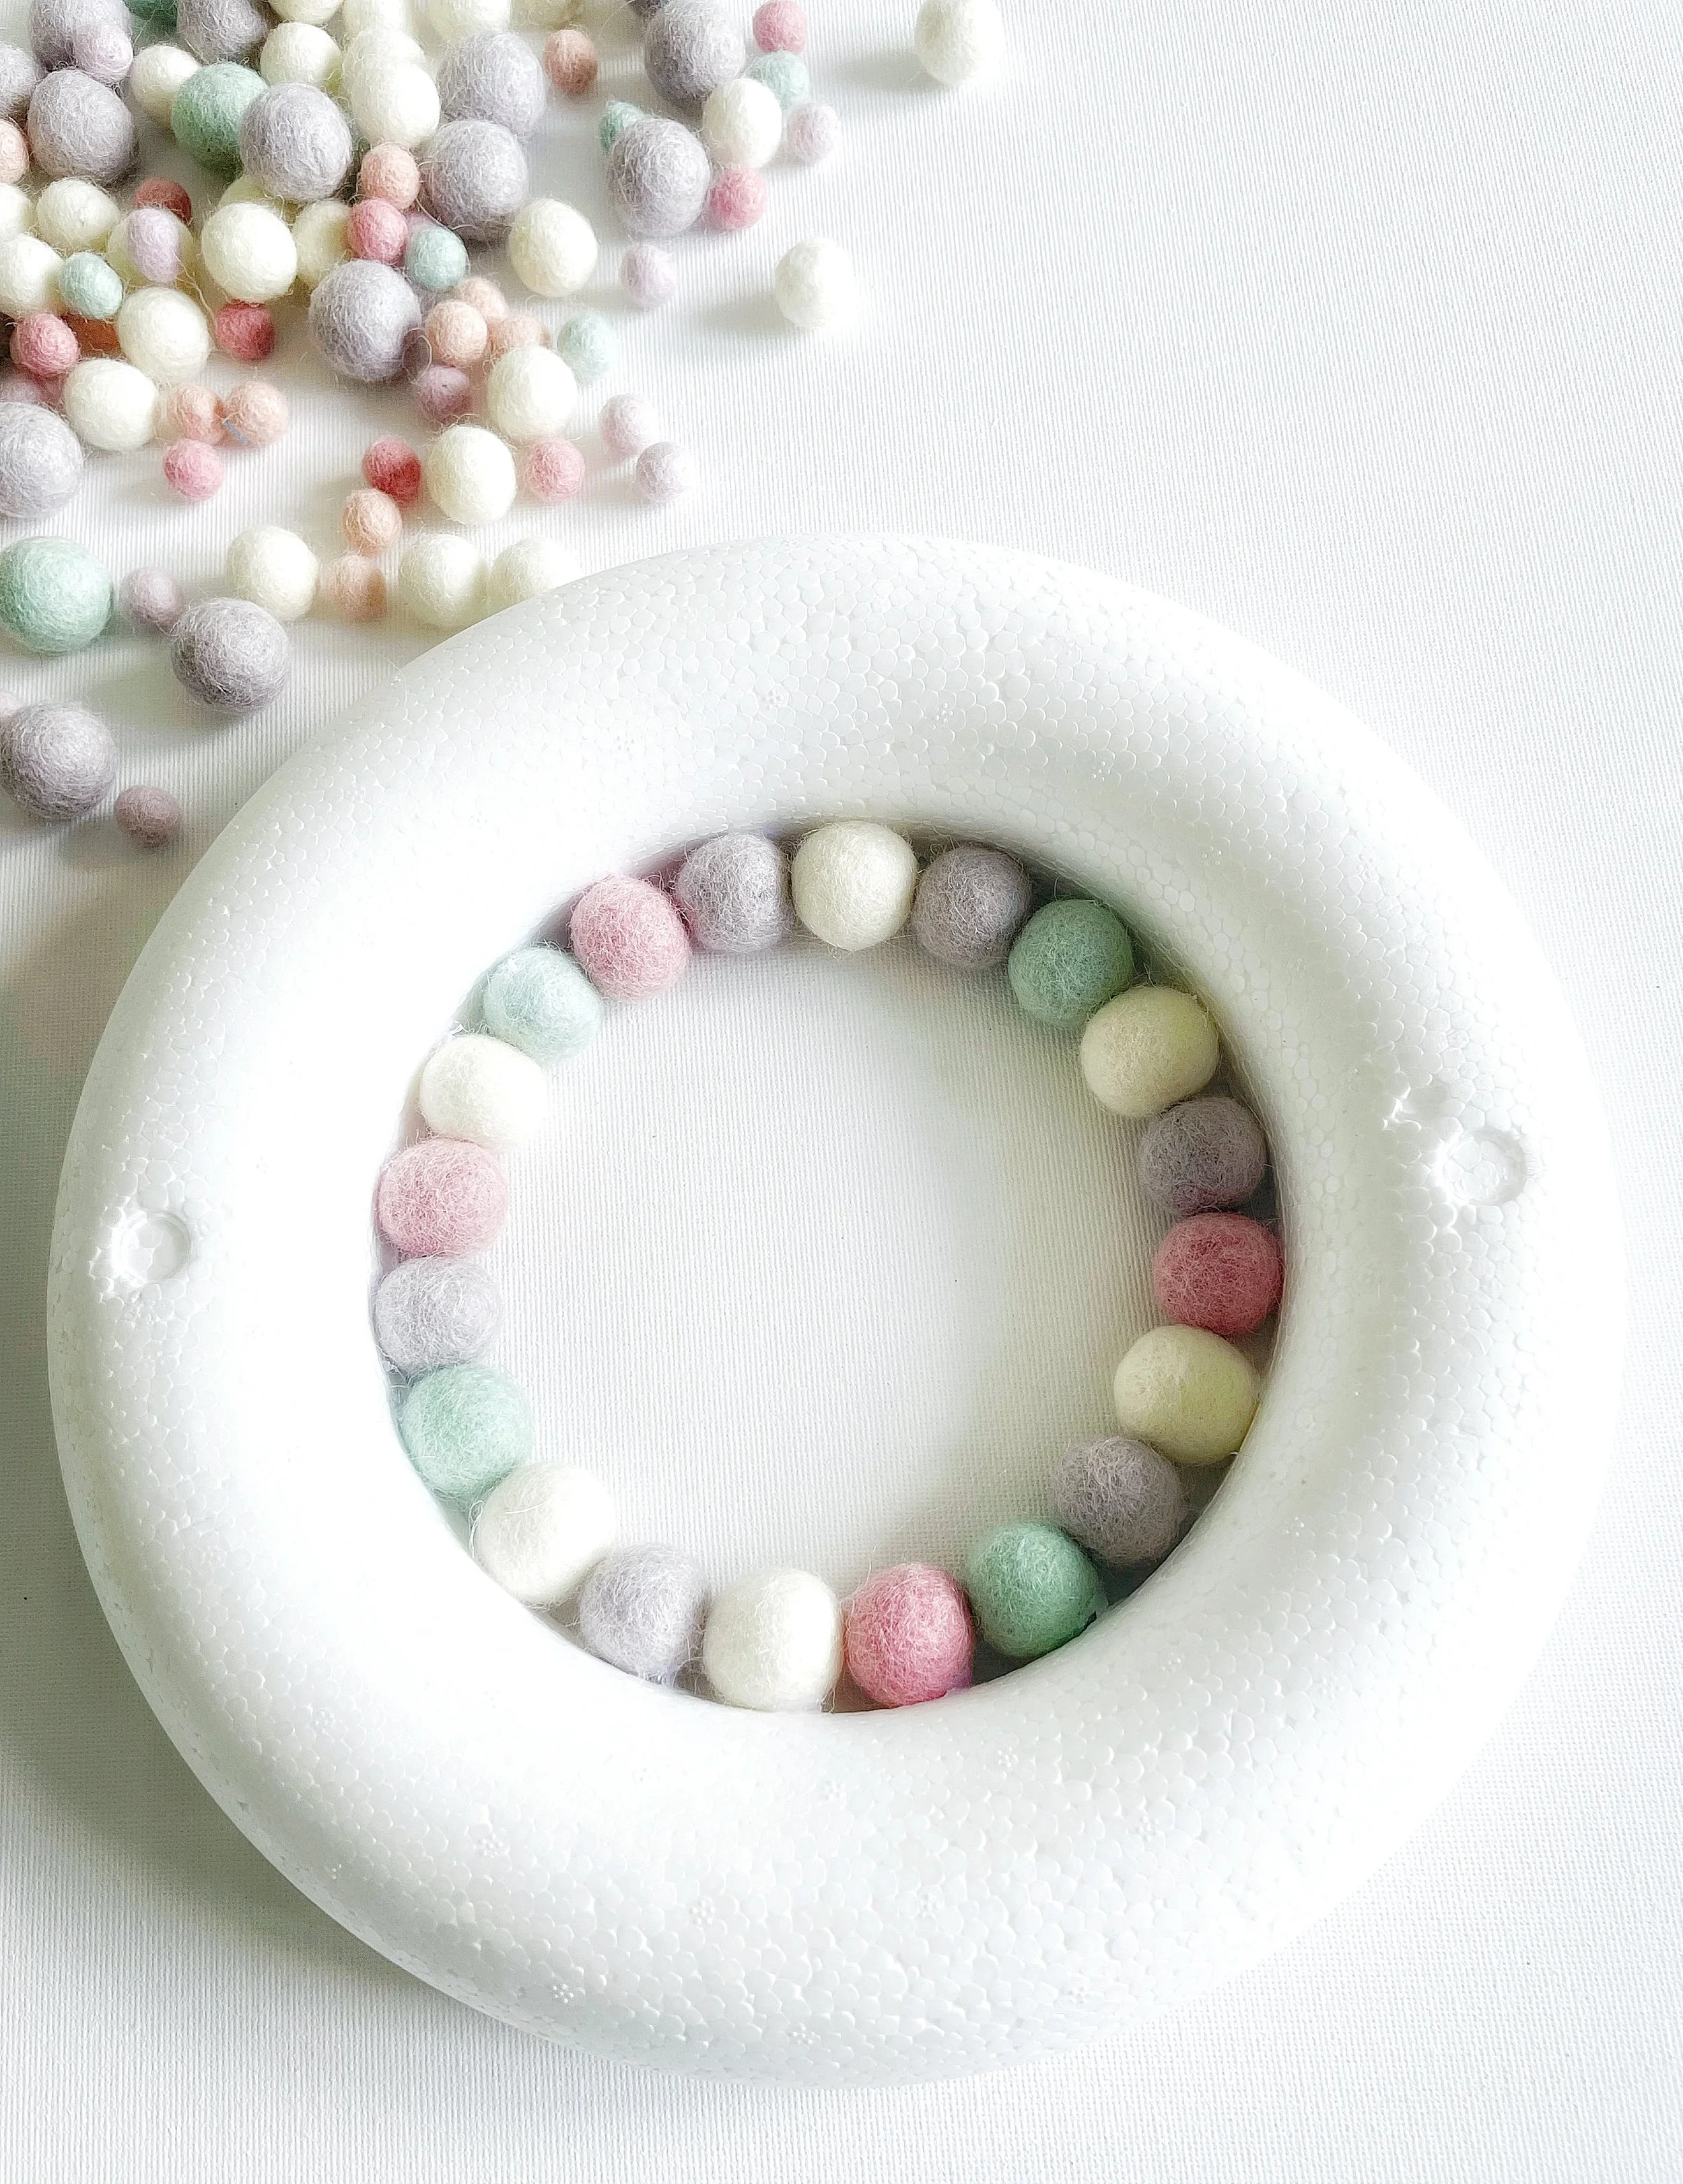
It’s super important to start with your polystyrene ring lying flat on your work surface. Do not to pick it up while you’re gluing. The felt balls need to be attached while the ring is flat.
This helps make sure your finished wreath will sit nice and flush against a wall, door, or wherever you decide to hang it.
Start by gluing the first layer of felt balls around the inner edge of the ring.
Build up the layers…
Now it’s time to move on to the next layer. Just keep gluing those felt balls, building up the wreath one layer at a time.
Work your way around in circles… it really couldn’t be simpler!
Keep going until your whole wreath is covered and looking full and plush. And remember, keep it flat on your surface as you go!
It might be tempting to pick it up, but leaving it flat will keep everything nice and even.
Make sure the back is flat…
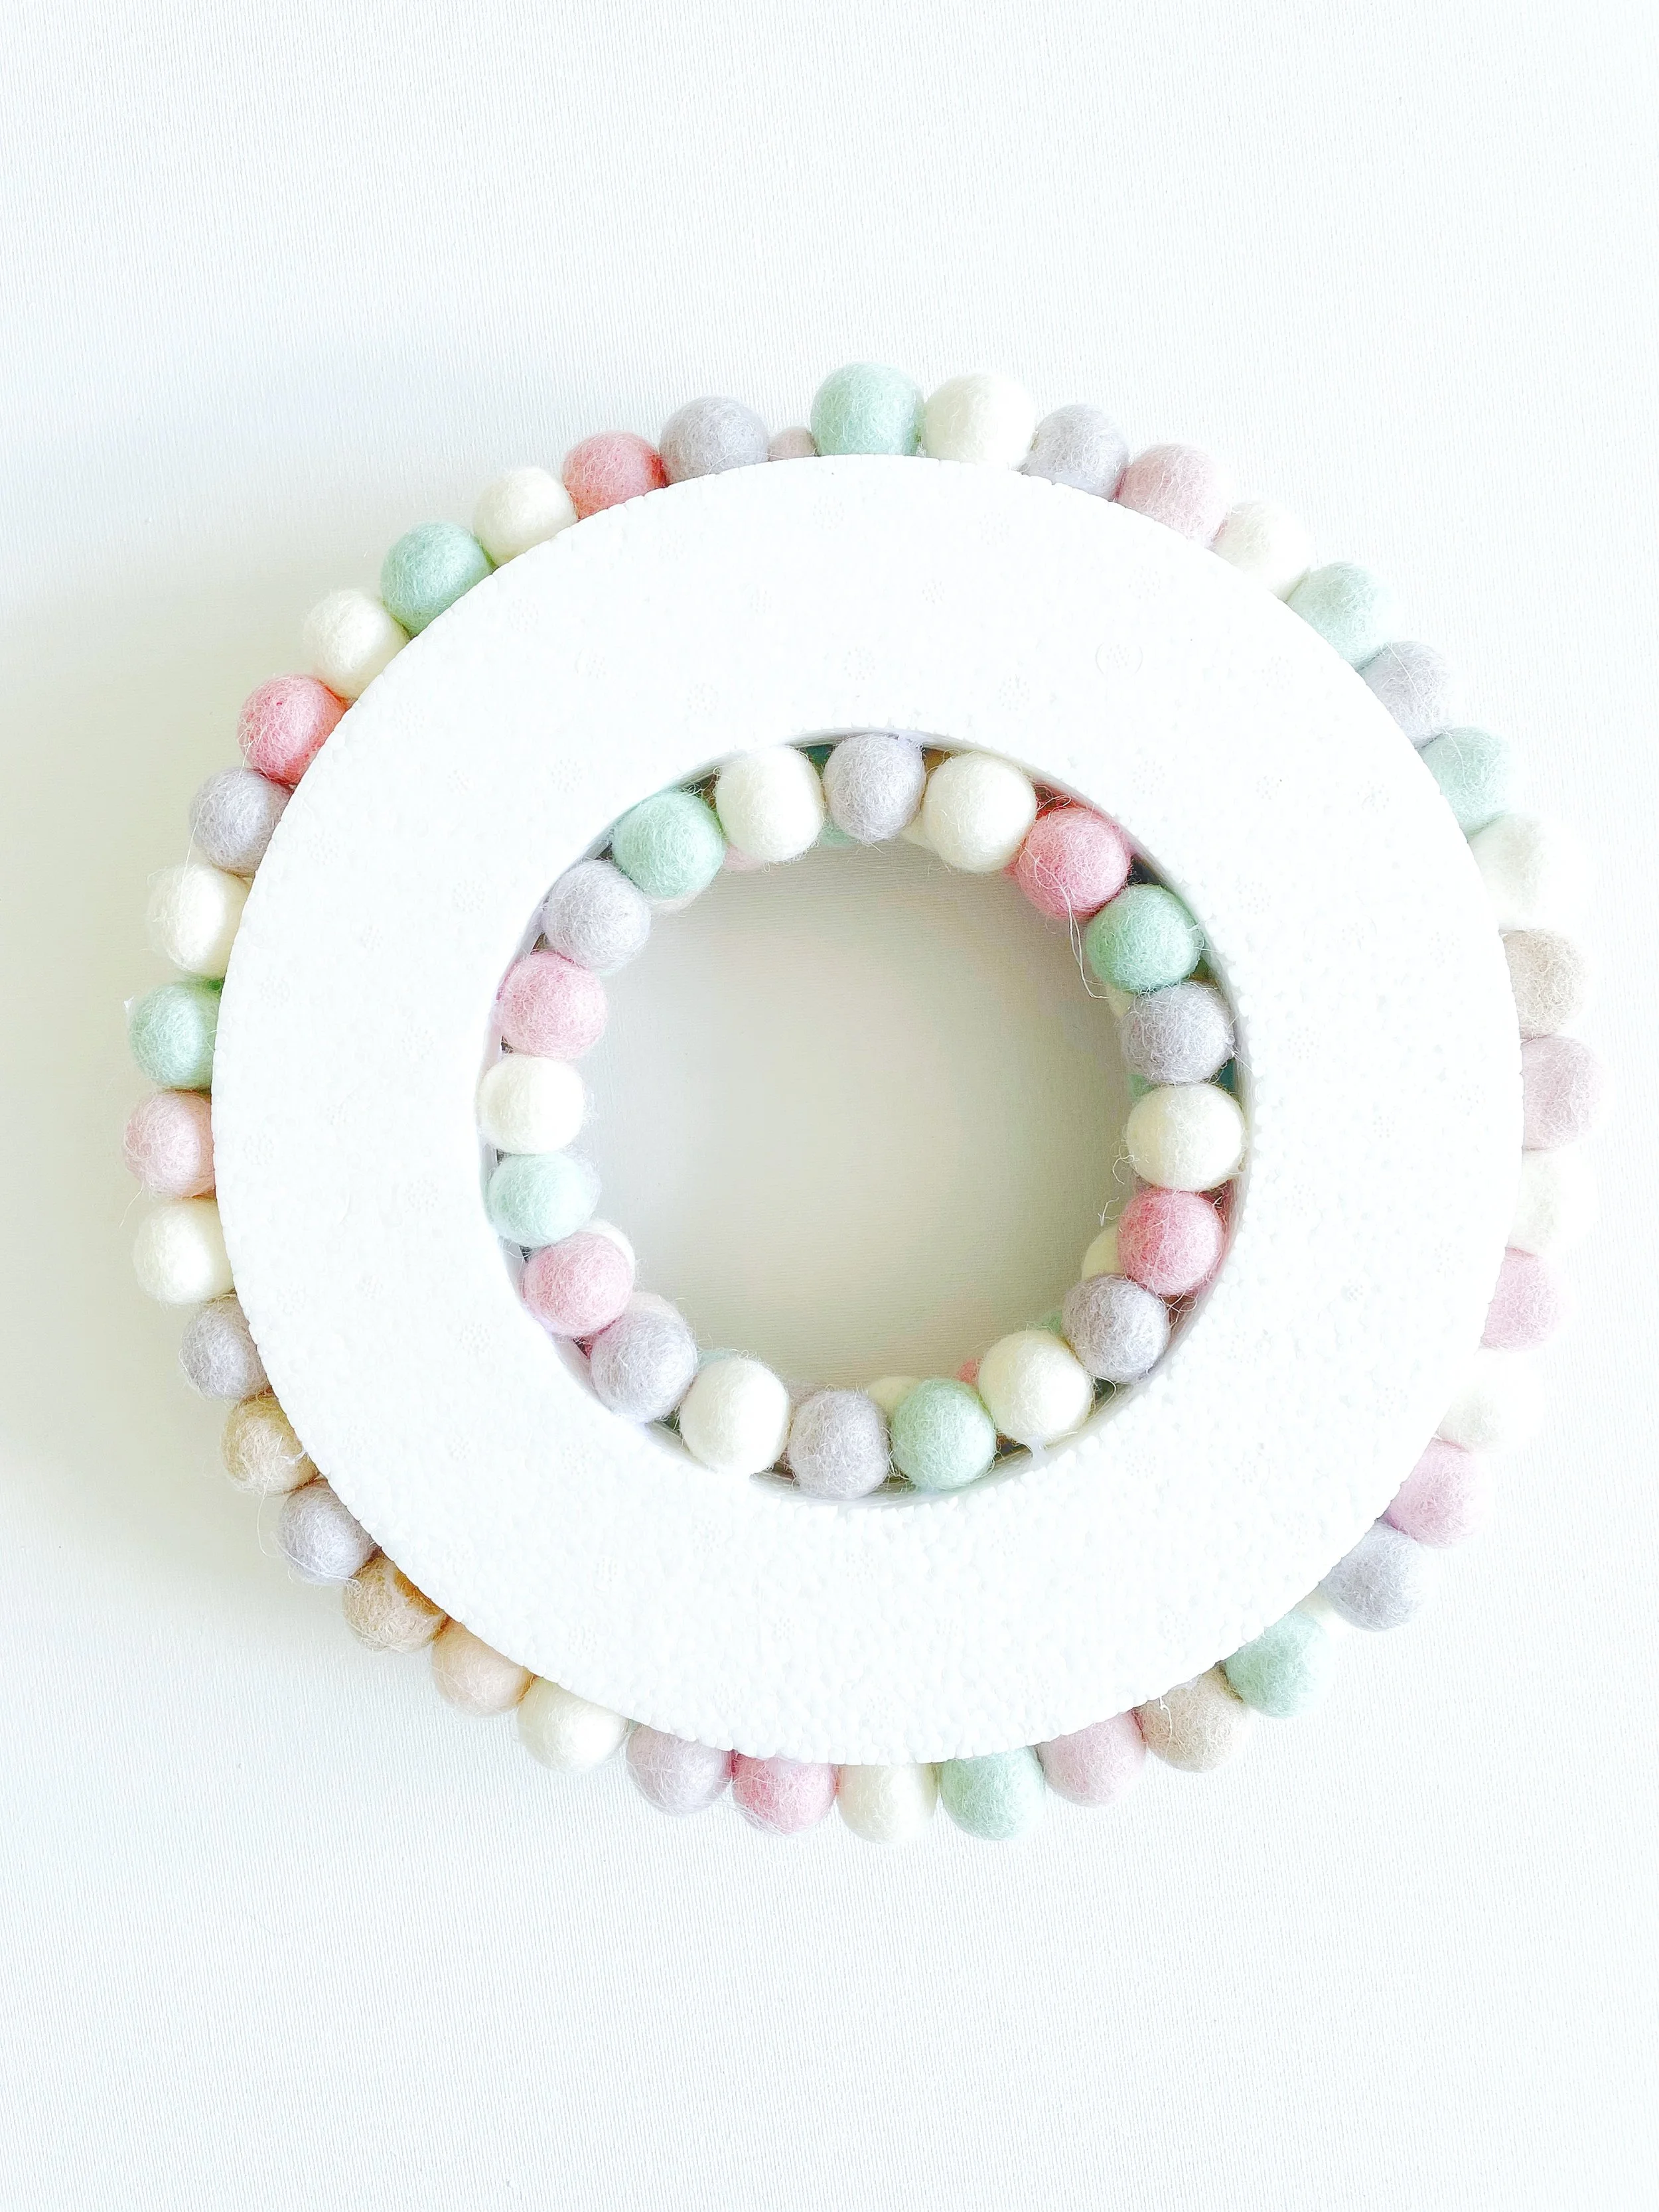
Once you’ve finished gluing, gently pick up your wreath and take a look at the back. You want to make sure it’s nice and flat, that way it’ll hang beautifully.
It should look something like the image above.
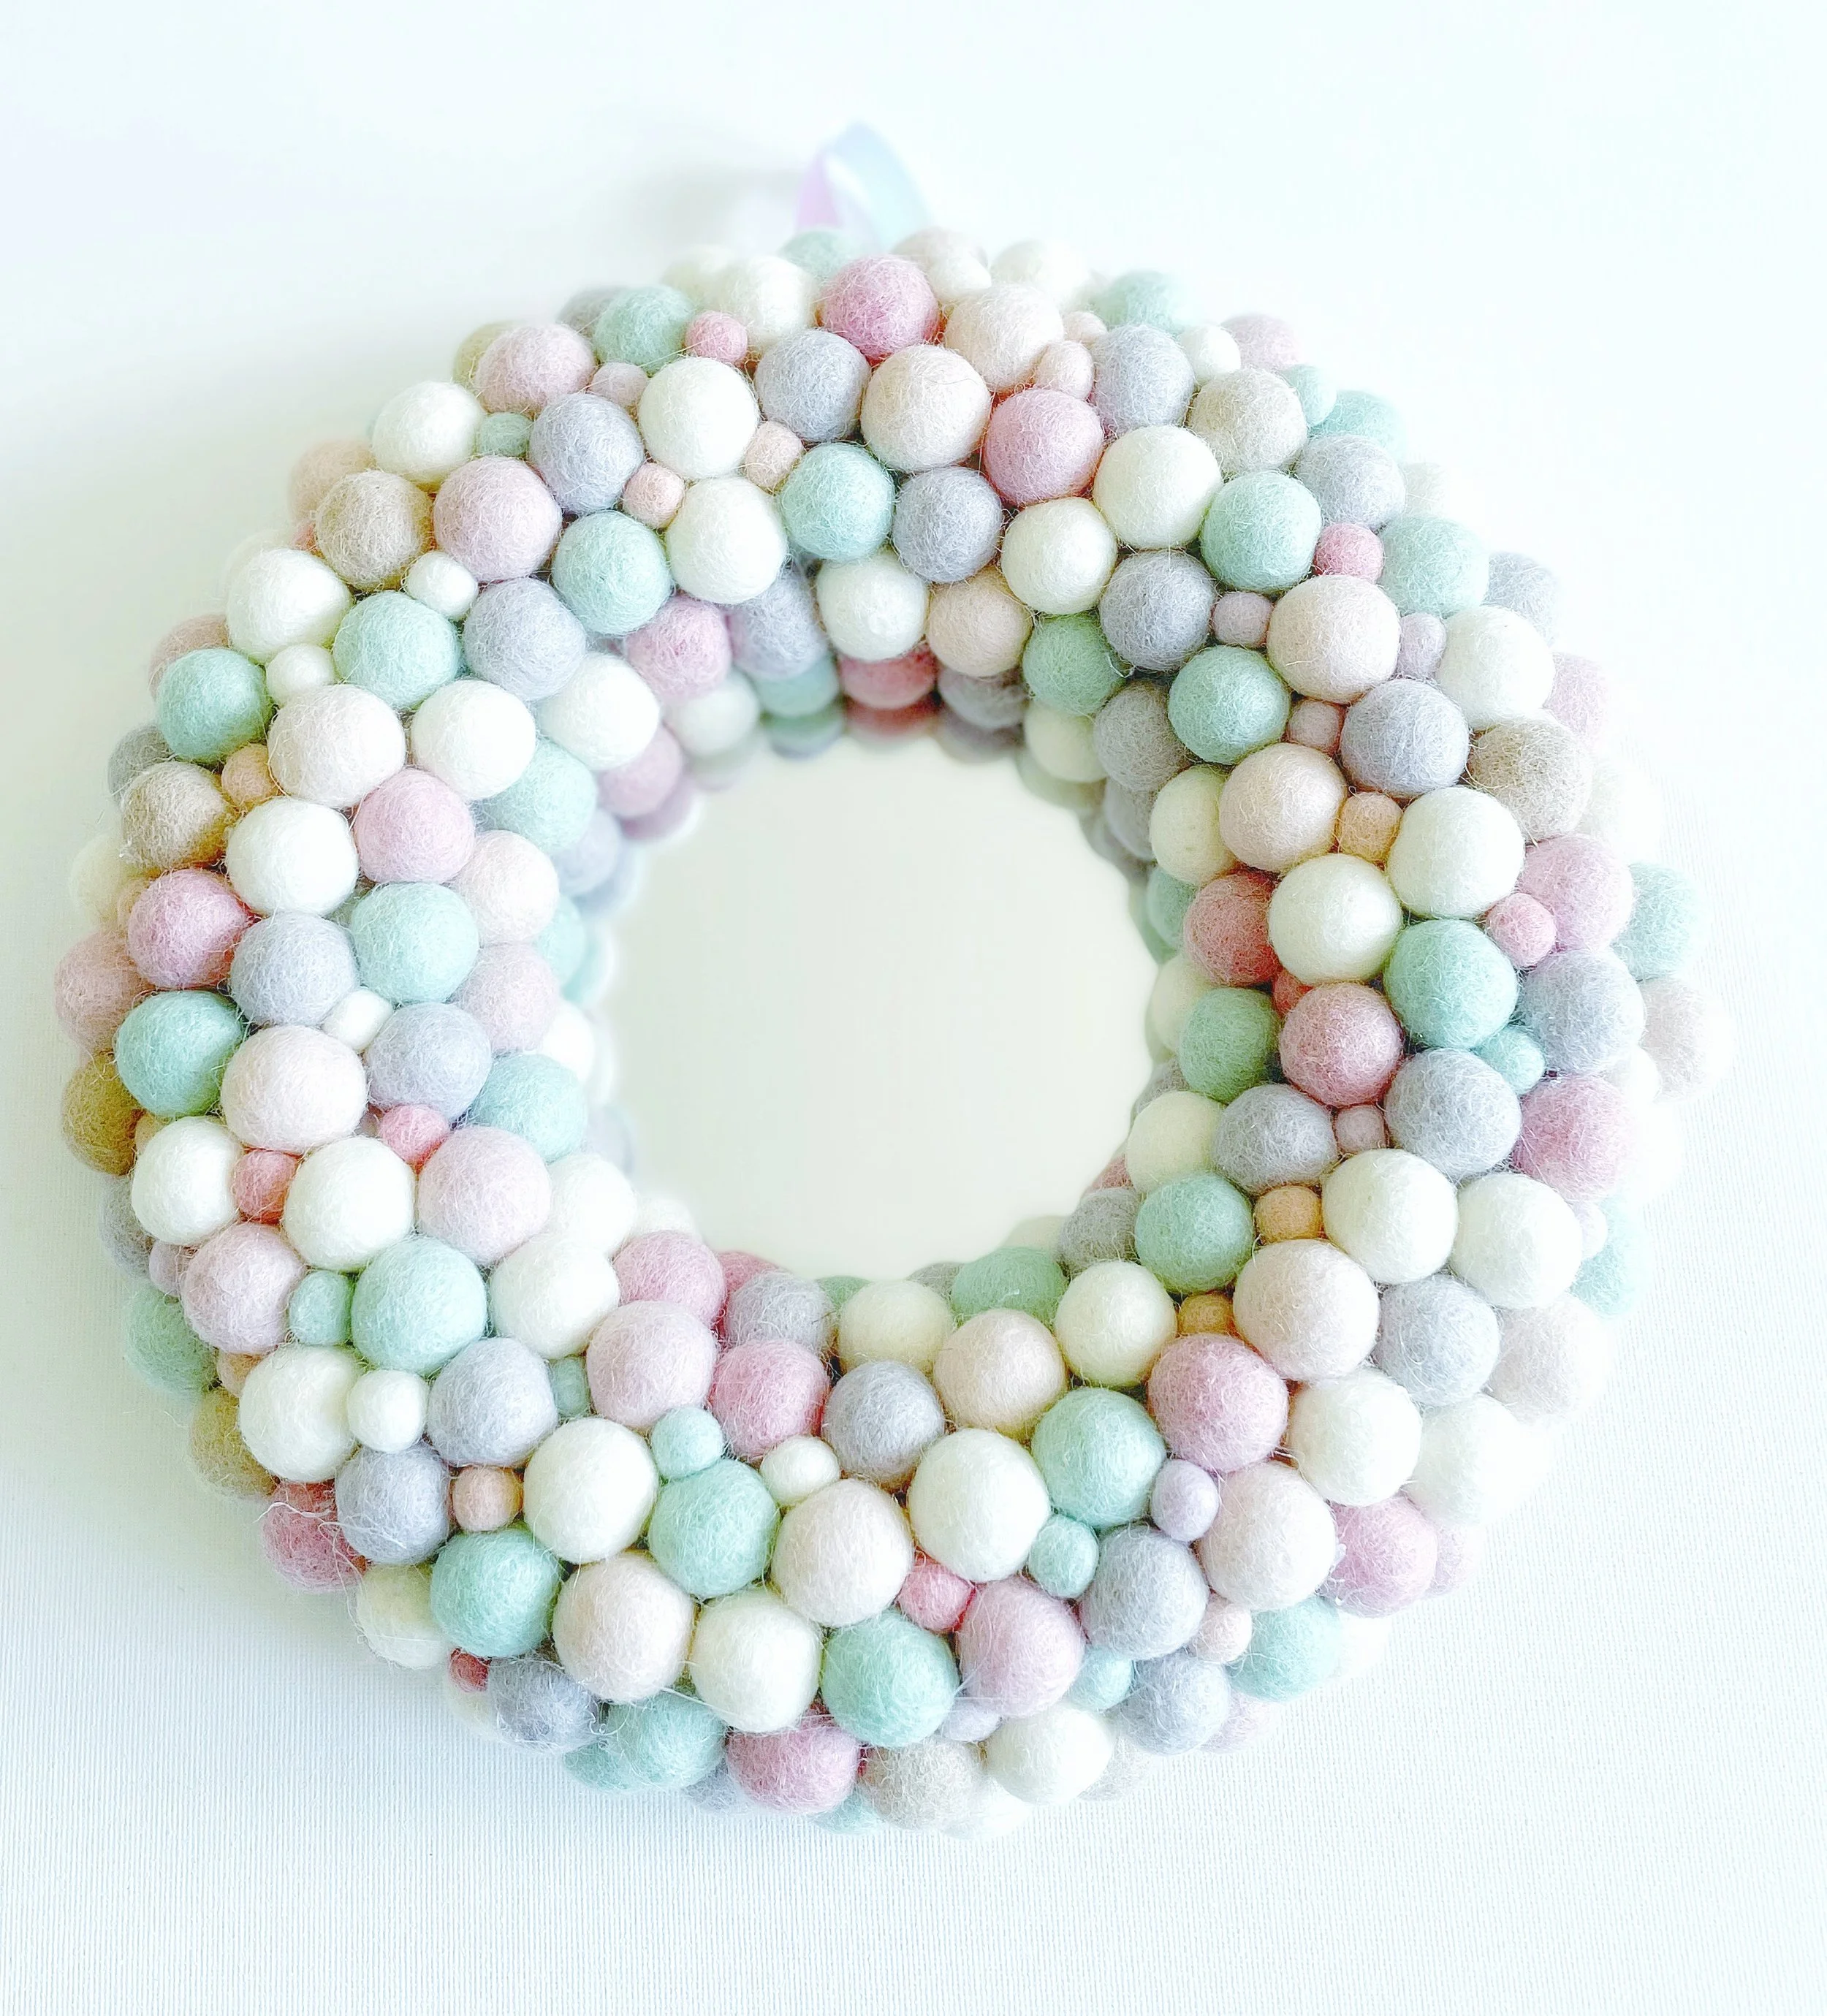
Create texture…

If you’re using 1cm felt balls, now’s the perfect time to pop them into any little gaps. They’re great for adding extra texture and giving your wreath that lovely, plush look.
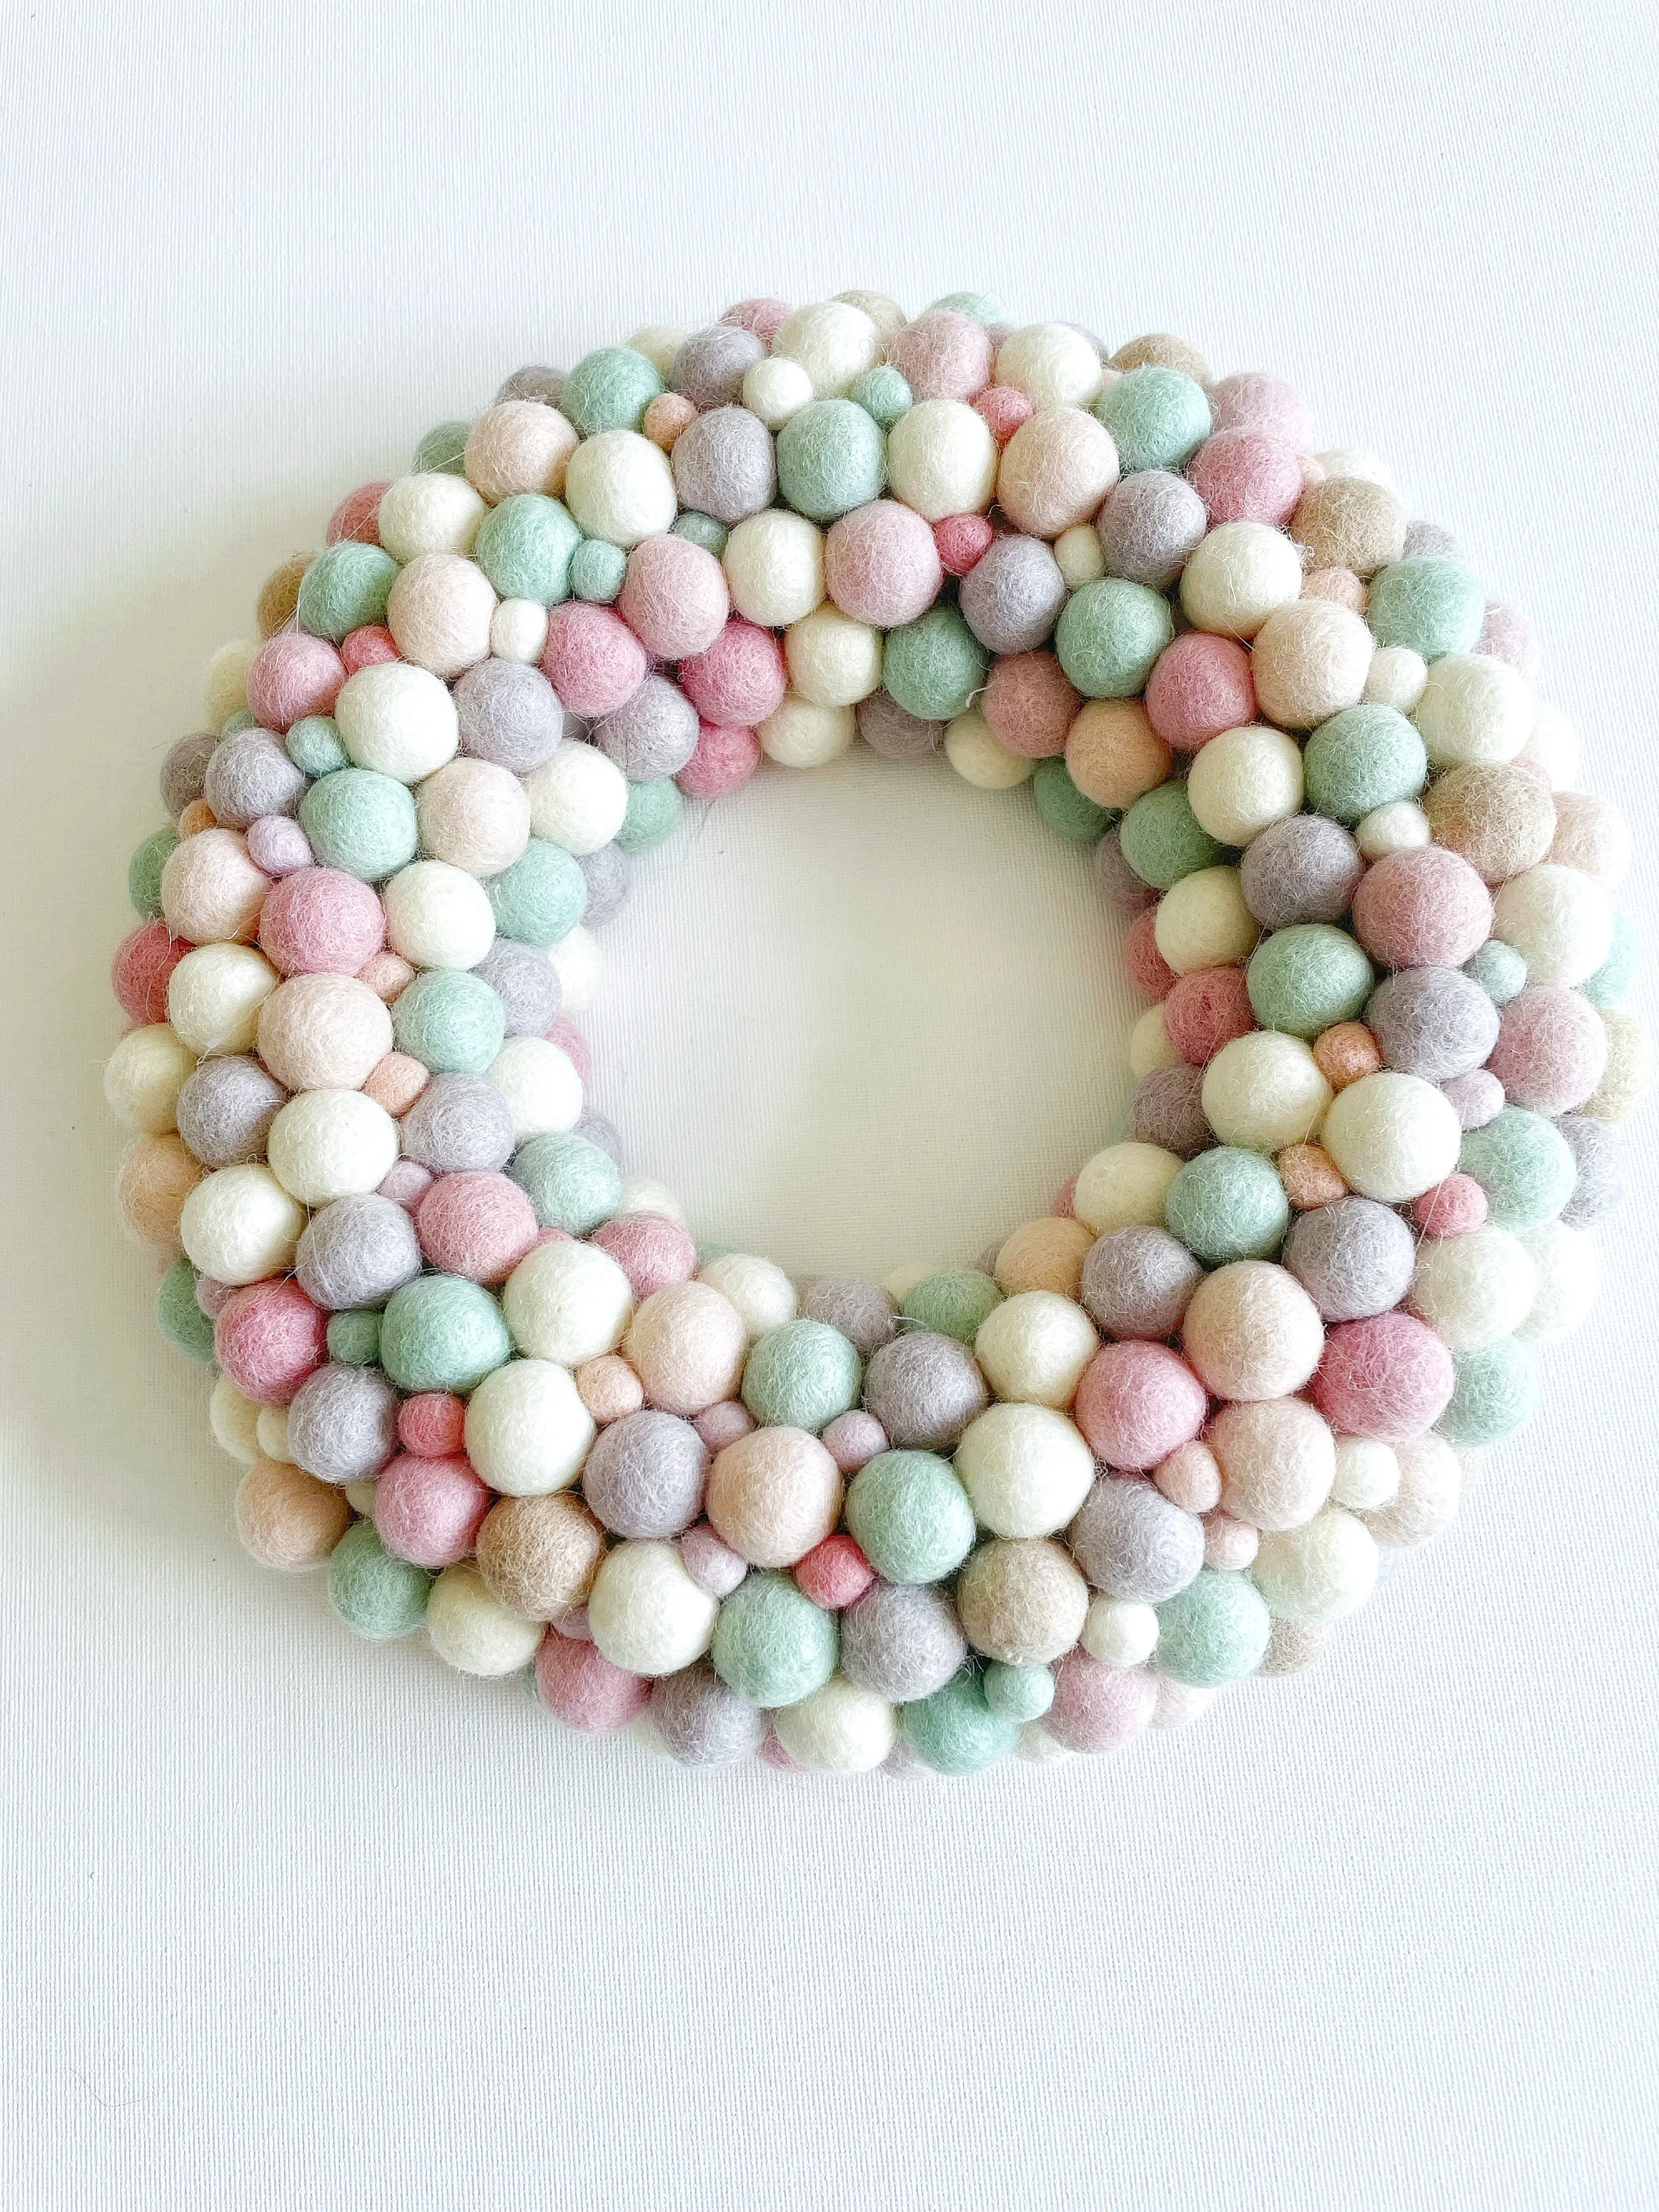
Once you’ve added all the 1cm felt balls, your pom pom wreath should be looking lovely and full, just like the one in the photo above.
If you're going for a classic felt ball wreath, the next step is to add a hook. I like to use ribbon for this, so follow along with the steps below, just skip the mirror part.
But if you’d like to make a felt ball mirror, let’s move on to the next bit!
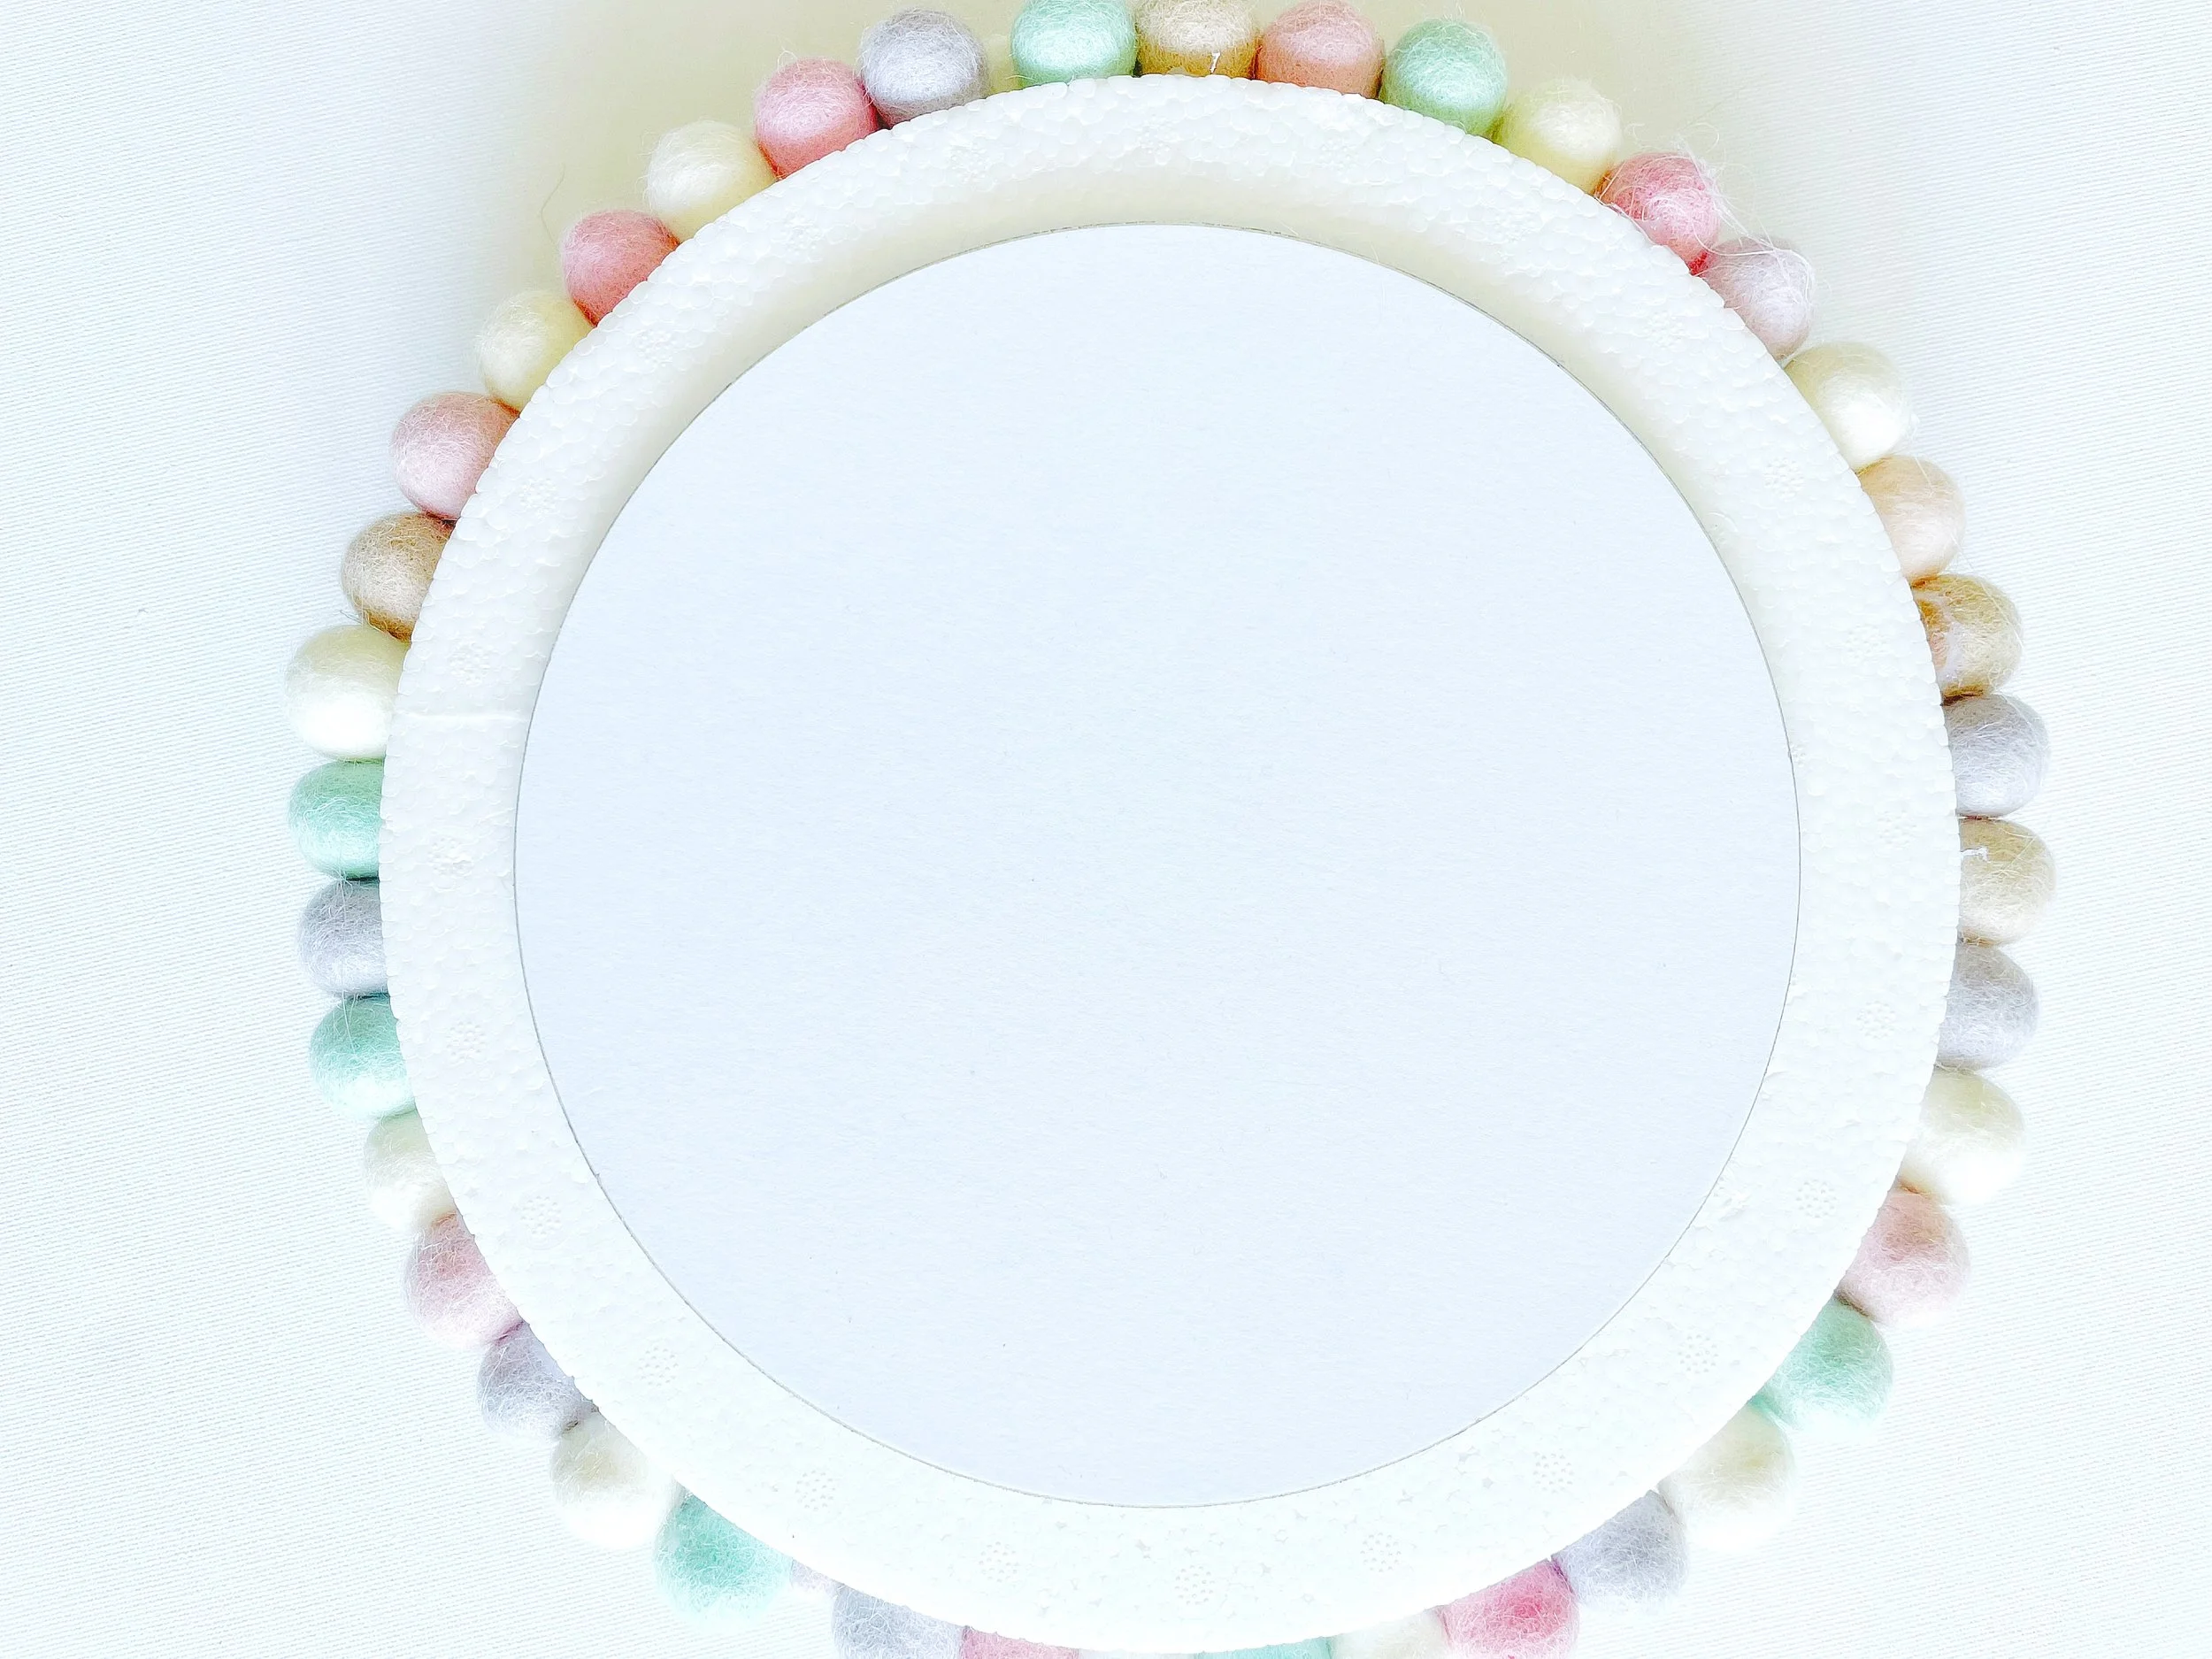
Add the mirror…
Start by taking off any protective film or wrapping from your mirror. Then, place the mirror on the back of your wreath to check the positioning and make sure you're happy with where it will sit.
When you're ready, take your glue gun and carefully apply glue around the edge of the glass side of the mirror. It’s best to glue the mirror itself, not the ring, as the heat from the glue could melt the polystyrene.
Plus, it gives you better accuracy this way.
Now, press the mirror firmly onto the back of your wreath and let it set.
Make a Hook …
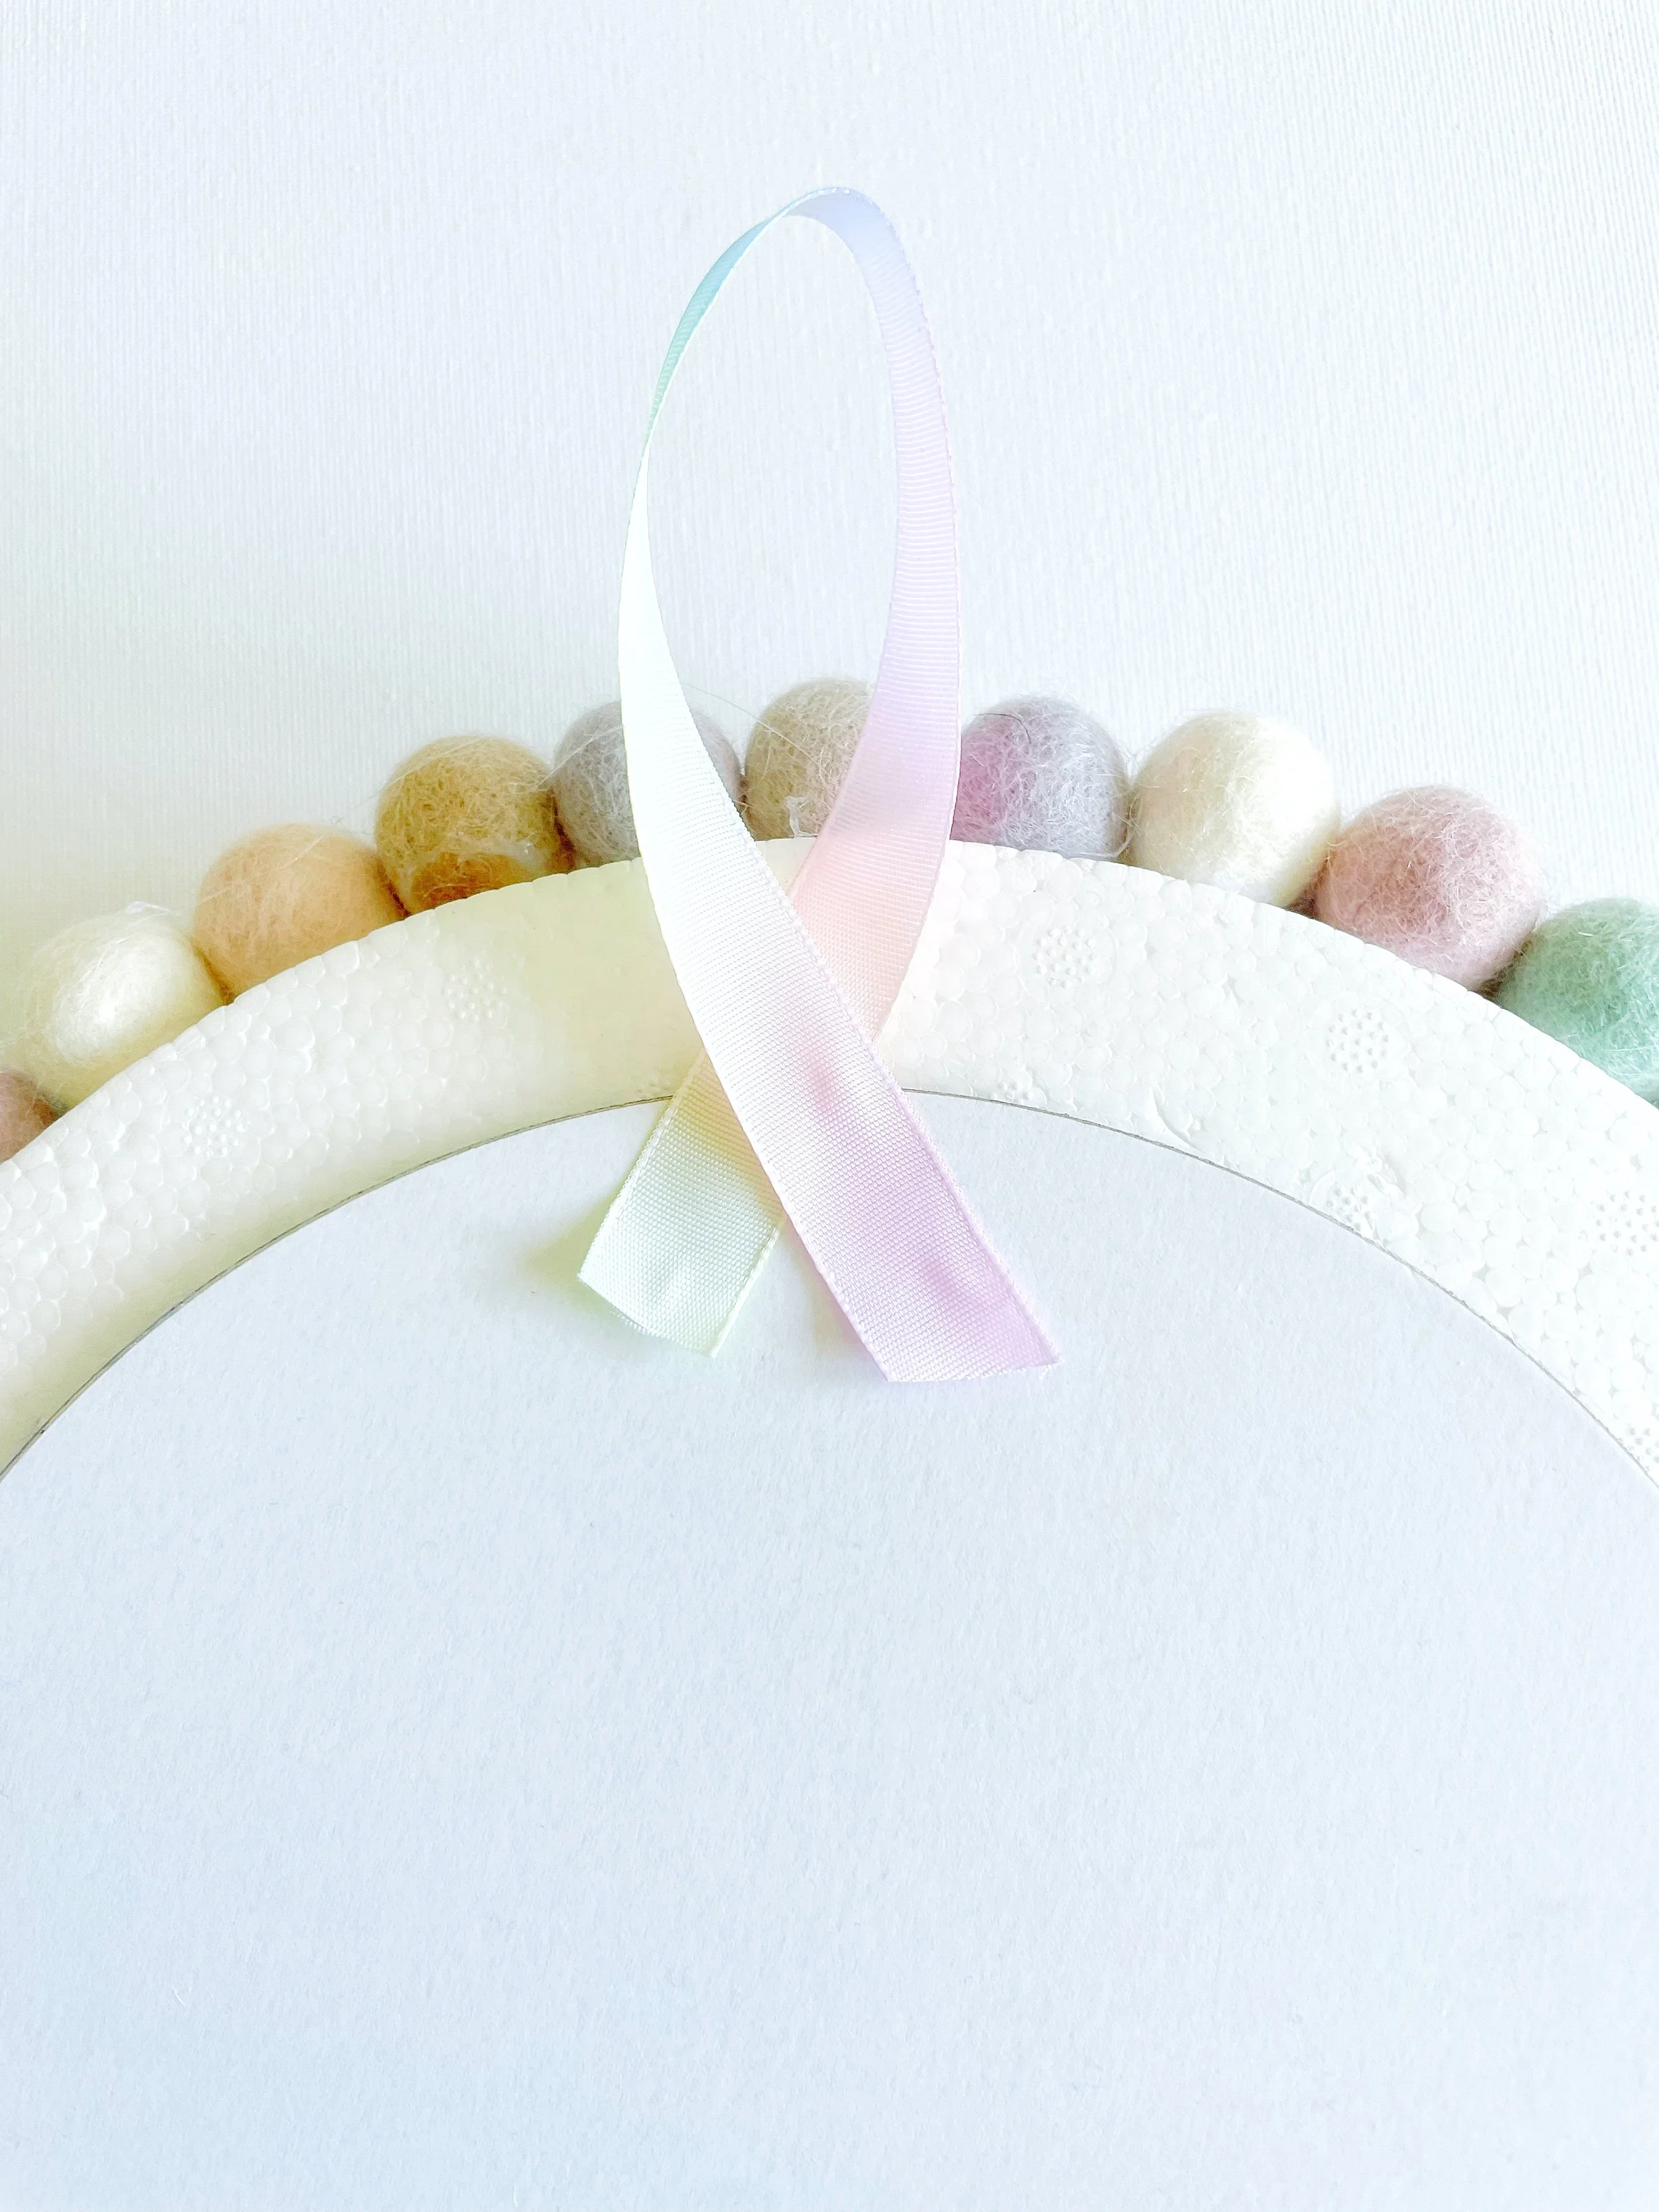
Next, grab a piece of ribbon, about 6 inches is usually just right, and form it into a loop like you see in the picture above.
You’ll want the top of the loop to sit around an inch above the wreath.
Once you’re happy with the length and placement, use a pencil to lightly mark where each end of the ribbon will go. Then, pop a couple of small dots of glue on those marks using your glue gun.
Press the ribbon ends down onto the glue to create your hanging loop, and give it a moment to set.
All Done!
And there you have it, a beautiful handmade felt ball wreath mirror, ready to hang or even sell!
See, I told you it was easy!
I really hope you enjoyed making this DIY felt ball wreath. If you have any questions or tips to share, feel free to drop them in the comments below, I’d absolutely love to hear from you!
With love, Karen x