
DIY No Sew Cloud Nursery Mobile

Want a simple, stress-free DIY nursery mobile with absolutely no sewing involved? Then this no-sew DIY nursery mobile is the perfect project for you..
You’re going to fall in love with how this minimalist baby mobile looks once it’s hanging in the nursery. As the little clouds softly sway, they create the most dreamy, calming atmosphere, so peaceful and soothing.
No matter your nursery style, modern, classic, or anything in between; this mobile’s timeless, gender-neutral design fits in beautifully with any décor.
And if you’re making this cloud baby mobile as a gift (how thoughtful is that?), you can feel confident knowing it will suit any nursery, regardless of theme or gender.
Hand it over to a parent-to-be and get ready for a very big smile, they’re going to be absolutely blown away.
Best of all, this mobile is wonderfully easy to make. All you need are a few simple supplies, or, even better, you can grab the No-Sew DIY Cloud Mobile Kit from the Flurraby store. It includes everything you need in one handy kit. Easy, right?
I’ll walk you through each step carefully, so you can create a beautiful nursery mobile you’ll be proud to hang (or gift!).
And remember, there’s no need to rush. Creating something by hand is so good for the soul. Take your time, relax, and enjoy the process.
I always recommend reading through the tutorial once or twice before you begin. It helps everything feel far less intimidating, especially if you’re new to crafting.
Once you’ve made your first nursery mobile, you’ll see just how easy (and a little addictive!) it is. Don’t be surprised if you find yourself making baby mobiles as gifts for every parent-to-be you know!
Safety
I’ve made sure to use only the best materials to create a safe nursery mobile, we’ll be working with wool products, wood, and cotton string only.
Since your DIY crib mobile will be hanging in a baby’s nursery, it’s really important to make sure all the pieces are securely attached and firmly in place.
Always hang the cloud nursery mobile well out of baby’s reach, and be sure not to place it directly above the crib or where your little one can grab it.
As soon as your little one can stand or pull themselves up, it’s time to take the mobile down. You can tuck it away as a keepsake, save it for your next little bundle, or even repurpose it into a gorgeous cloud garland! You can check out the felt ball garland tutorial here.
Alright, let’s dive in and get started!
What you need to make your own nursery mobile..
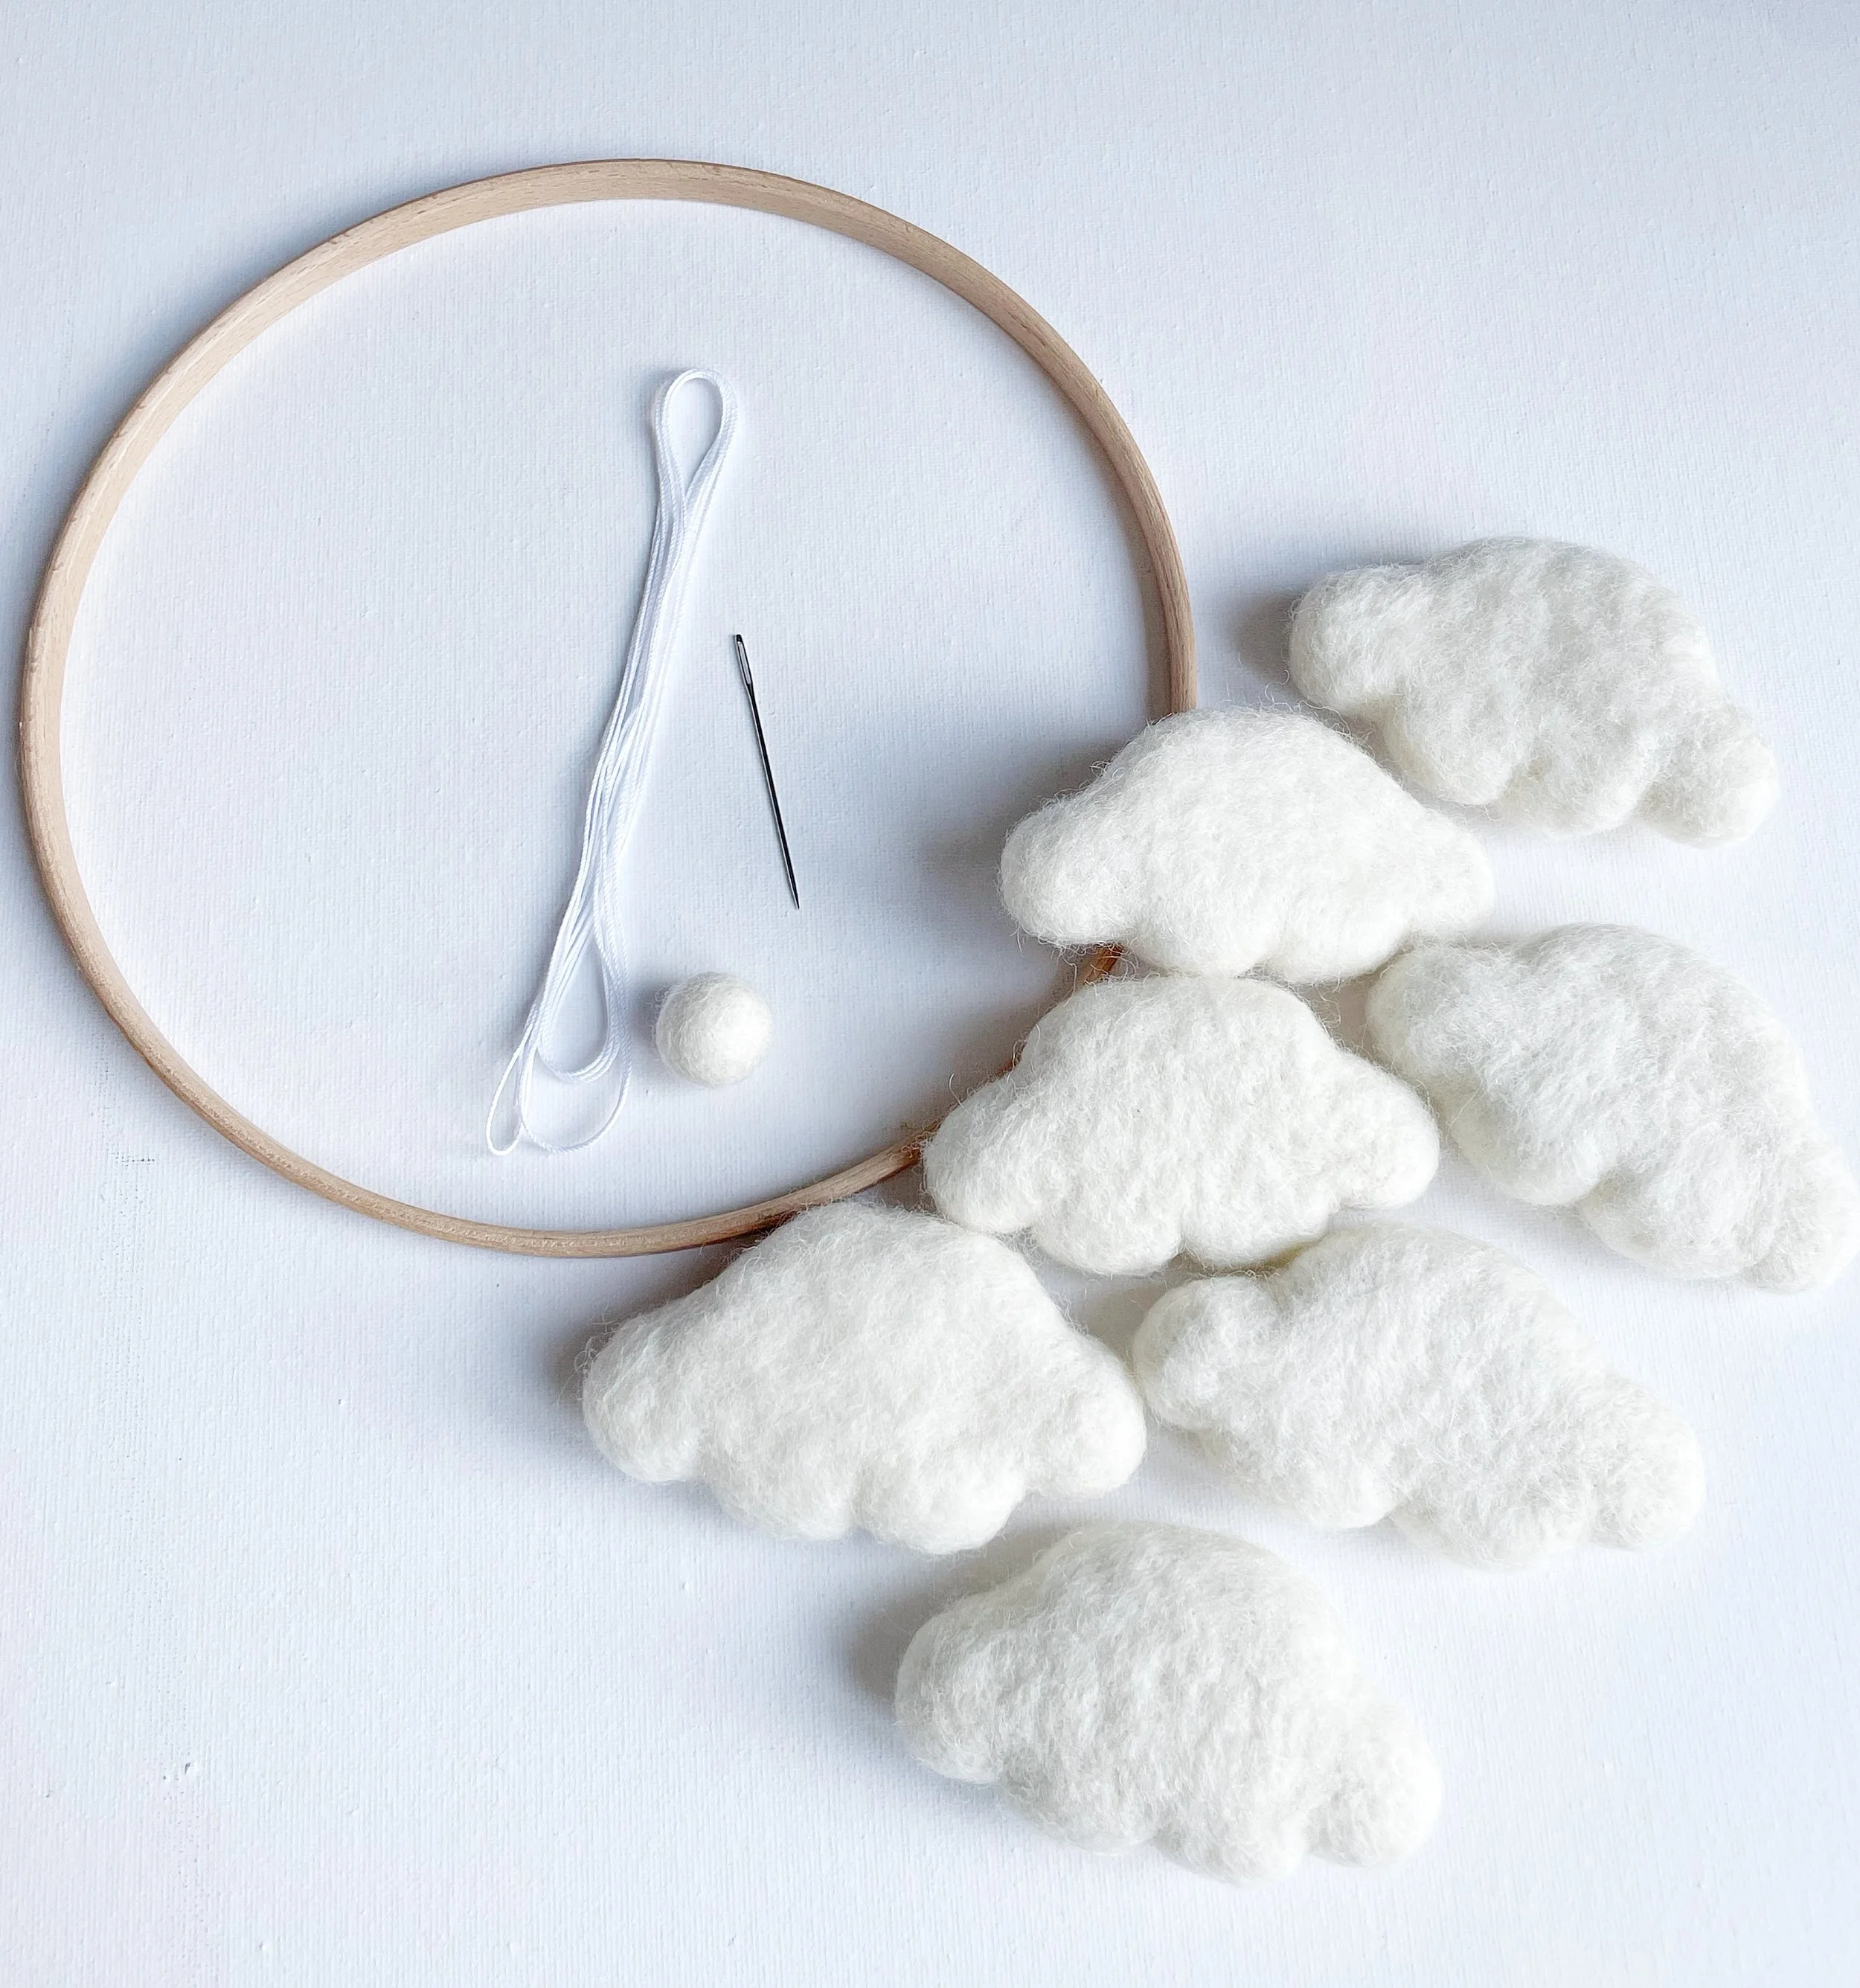
You don’t need a lot to make your own nursery mobile:
If you want make it super simple head over to the Flurraby store and grab this DIY Cloud Mobile kit. It contains everything you need to make the cloud mobile.
Otherwise you will need:
Wooden ring - size 22cm/9"
Thread/string for hanging - I l like to use Crochet thread size 10
Ivory Felt Balls - optional. You can make the baby mobile without felt balls if you prefer.
For this mobile I have used 1 x2cm and 8x1cm felt balls.
Large sewing needle for threading the felt balls and cloud shapes onto string.
7 wool felt cloud shapes
Pencil & Eraser
Scissors
Cutting mat or tape measure - If you’re starting to get into crafting, I definitely recommend investing in a cutting mat, they’re incredibly handy and you’ll find yourself reaching for it again and again. That said, if this is a one-off project, a simple tape measure works just fine.
A little tip from me: I like to use a small piece of sellotape to secure the tape measure along the straight edge of a table. It stops it sliding around and makes measuring so much easier (and far less fiddly!).
Measure and mark the wooden ring
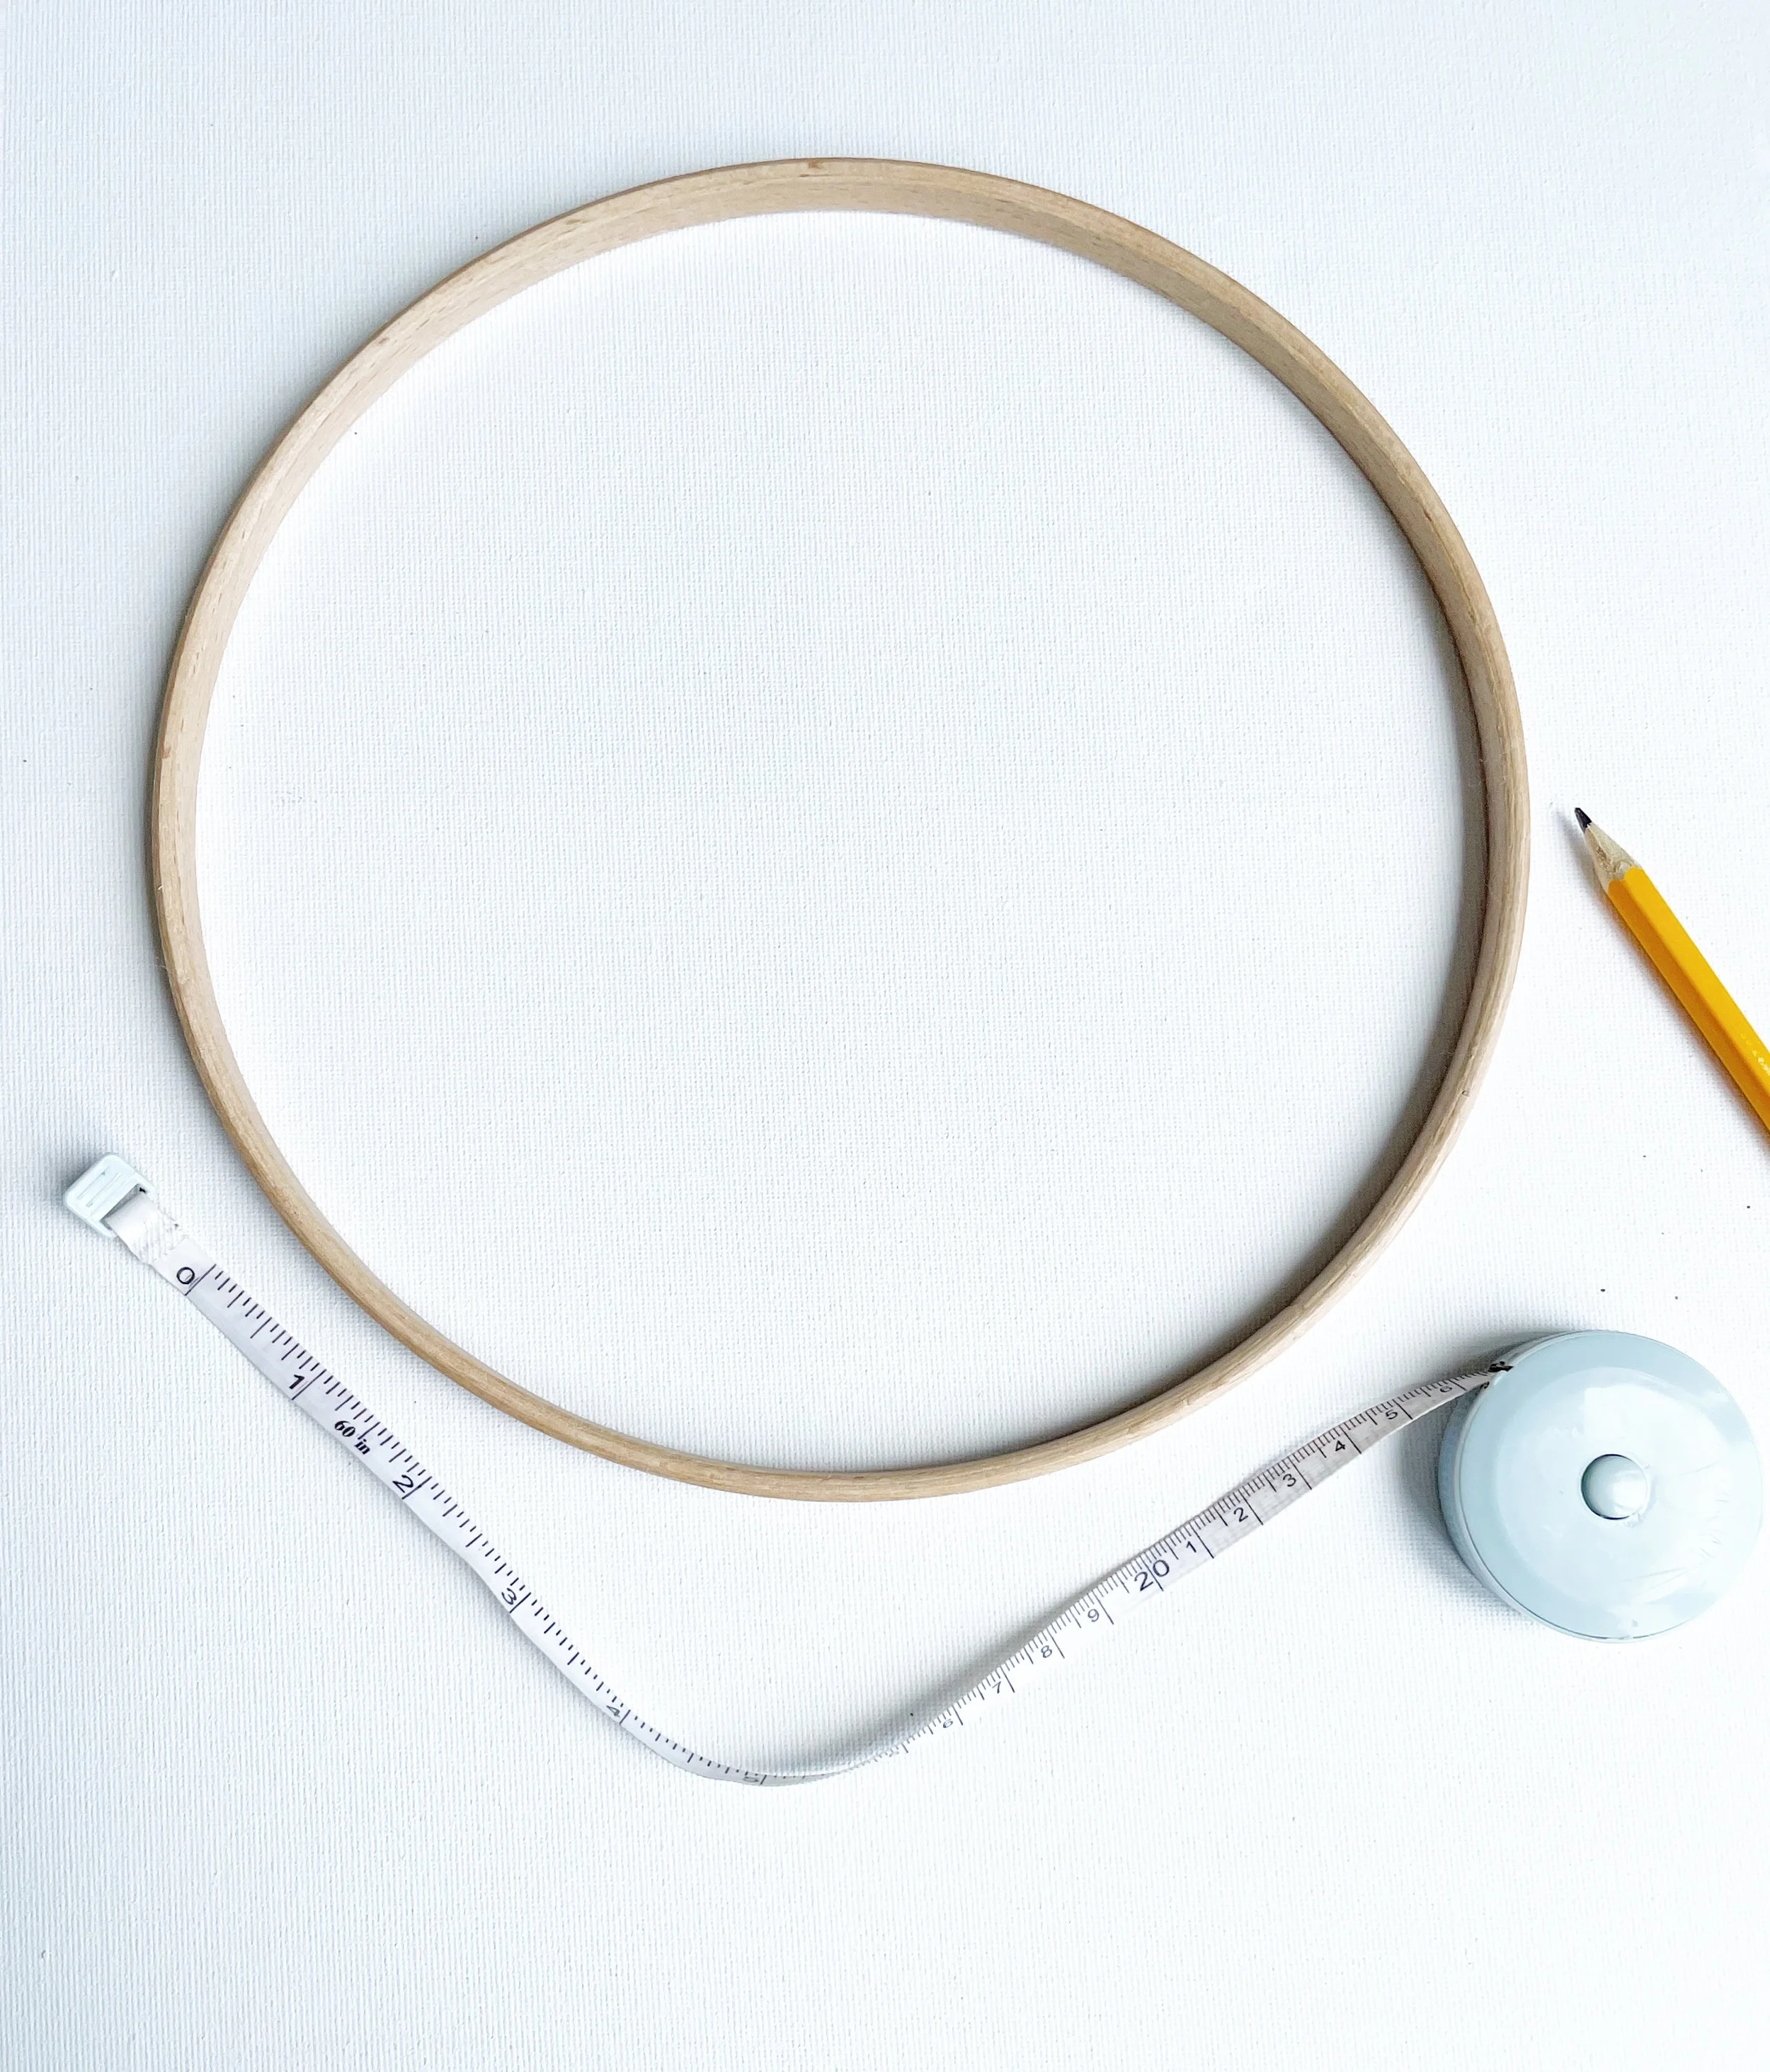
Start by using your pencil to mark six evenly spaced points around your wooden ring. These marks will show you exactly where to attach your strings.
If you’re using a 22cm (9 inch) beech hoop, you’ll want to make a mark every 12cm around the ring.
Add the string…
Cut seven pieces of string, each 40 inches long.
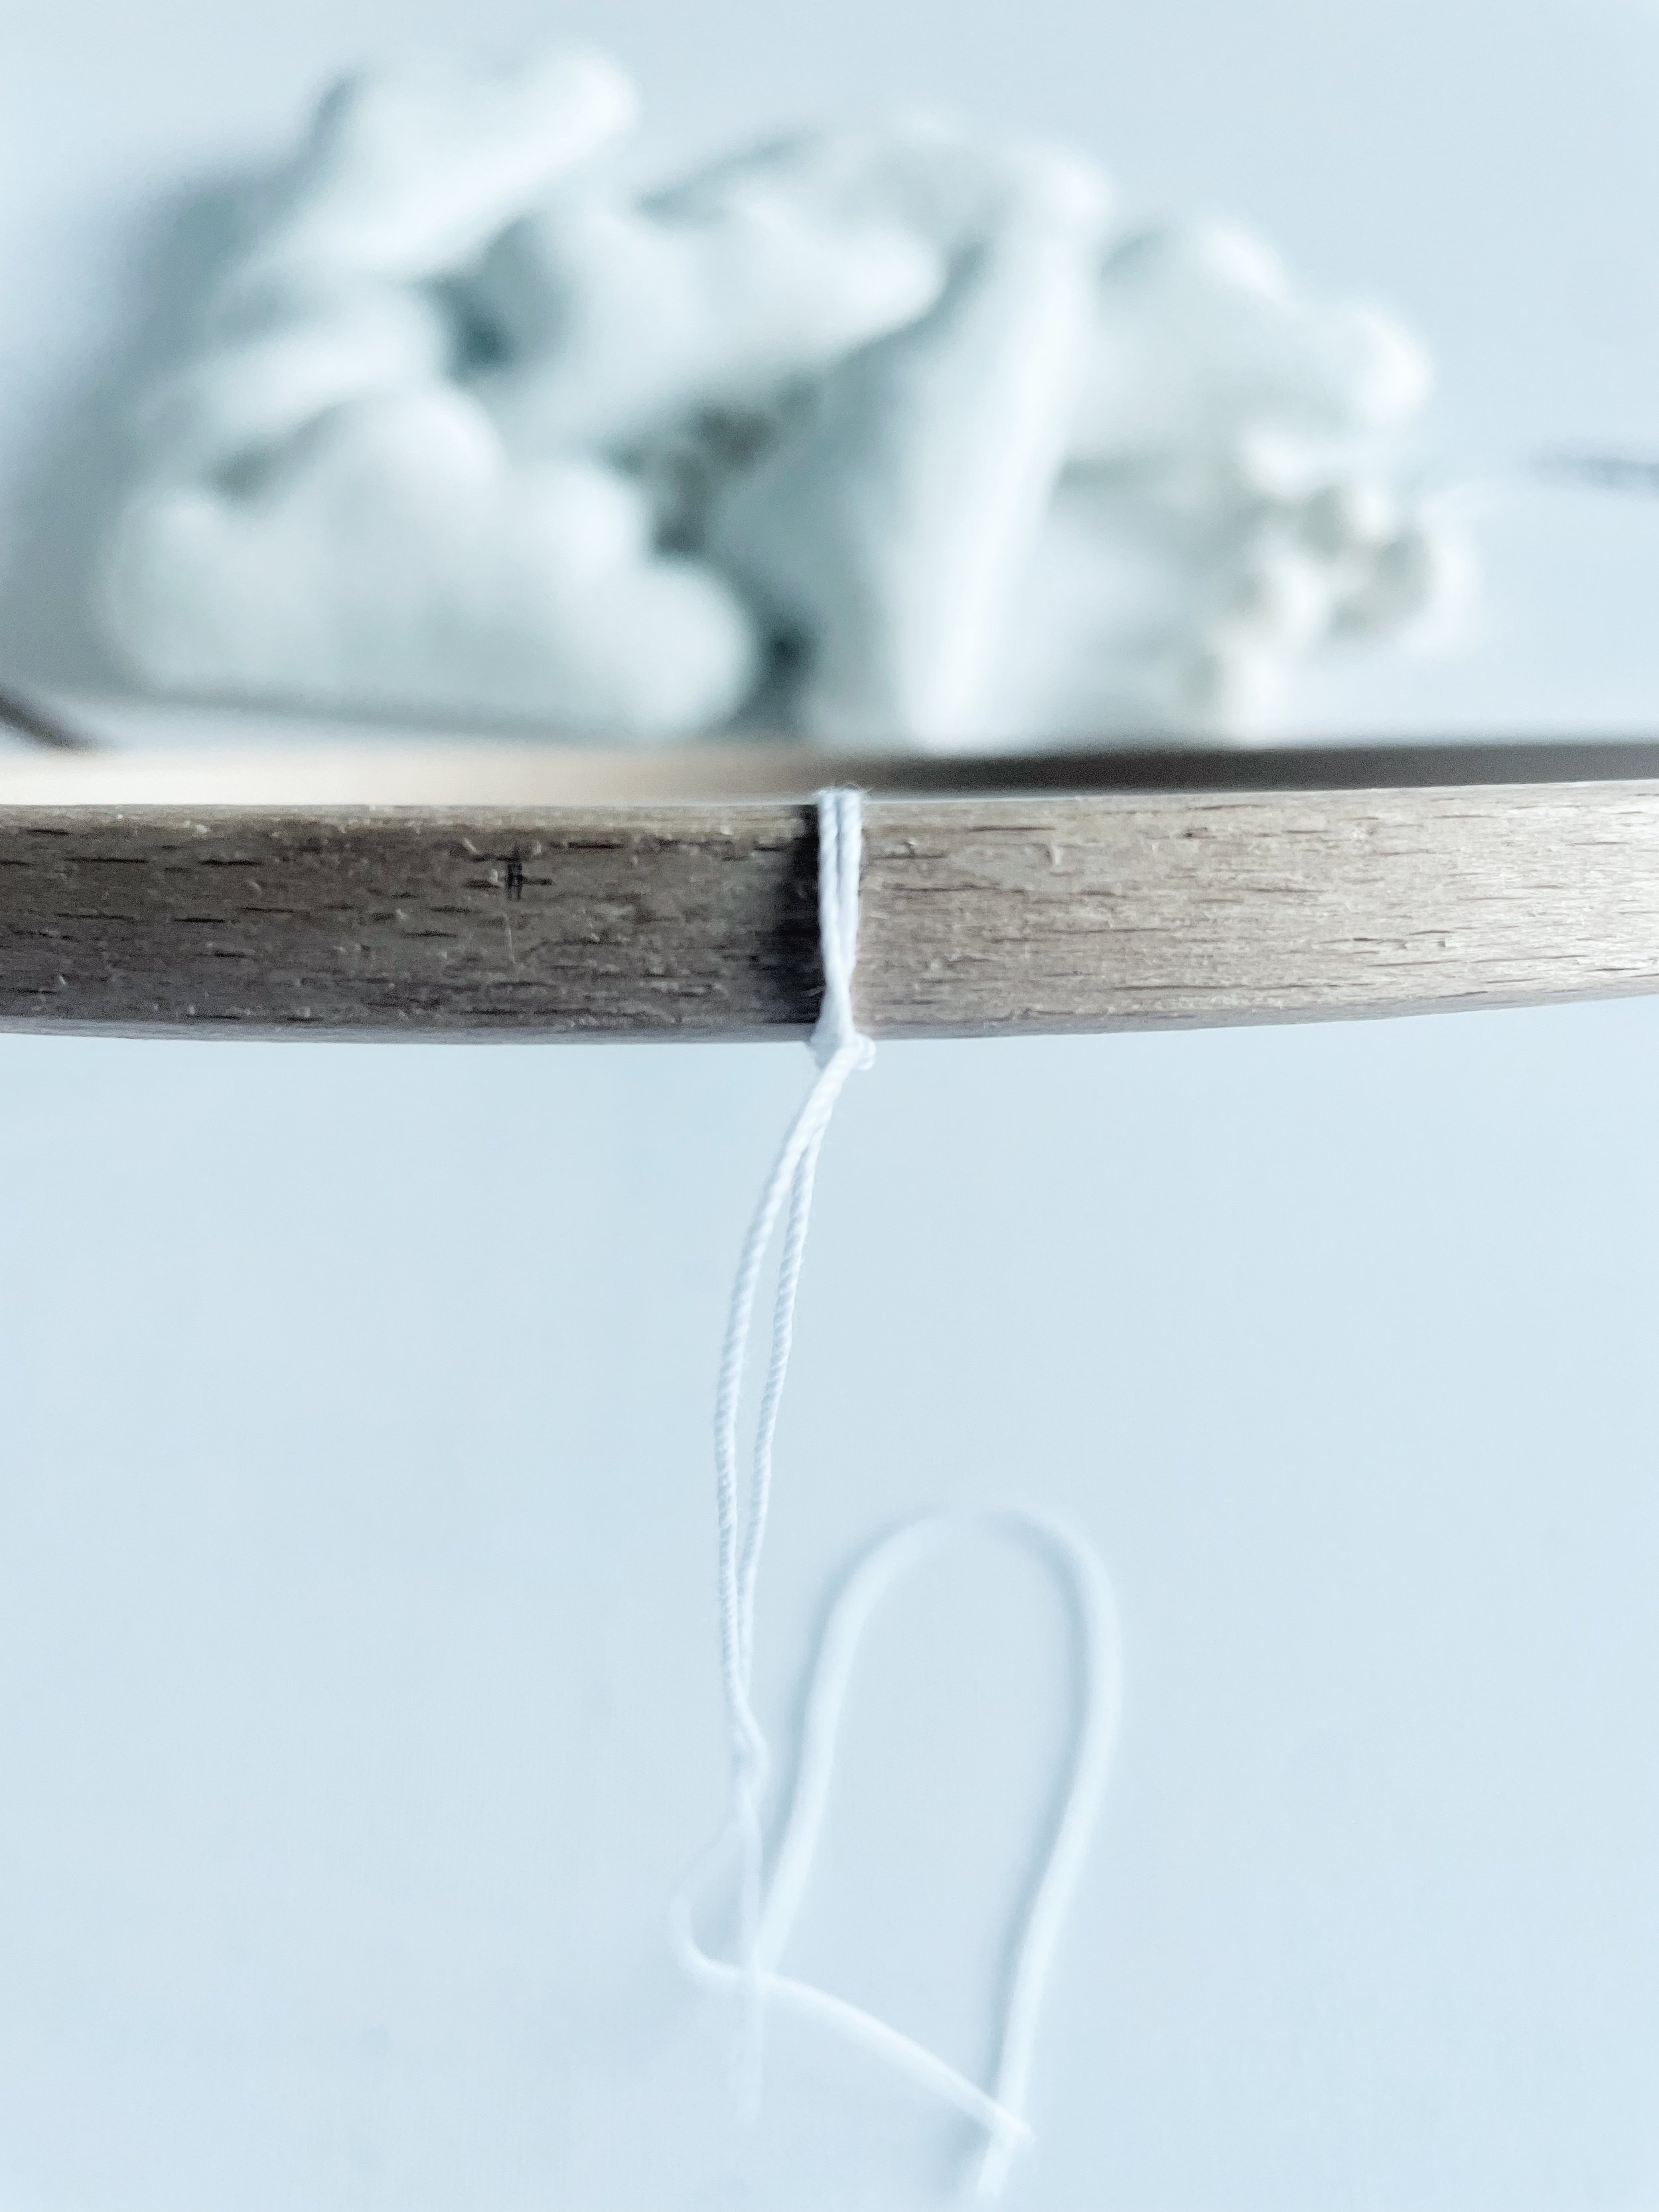
Take one piece of string and fold it in half. Line up the fold with one of the pencil marks on your beech hoop, so that each side of the string hangs down about 20 inches.
Now, take one end of the string and loop it once around the hoop. Then, using both ends of the string together, tie a tight knot to secure it in place.
Repeat this process with five more pieces of string, attaching one to each pencil mark, until all six marks are covered.
You’ll have one piece of string left over, don’t worry, that’s for the felt balls and cloud in the centre!
Make a loop to hang your mobile
Gather together six strands of string and make sure they’re all positioned correctly. You want the bottom length of the strings to hang down neatly on the outside of the hoop, and the top parts to be pulled upwards, all gathering from the outside.
Now, lift them up together and add your extra piece of string, making sure it falls right in the centre. Tie all the strings together securely with one big knot.
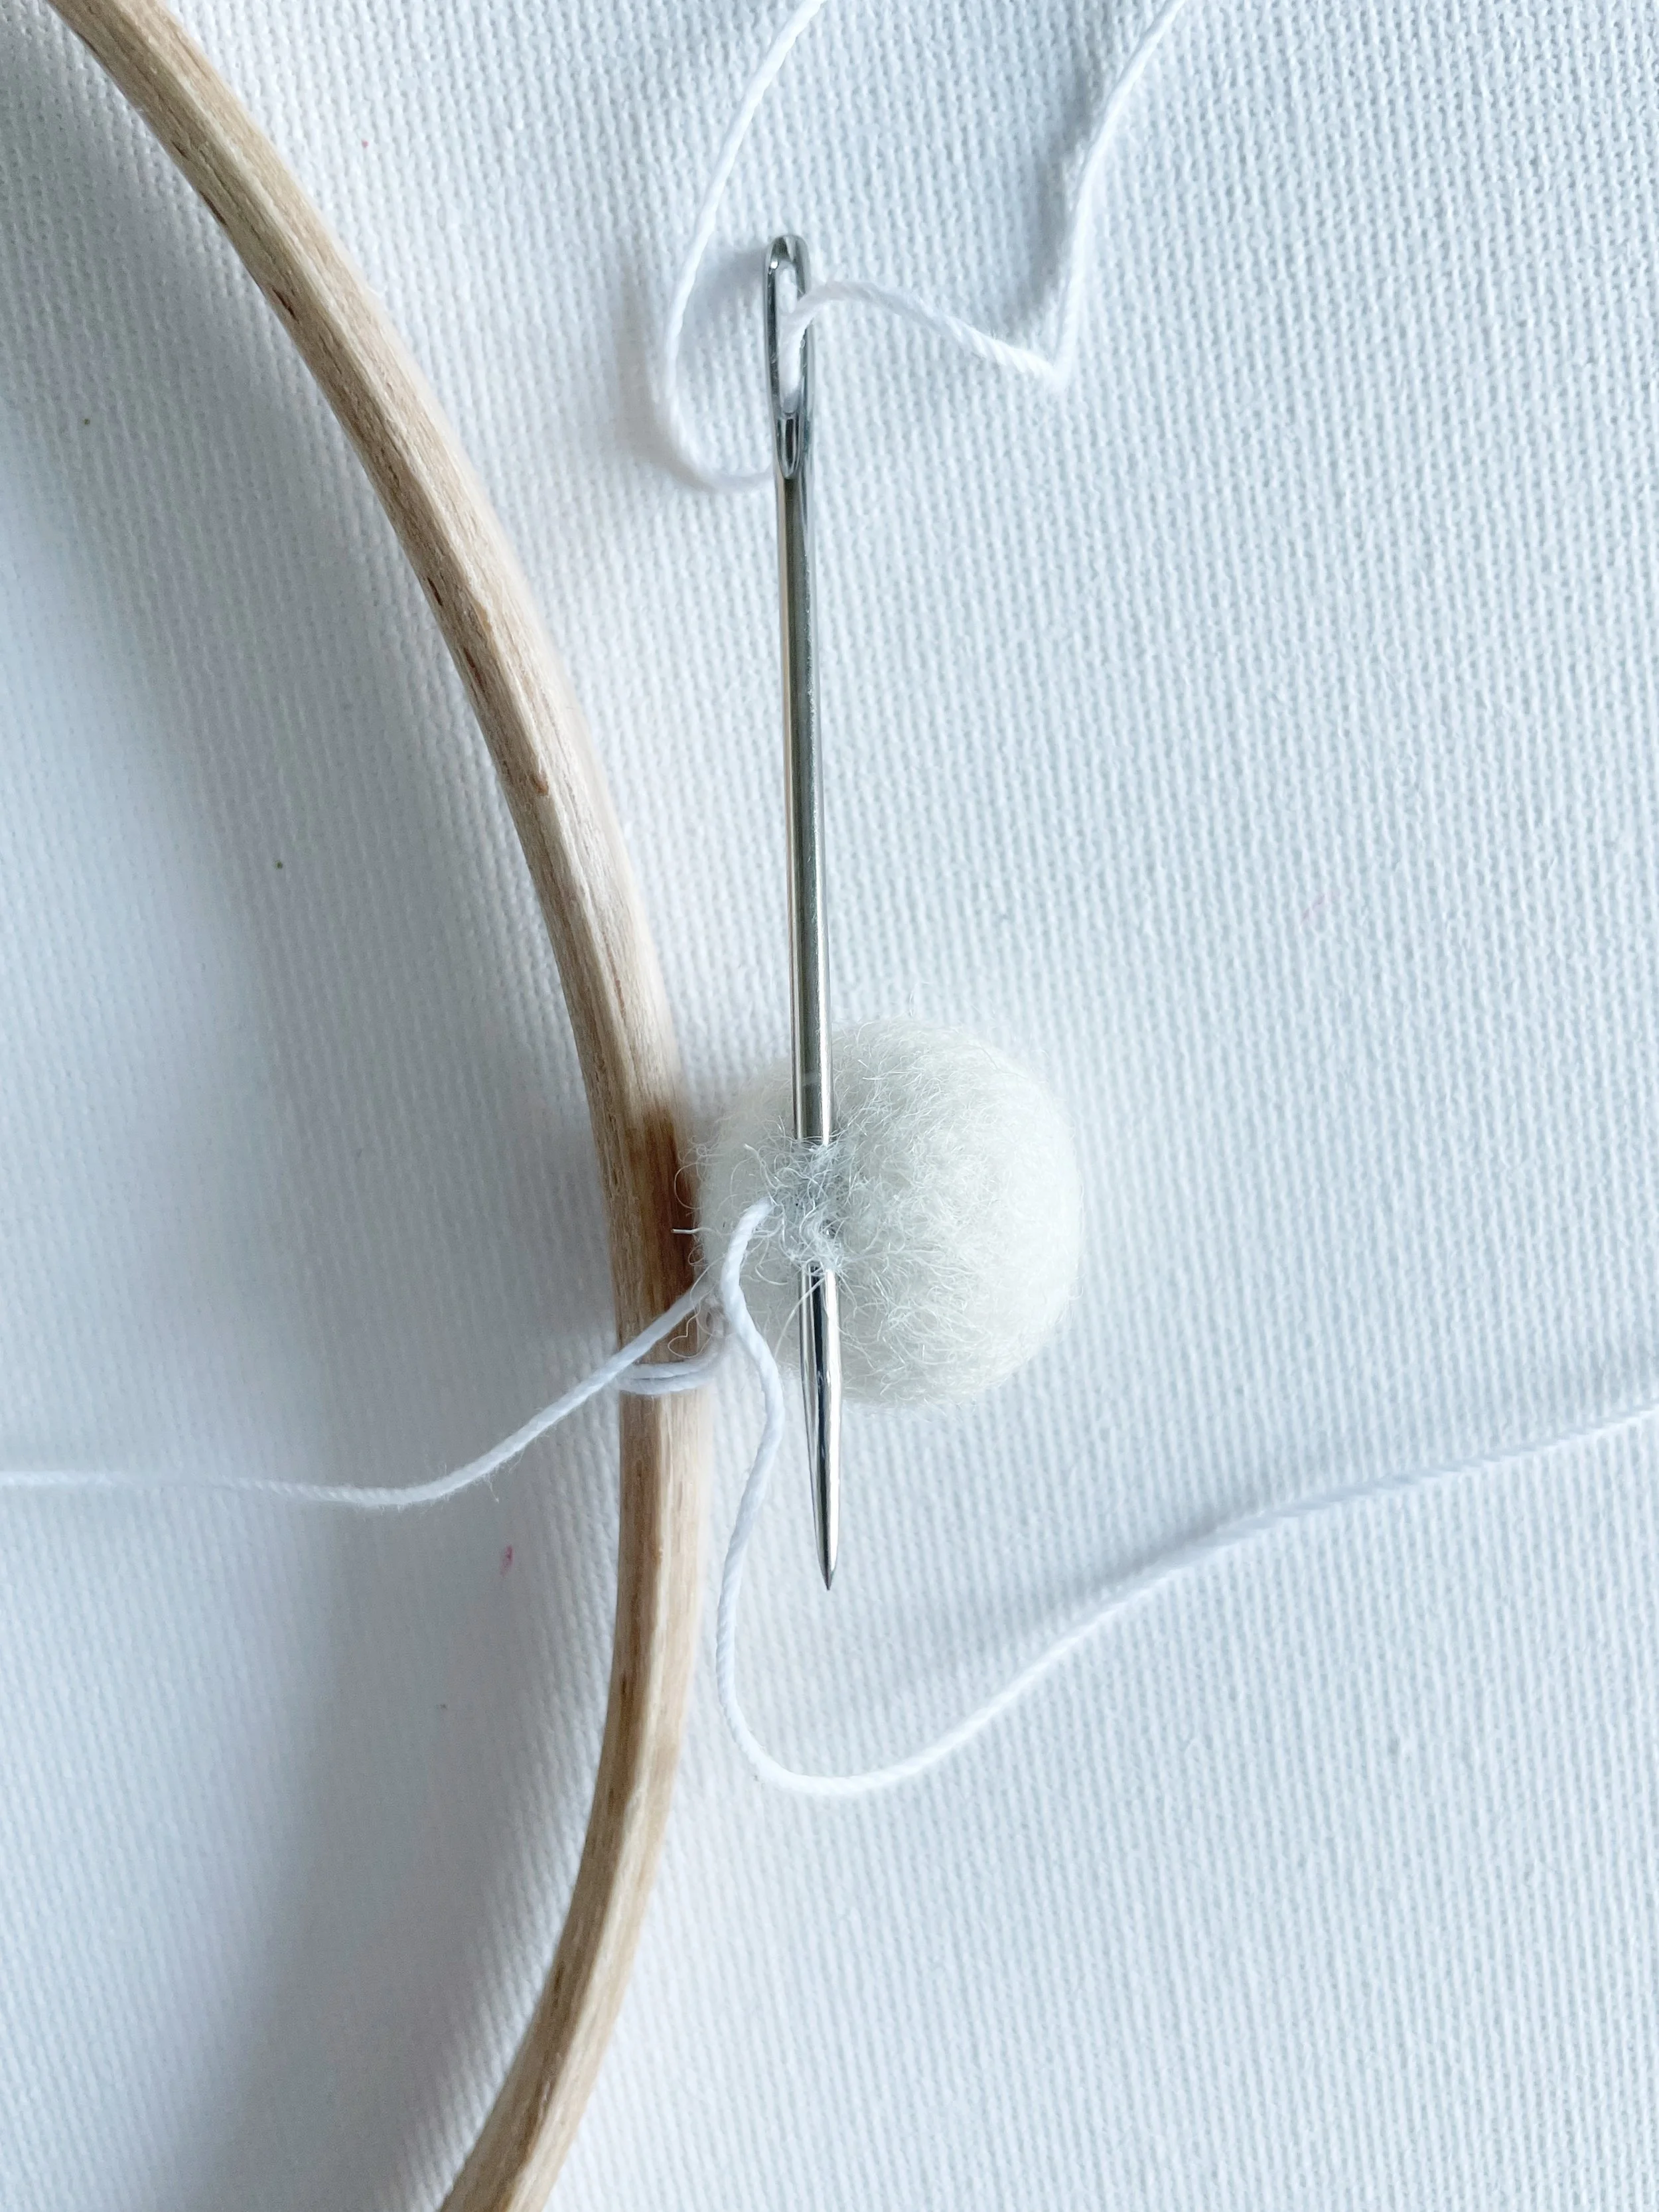
If you are using felt balls for your DIY nursery mobile we’re going to use the 2cm felt ball to cover the knot we have just made.
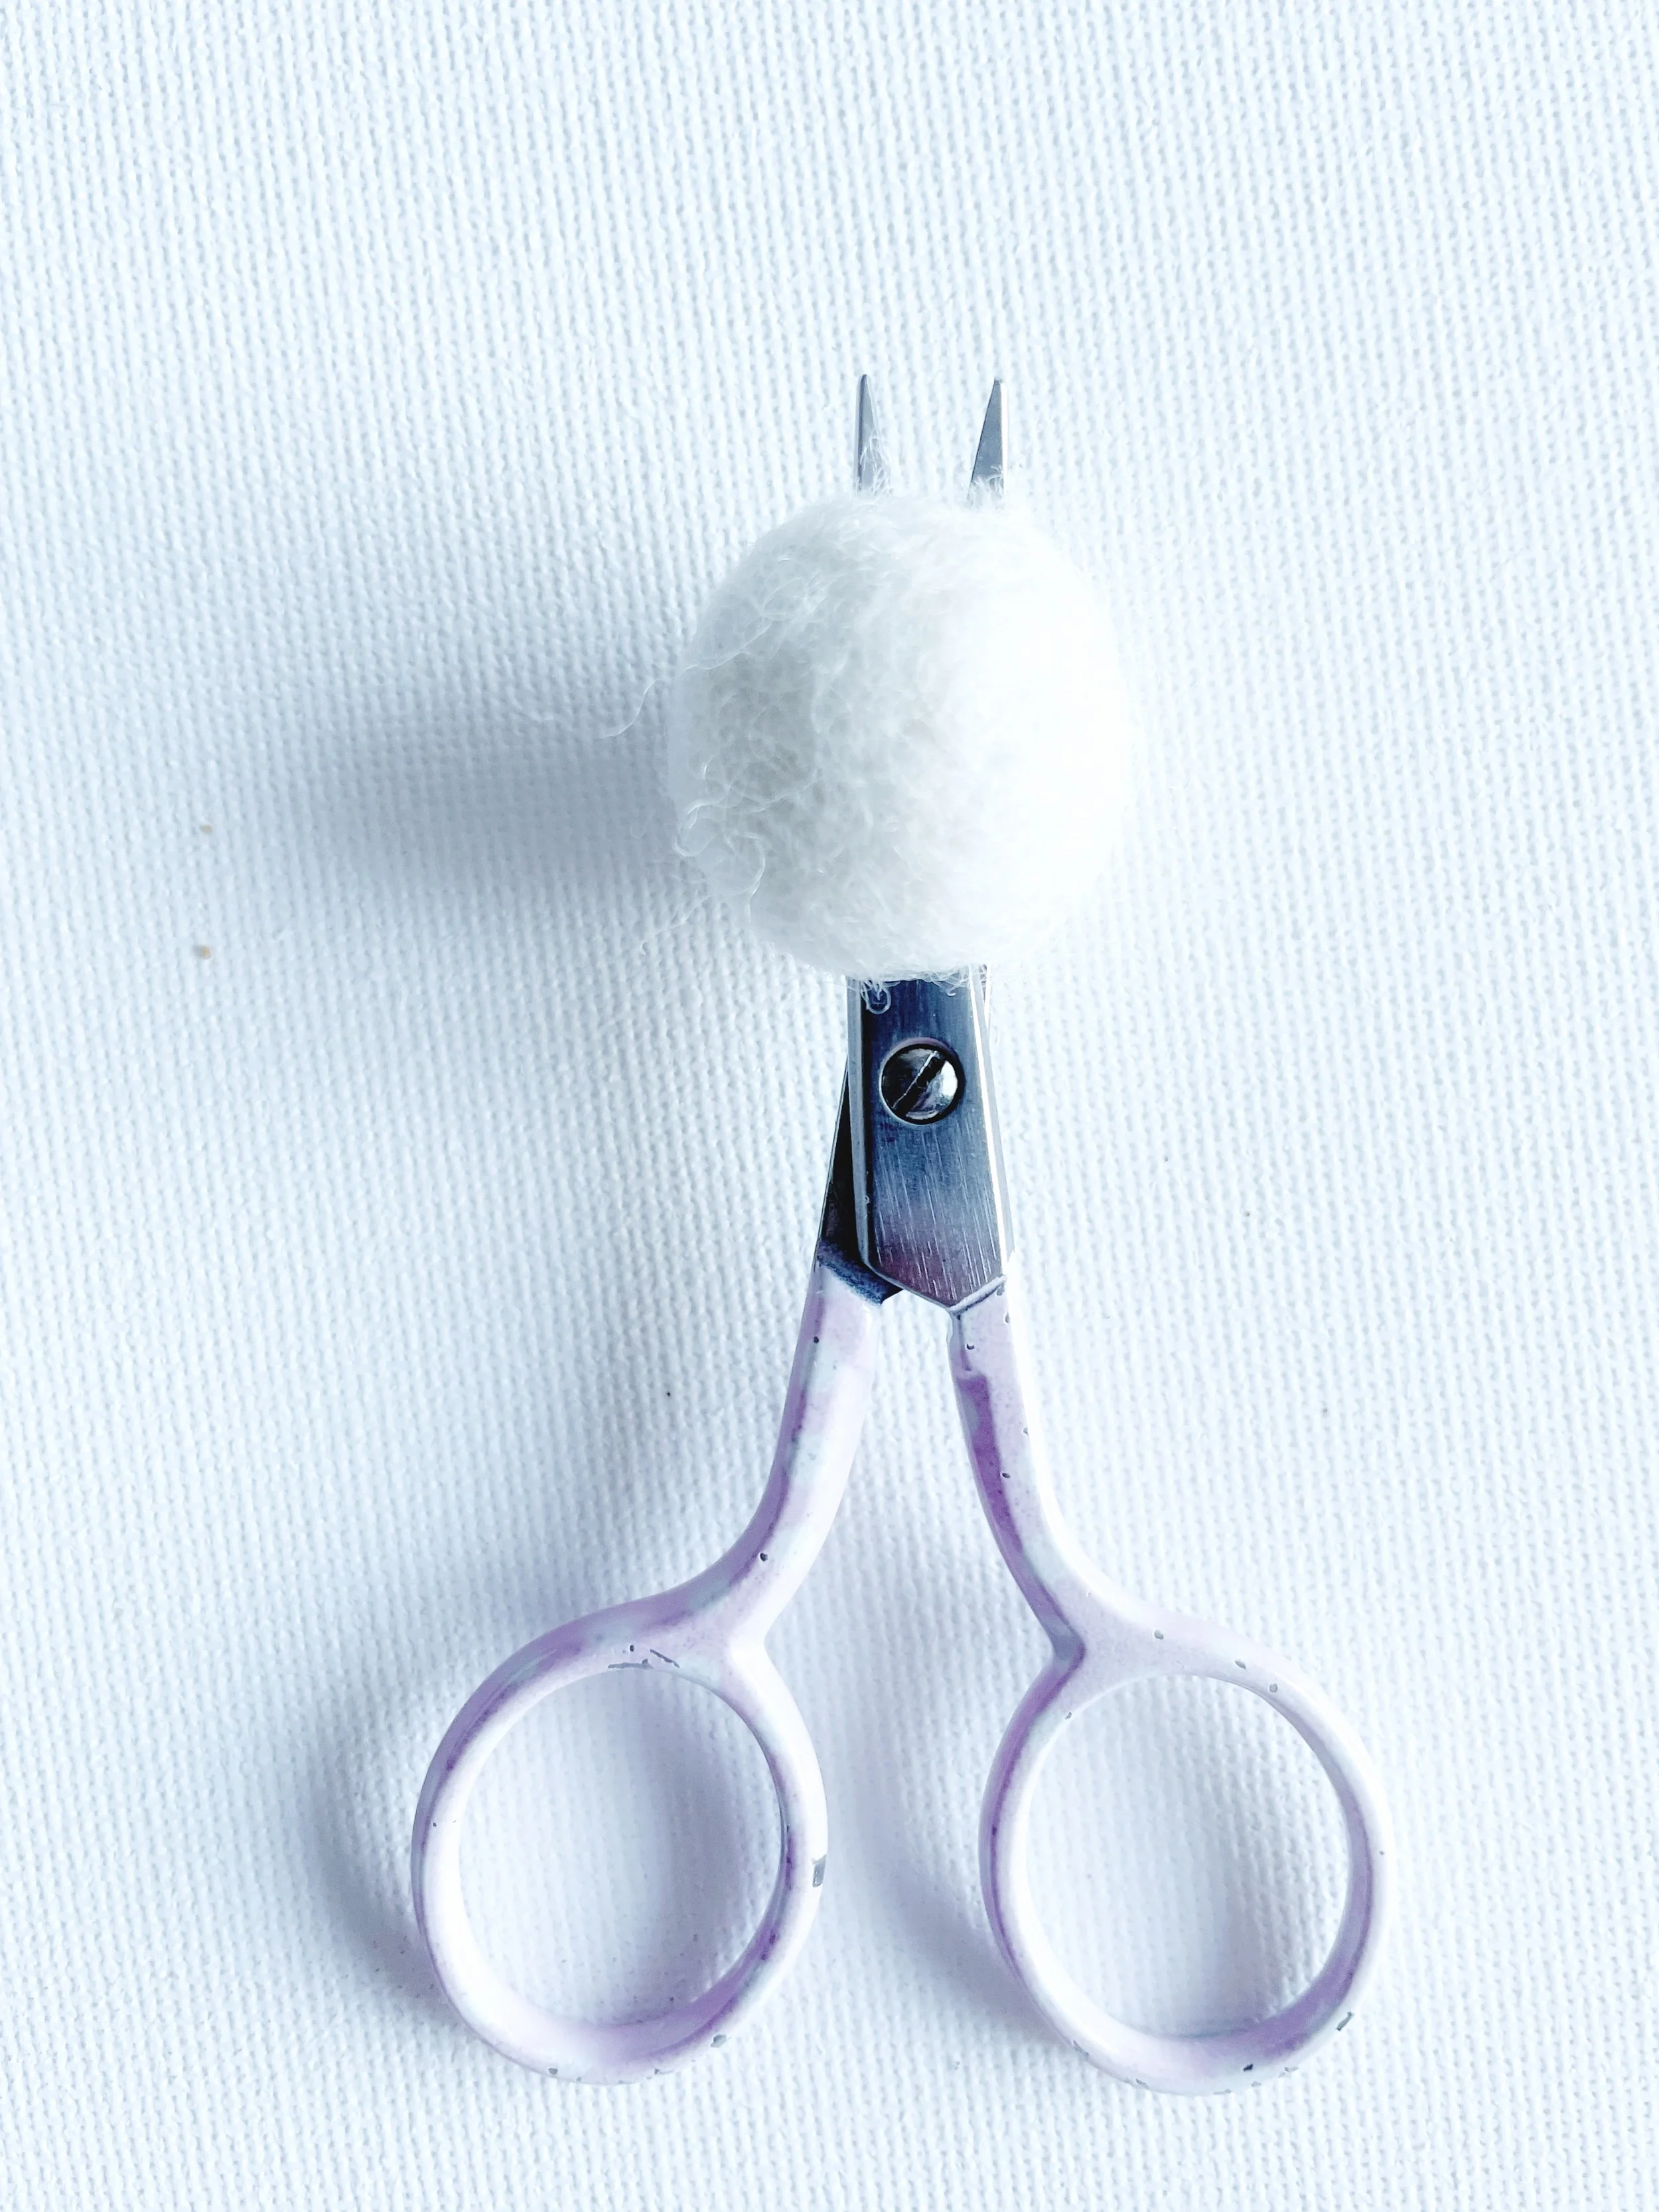
Take your scissors and snip into the centre of a 2cm felt ball until your scissors come out the other side (see above).
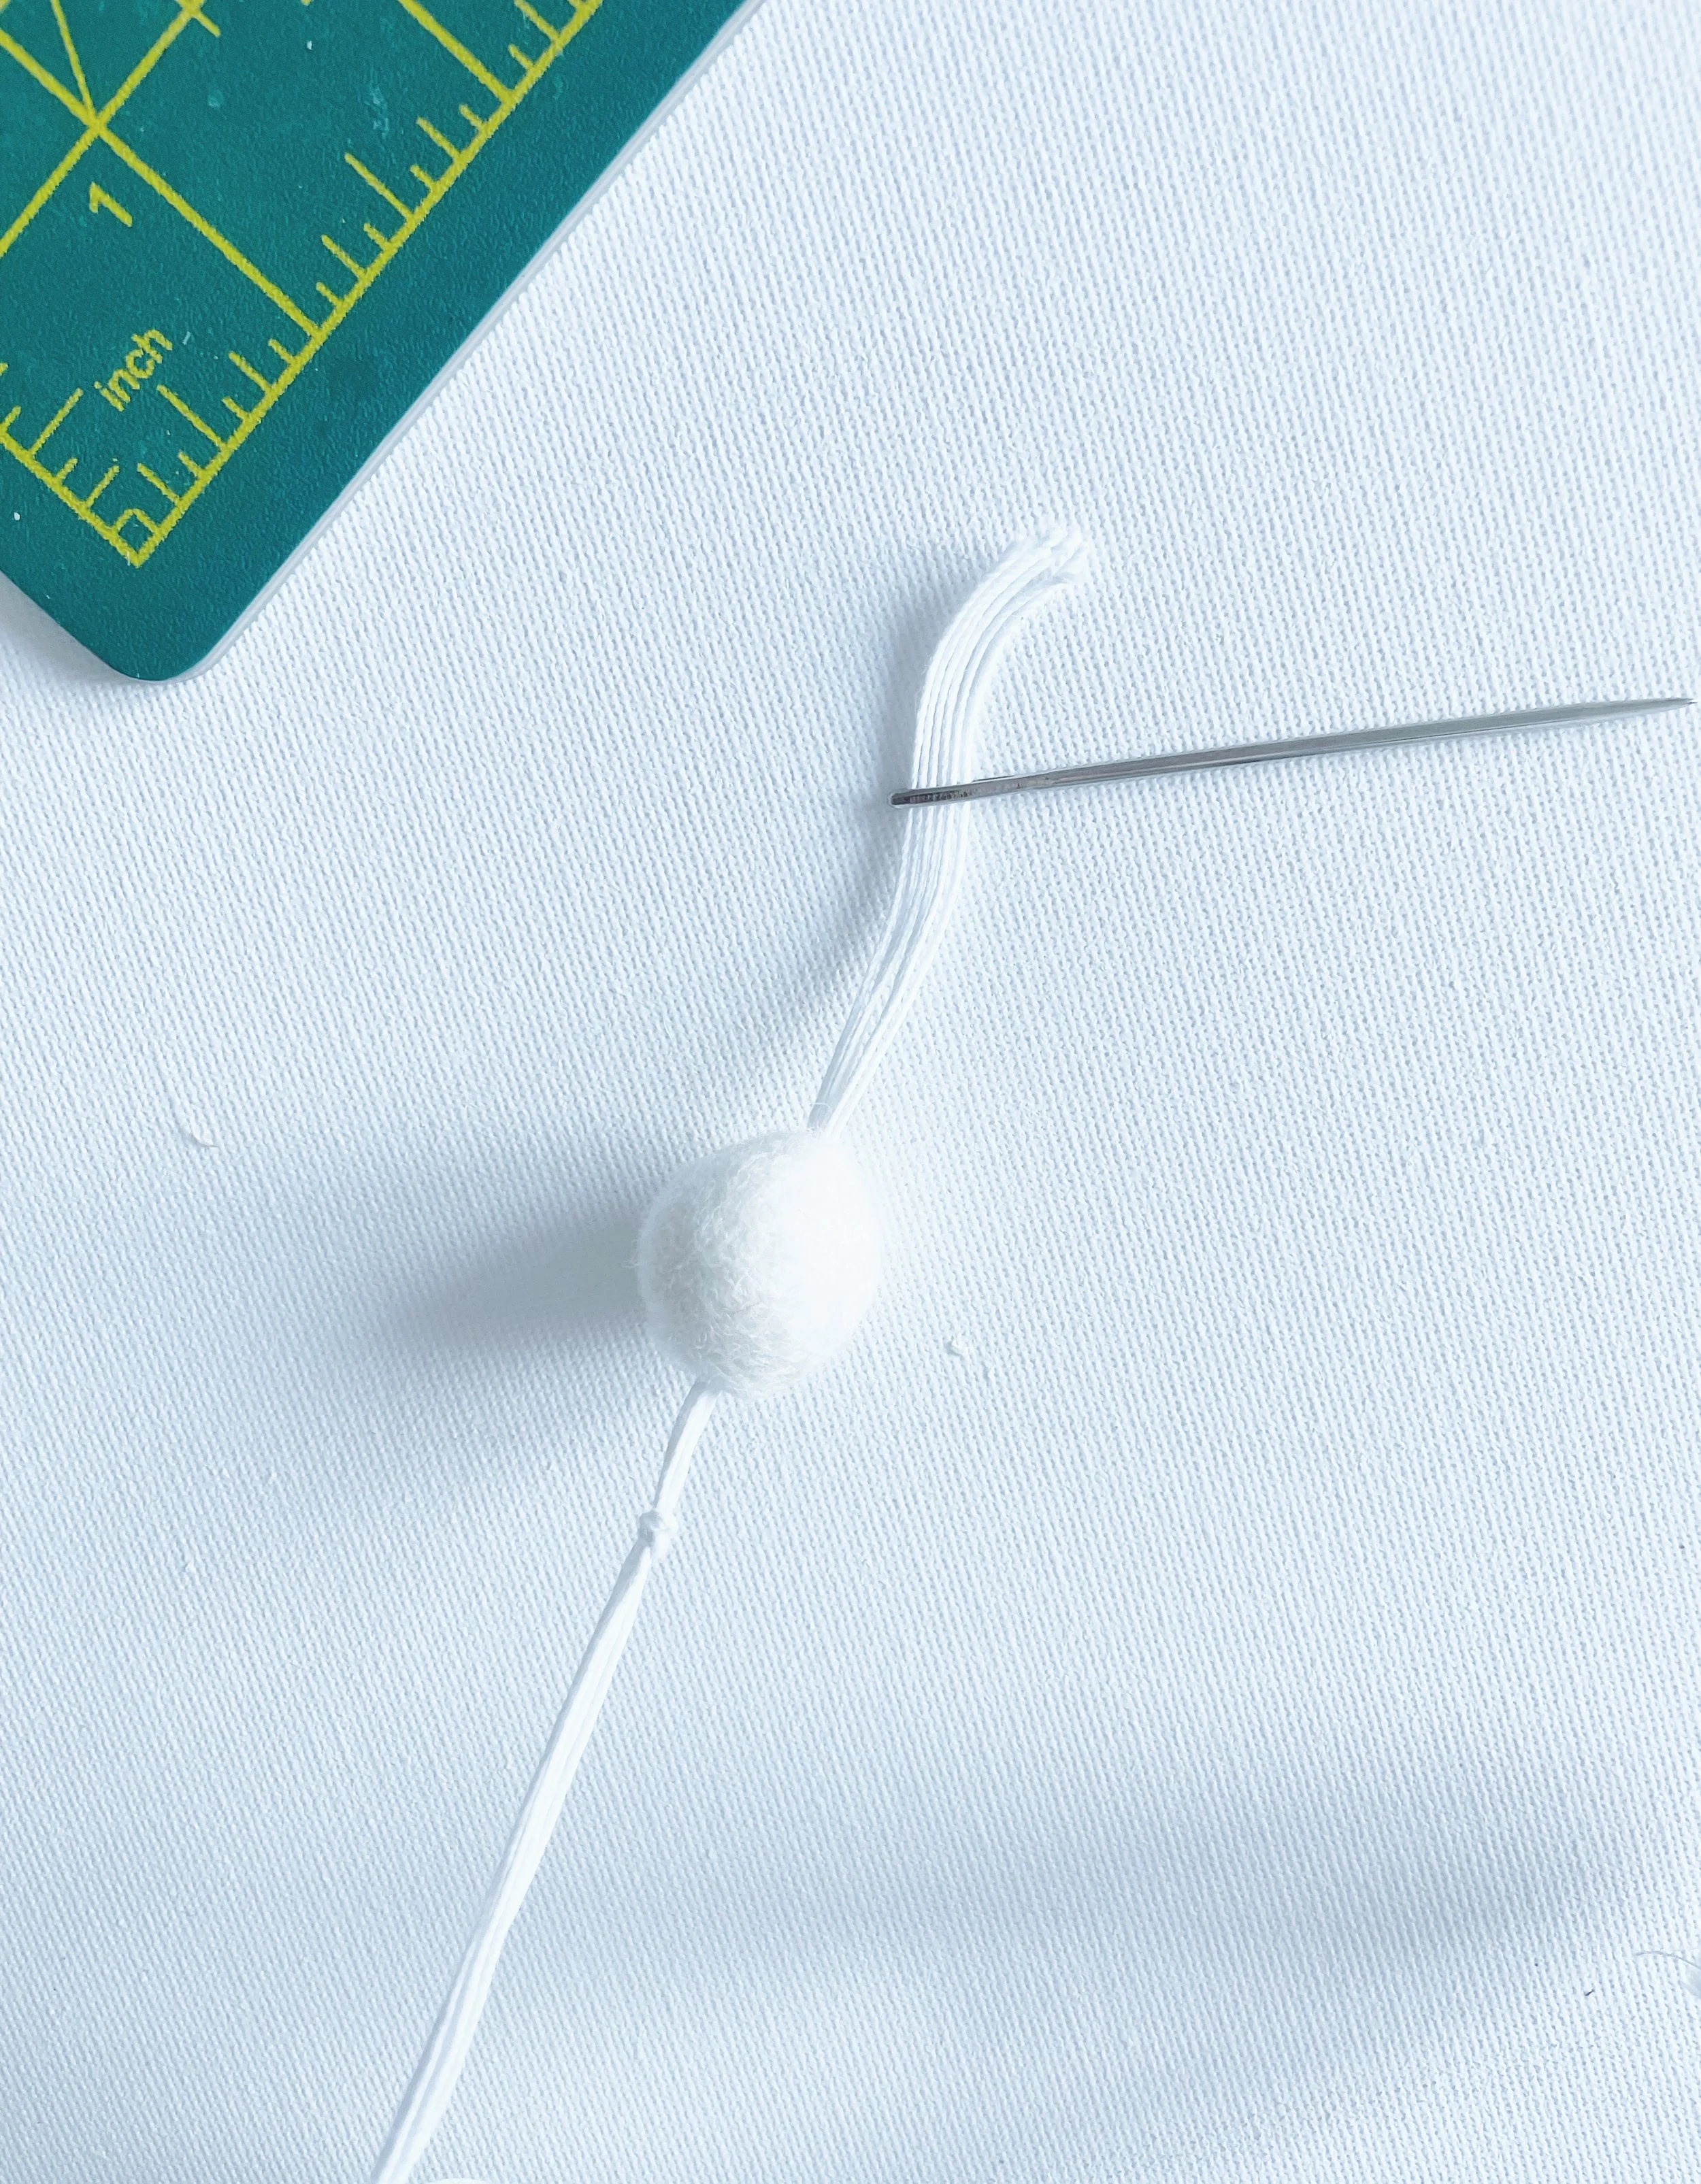
Thread all seven strands of string through your large needle. Then, use the needle to carefully slide the 2cm felt ball onto the strands.

Push the 2cm felt ball down the thread until it completely covers the knot.
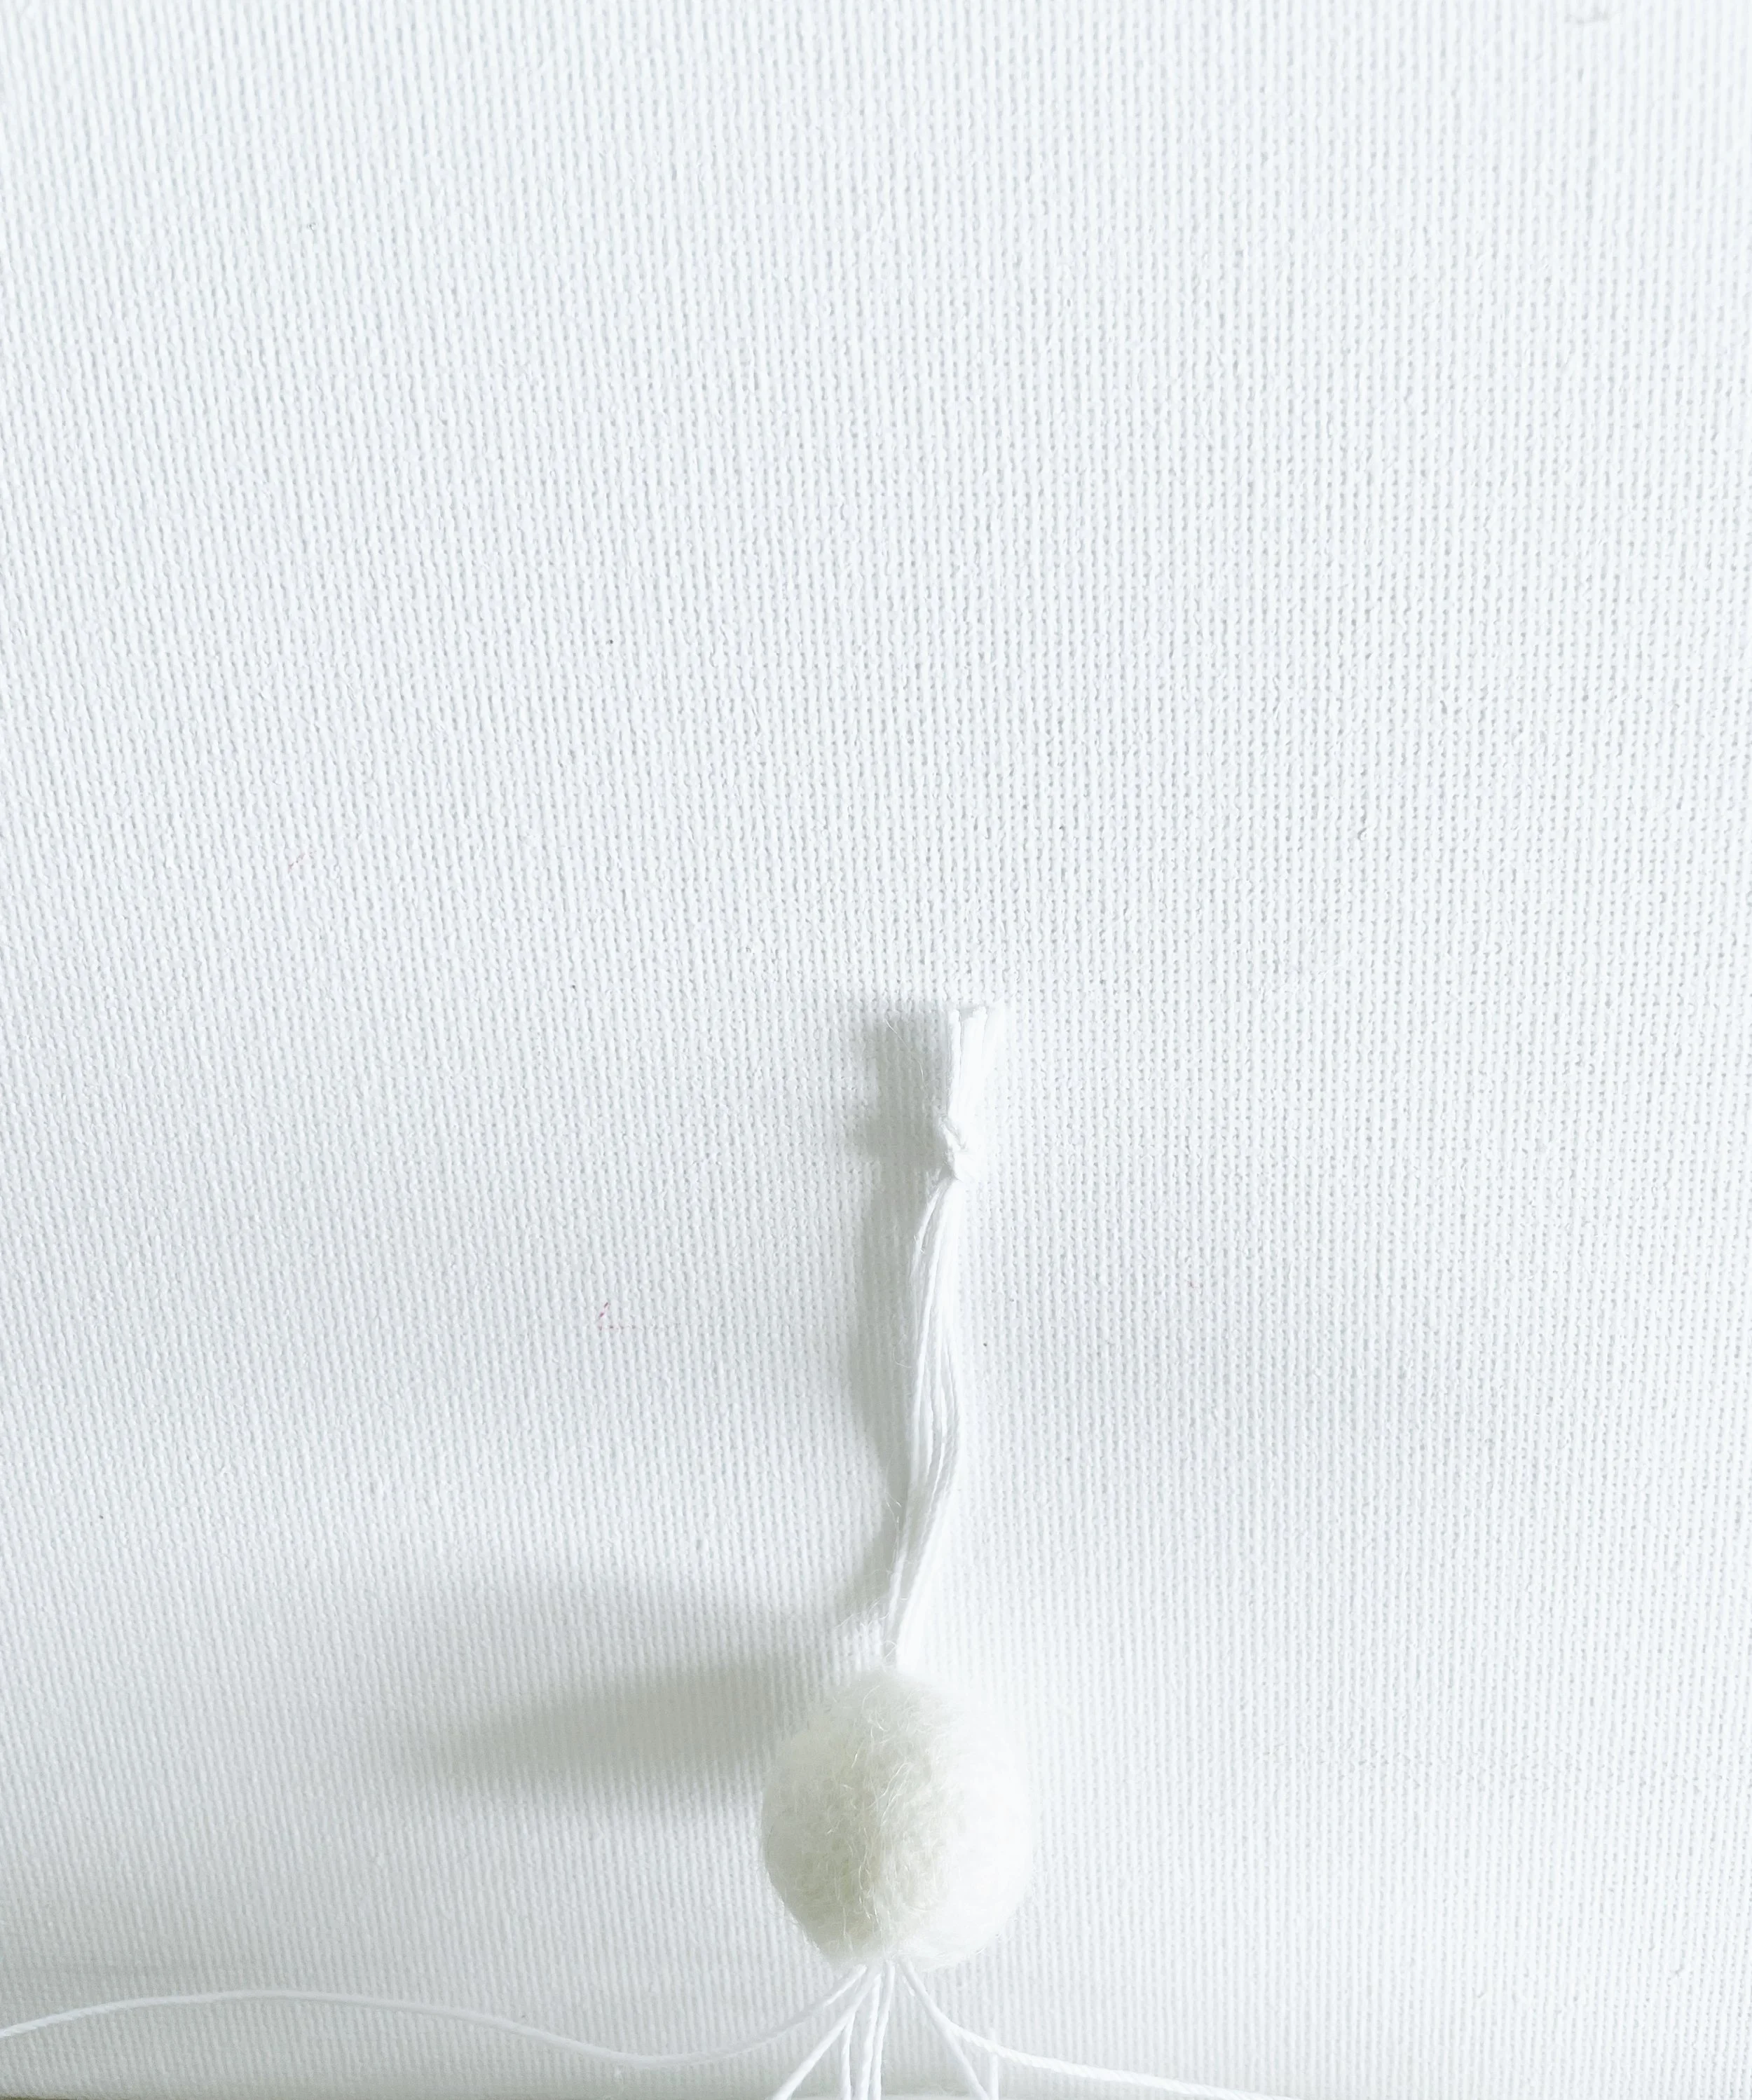
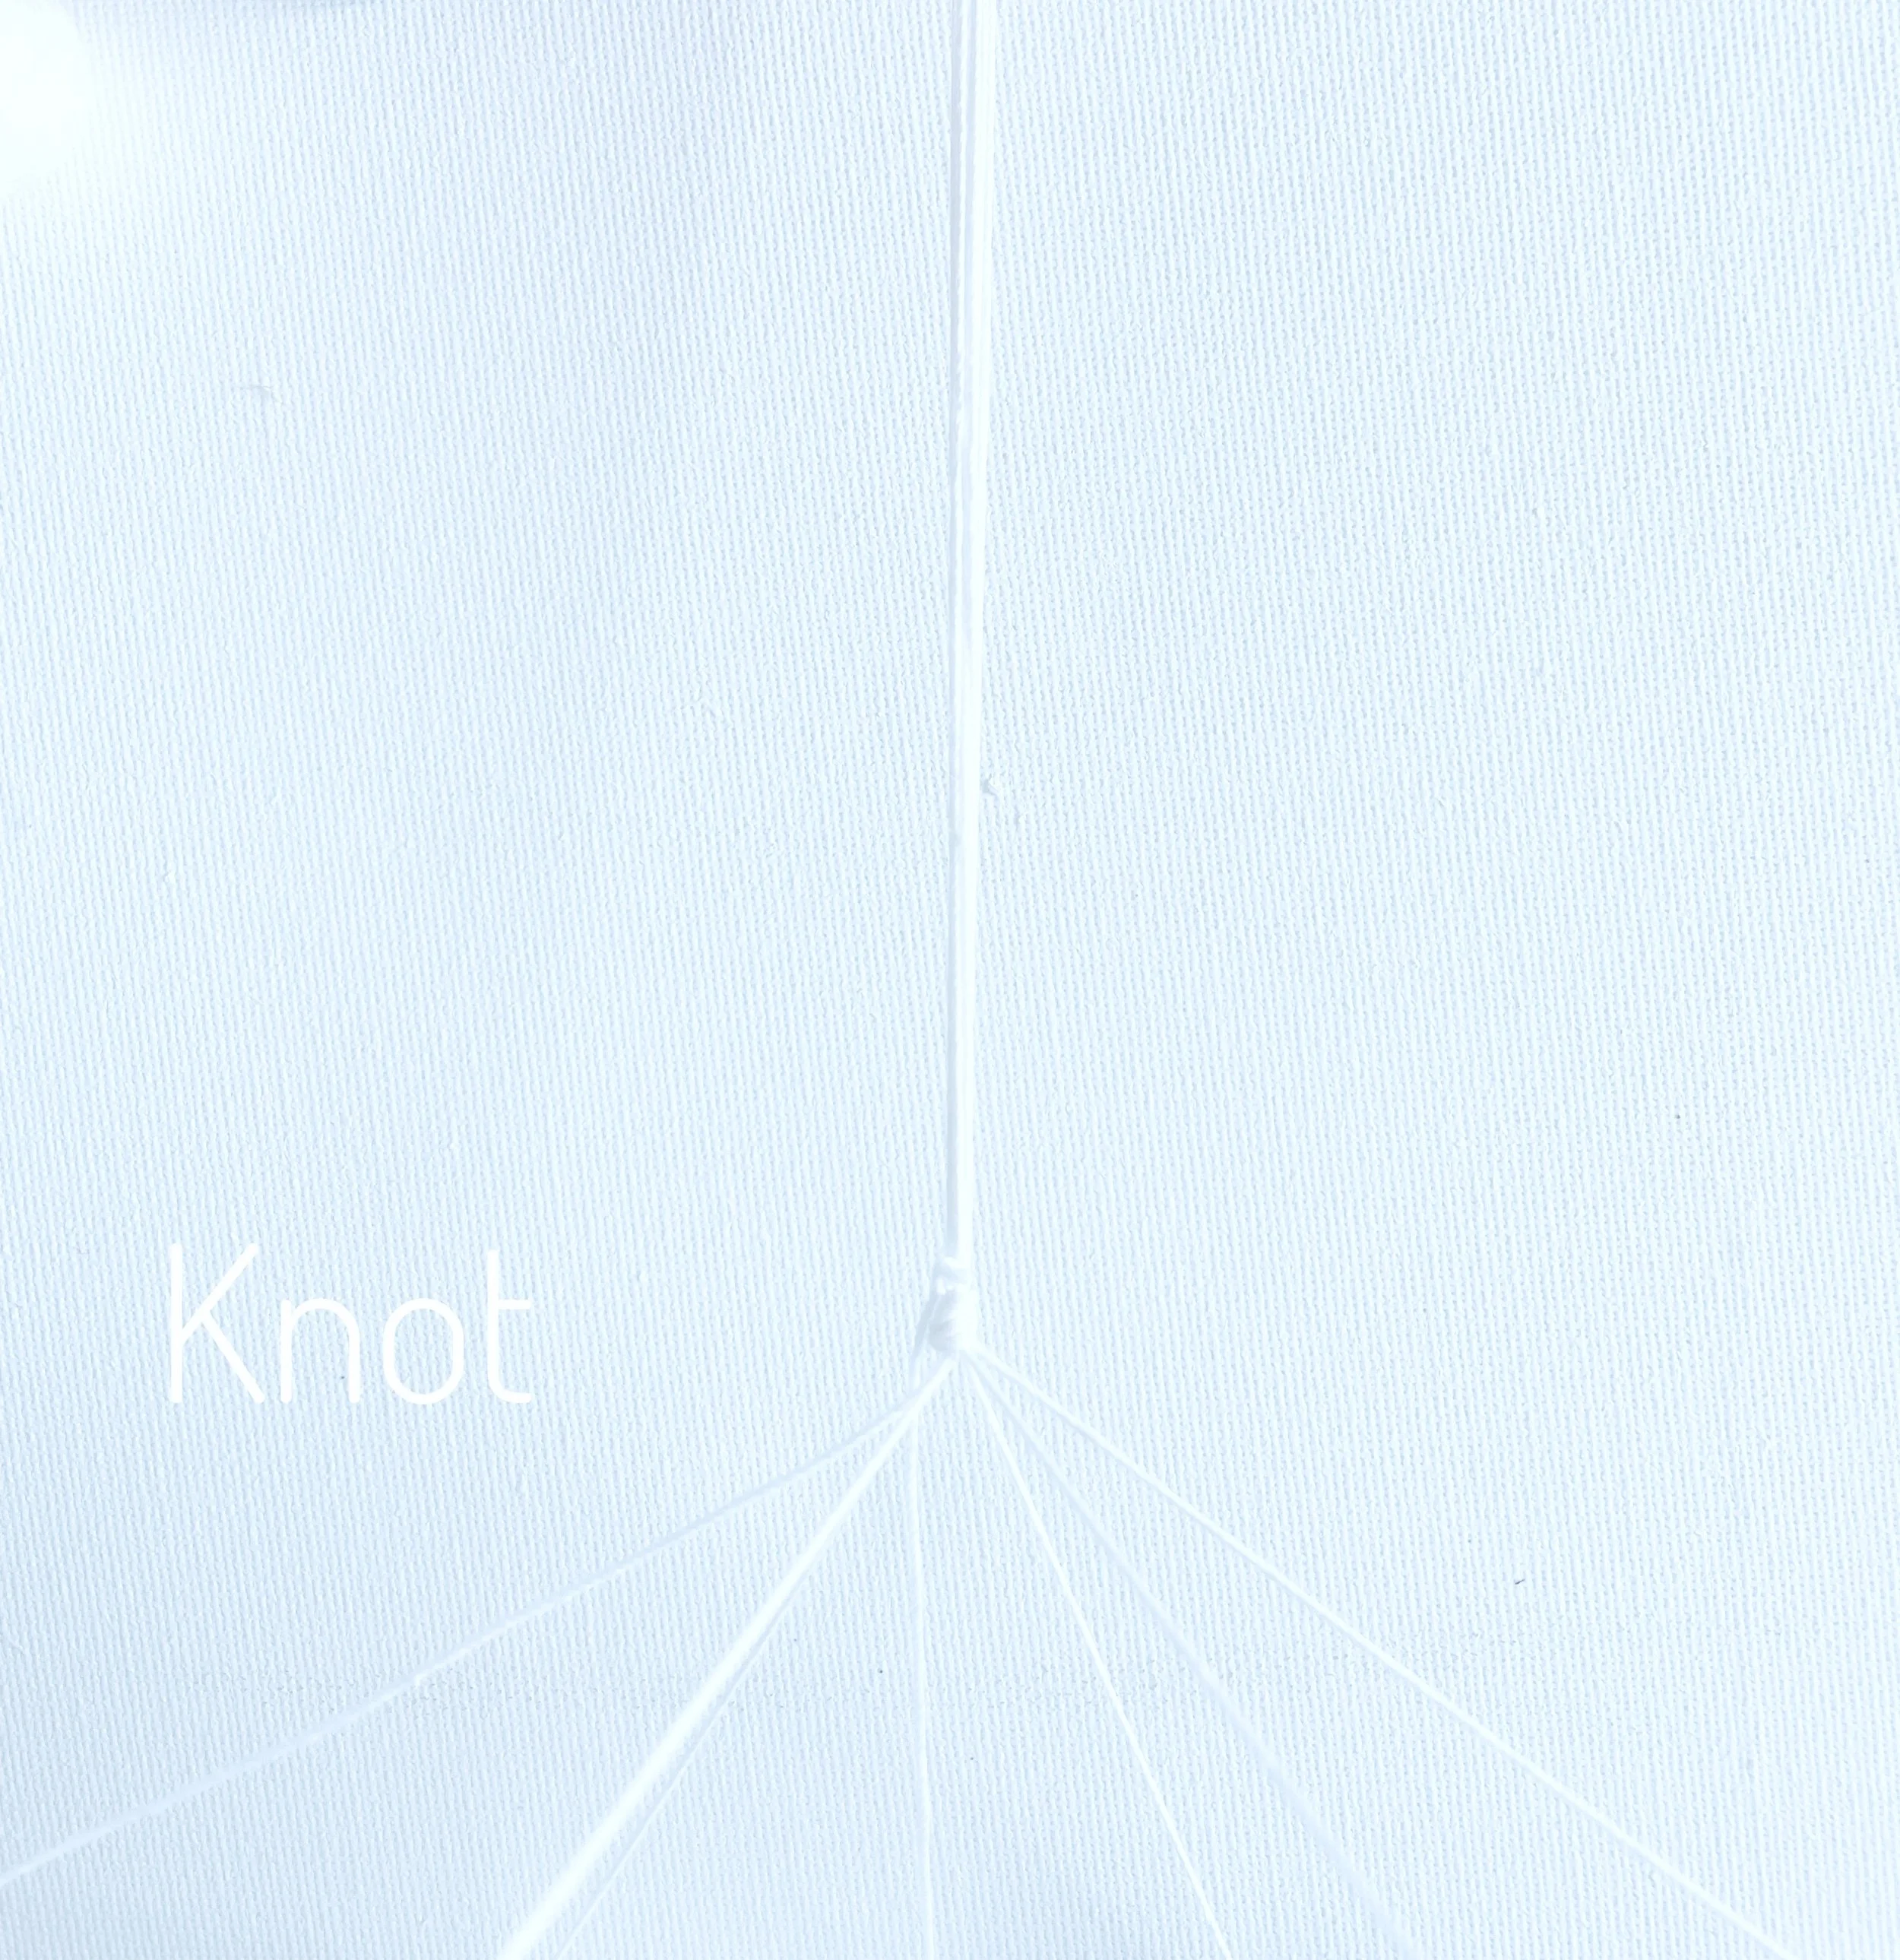
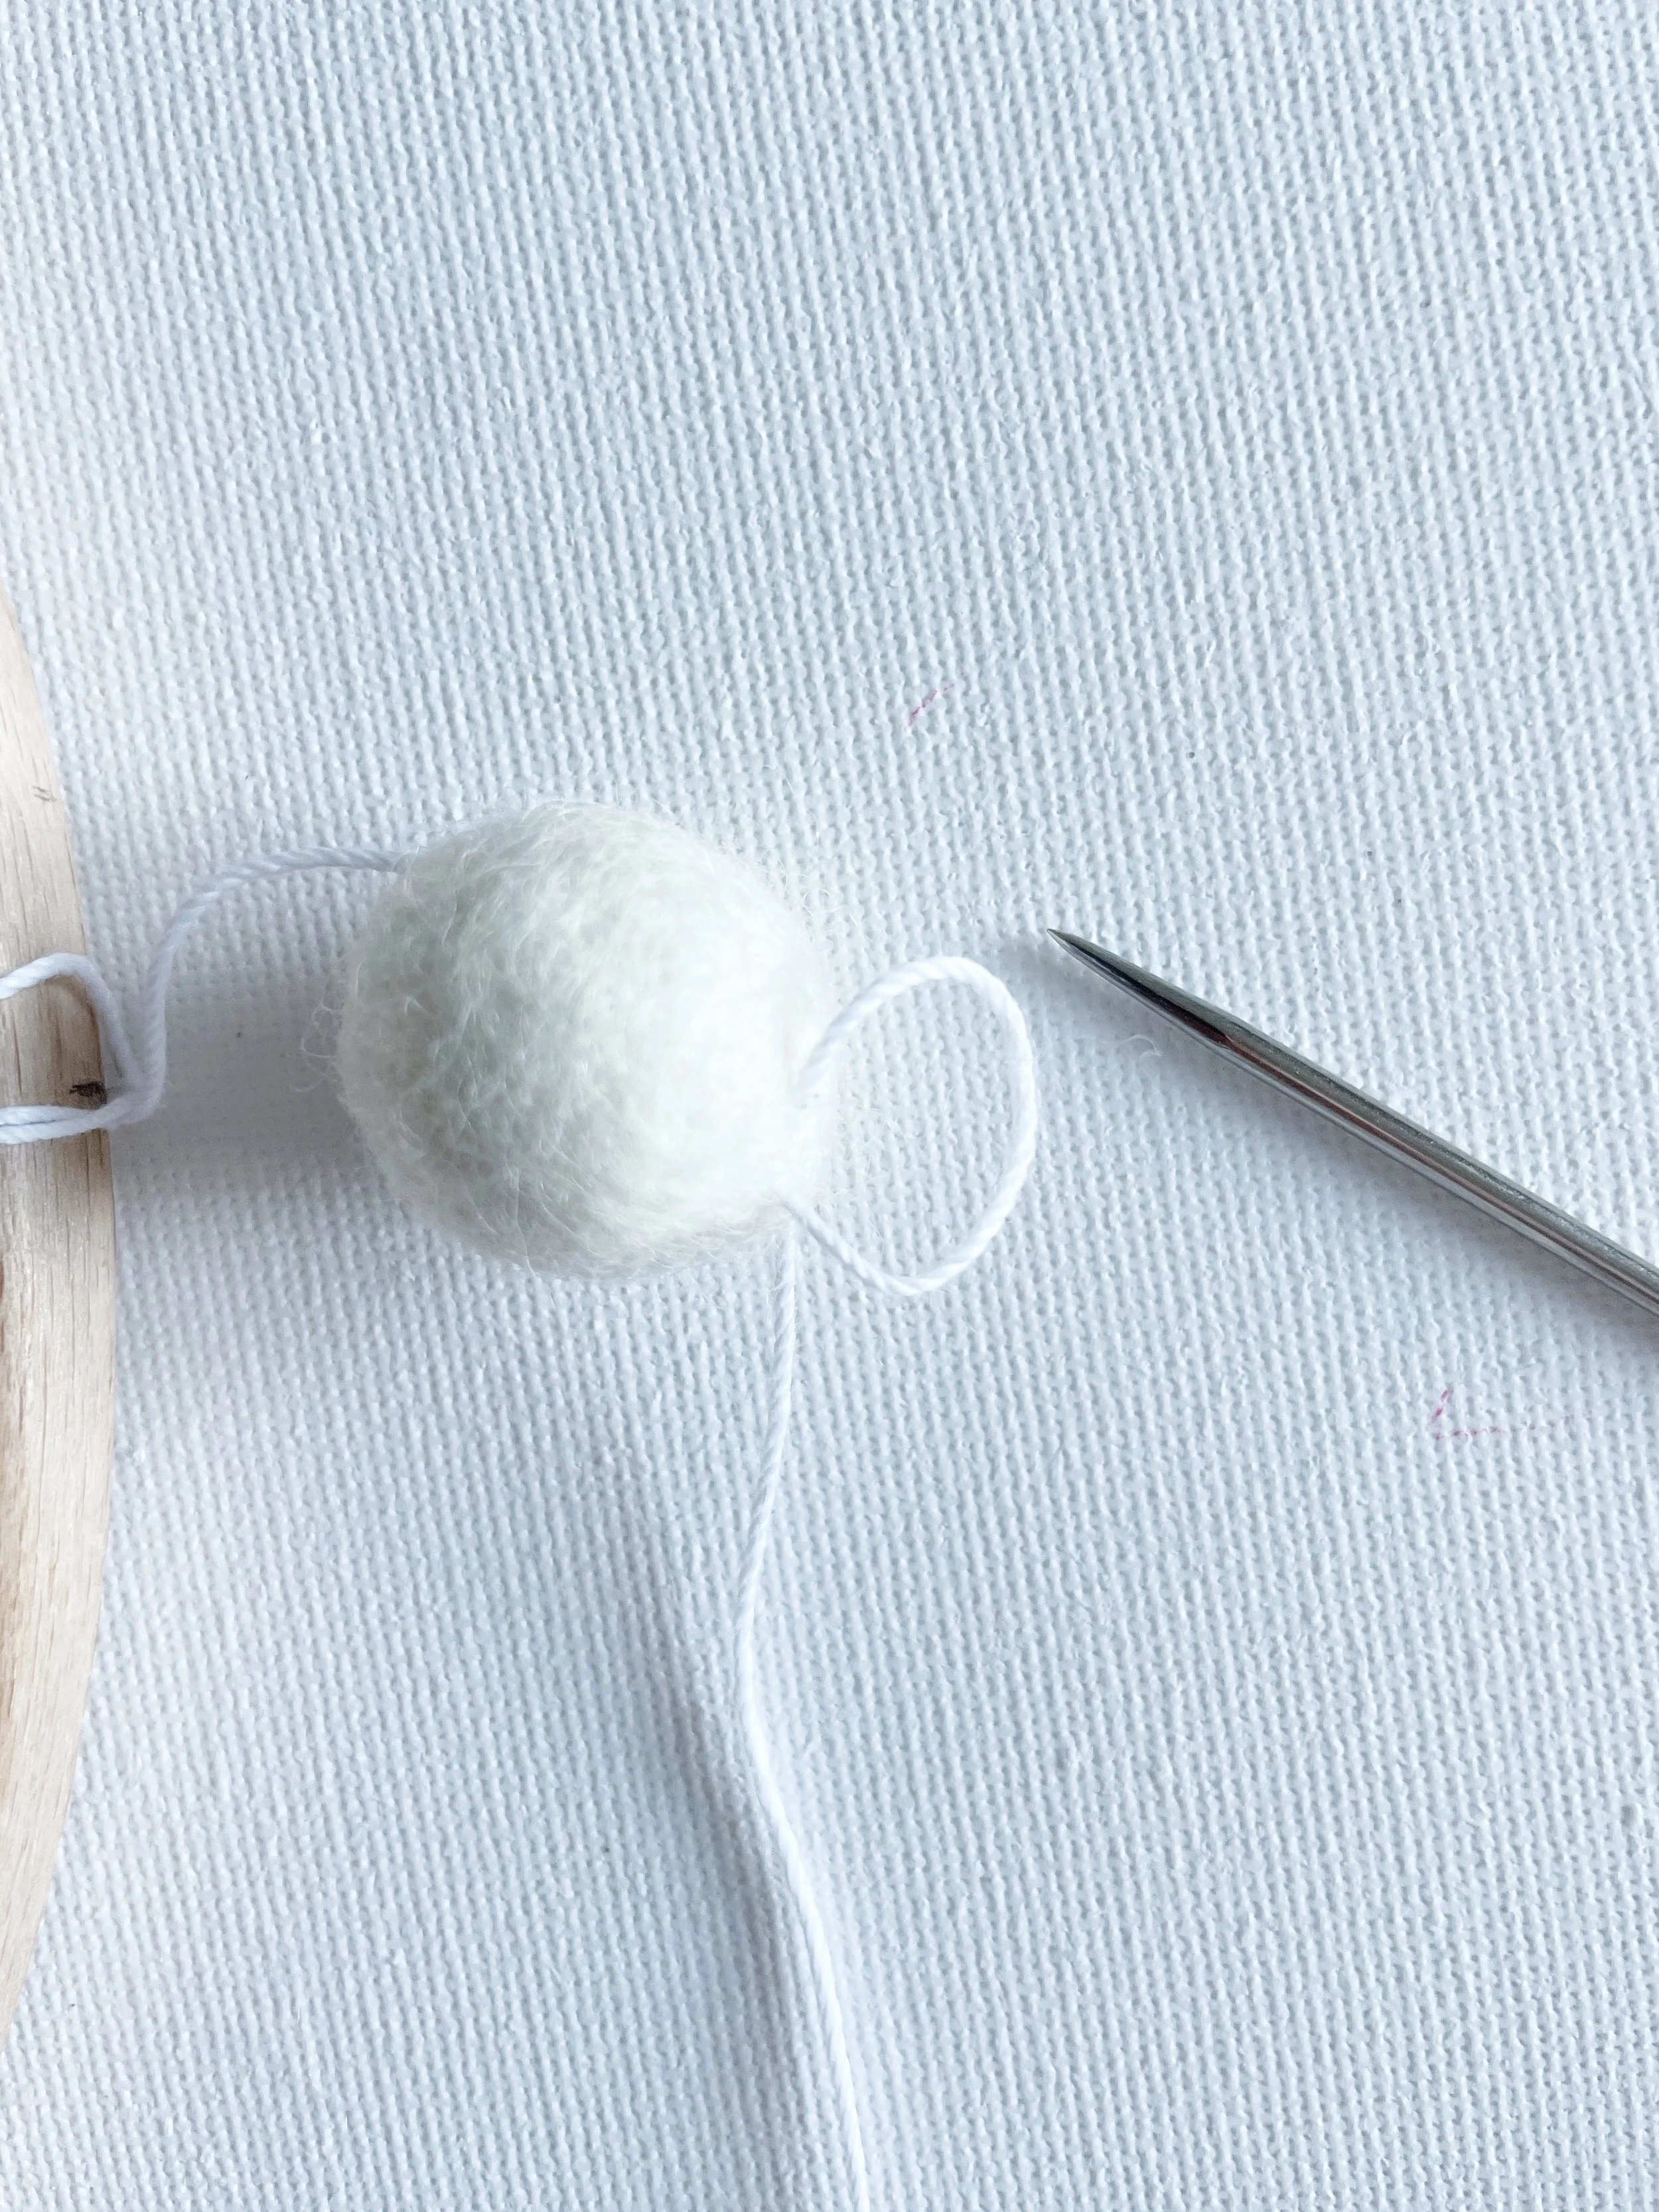
Make a second knot in the strands about 1 or 2 inches above the felt ball. It needs to be secure so make sure you pull it tightly.
Using your scissors, cut off the excess thread above this knot. Be sure to leave a little extra thread above the knot as shown in the image above.
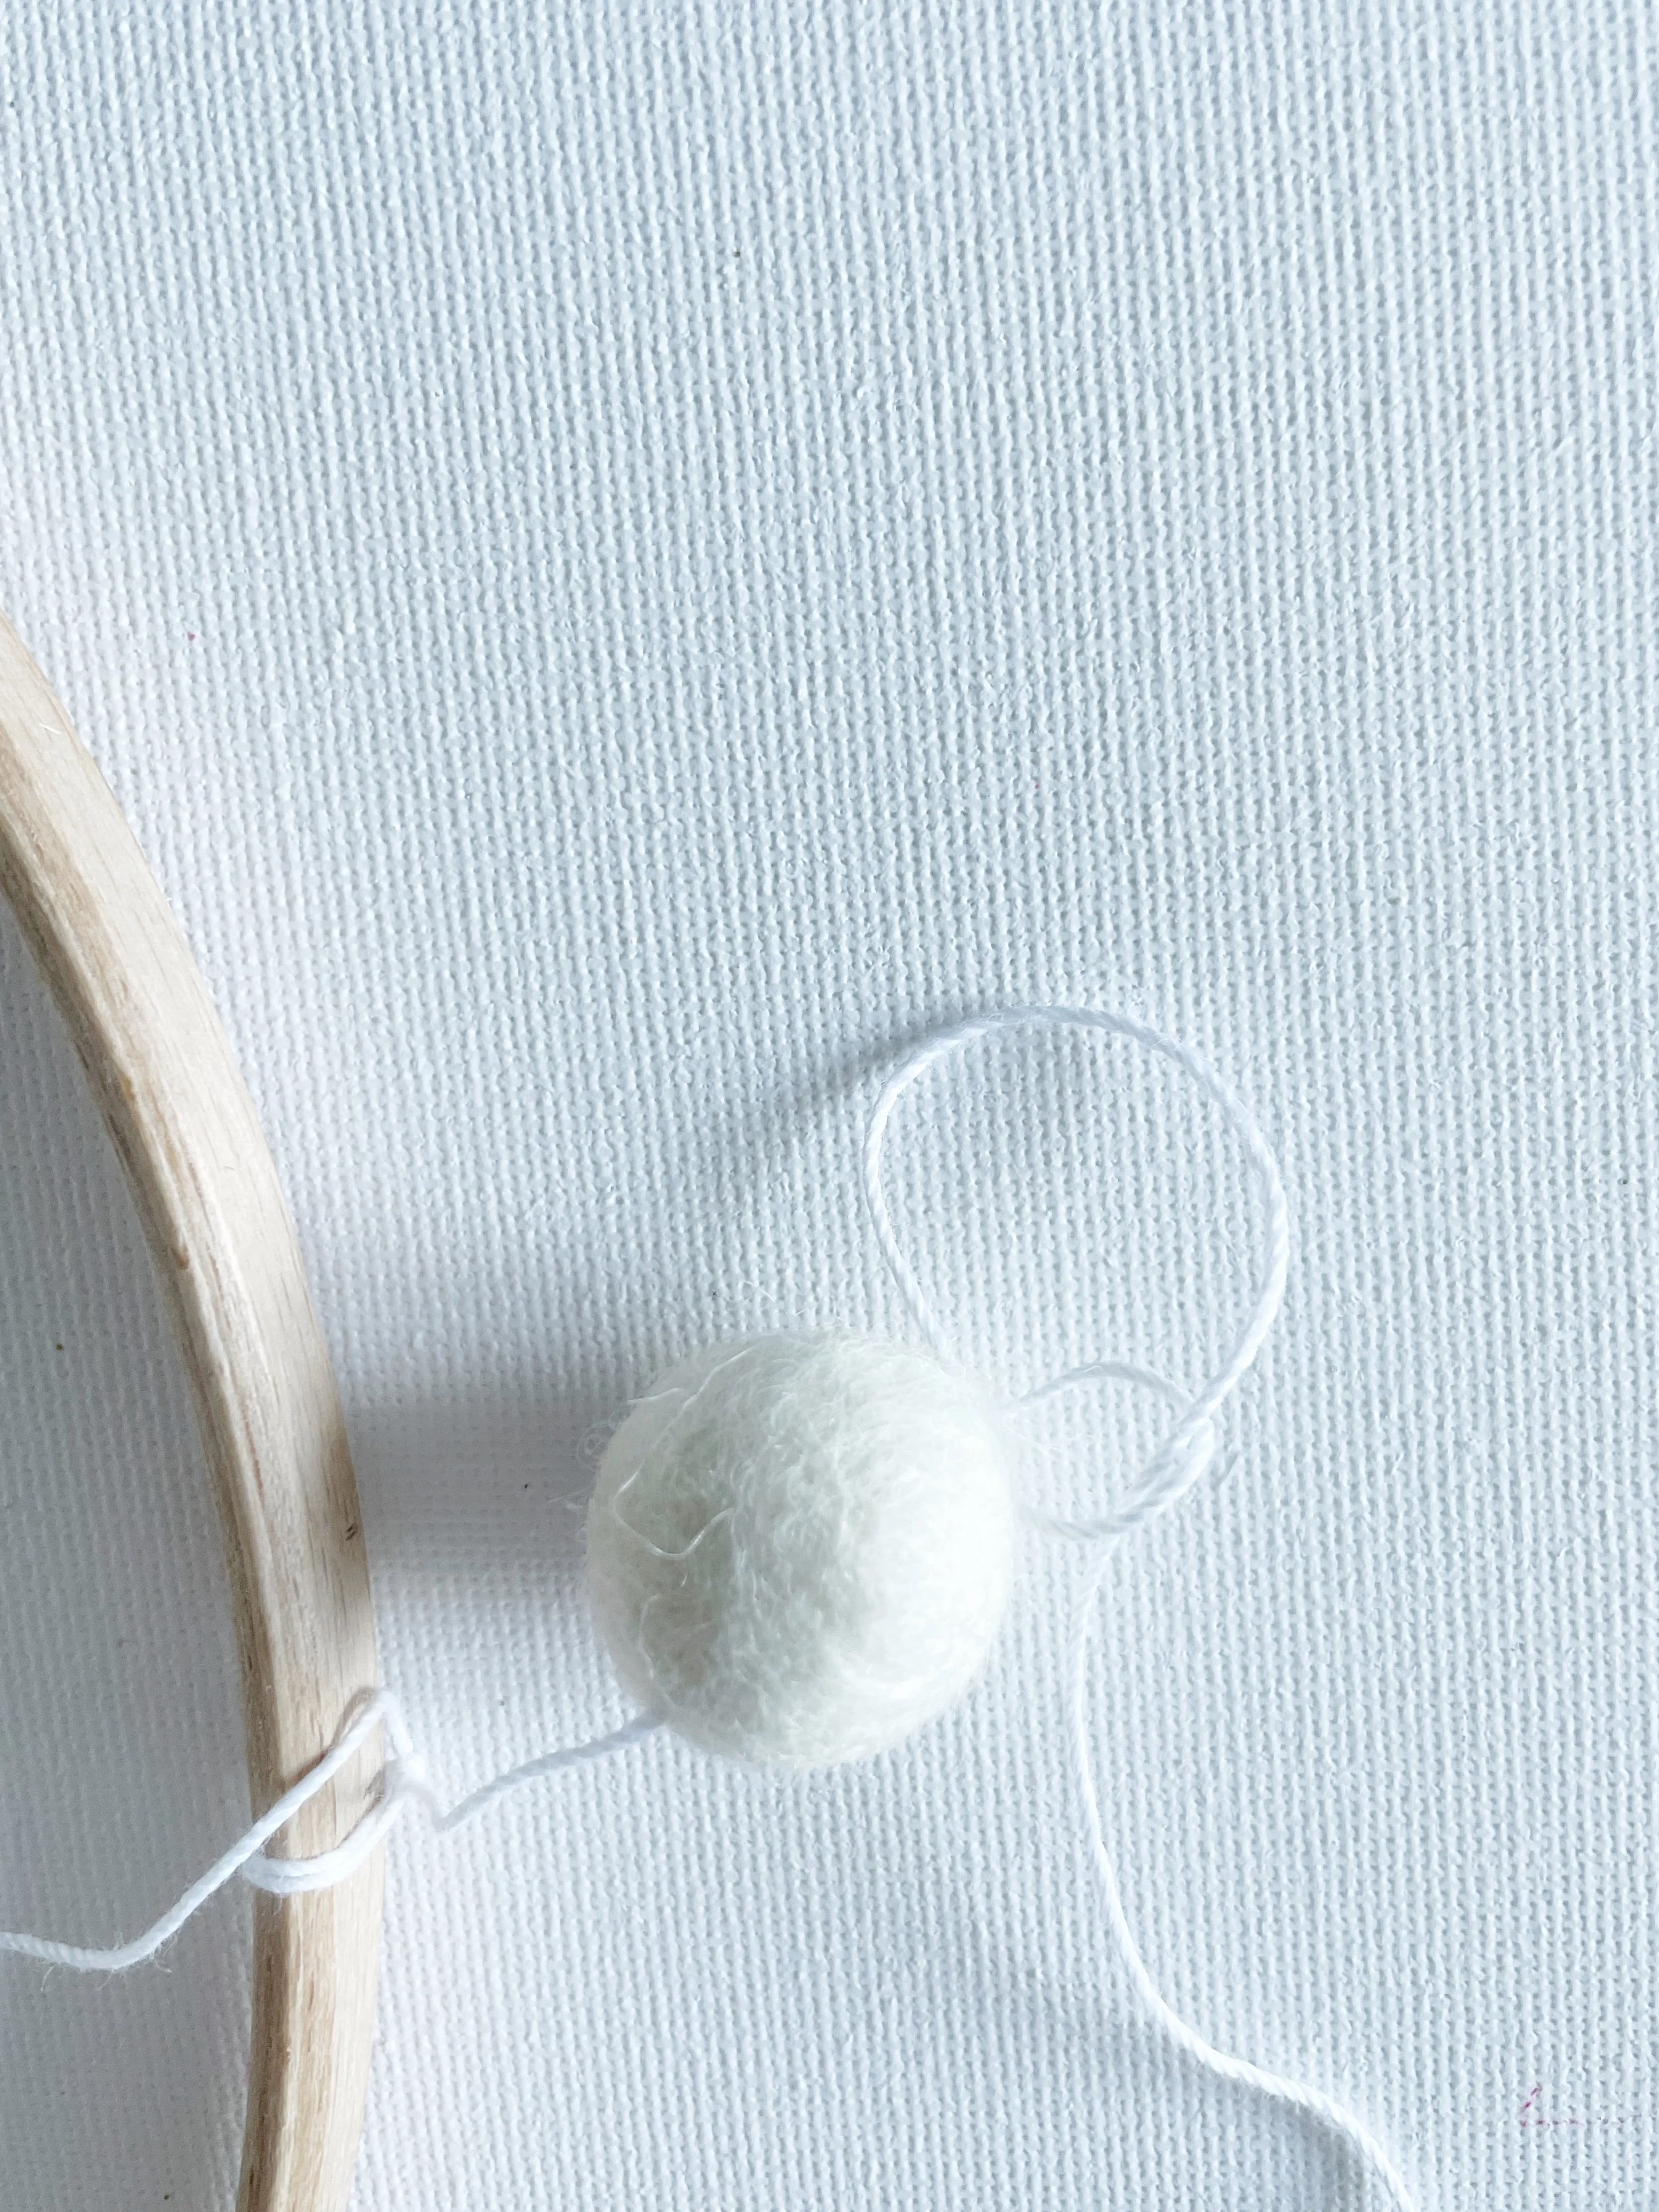
This prevents the knot coming loose.
You now have a loop for hanging your nursery mobile.
Attach the clouds and felt balls…
We’re onto the final stage of making your DIY baby mobile; it’s time to attach the felt balls and clouds! Don’t worry, I’ll guide you through each step.
I’ll show you exactly how to secure everything nice and tightly using your needle.
When it comes to adding the clouds and felt balls, we’ll be staggering their positions so they don’t all line up at the same height. Think of it like a "one up, one down" pattern.
This avoids the mobile looking cluttered and gives it a more professional and visually interesting finish.
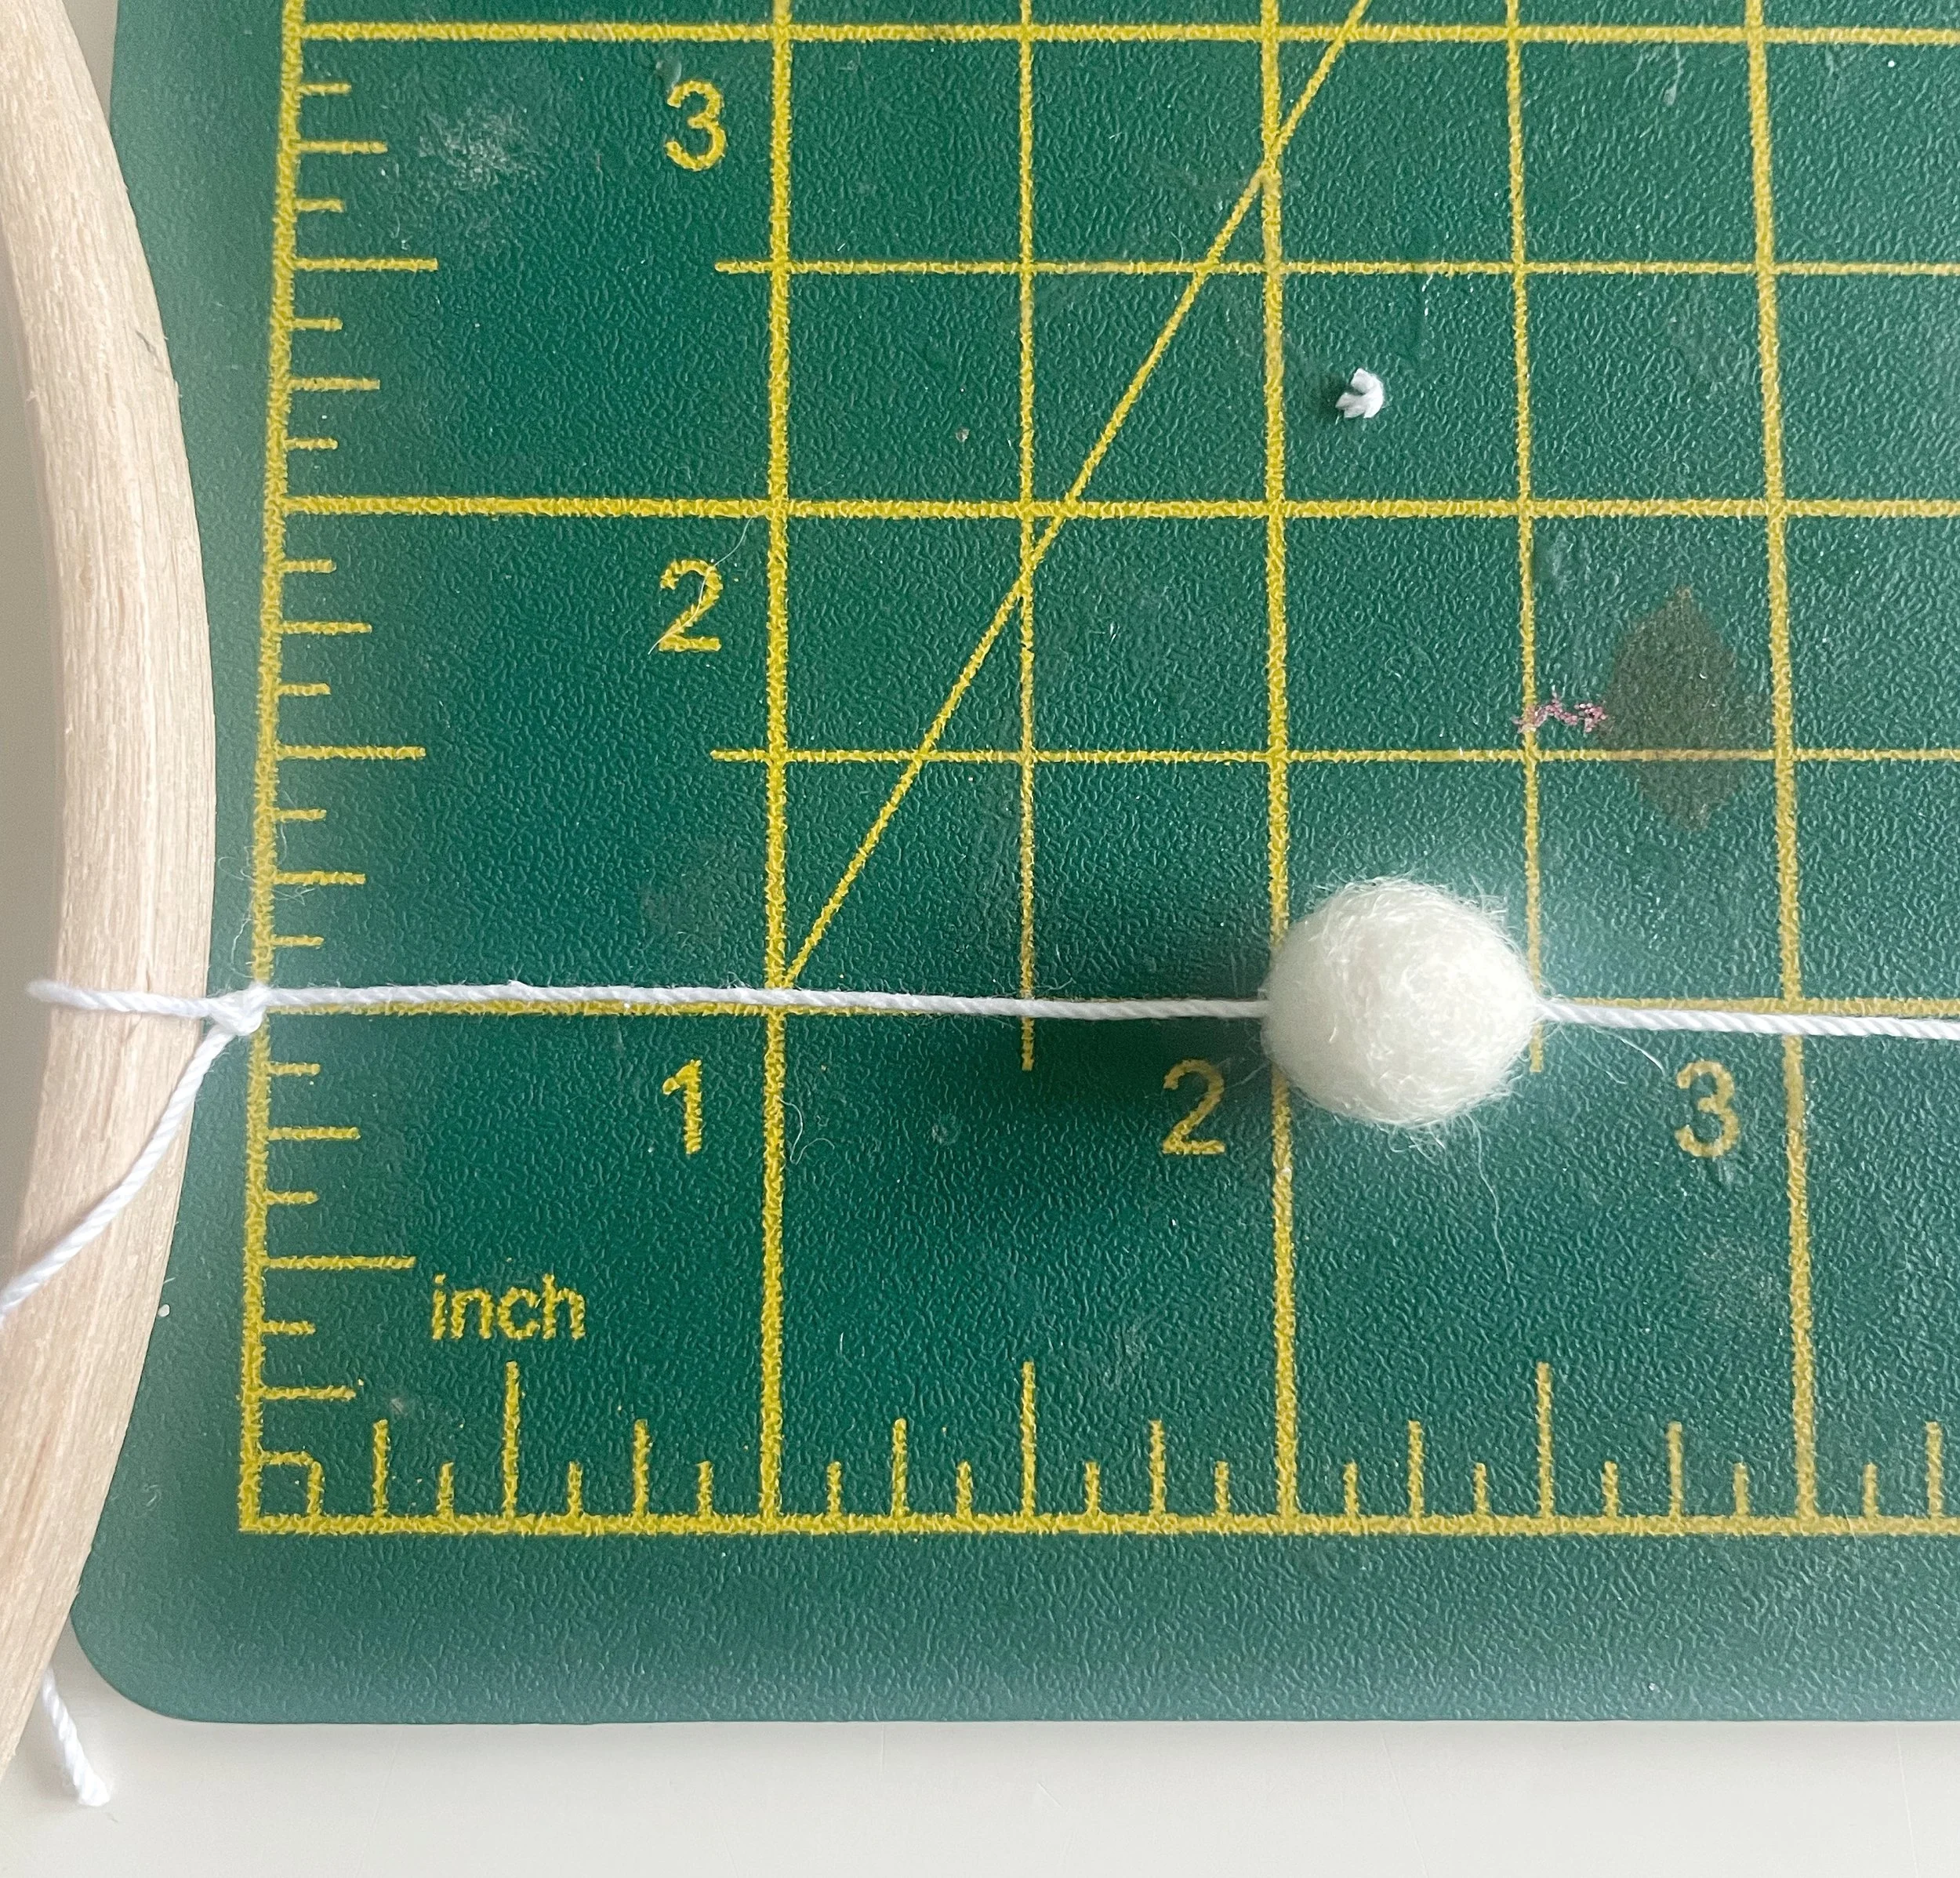
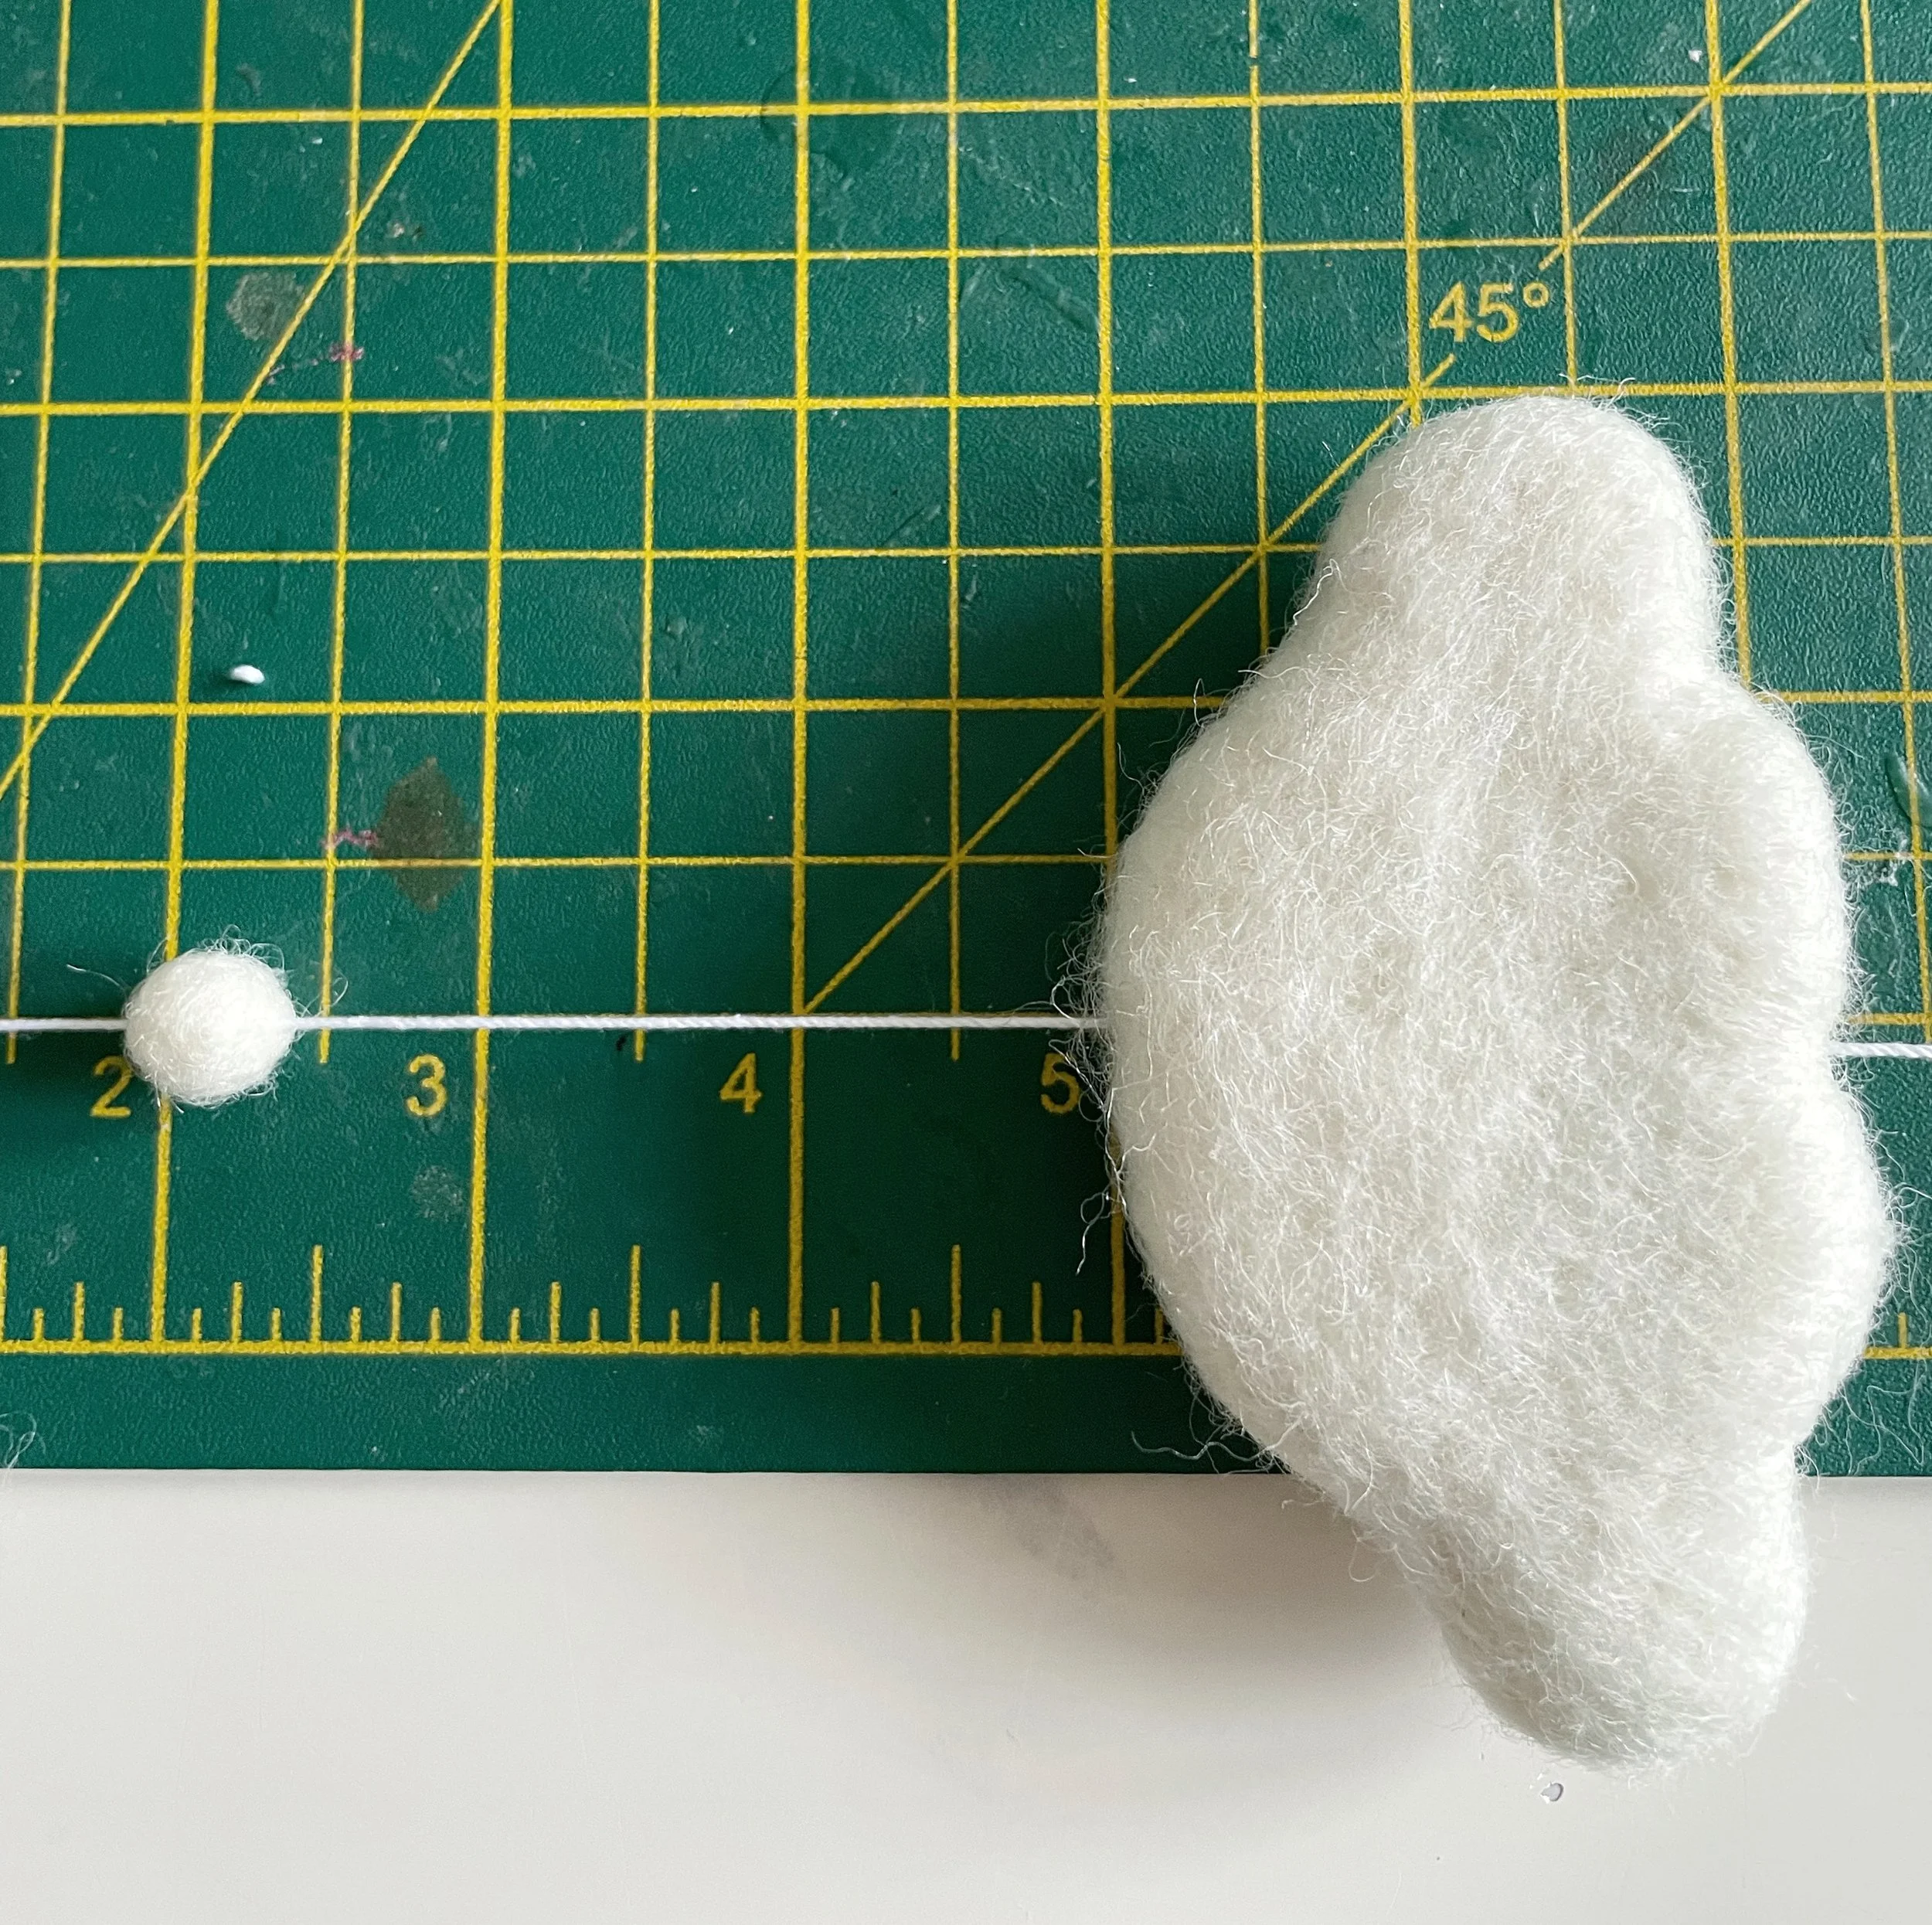
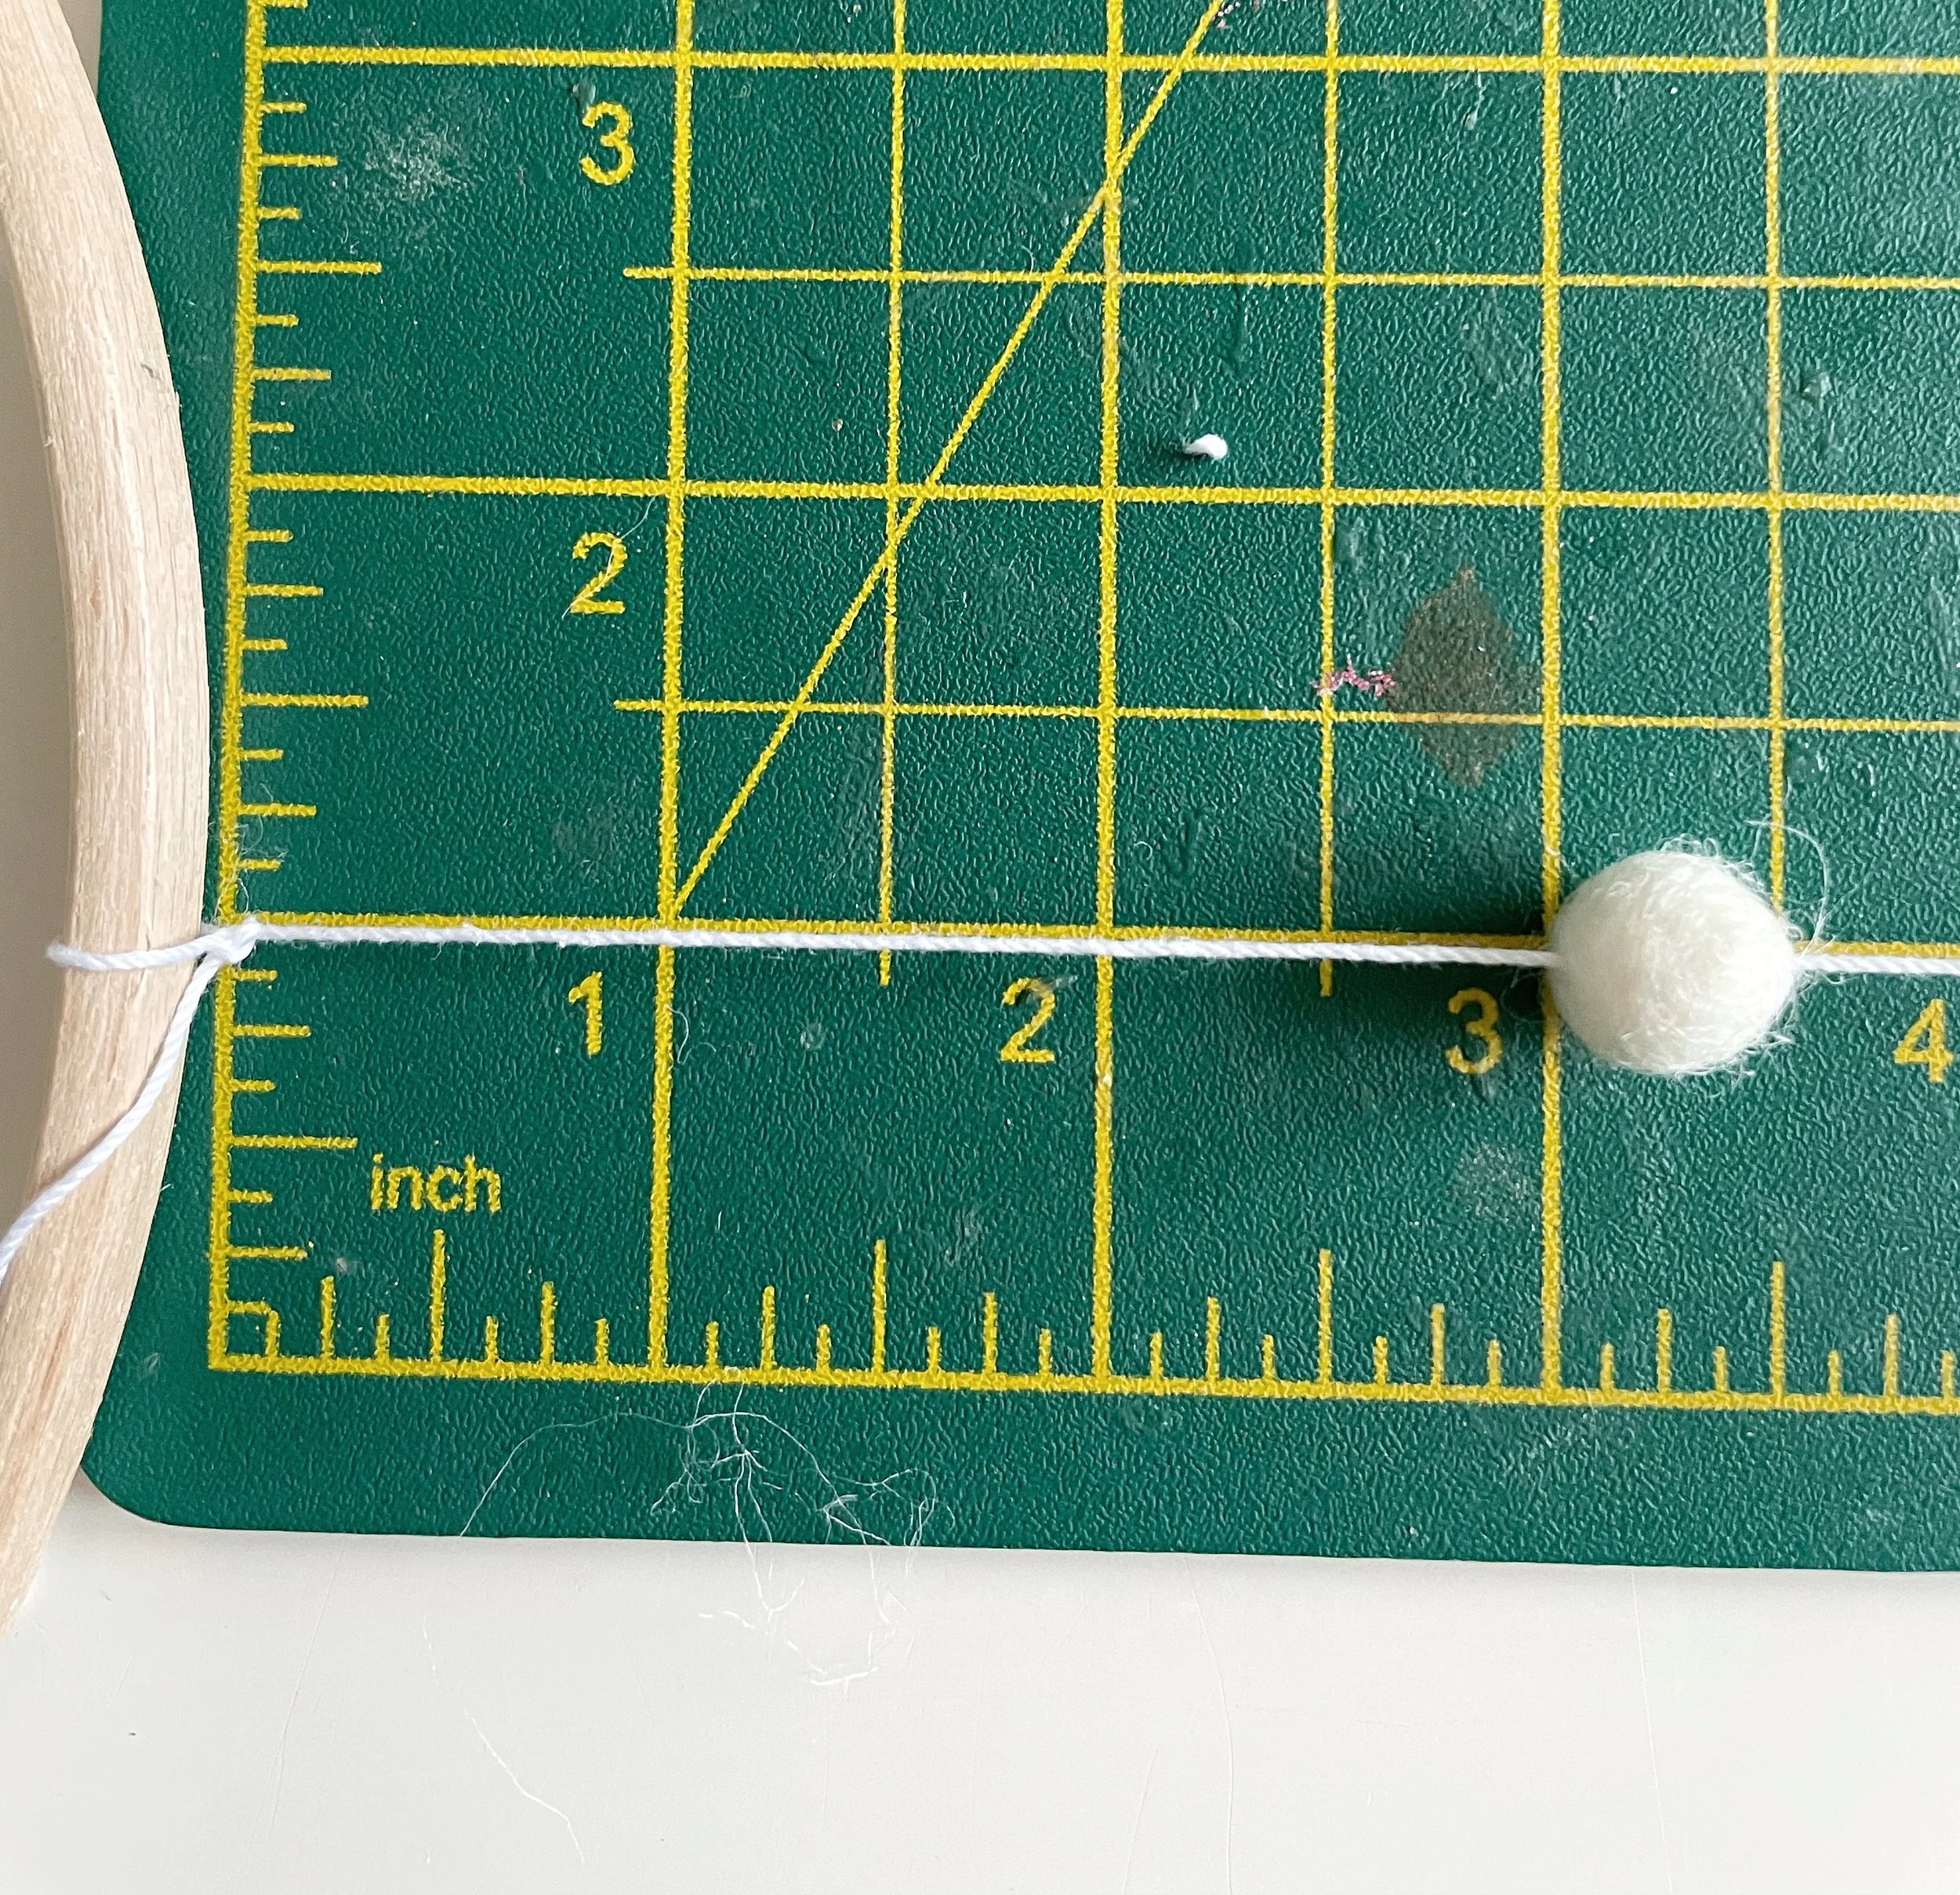
Let’s start by attaching the first 1cm felt ball (if you’re using one). Thread your large needle with one of the strands of string, then gently slide the felt ball onto the string.
Position it so it sits 2 inches below the top of the beech ring. (You can refer to the picture above for a visual!).
Use the needle to secure the felt ball in place. Create a small loop with the string by sewing a small stitch at the base of the felt ball. Thread the needle through the loop and pull it tight to keep everything in position (see below).
Thread the string through the base of the felt ball.
Make a loop.
Thread the needle back through the loop and secure tightly.
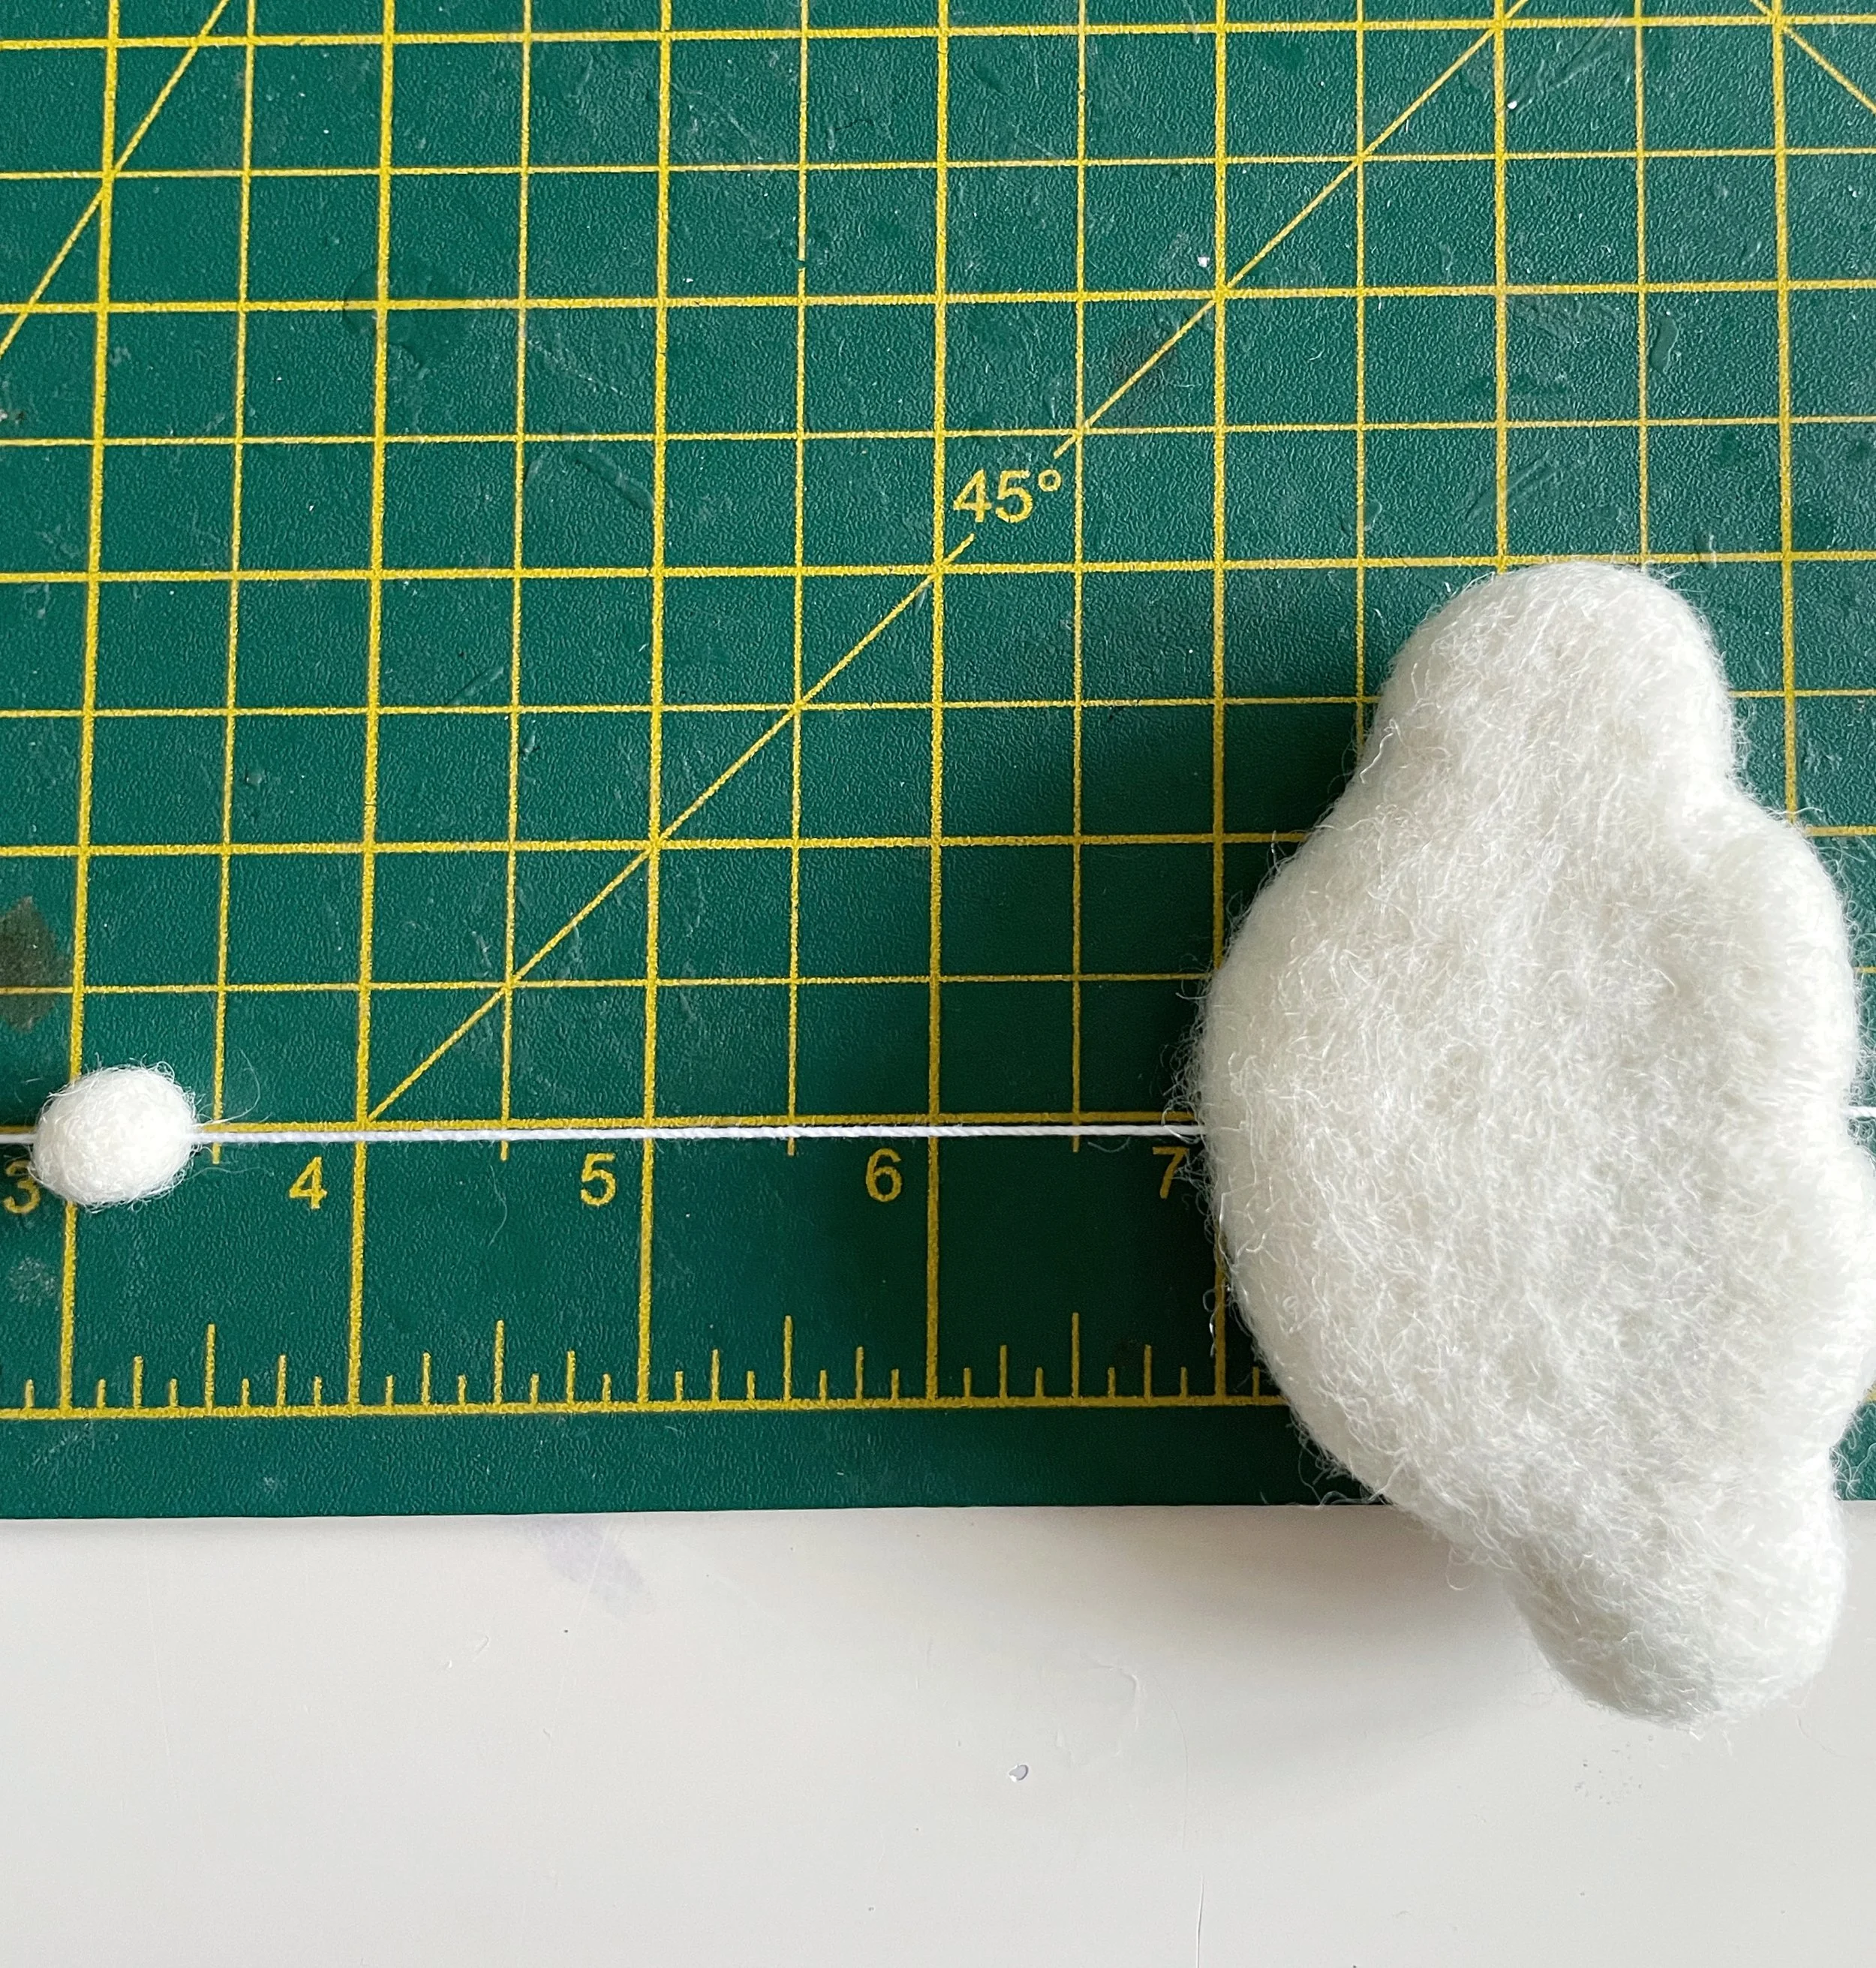
Using the large needle, carefully thread your cloud onto the string and position it so it hangs 3 inches below the base of the felt ball. It should sit at the 5inch point of your cutting mat.
Secure the cloud in place by using your needle to sew a knot at the base, just like we did with the felt ball.
Don’t cut the string just yet, we’ll wait until the end to trim everything once we’re happy with how the finished mobile looks.
Grab the next piece of string. Thread a felt ball onto it and slide it down so it sits 3 inches below the beech ring (you can check the photo above for a visual).
Secure the felt ball in place by using your needle to tie a little knot.
Now, thread a cloud onto the string. Position it so it’s 4inches below the base of the felt ball you just added. It will sit at the 7inch point of your cutting mat.
Secure it with another knot.
For the third string, you’ll use the same measurement as the first, place the felt ball 2 inches down and the cloud 5inches down.
For the fourth string, follow the second placing the felt ball 3 inches down and the cloud 7 inches down..
Keep repeating this pattern, alternating the measurements as you go. This way, your pieces will be nicely staggered one up, one down, creating a lovely, balanced look.
Finally, it’s time to add the last two felt balls and cloud to the centre string. I don’t stick to a specific measurement for this one I secure it where I think it looks good.
I usually like to position it so the top felt ball sits roughly in line with the beech ring (you can see what I mean in the picture below), but feel free to place it wherever looks best to you. Make sure to firmly secure them.
Once you're happy with the placement of your clouds and felt balls, grab an eraser and gently remove any pencil marks from the beech ring.
Now you can step back and see how your finished nursery mobile is coming together! If anything looks a little off, don’t worry, you can easily tweak it to get everything nicely balanced.
Use your needle to gently unpick any knots if you need to make adjustments. Once you’re happy with how it all looks, make sure to firmly secure each cloud in place, a double knot is a great idea for extra security.
When you’re ready, go ahead and trim the strings. Just be careful not to cut too close to the knot, or it might come undone.

And just like that… you’ve made your very own cloud nursery mobile!
I hope you had fun creating this DIY nursery mobile, just as much fun as I had putting this tutorial together for you.
There’s something really magical about watching those little clouds come together, especially when you know they’re going to float above a beautiful, little dreamer.
If you loved making this baby mobile, please don’t stop here! Be sure to check out the felt ball garland tutorial too. You can add felt clouds to make the perfect addition to your cloud-themed nursery.
Got a question, a clever tip, or a finished mobile you’re bursting to show off? I’d absolutely love to see it! Pop a comment below and share your creation, I promise it’ll make my day.
Now step back, admire your handiwork, and enjoy that “I made this!” feeling. Fair warning though… this might just be the start of a new crafting obsession 😉
Sending Peace, Love & Creativity,
Karen x