
Make Your Own Hanging Cloud Decoration

I’m so excited to share this handmade craft tutorial with you, I’m going to show you how to make your own gorgeous hanging cloud decoration! It’s a perfect handmade touch for a nursery, children’s bedroom, or playroom.
Making your own nursery decor is such a joyful little win: it looks beautiful, gives you a chance to get creative, and it’s budget-friendly too!
You’re going to love how this soft, fluffy cloud looks hanging in your space. The gentle swaying of the soft felt cloud and tiny stars gives it the dreamiest, most calming feel.
Perfect for soothing your little one.
Whether your style is modern, classic, or somewhere in between, this project is super-easy to tailor to your taste. I made my cloud nursery decoration with soft ivory felt and felt balls.
I chose mint green stars because they’re gender neutral, but feel free to make the cloud decoration your own! You could keep things neutral and minimalist, go for soft pastels, or add a burst of bold colours. It’s completely up to you.
And if you’re making this as a gift (how lovely is that?!), you can be sure it’ll look adorable in any child’s room, whatever the theme or colour scheme.
In this step-by-step guide, I’ll walk you through everything you need to know to make your own dreamy hanging cloud decoration. You’re going to feel such a lovely sense of joy and pride when you hang up your finished cloud!
Take your time, there’s absolutely no need to rush. Enjoying the process is part of what makes handmade projects so special. They really are little gifts for the soul.
I always suggest reading through the tutorial once or twice before you dive in. It helps everything feel more doable, especially if you're new to crafting.
And once you’ve made your first cloud, don’t be surprised if you want to make more! They’re so fun to create (and just a little bit addictive). You’ll be wanting to make them for every little one you know!
Selling your handmade crafts…
Once you start making your own kids' room decor, don’t be surprised if you get totally hooked, you might even find yourself dreaming up your own little shop! Nursery decor is always a popular choice, not just with parents, but with anyone looking for a sweet and meaningful gift.
That’s why this hanging cloud decoration could be a lovely addition to your product range, or even the perfect way to launch your handmade business!
Sticking with gender-neutral colours can make it easier for customers to say “yes,” but offering a mix of options is a great way to suit different styles and preferences.
A great tip to boost your sales? Offer this matching nursery mobile as an upsell, or bundle it with a cloud garland at a special price, little touches like that can make your listing truly irresistible!

Make Your Own Cloud Nursery Mobile
And if you’re thinking about selling your makes, don’t miss my super-handy Beginner’s Guide to Pricing Your Handmade Items. Pricing can be surprisingly tricky when you’re just starting out, but this guide will make it feel a lot more manageable.
Pin it now to save for later!

Safety…
Since your cloud decoration is likely to be hanging in a baby’s nursery, it’s really important to make sure all the small pieces are securely attached and firmly in place.
Always hang the cloud decoration well out of baby’s reach and be sure not to place it directly above a crib or anywhere your little one can grab it.
What you will need…

Mix of felt balls and stars - for this project I have used 15 1cm ivory felt balls and 5 mint green felt stars.
Wool felt fabric - I have used ivory wool felt. A 40% wool blend is less expensive, easy to work with and looks great for this project.
Matching thread - I like Gutterman threads, they are such great quality and don’t fray or snap.
Two sewing needles - you will need a large (I have used a 7cm) and regular sewing needle
Scissors - they need to be sharp enough to easily cut through fabric. I like to use fabric scissors for this. If you’re just getting in to crafting they’re definitely worth the investment. Don’t use them on paper though, it will make them blunt.
Hollowfibre stuffing - Choose one that features the relevant fire safety standards.
Cloud template click to download your free template
Kraft card - old Amazon envelopes work great too
Glue - for sticking the template to card so any old glue will do
Pen
Cutting mat -you can complete this project with only a tape measure if you really want to but I believe a cutting board makes things much easier. If you’re on a budget or unlikely to use a cutting mat again, use a tape measure instead.
Thread/ String for hanging - any string will do. I like to use crochet thread size 10. It’s great for so many projects like garlands and mobiles so is worth the investment if you plan to continue crafting.
Create your cloud template…
Print off the cloud template. You may need to adjust the size of the template on your printer to create the perfect sized cloud for your project.
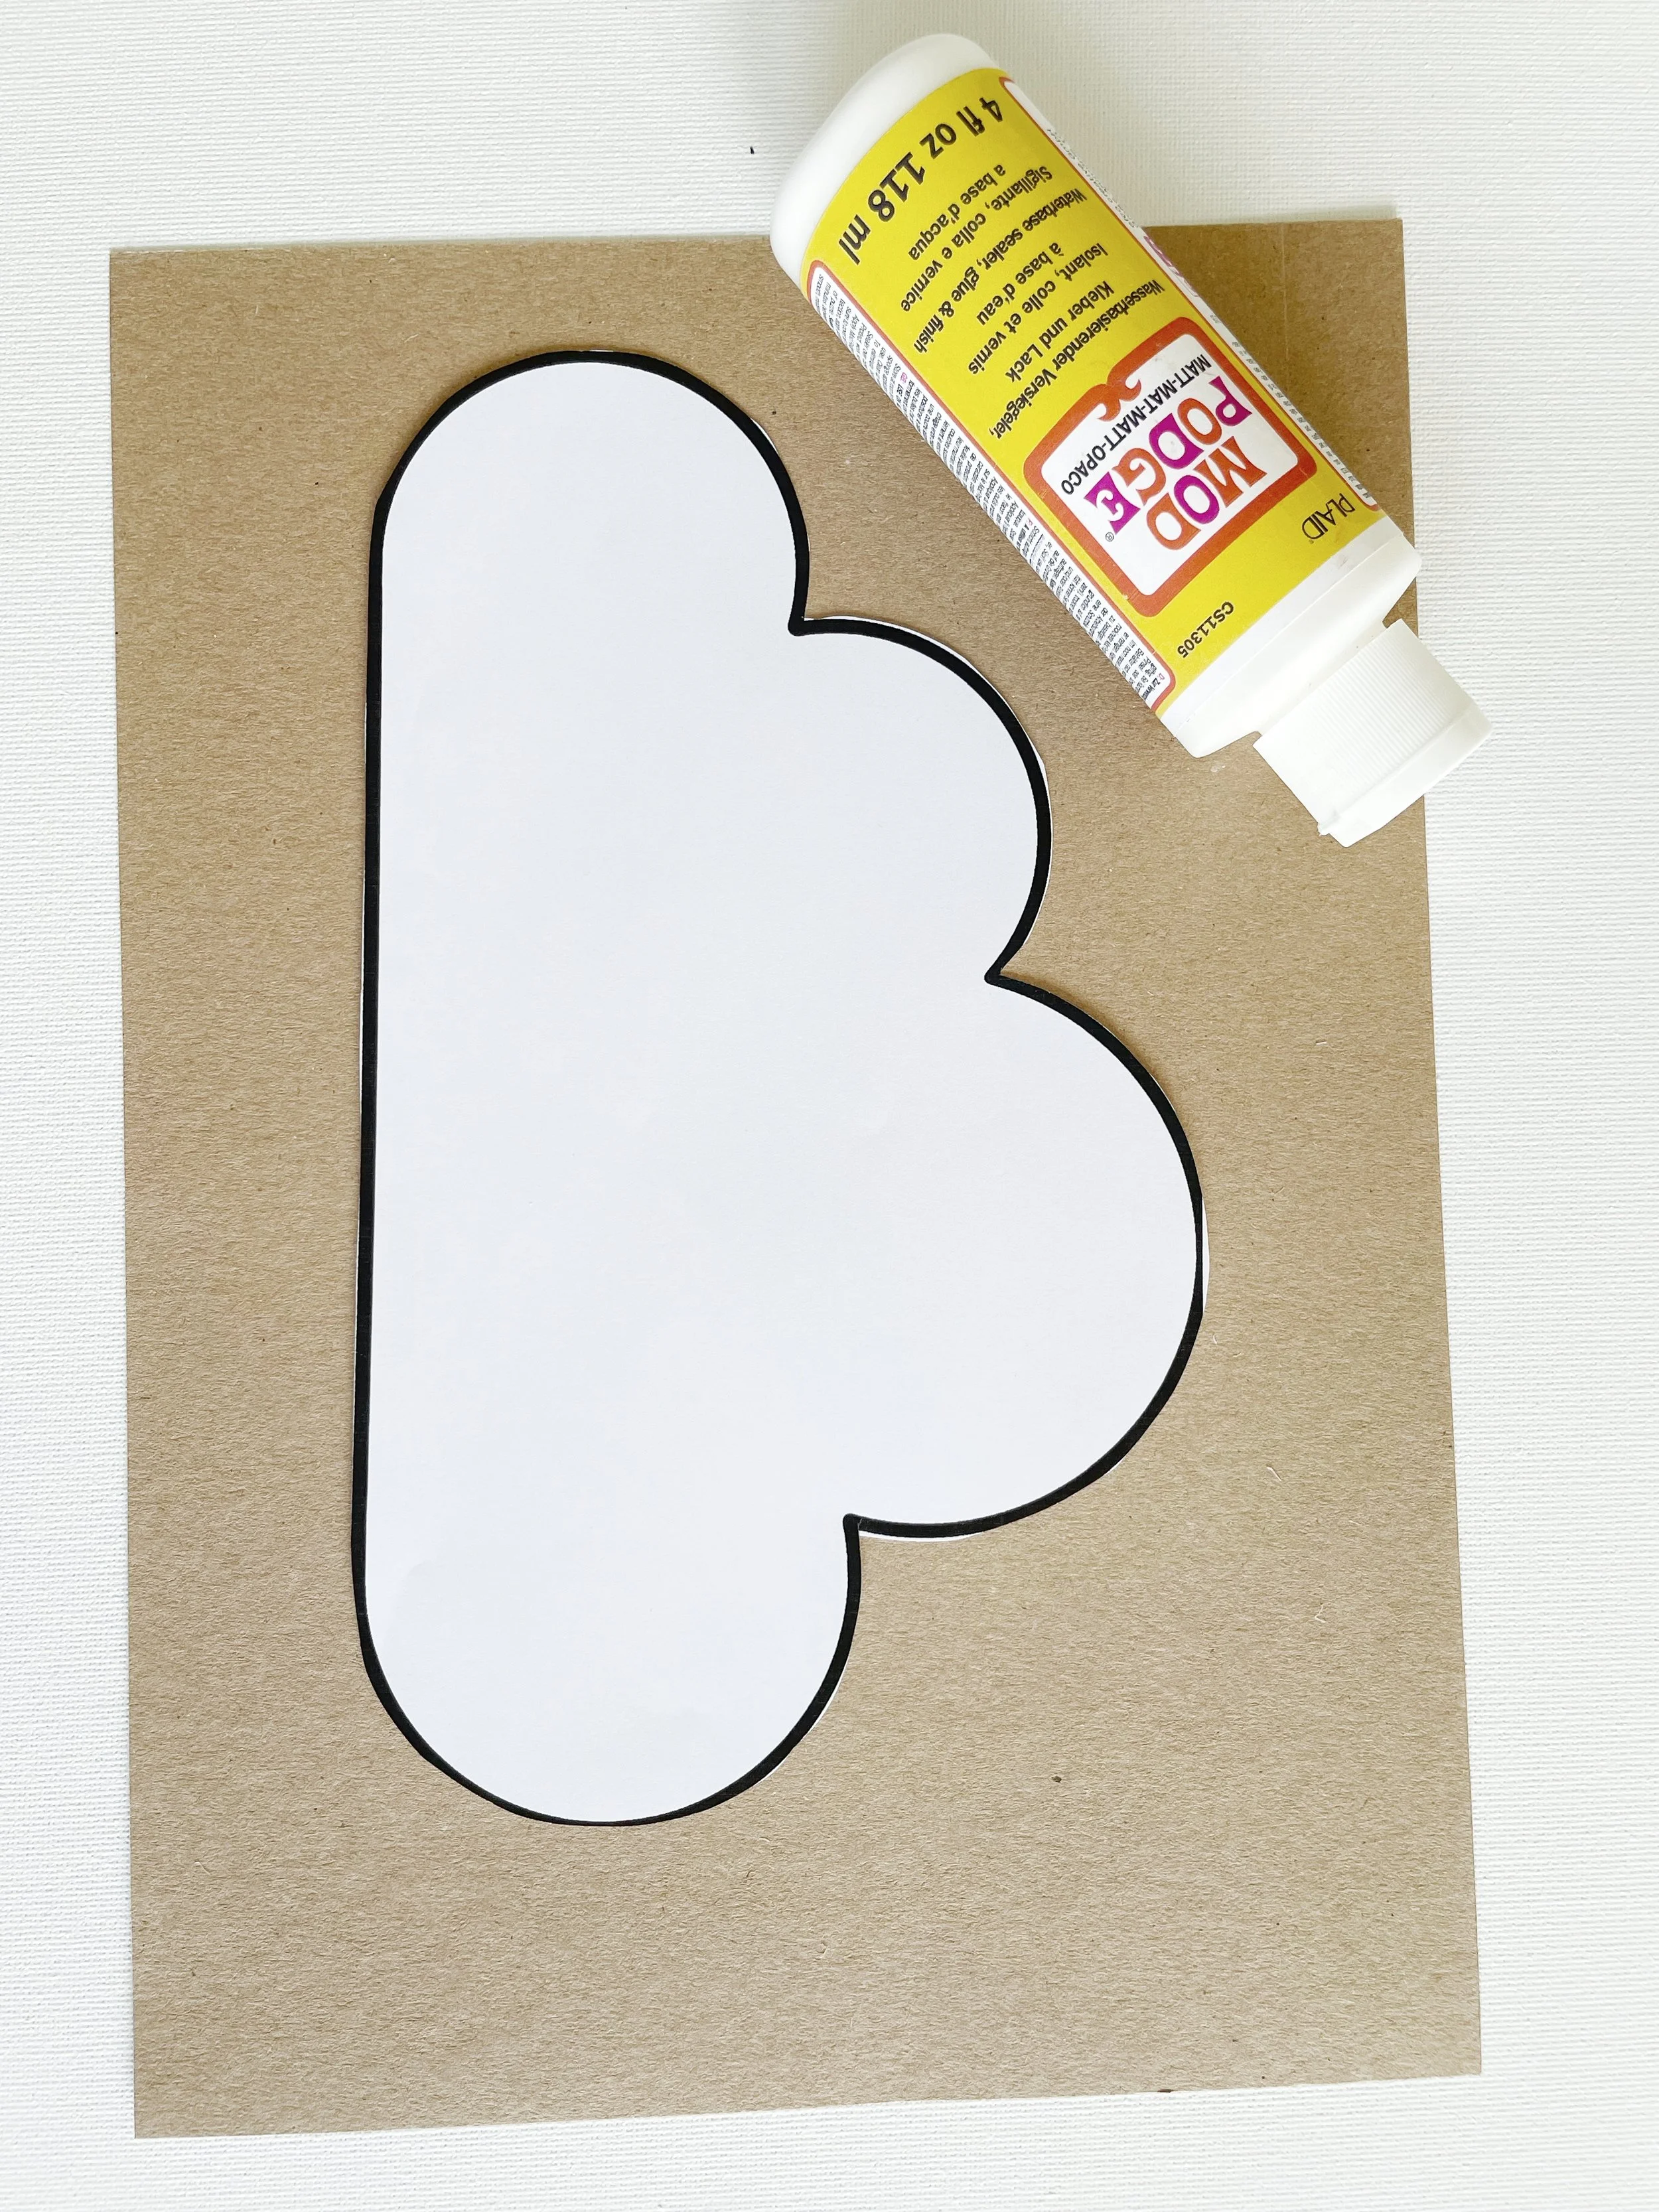
When you are happy with the size of the template, print it and then carefully cut around it. Now glue the template on to the piece of card.
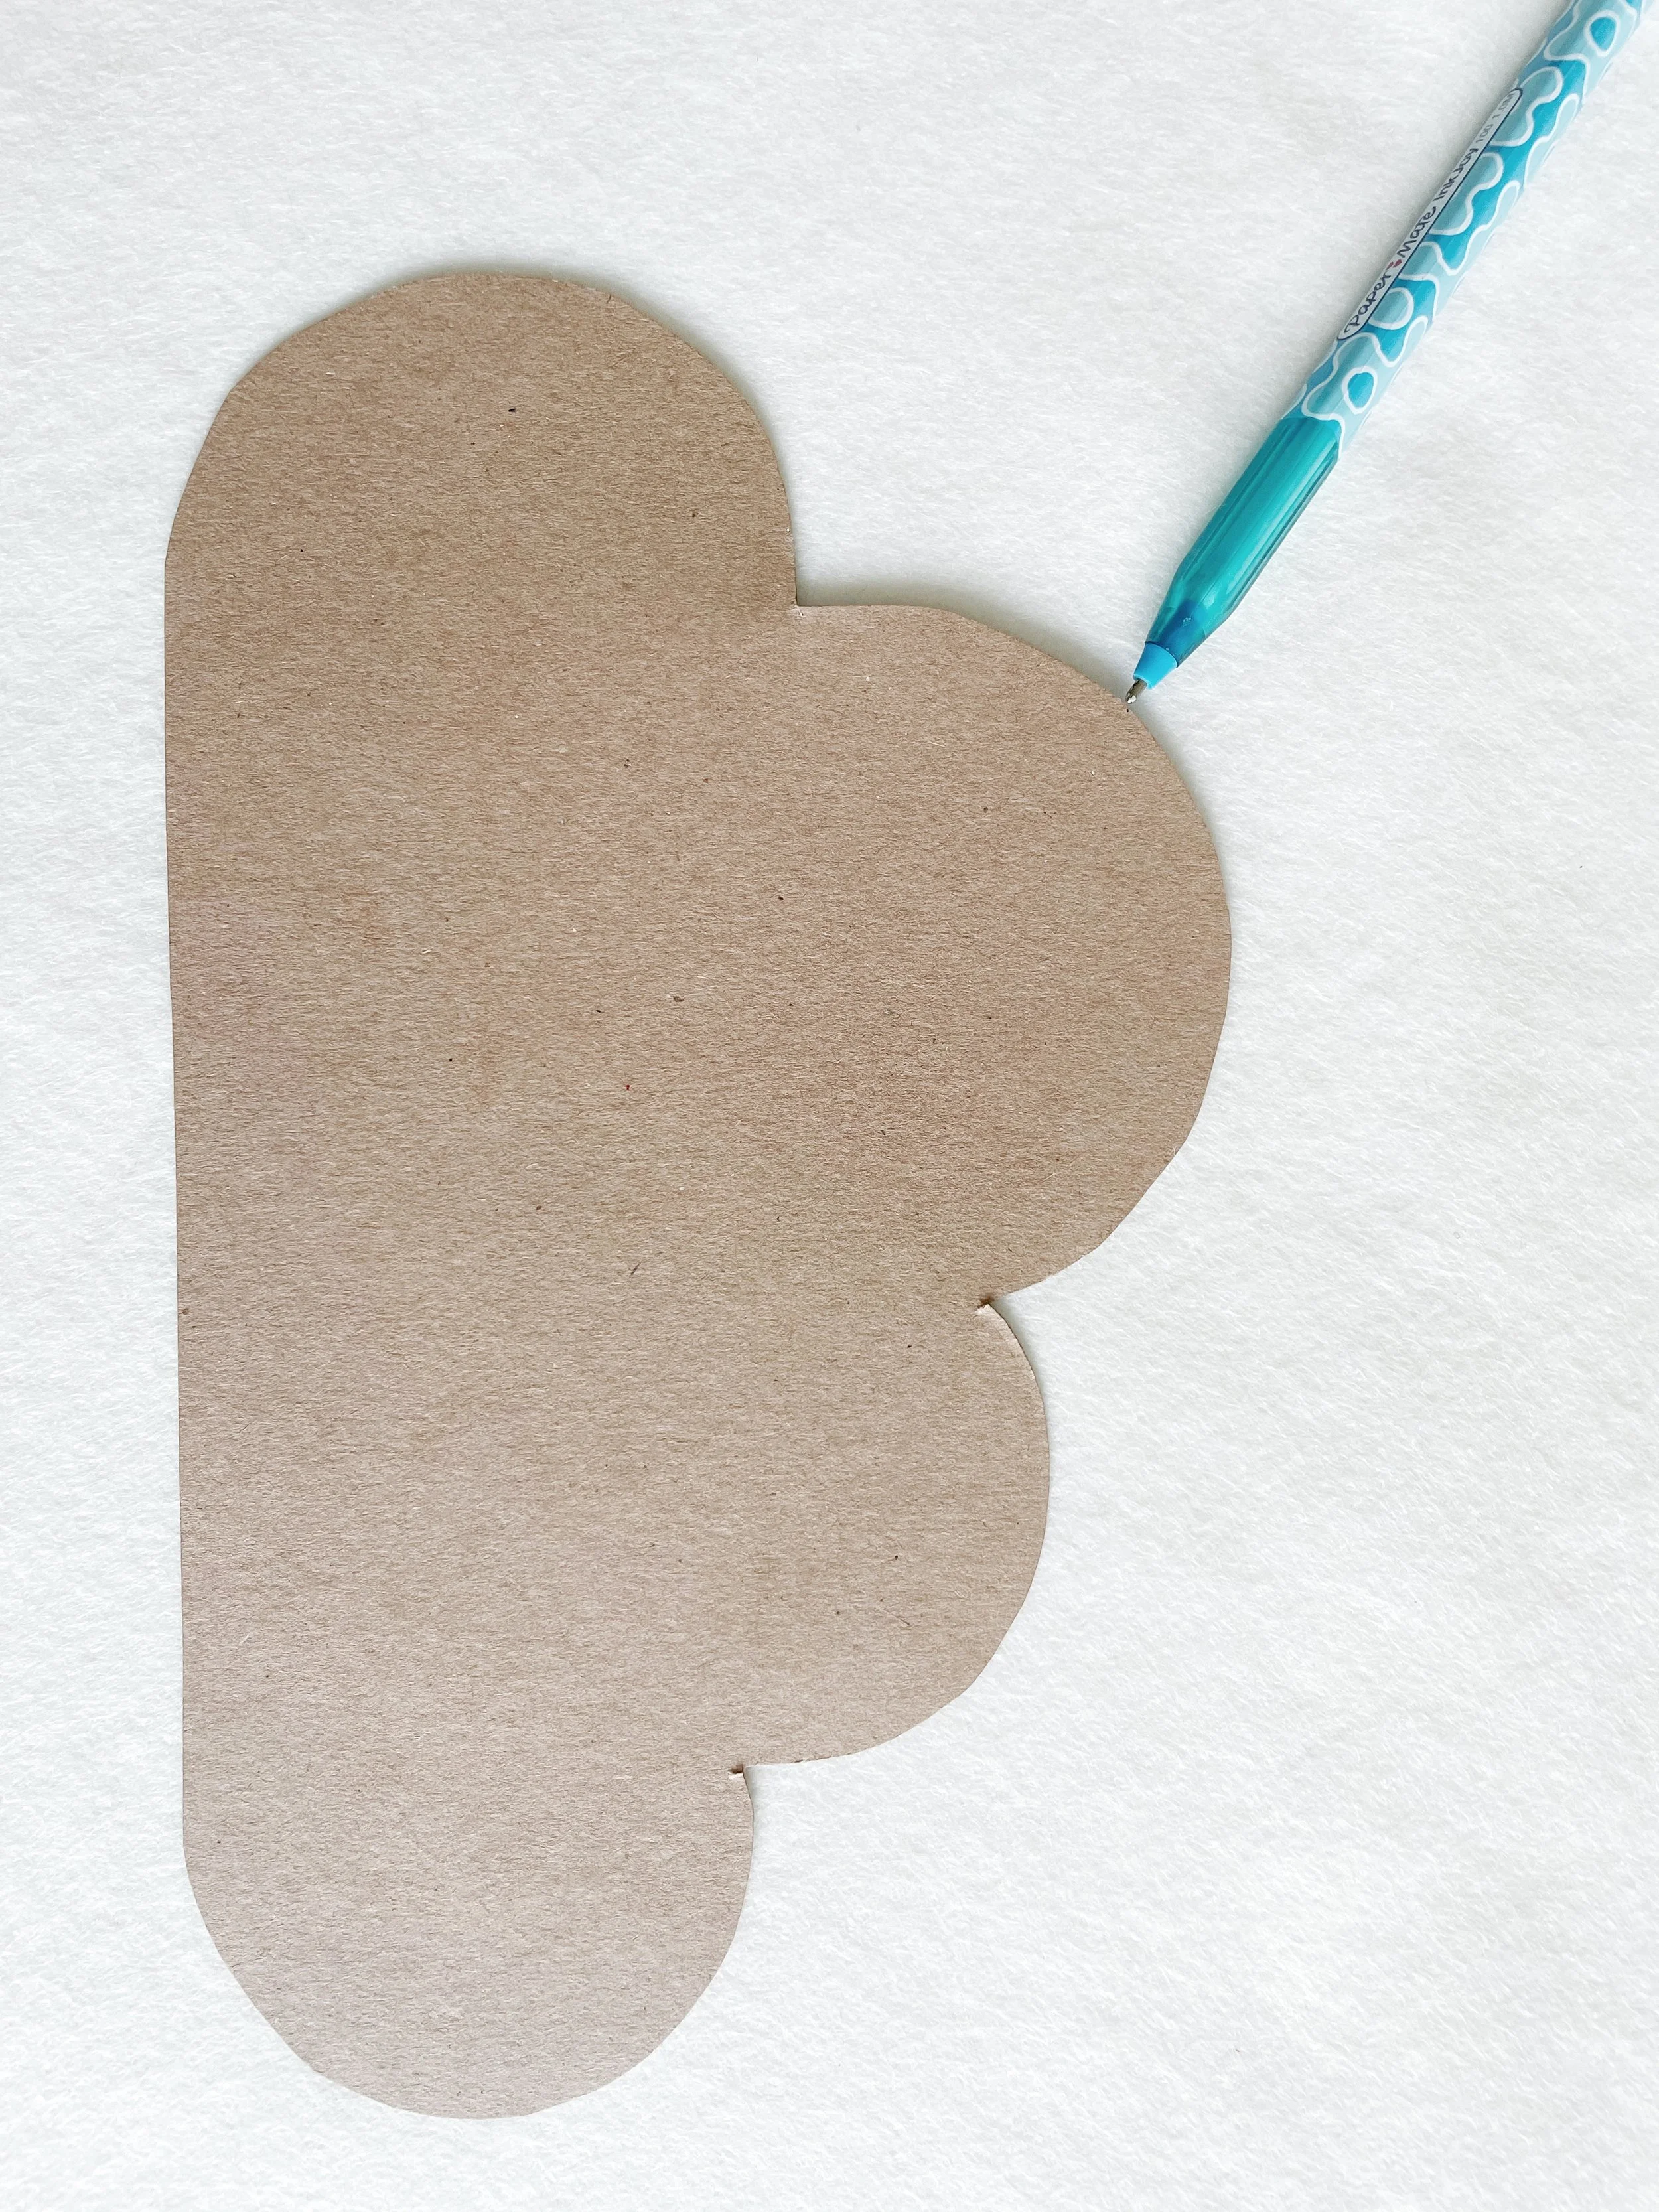
Once the glue has dried, carefully cut around the template.
Draw a cloud shape onto the felt…
Neatly fold the piece of wool felt in half so that you have two layers of wool felt to work with. Make sure all edges are neatly aligned, this makes it much quicker and easier to cut symmetrical cloud shapes.
For best results, give the felt a quick iron to remove any creases and secure the fold.
Place the cloud template on the top layer of the wool felt. Use your pen to draw around the template.
Use your scissors to cut carefully around the cloud shape. Cut through both layers of wool felt.
Turn over the cloud that has been marked with pen. Any pen marks will now be on the inside of the cloud. This will ensure that no pen marks are visible on your finished cloud decoration.
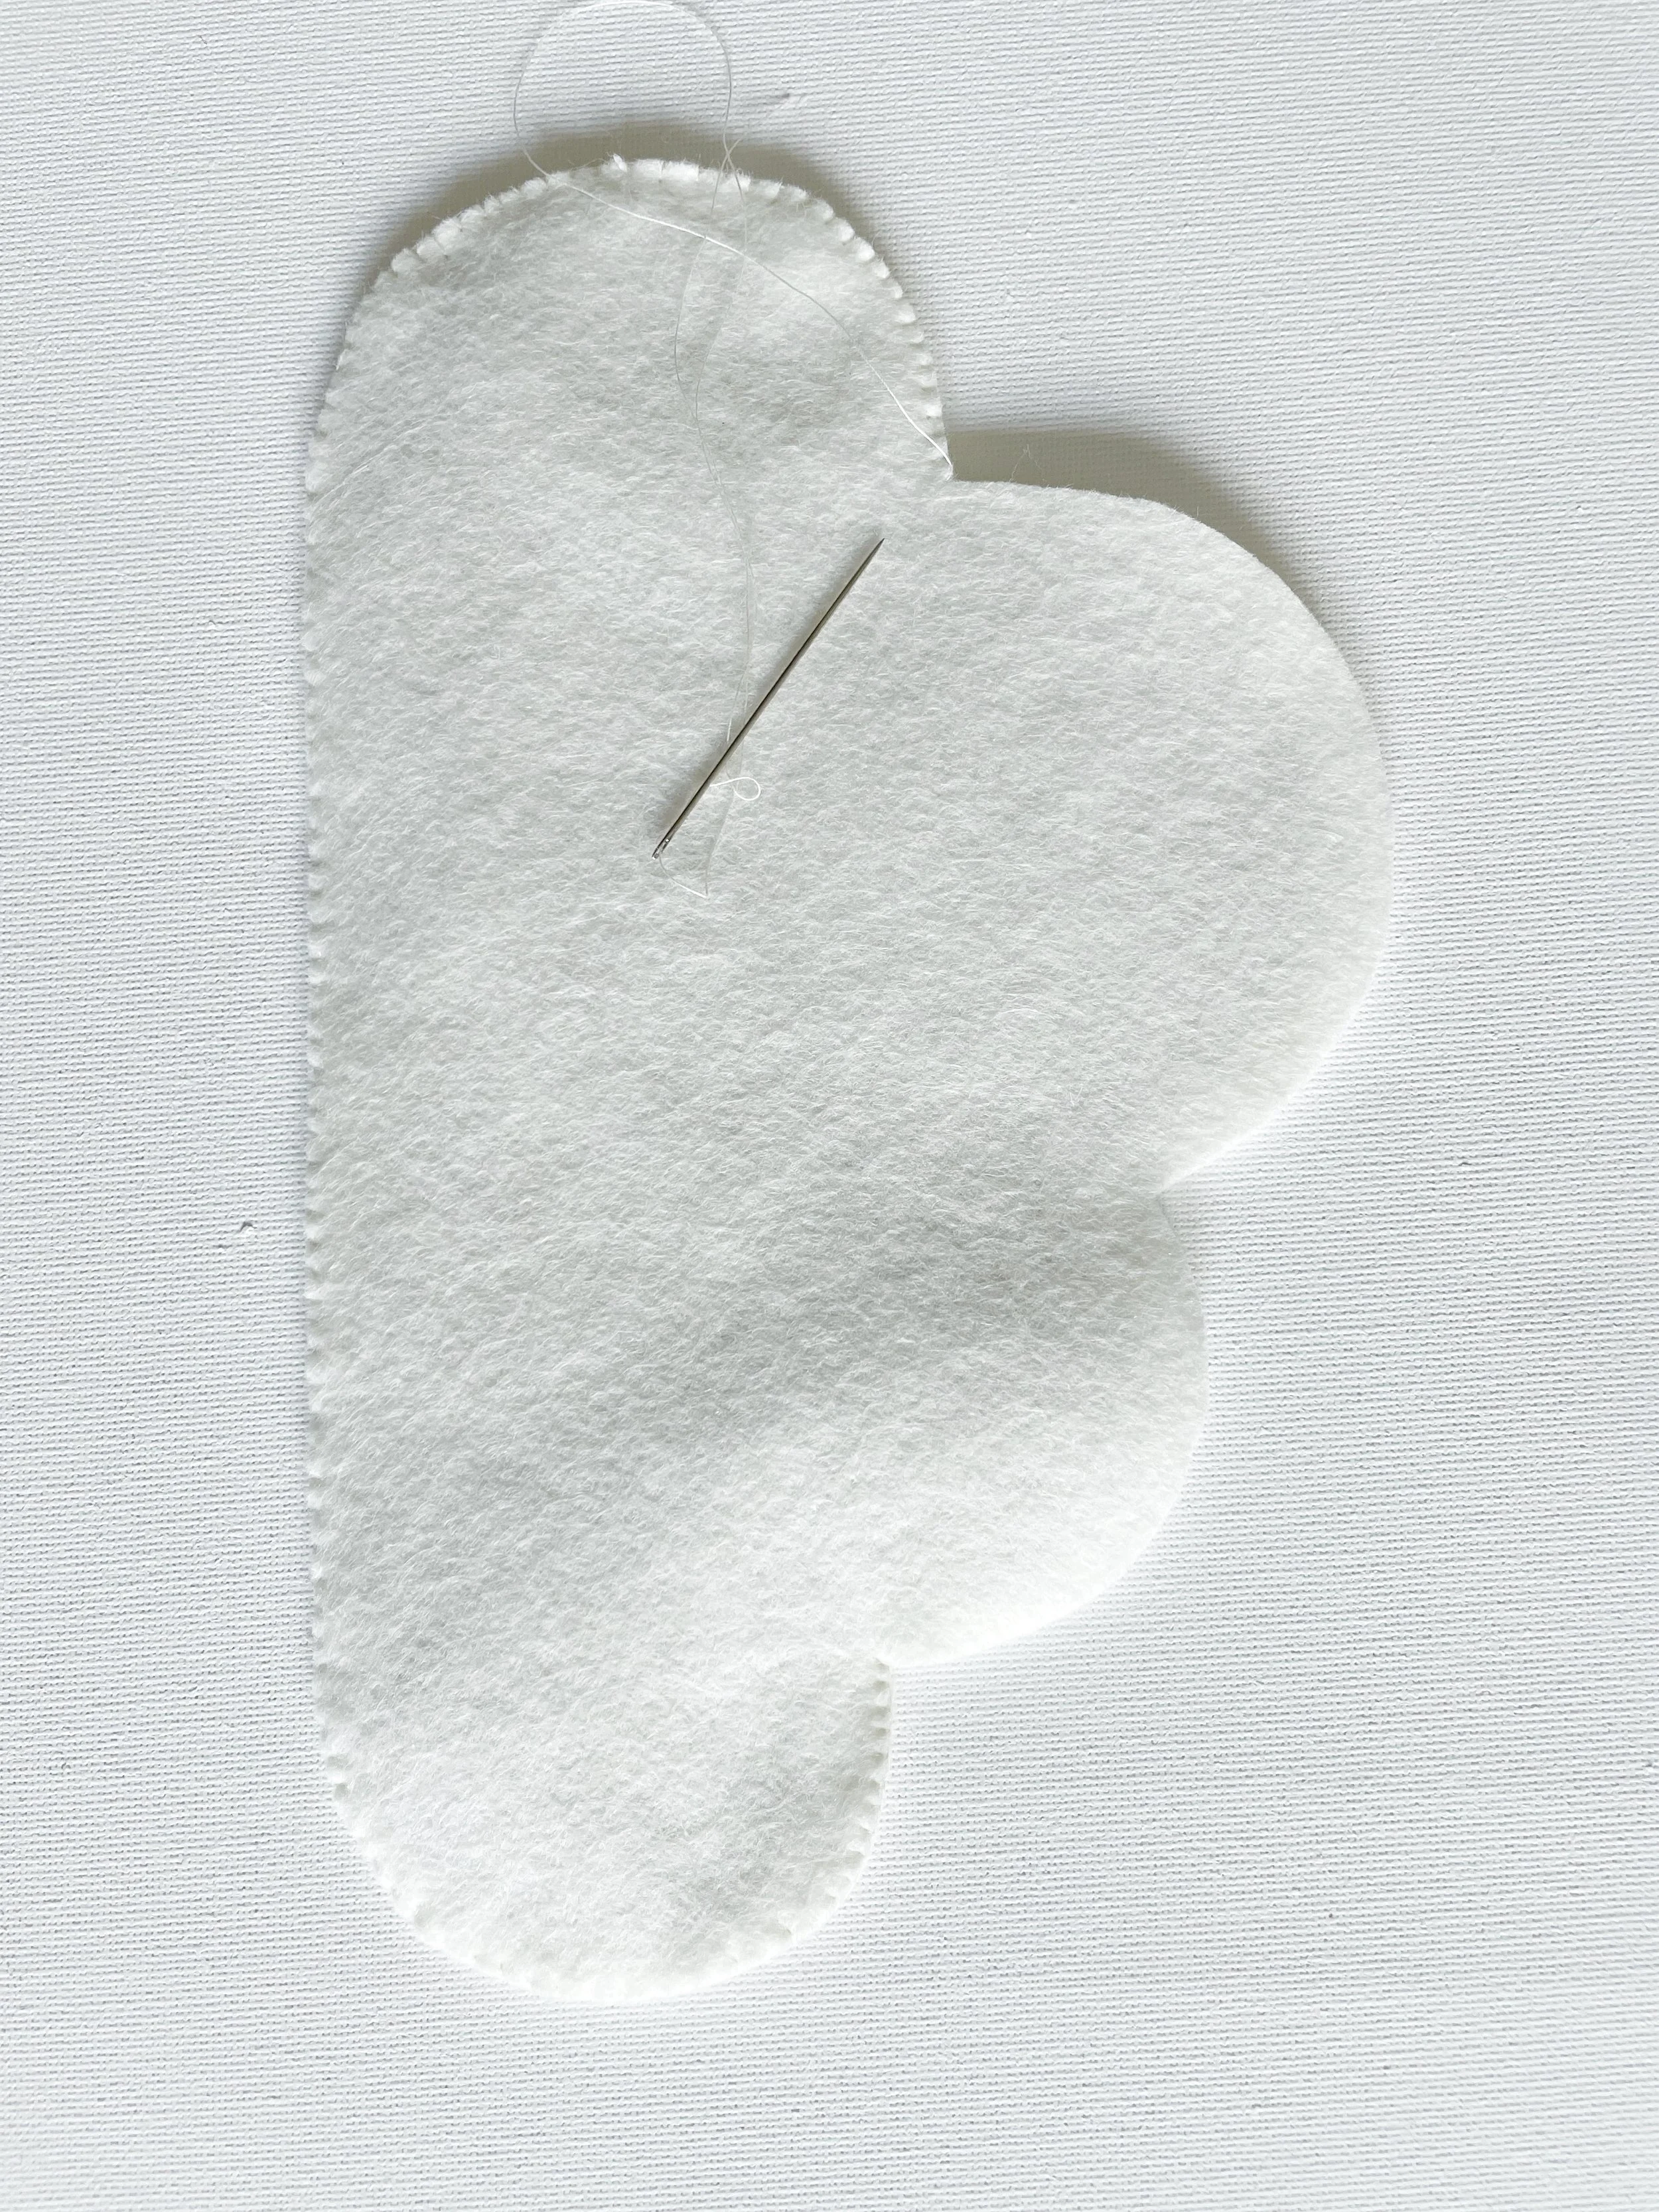
Sew the cloud…
Now it’s time to sew your cloud decoration! Don’t worry if you’re brand new to sewing, I’ll walk you through two simple stitches to get you started.
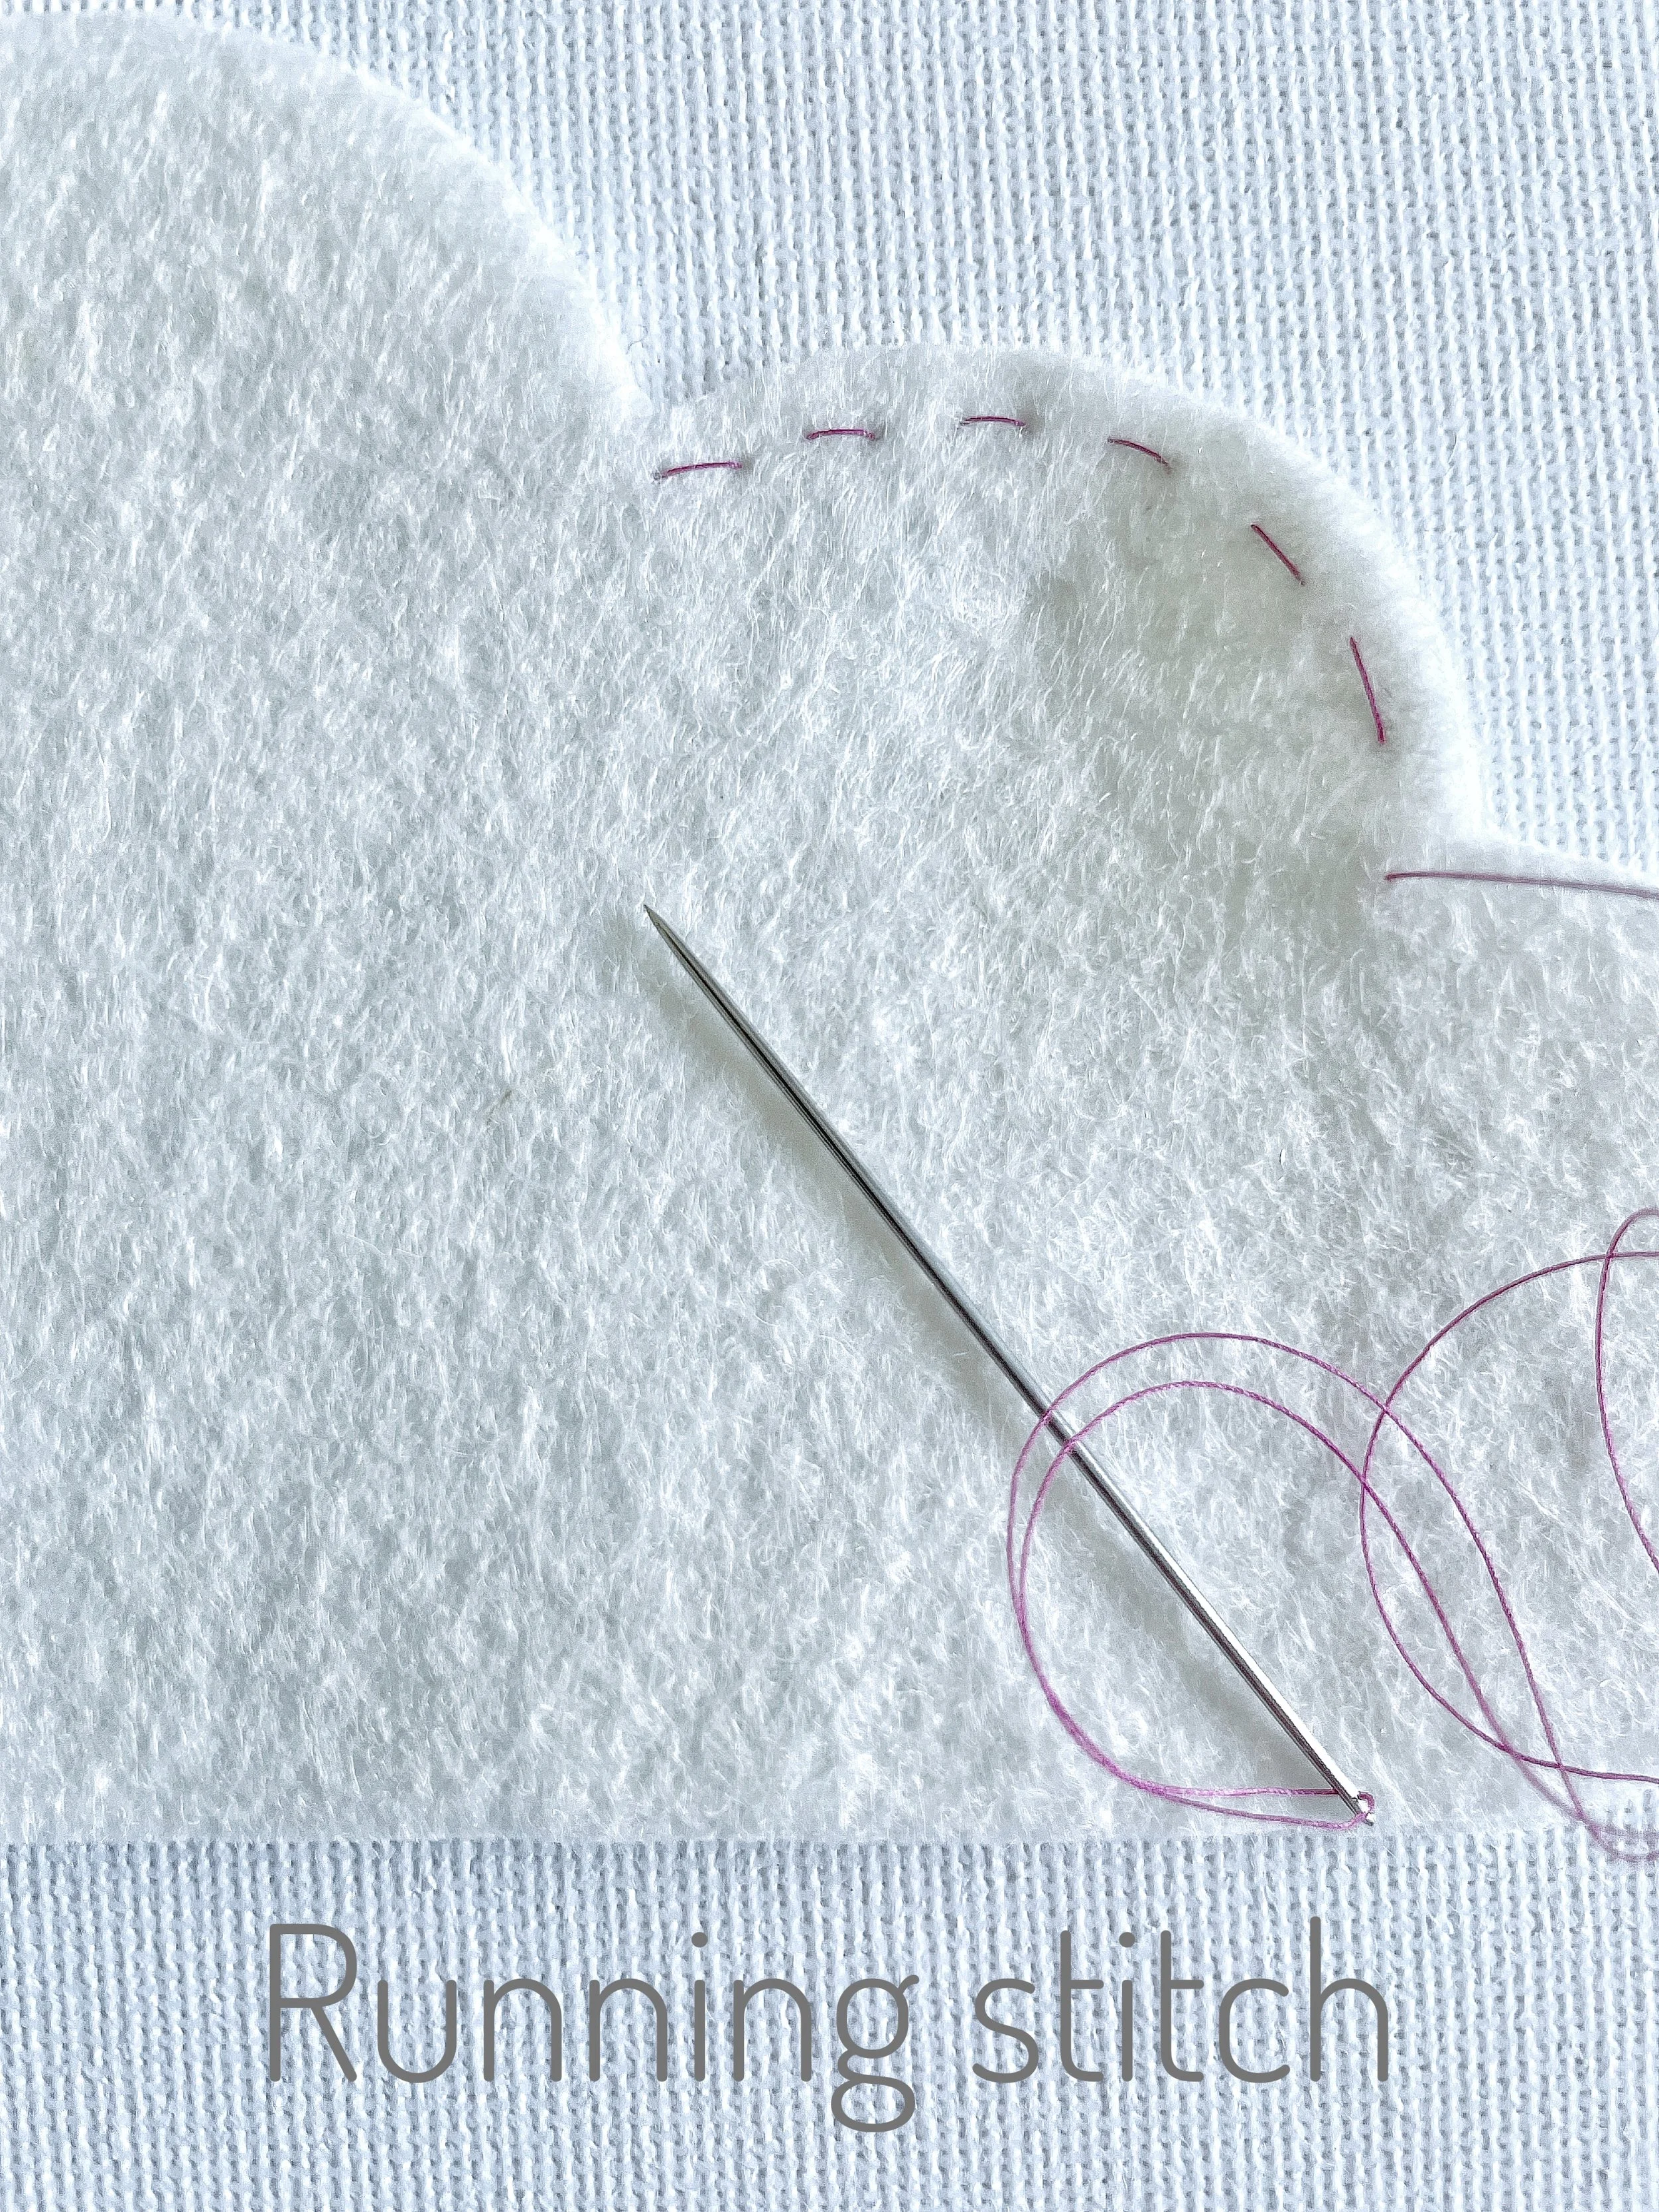
First up is the running stitch. It’s beginner-friendly and doesn’t take much practice to master.
I’m using pink thread in the examples so you can easily see the stitches, but when you sew your nursery mobile, you’ll want to use thread that matches your fabric.
Instead of writing out all the steps for each stitch, I thought it would be much easier (and more fun!) for you to learn from a video. This running stitch tutorial from Red Ted Art is absolutely perfect for beginners. You can watch it here: Running stitch tutorial.
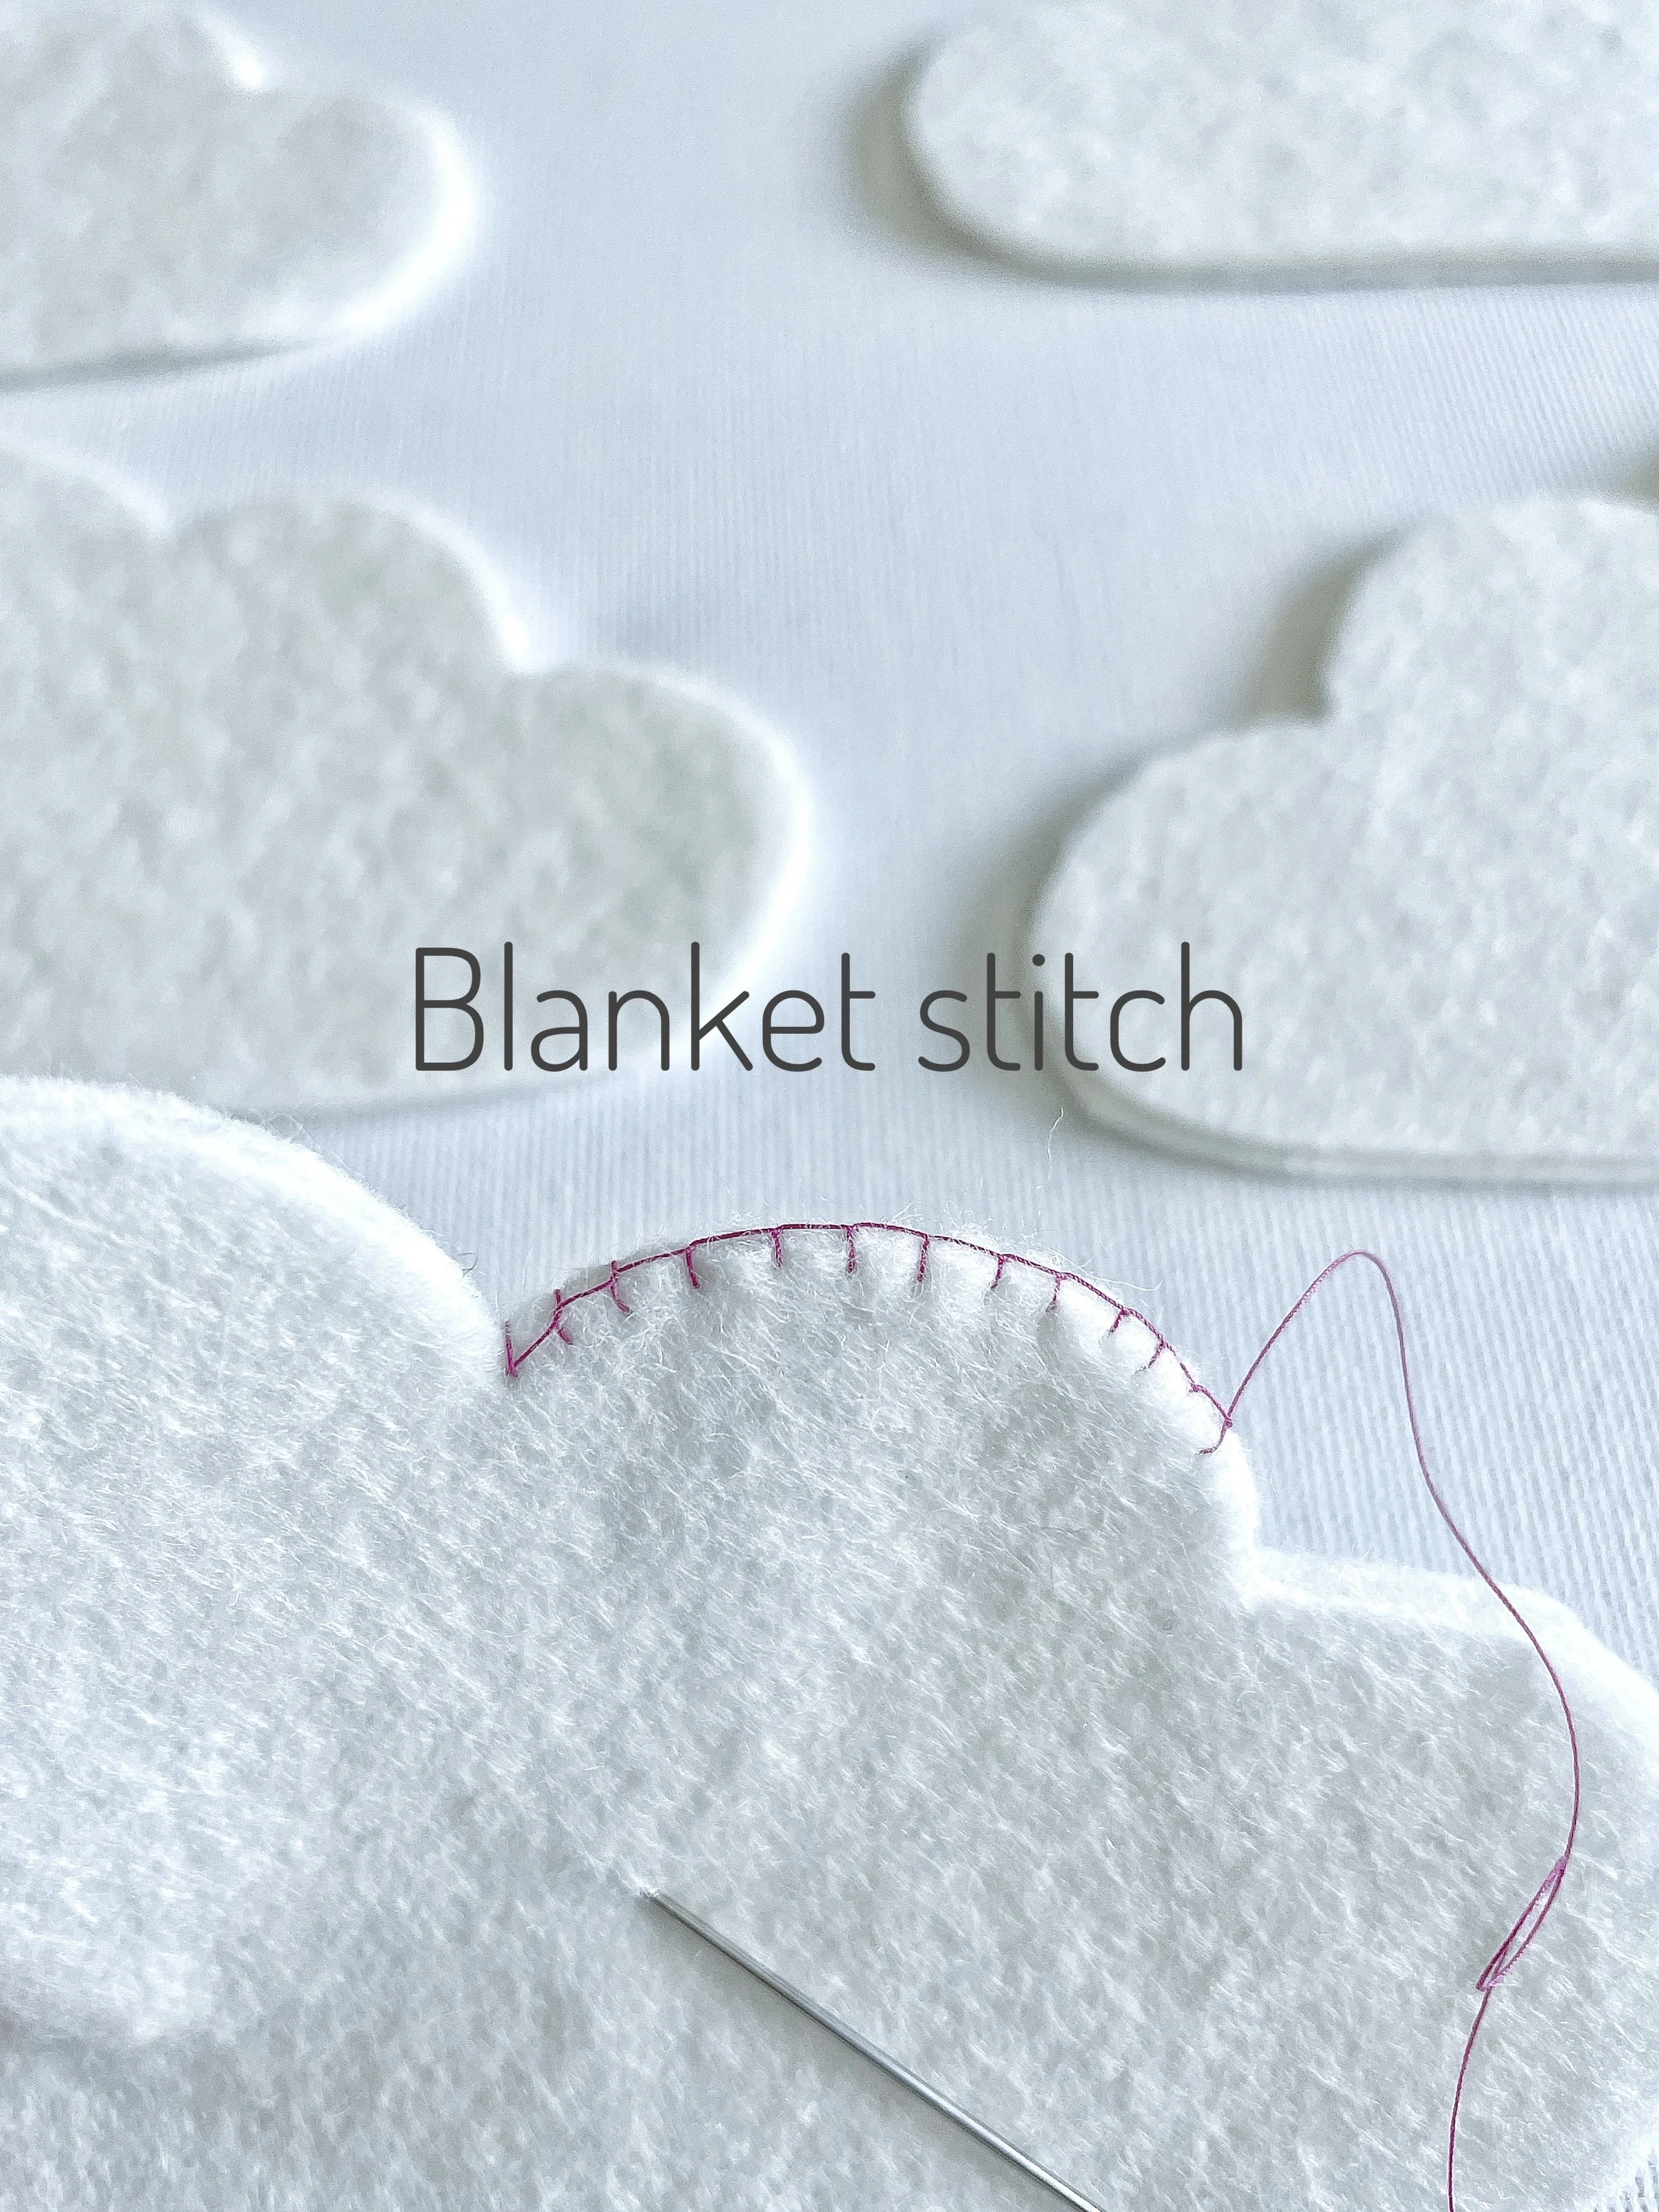
If you’re more confident with your sewing, the blanket stitch is a great choice for the nursery cloud decoration.
I’ve included a link to a fantastic blanket stitch tutorial by Red Ted Art. If you’d like to give it a try, you can watch it here: Blanket stitch tutorial
Sew the base of the cloud…
Use your chosen stitch to sew around the base of your cloud. Only sew up to the first curve on each side (as shown in the picture below).
We will now move on to adding the stars and feltballs to the cloud decoration.
Add strands of cotton to the cloud’s base…
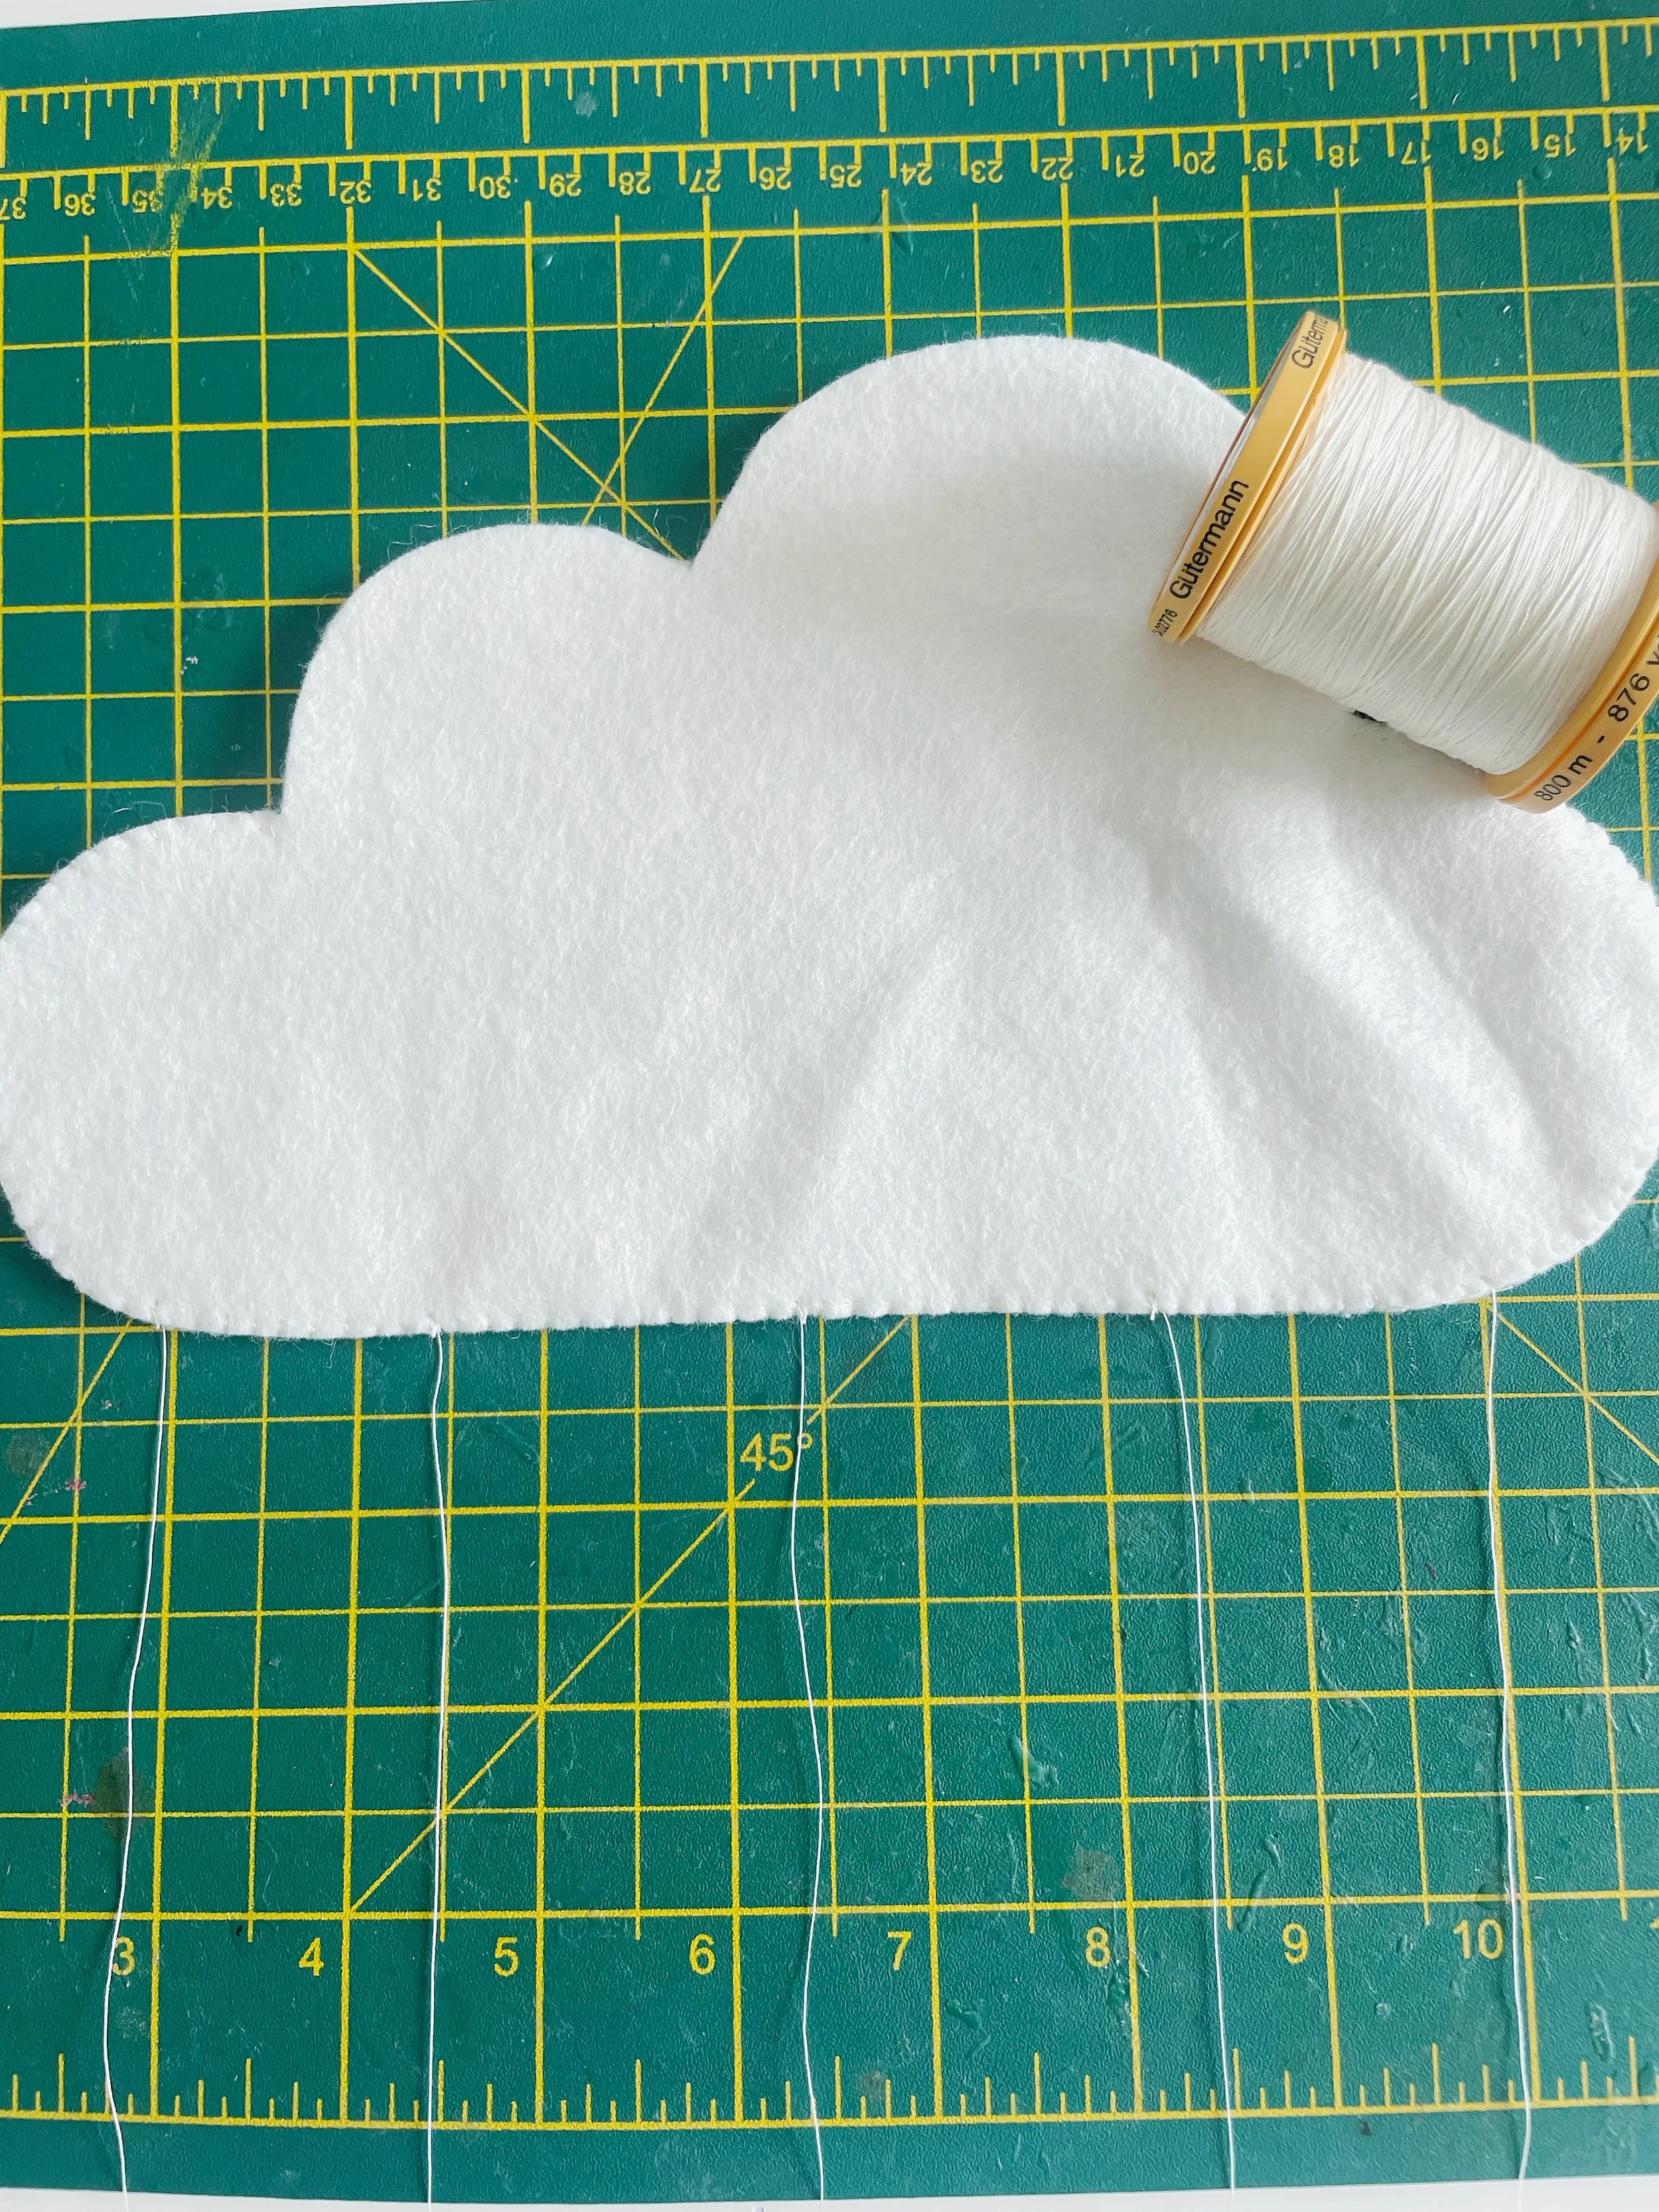
Using your cutting mat or a tape measure, measure along the base of the cloud you’ve made.
Now decide how many strands of stars and felt balls you’d like to hang from your cloud. I personally think an odd number of strands looks nicest!
Take the total measurement of the cloud’s base and divide it by the number of strands you want to add.
For example, my cloud measured 7.5 inches and I wanted 5 strands, so:
7.5 ÷ 5 = 1.5
That meant I spaced my strands 1.5 inches apart.
I cut 5 lengths of cotton thread, each around 8 inches long, it's always handy to have a little extra so you definitely have enough string to work with. You can trim it neatly at the end.
Sew each strand securely to the bottom of the cloud, knotting it a few times to make sure it’s firmly attached. Since this will be hanging in a little one’s room, it’s really important that everything is nice and secure so nothing comes loose.
Add the stars and felt balls…
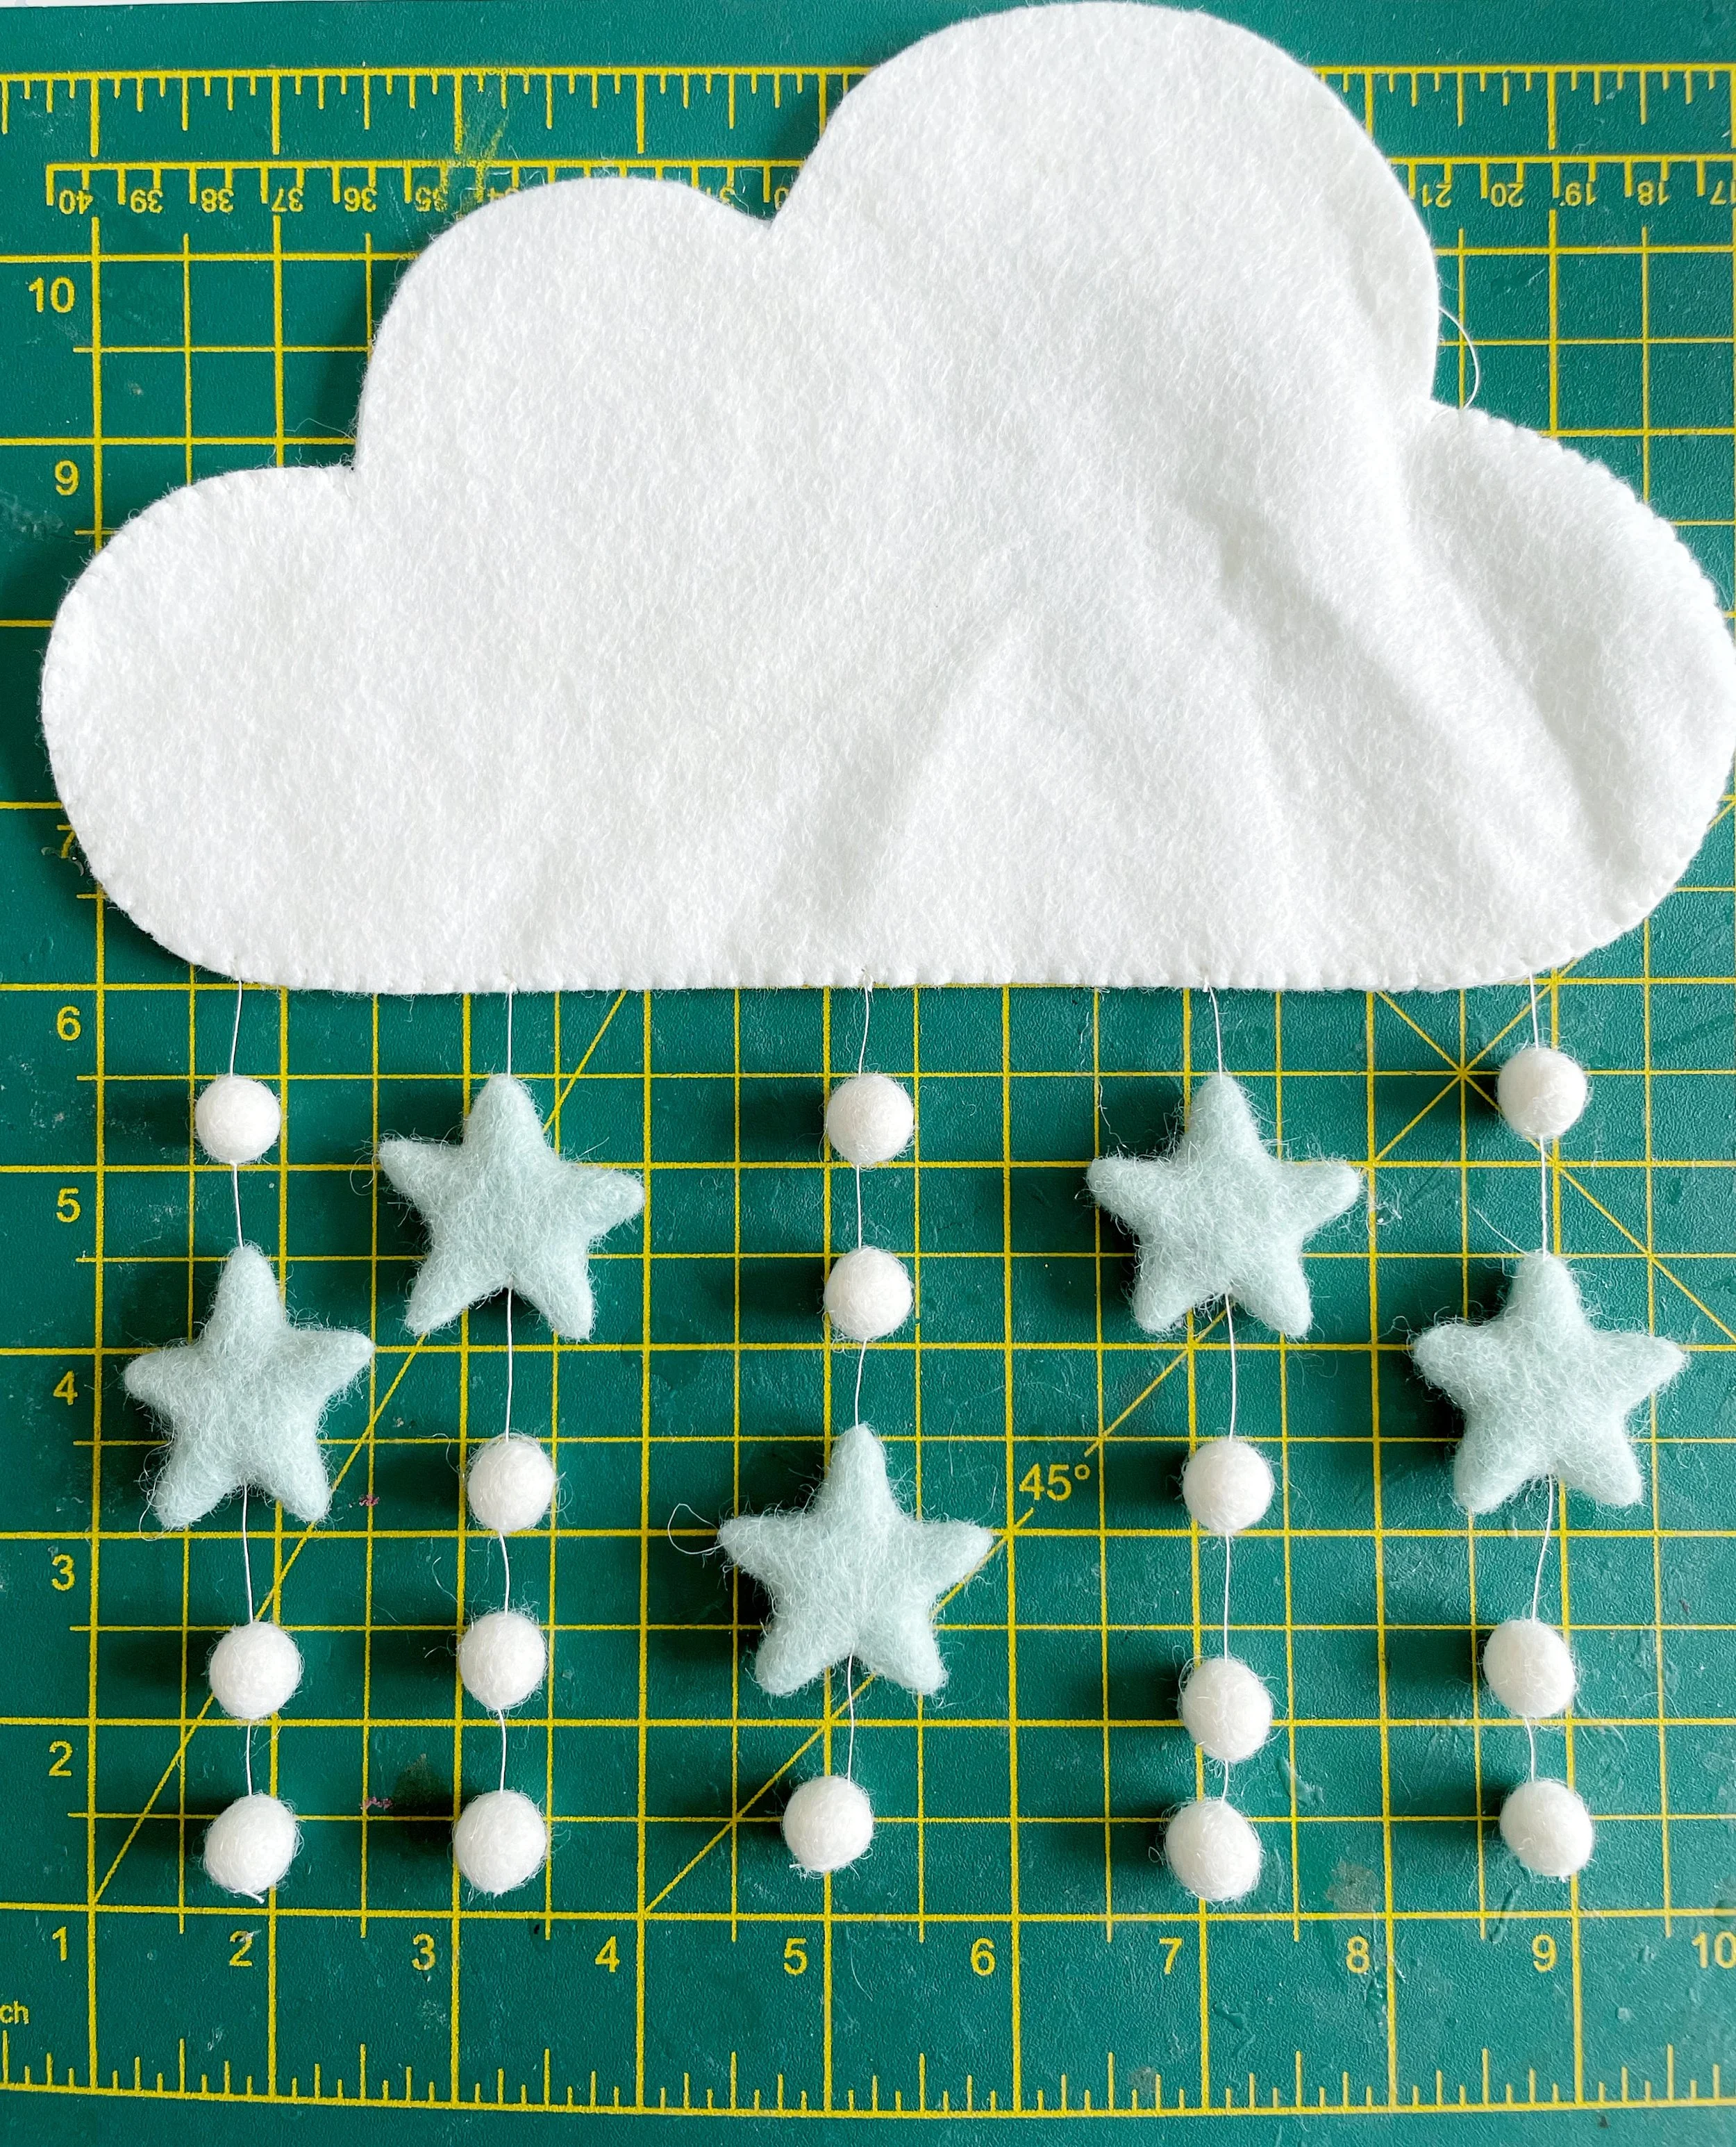
Now it’s time for the fun part, adding your felt balls and stars to each cotton strand!
In the picture above, you’ll see how I used the measurements on my cutting mat to help space everything out evenly. It really helps to keep things looking neat.
I started by placing the first felt ball or star on each strand at the 0.5 inch mark, then added the rest with a 0.5 inch gap between each one.
If you look closely at each strand, you’ll notice I never place two stars right next to each other. I like to stagger them so they’re spaced out between the felt balls, it gives a lovely, balanced look.
But that’s just my personal style! Feel free to arrange yours however you like, this is your creation, so make it feel just right for you.
To add your stars and felt balls, simply use your needle to thread them onto each strand of cotton.
As you go, make sure to secure each one in place by sewing a small knot at the base before adding the next felt shape. This helps keep everything right where you want it, and nice and secure too!
After all, we want your beautiful cloud decoration to be safe with no loose parts, especially if it’s going to hang in a little one’s room.
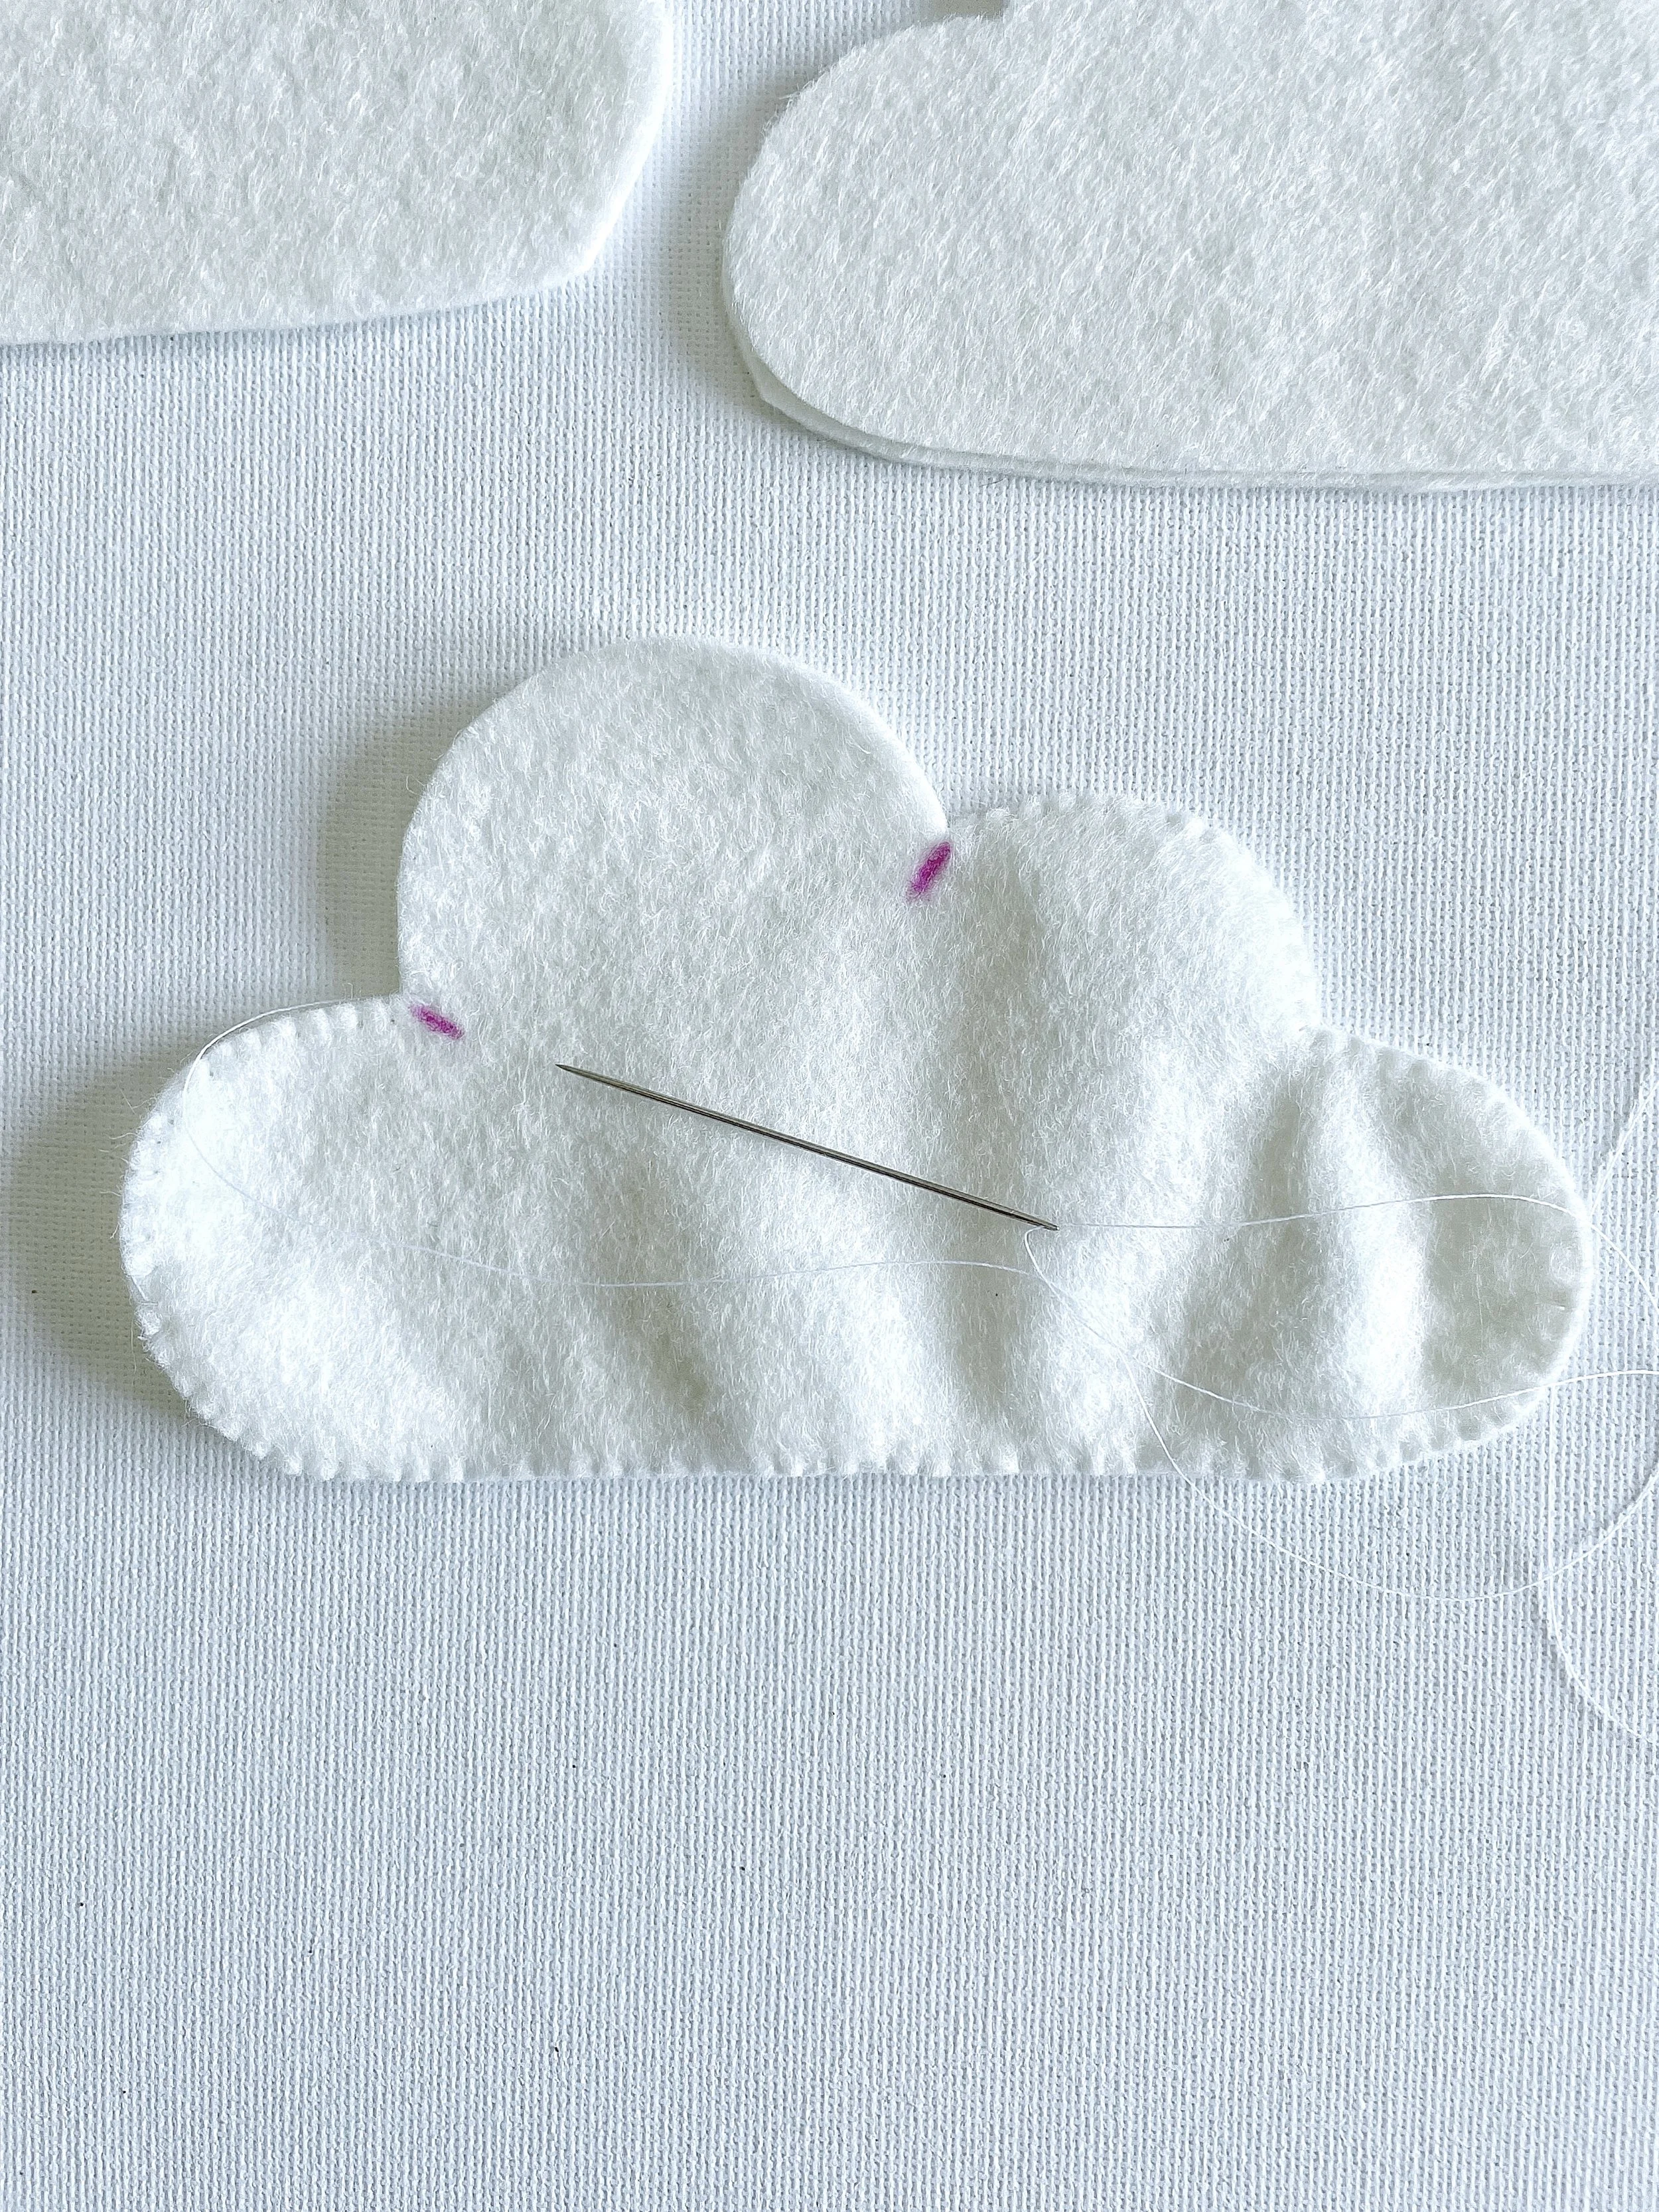
Sew the rest of the cloud…
Now it's time to sew the rest of your cloud.
Leave a gap at the top of each cloud (shown below marked with pink pen).
You will use this gap to add the stuffing to your cloud.
Stuff the cloud…
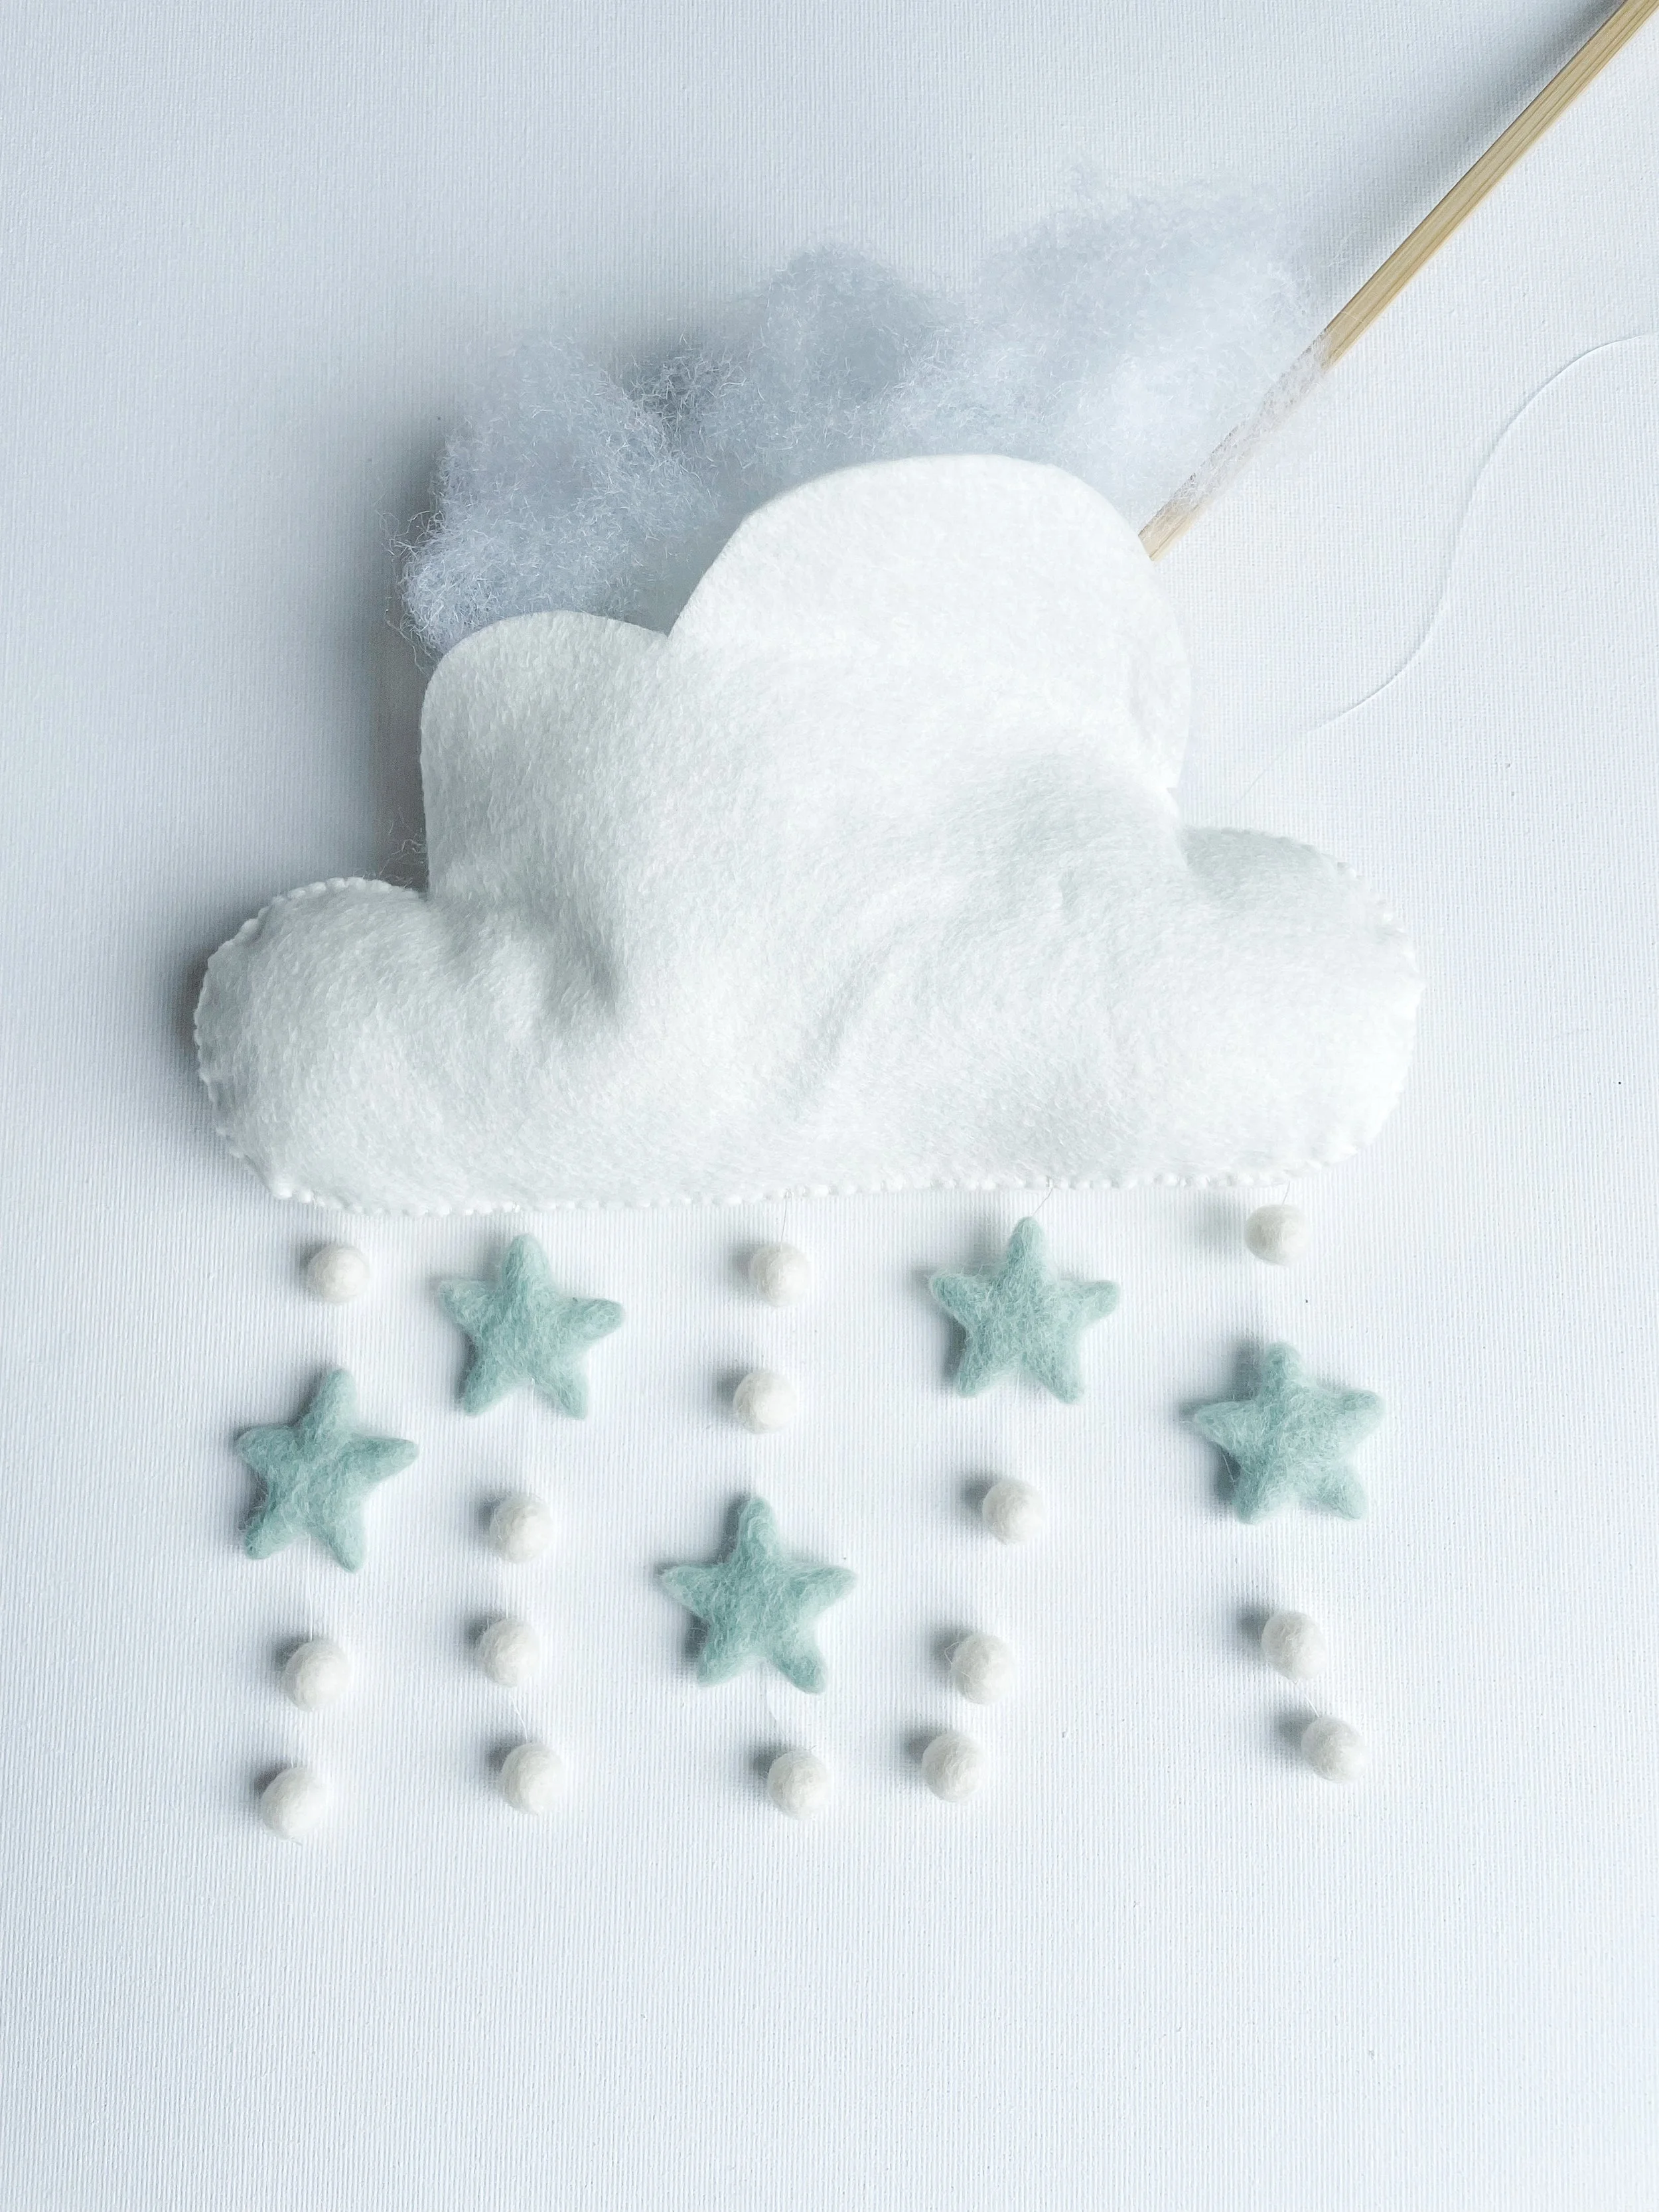
Take a small amount of stuffing and using a wooden chopstick (or something similar) gently push the stuffing into the gap at the top of the cloud and down into the edges of the cloud where you’ve already sewn. Take care, being too forceful can loosen or damage your stitches.
Keep adding small amounts of stuffing until your cloud feels soft and squishy, but not overstuffed. You're aiming for a soft, plushy feel, just enough to give it a plump fullness without stretching or damaging the stitches.
Once you're happy with the shape of your cloud, it's time to sew up the gap at the top. Tuck in that final bit of stuffing before closing it up with a few neat stitches.
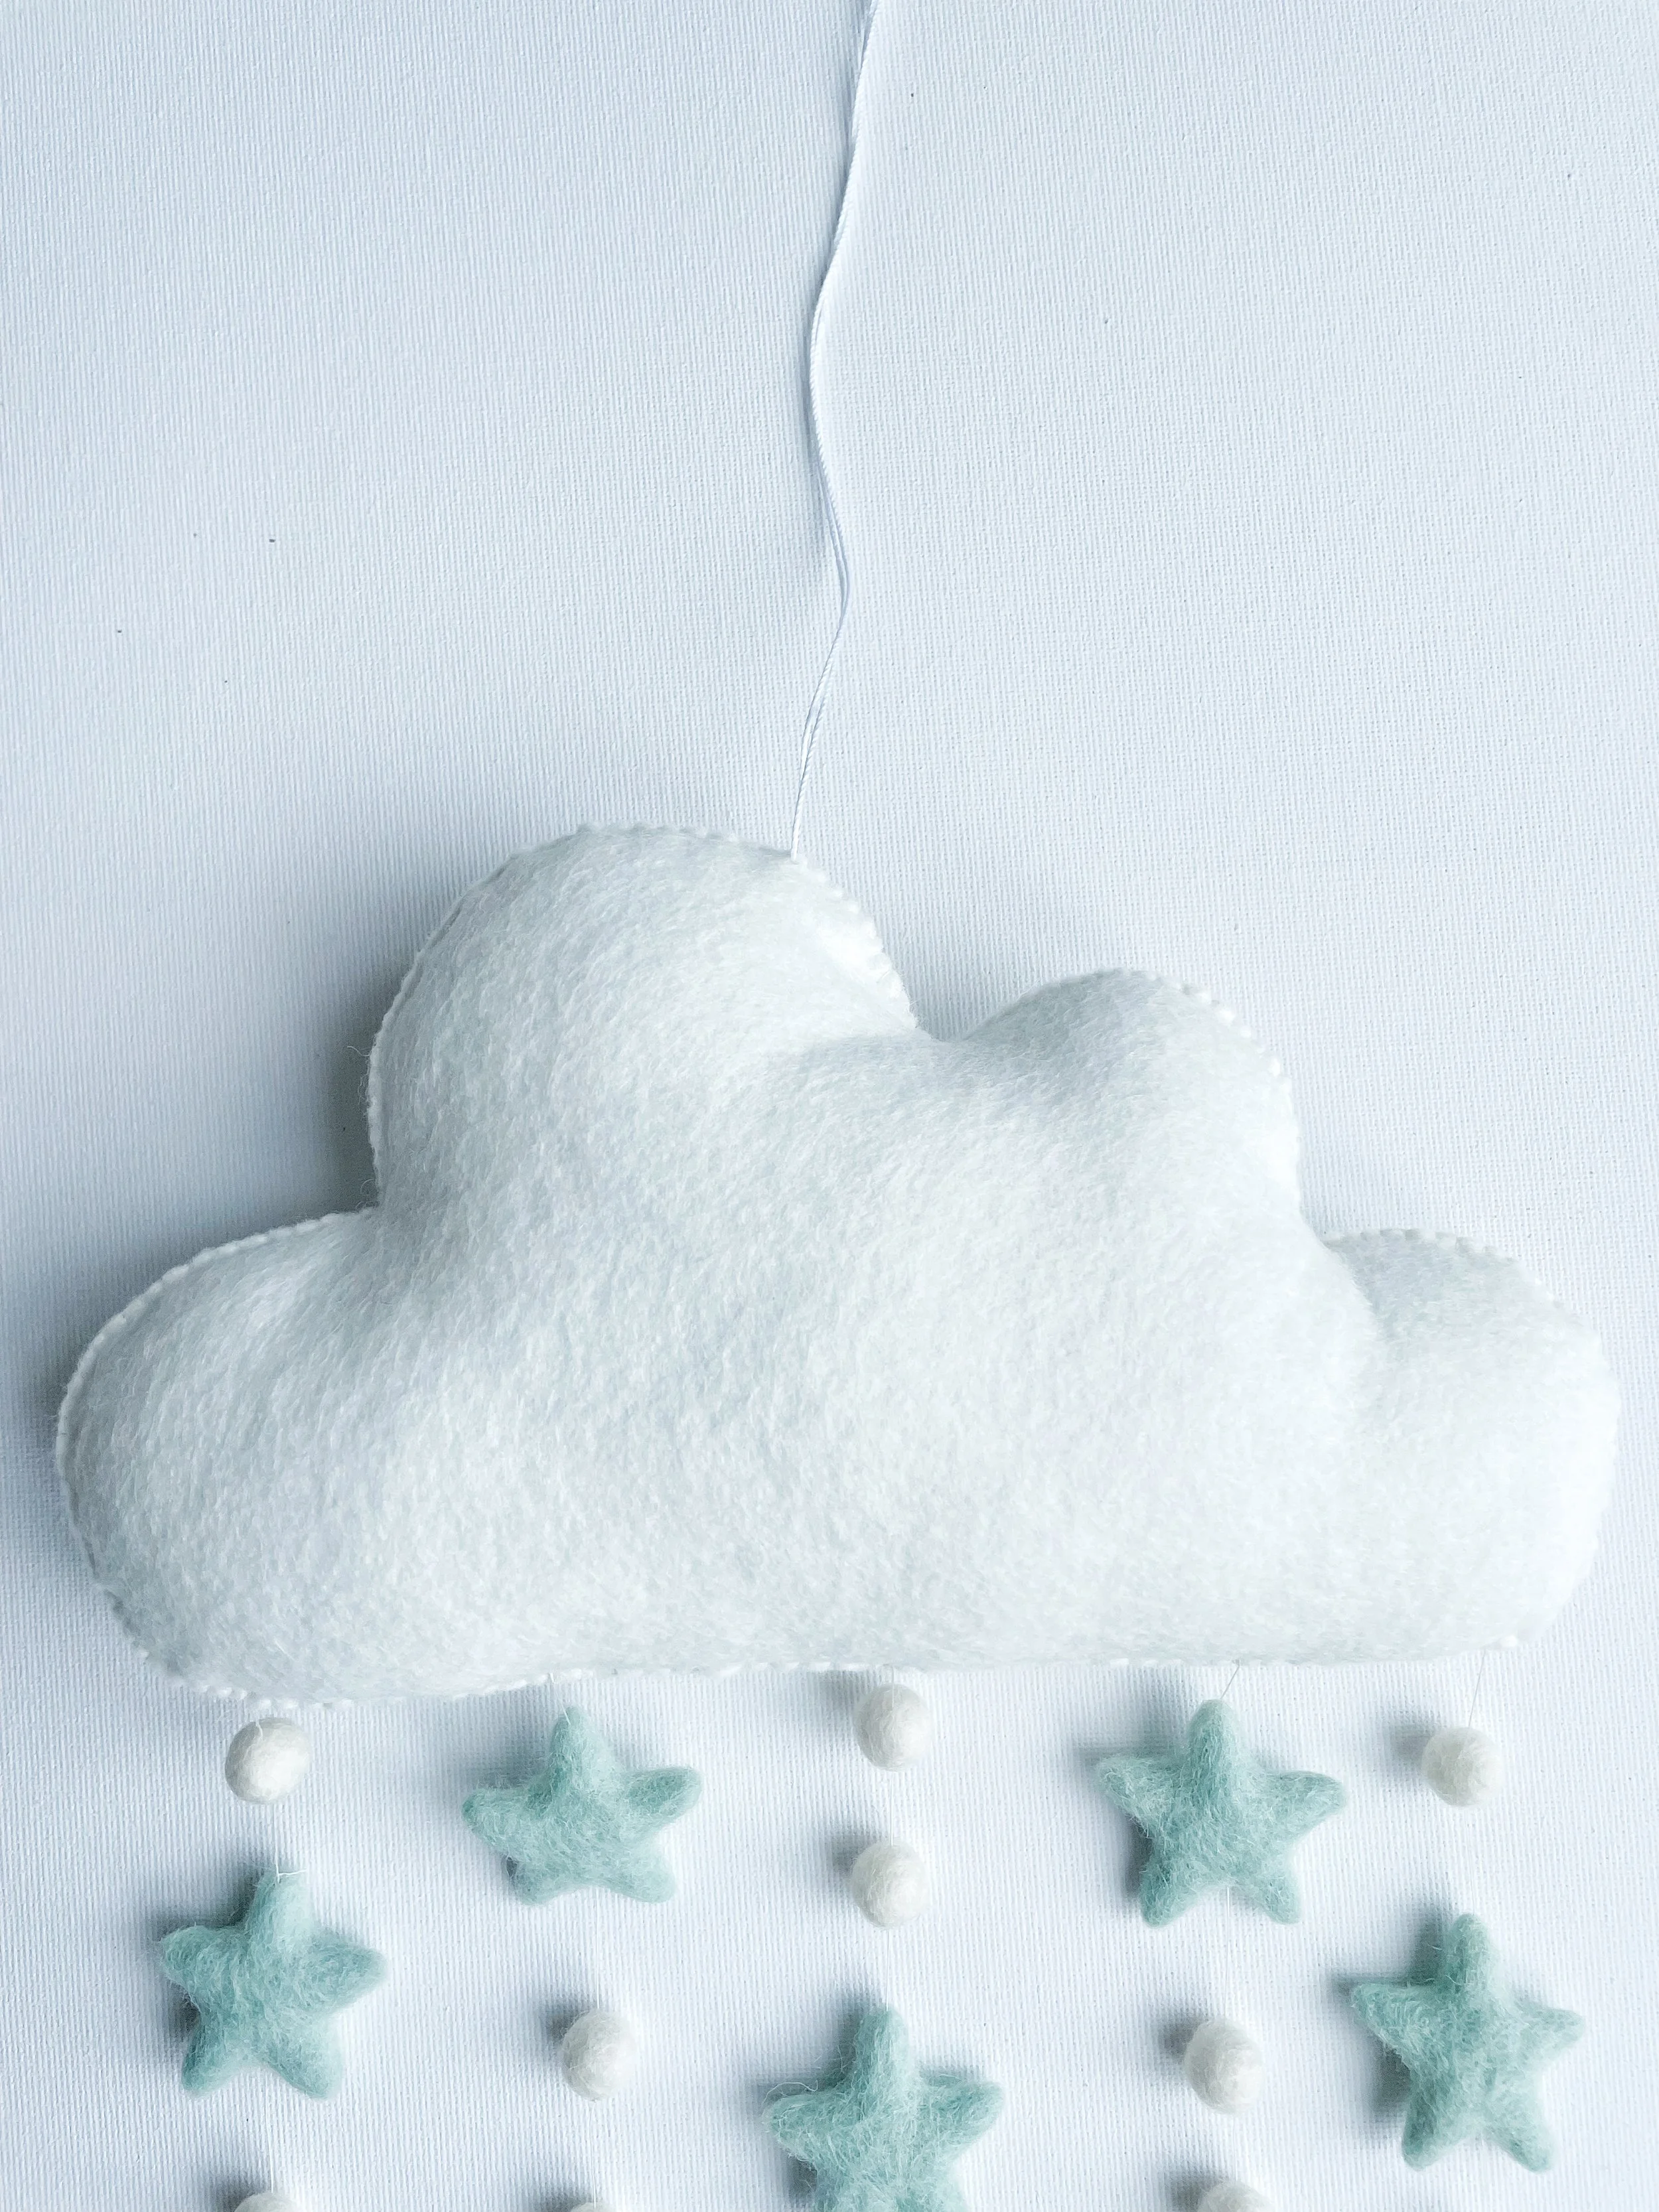
Add string for hanging…
The last step in making your cloud decoration is to add the string for hanging.
The length of the string is completely up to you, it all depends on where you’d like to hang your cloud. You might prefer a short little loop, or a longer one if you want it to dangle a bit lower.
Just for reference, I used a 20-inch piece of string, which gave me a 10-inch drop once folded into a loop.
To make your hanging loop, thread the string onto your large needle and sew through the centre point at the top of your cloud. I like to use my cutting mat or a tape measure to find the centre, it helps make sure everything is nicely balanced so your cloud hangs straight.
Once you’ve sewn the string through, put your needle aside, take both ends of the string and tie them together in a small, tight knot to form the loop. If there’s excess string above the knot just trim it neatly. Just be careful not to cut too close to the knot, or it might come undone.
You’ve made your cloud decoration…
And that’s it you’ve made your very own hanging cloud decoration!
I really hope you had as much fun making this DIY cloud hanging decoration as I did putting it together for you. If you enjoyed making your own nursery decor, be sure to check out the cloud garland tutorial too, it’s the perfect matching piece!
If you have any questions, tips, or just want to share how yours turned out, I’d absolutely love to hear from you, feel free to drop a comment below.
Sending Love & Creativity, Karen x