
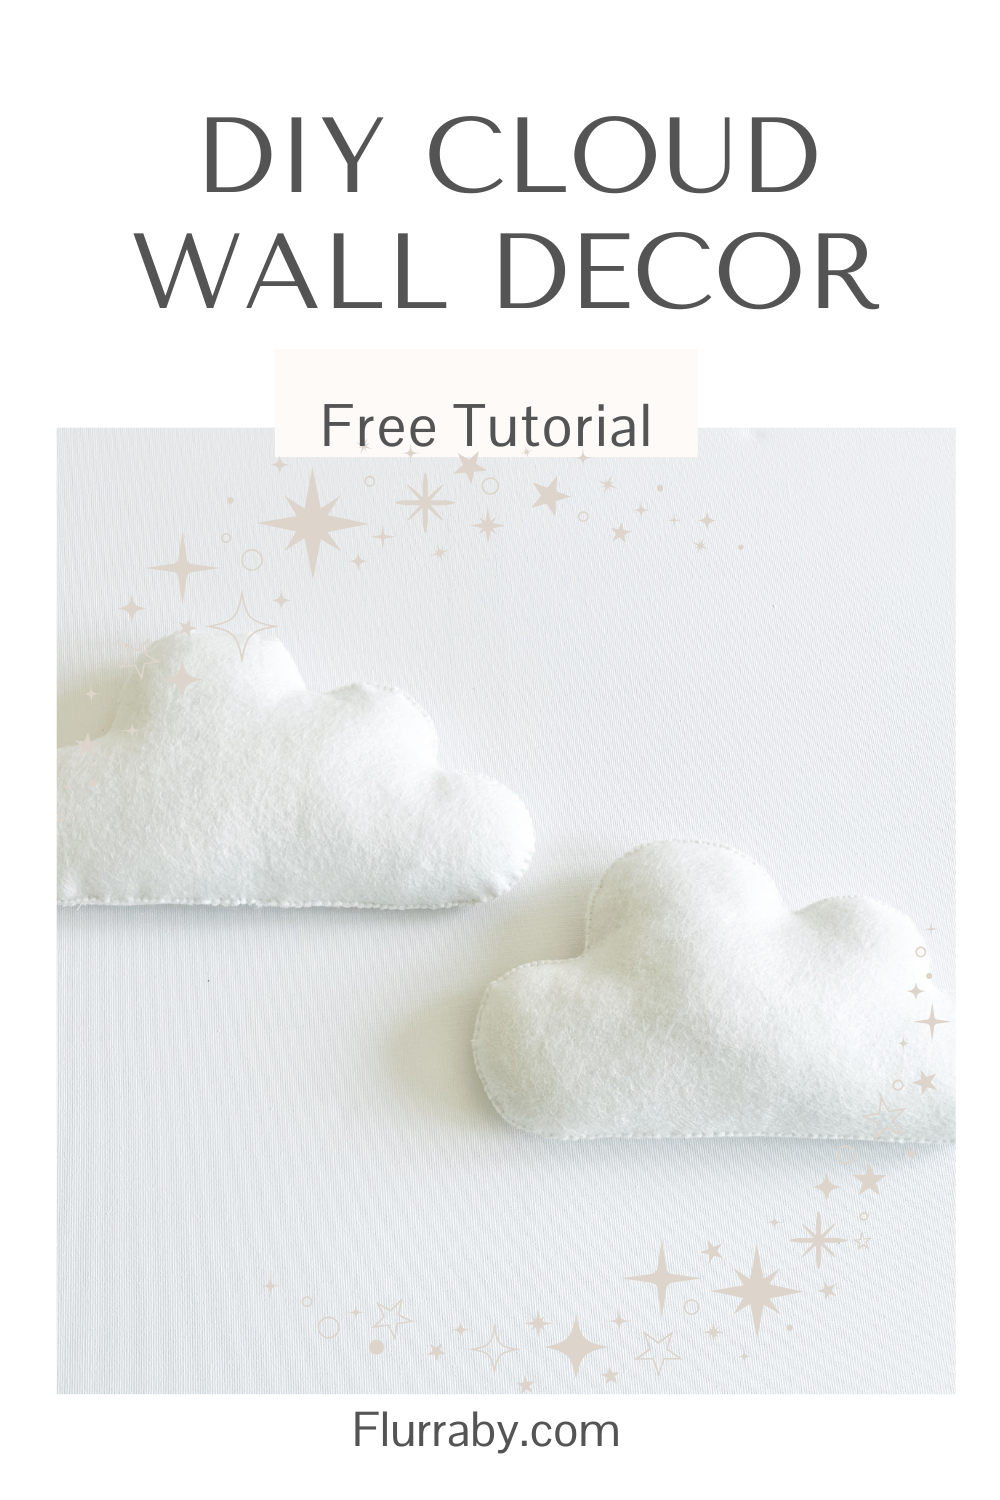
DIY Cloud Wall Decor
I'm so excited to share this fun tutorial with you, I’m going to show you how to make your own fluffy cloud wall decor. It’s the perfect project if you want to make your own nursery decor.
Cloud wall decor is not just for nurseries, a fluffy cloud wall display looks great in children’s bedrooms or playrooms too.
Creating your own nursery decor is such a special way to add your love and personal touch to your little one’s space. It’s made by you with love for them, nothing beats that!
It’s also fun, budget-friendly, and looks absolutely adorable.
You're going to love how this simple, minimalist cloud wall decor adds a gentle touch of magic to your little one’s space. A fluffy cloud wall display creates the softest, dreamiest, peaceful feel, it’s so soothing.
Another great thing about making your own cloud nursery decor is it’s a great excuse to get creative (not that you ever need an excuse!). Feel free to mix and match different sized clouds and make as many as you like to create the perfect dreamy scene for your space.
No matter if you're styling a modern nursery or going for a more classic feel, this sweet, gender-neutral cloud decor fits beautifully with any theme.
And if you're making it as a gift (which is just the loveliest idea!), you can rest easy knowing it’ll suit any nursery theme or colour palette. It’s a perfect present for a new baby or baby shower, and adding that handmade touch makes it all the more special.
Whoever you make cloud wall decorations for is sure to feel so loved and grateful for the thought you have put into their gift.
I made my own cloud decor using a soft ivory felt, but don’t be afraid to get creative with yours. Bouclé fabric looks gorgeous and adds an extra layer of softness and texture.
You could even play with colour, try gentle pastel pinks or blues, or keep things calm and neutral with soft beige or grey. Just go with whatever feels right for your space and style.
Let your creativity shine!
If you're planning a cloud-themed nursery, why not make a matching cloud mobile? I've got a lovely tutorial for that too: DIY Cloud Nursery Mobile

DIY Cloud Nursery Mobile Tutorial
There’s even a matching cloud garland to complete the look!
In this step-by-step guide, I’ll carefully guide you through every step to help you can create your own dreamy cloud wall decor. You’re going to feel so happy when you get to hang your finished clouds.
And remember, there’s no need to rush. Taking your time and enjoying the process is all part of the magic. Handmade projects are a little gift for the soul.
I always recommend giving the tutorial a quick read-through once or twice before you get started, it makes everything feel more manageable, especially if you're new to crafting.
Once you’ve made your first cloud, you’ll see just how fun (and yes, a little addictive!) it is. You’ll be whipping these up for every little one you know in no time!
SEll..
Once you start making your own baby decor, don’t be surprised if you catch the creative bug and feel inspired to start selling it too! Nursery decor is always in demand, whether it’s for parents-to-be or anyone searching for a thoughtful, handmade gift.
That’s why this fluffy cloud wall decor could make such a lovely addition to your shop, and even a brilliant way to start a new small business!
Sticking with soft, gender-neutral colours can help make shopping easy for your customers, but offering a range of colour options is a great way to appeal to different styles and preferences.
A clever way to boost sales is by offering this matching cloud garland or cloud mobile as an add-on. You could even create a discounted bundle to make it extra tempting!
And if you're thinking about selling your creations, make sure to check out my super-helpful Beginner’s Guide to Pricing Your Handmade Items. Pricing can be trickier than it seems when you're just starting out, so a little guidance can go a long way.
Why not save it to Pinterest now and come back to it when you’re ready?

You might also like to take a look at my post, Make It, List It, Sell It!, where I share all the best places for beginners to start selling their handmade creations, it’s full of helpful tips to get you going.
And if you love the idea of making this cloud wall decor but aren’t quite ready to dive in just yet, why not save it to Pinterest for later? That way, it’ll be waiting for you when the mood strikes!
What you will need…
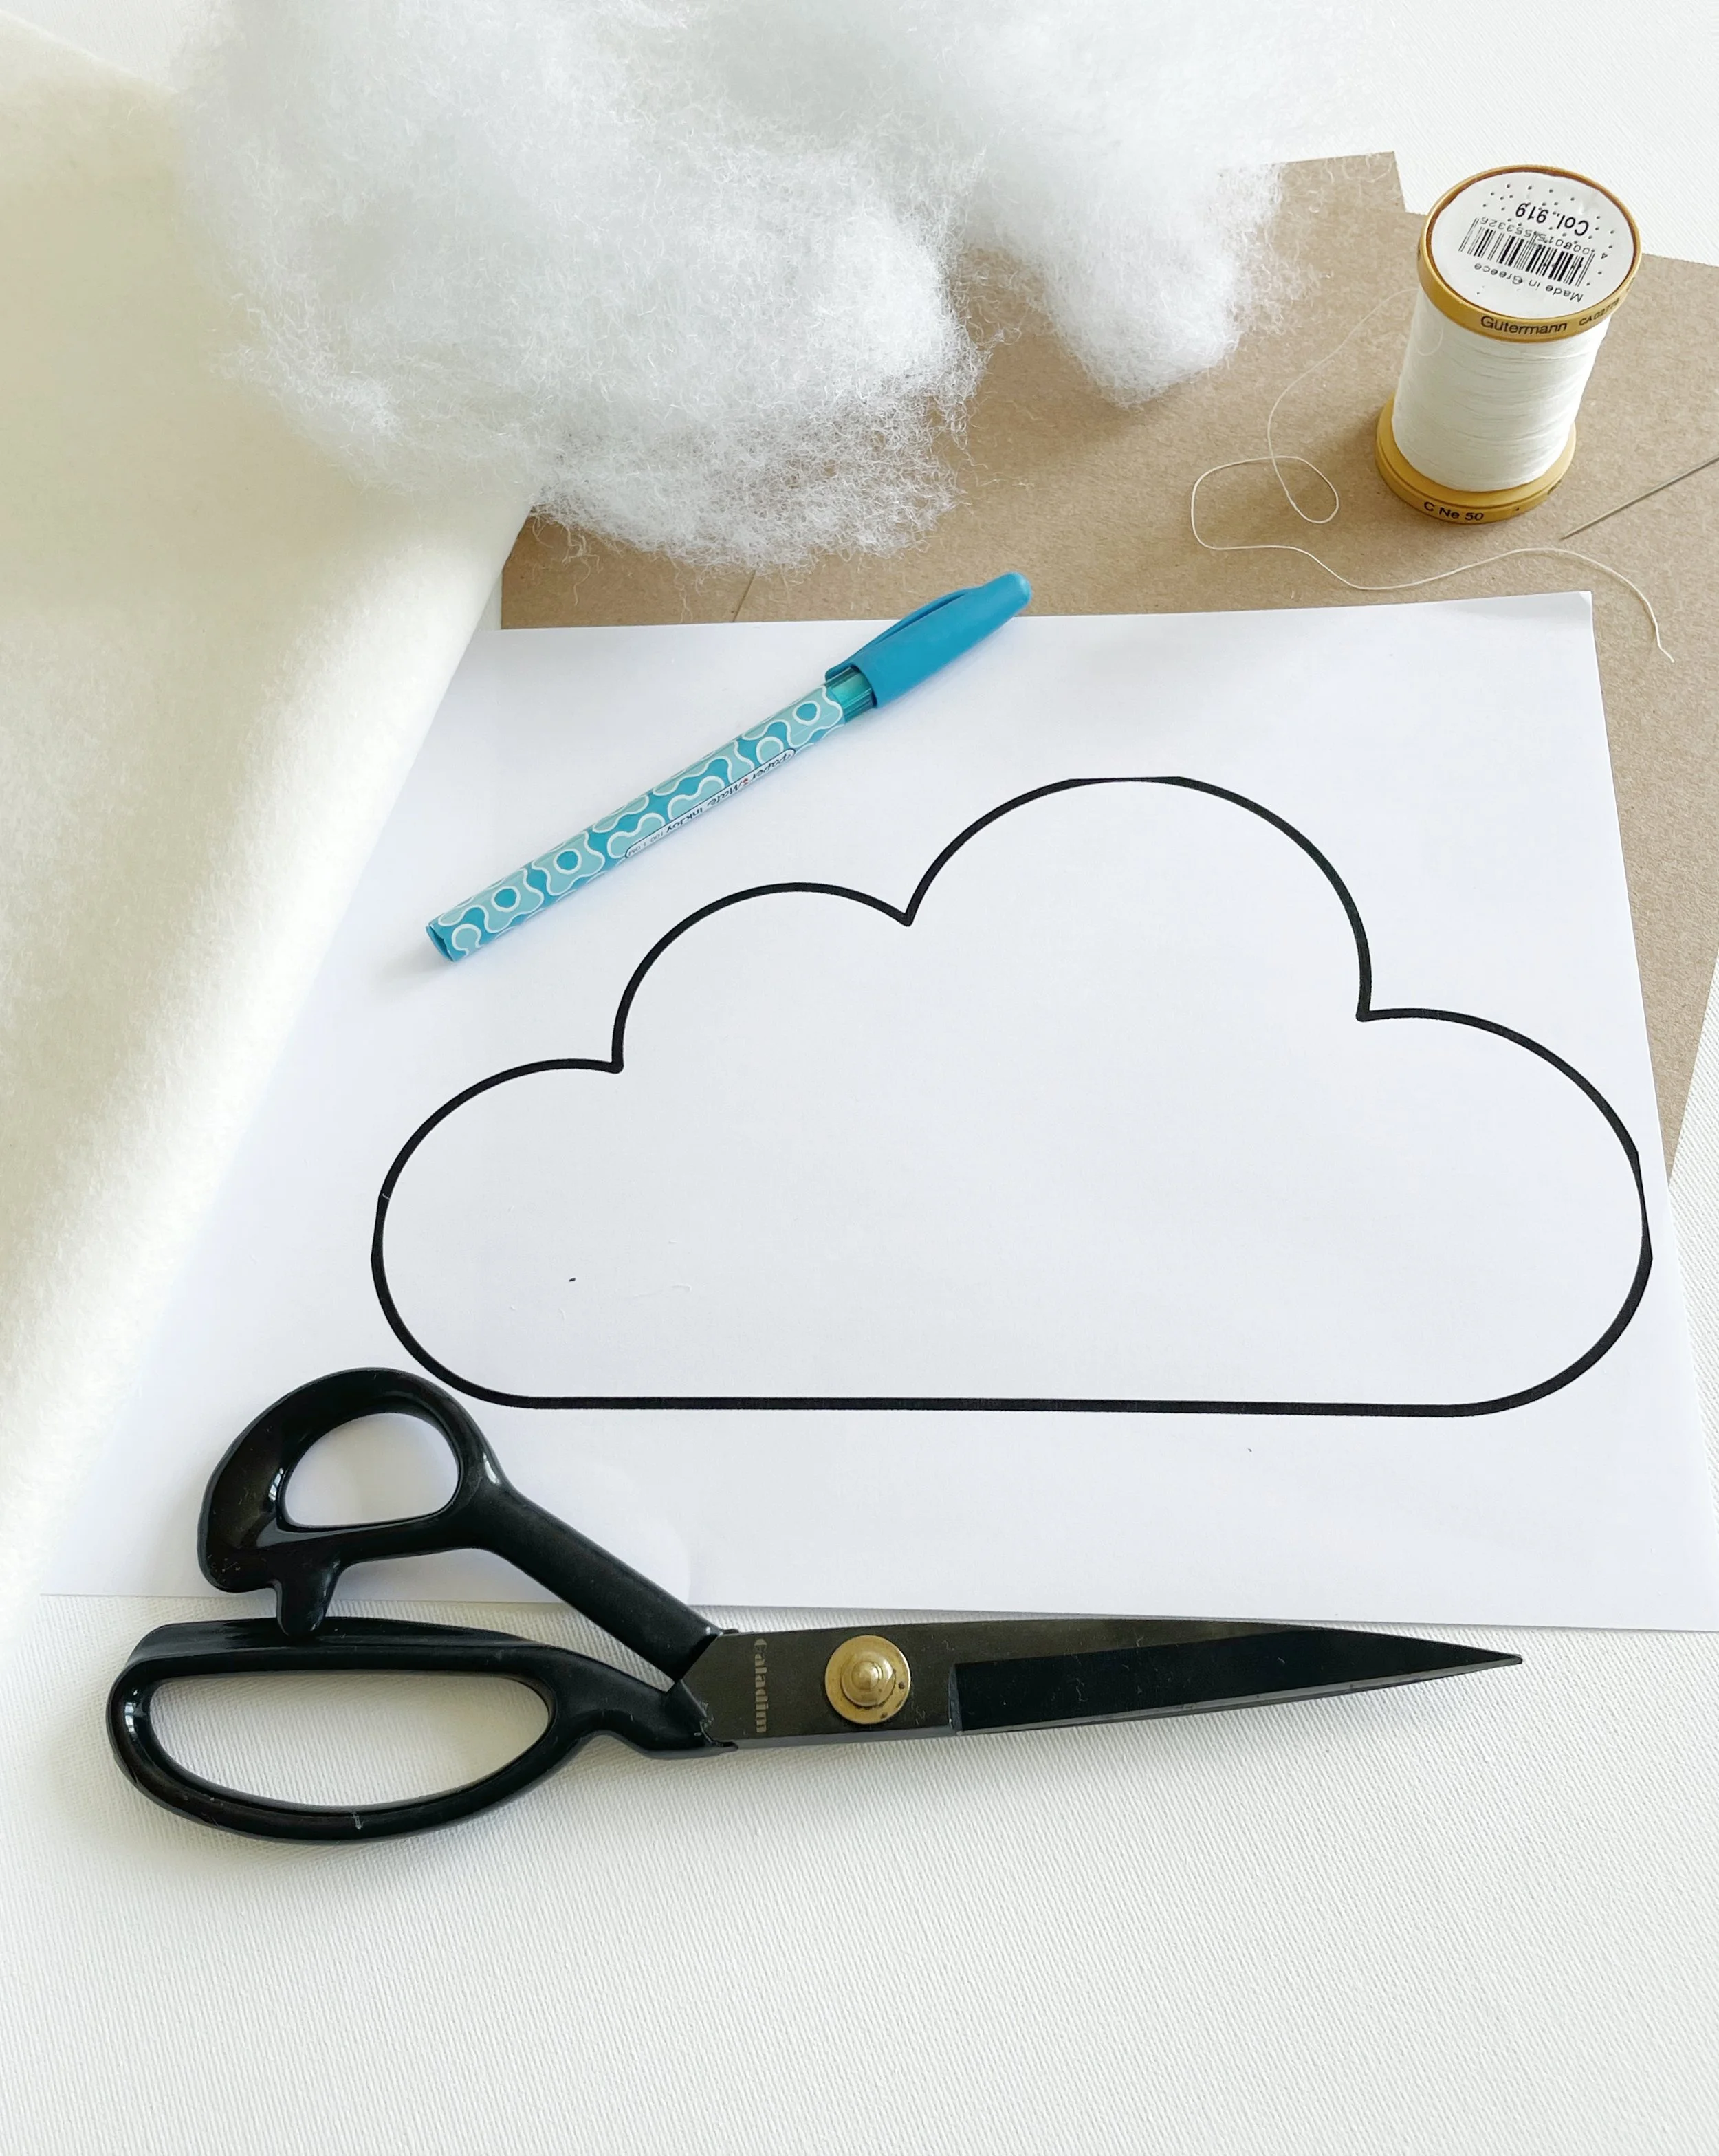
You need the following items:
White or Ivory wool felt - I Use 40% Wool Felt Blend
Kraft card - or you could use old amazon envelopes
Large cloud template - click to download
Pen
Measuring Tape
Fabric glue - Modge Podge is perfect for this project and is a great addition to your craft kit as it’s super-useful for so many craft projects.
Matching thread - I like to use Gutterman threads as they are fantastic quality and don’t fray or snap.
Sewing Needle
Hollowfibre stuffing - fire safety compliant
Wooden chopstick or similar for pushing in stuffing
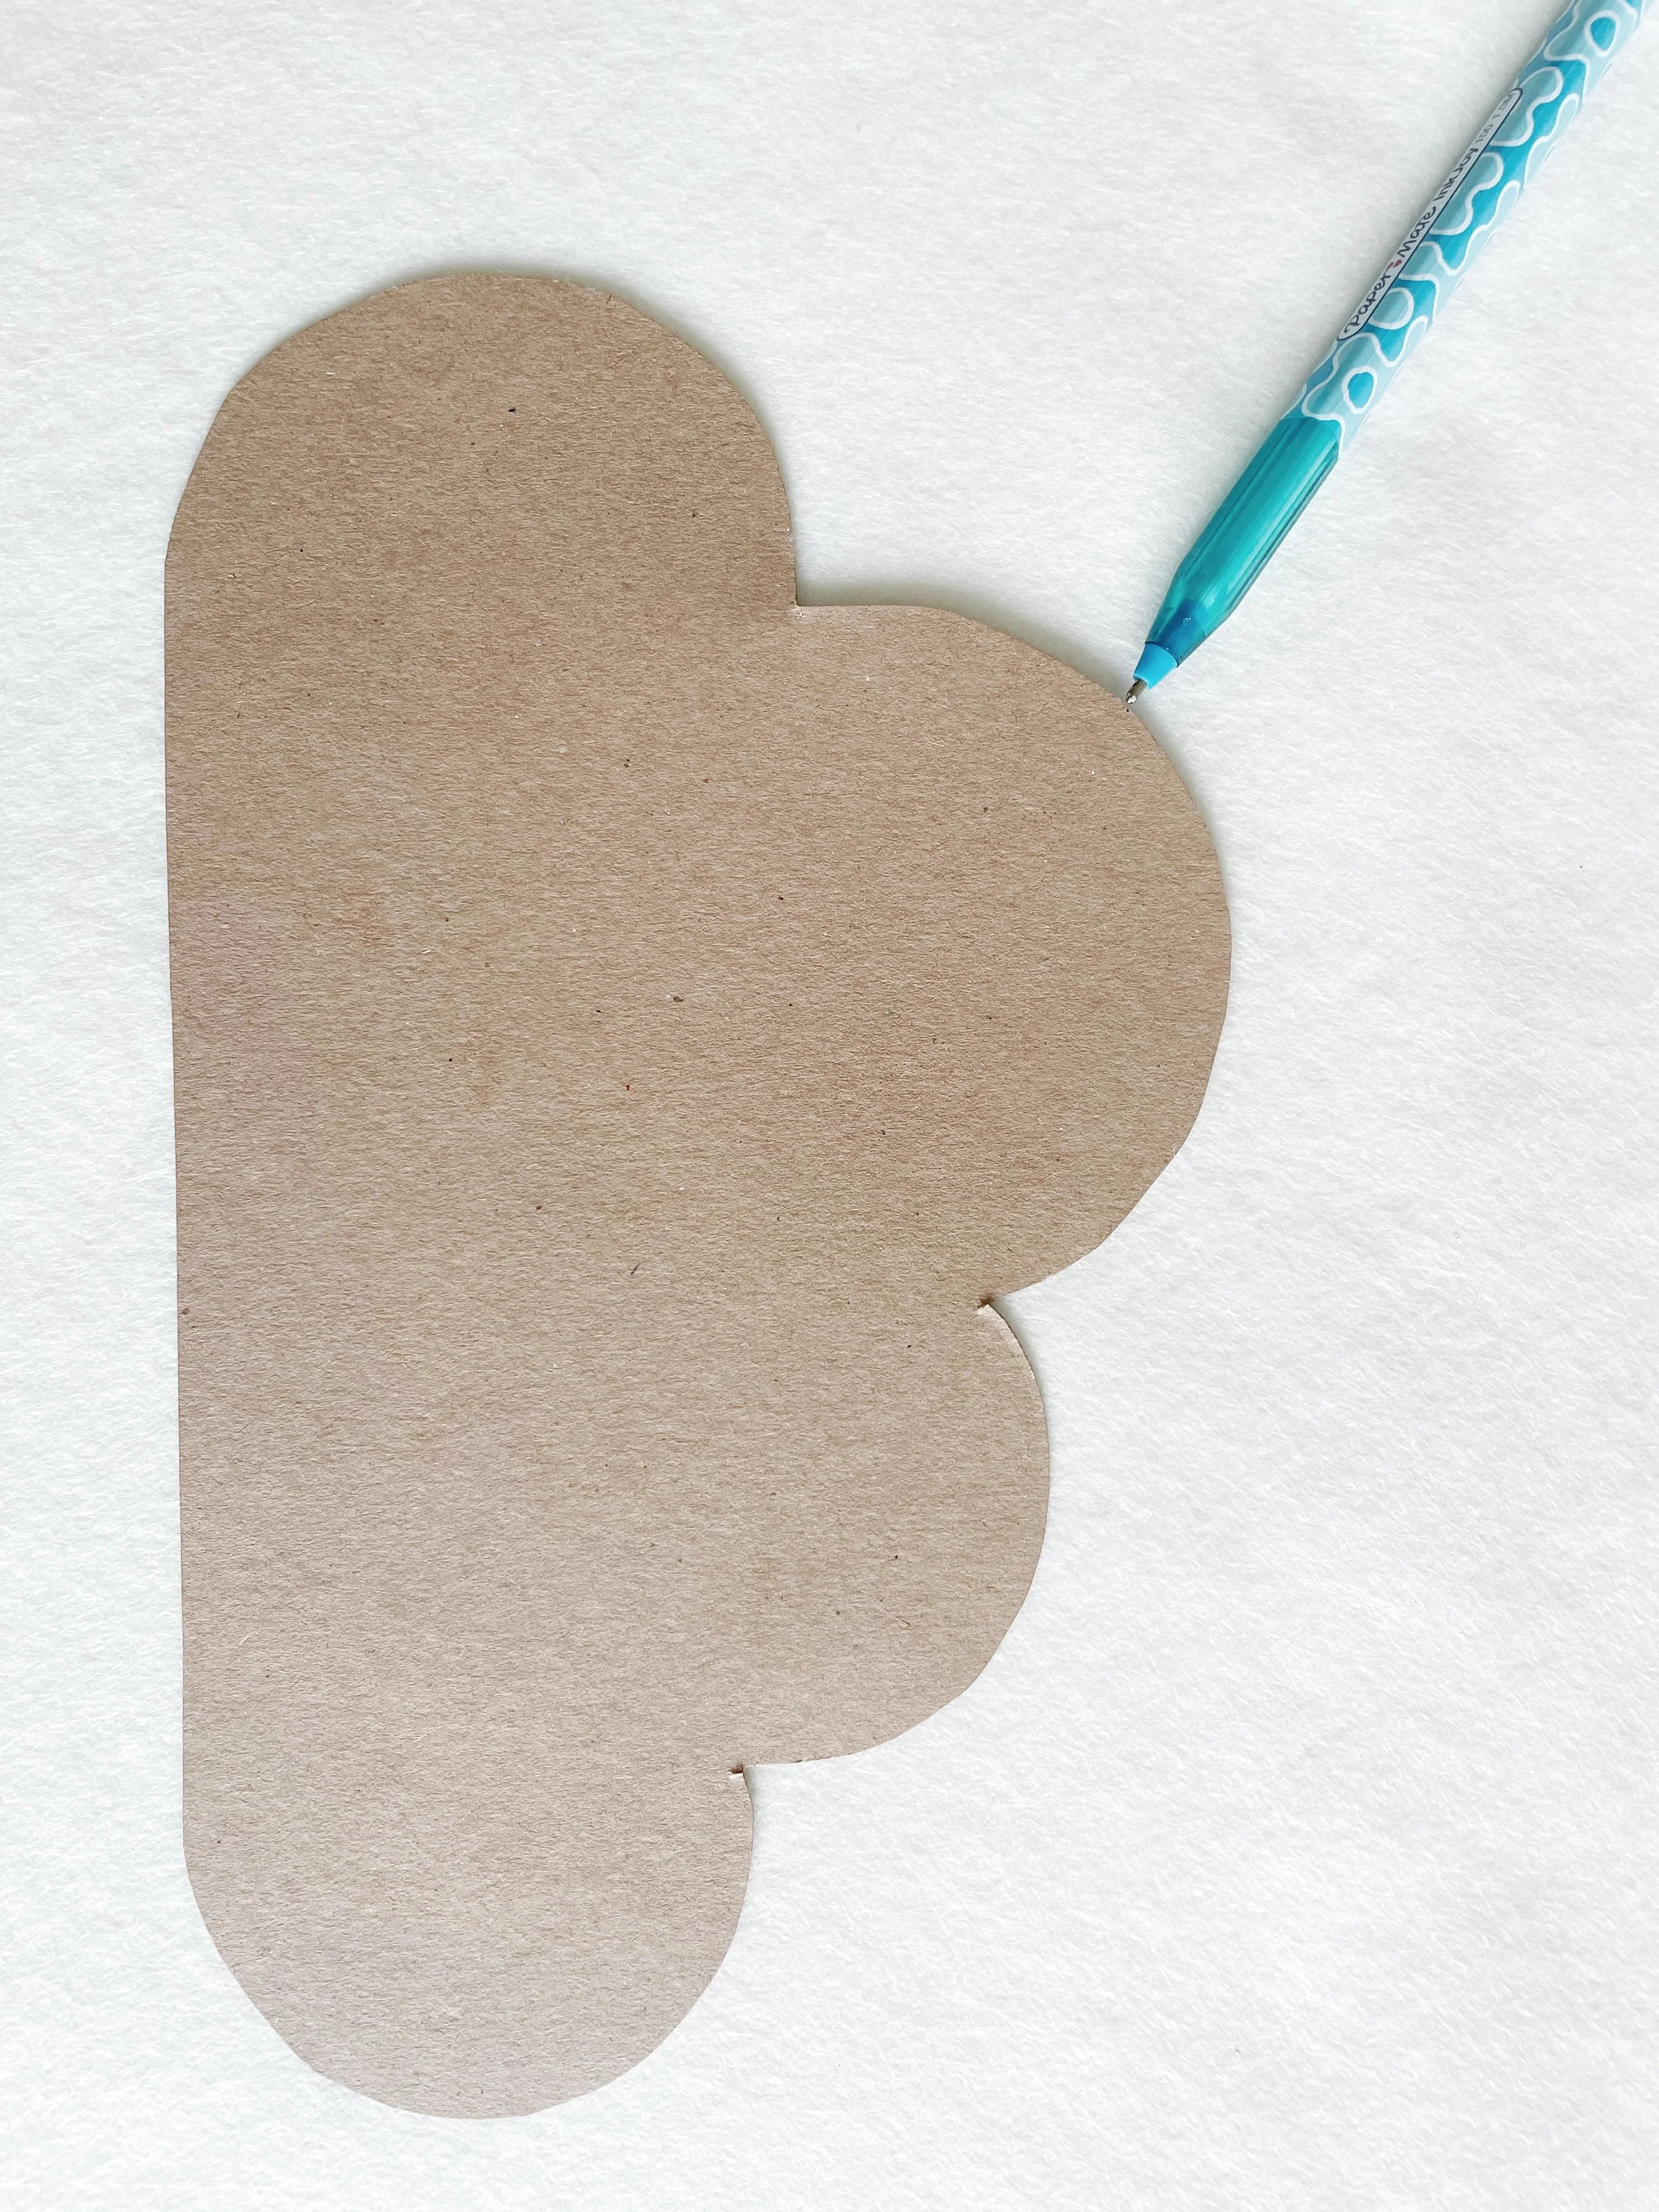
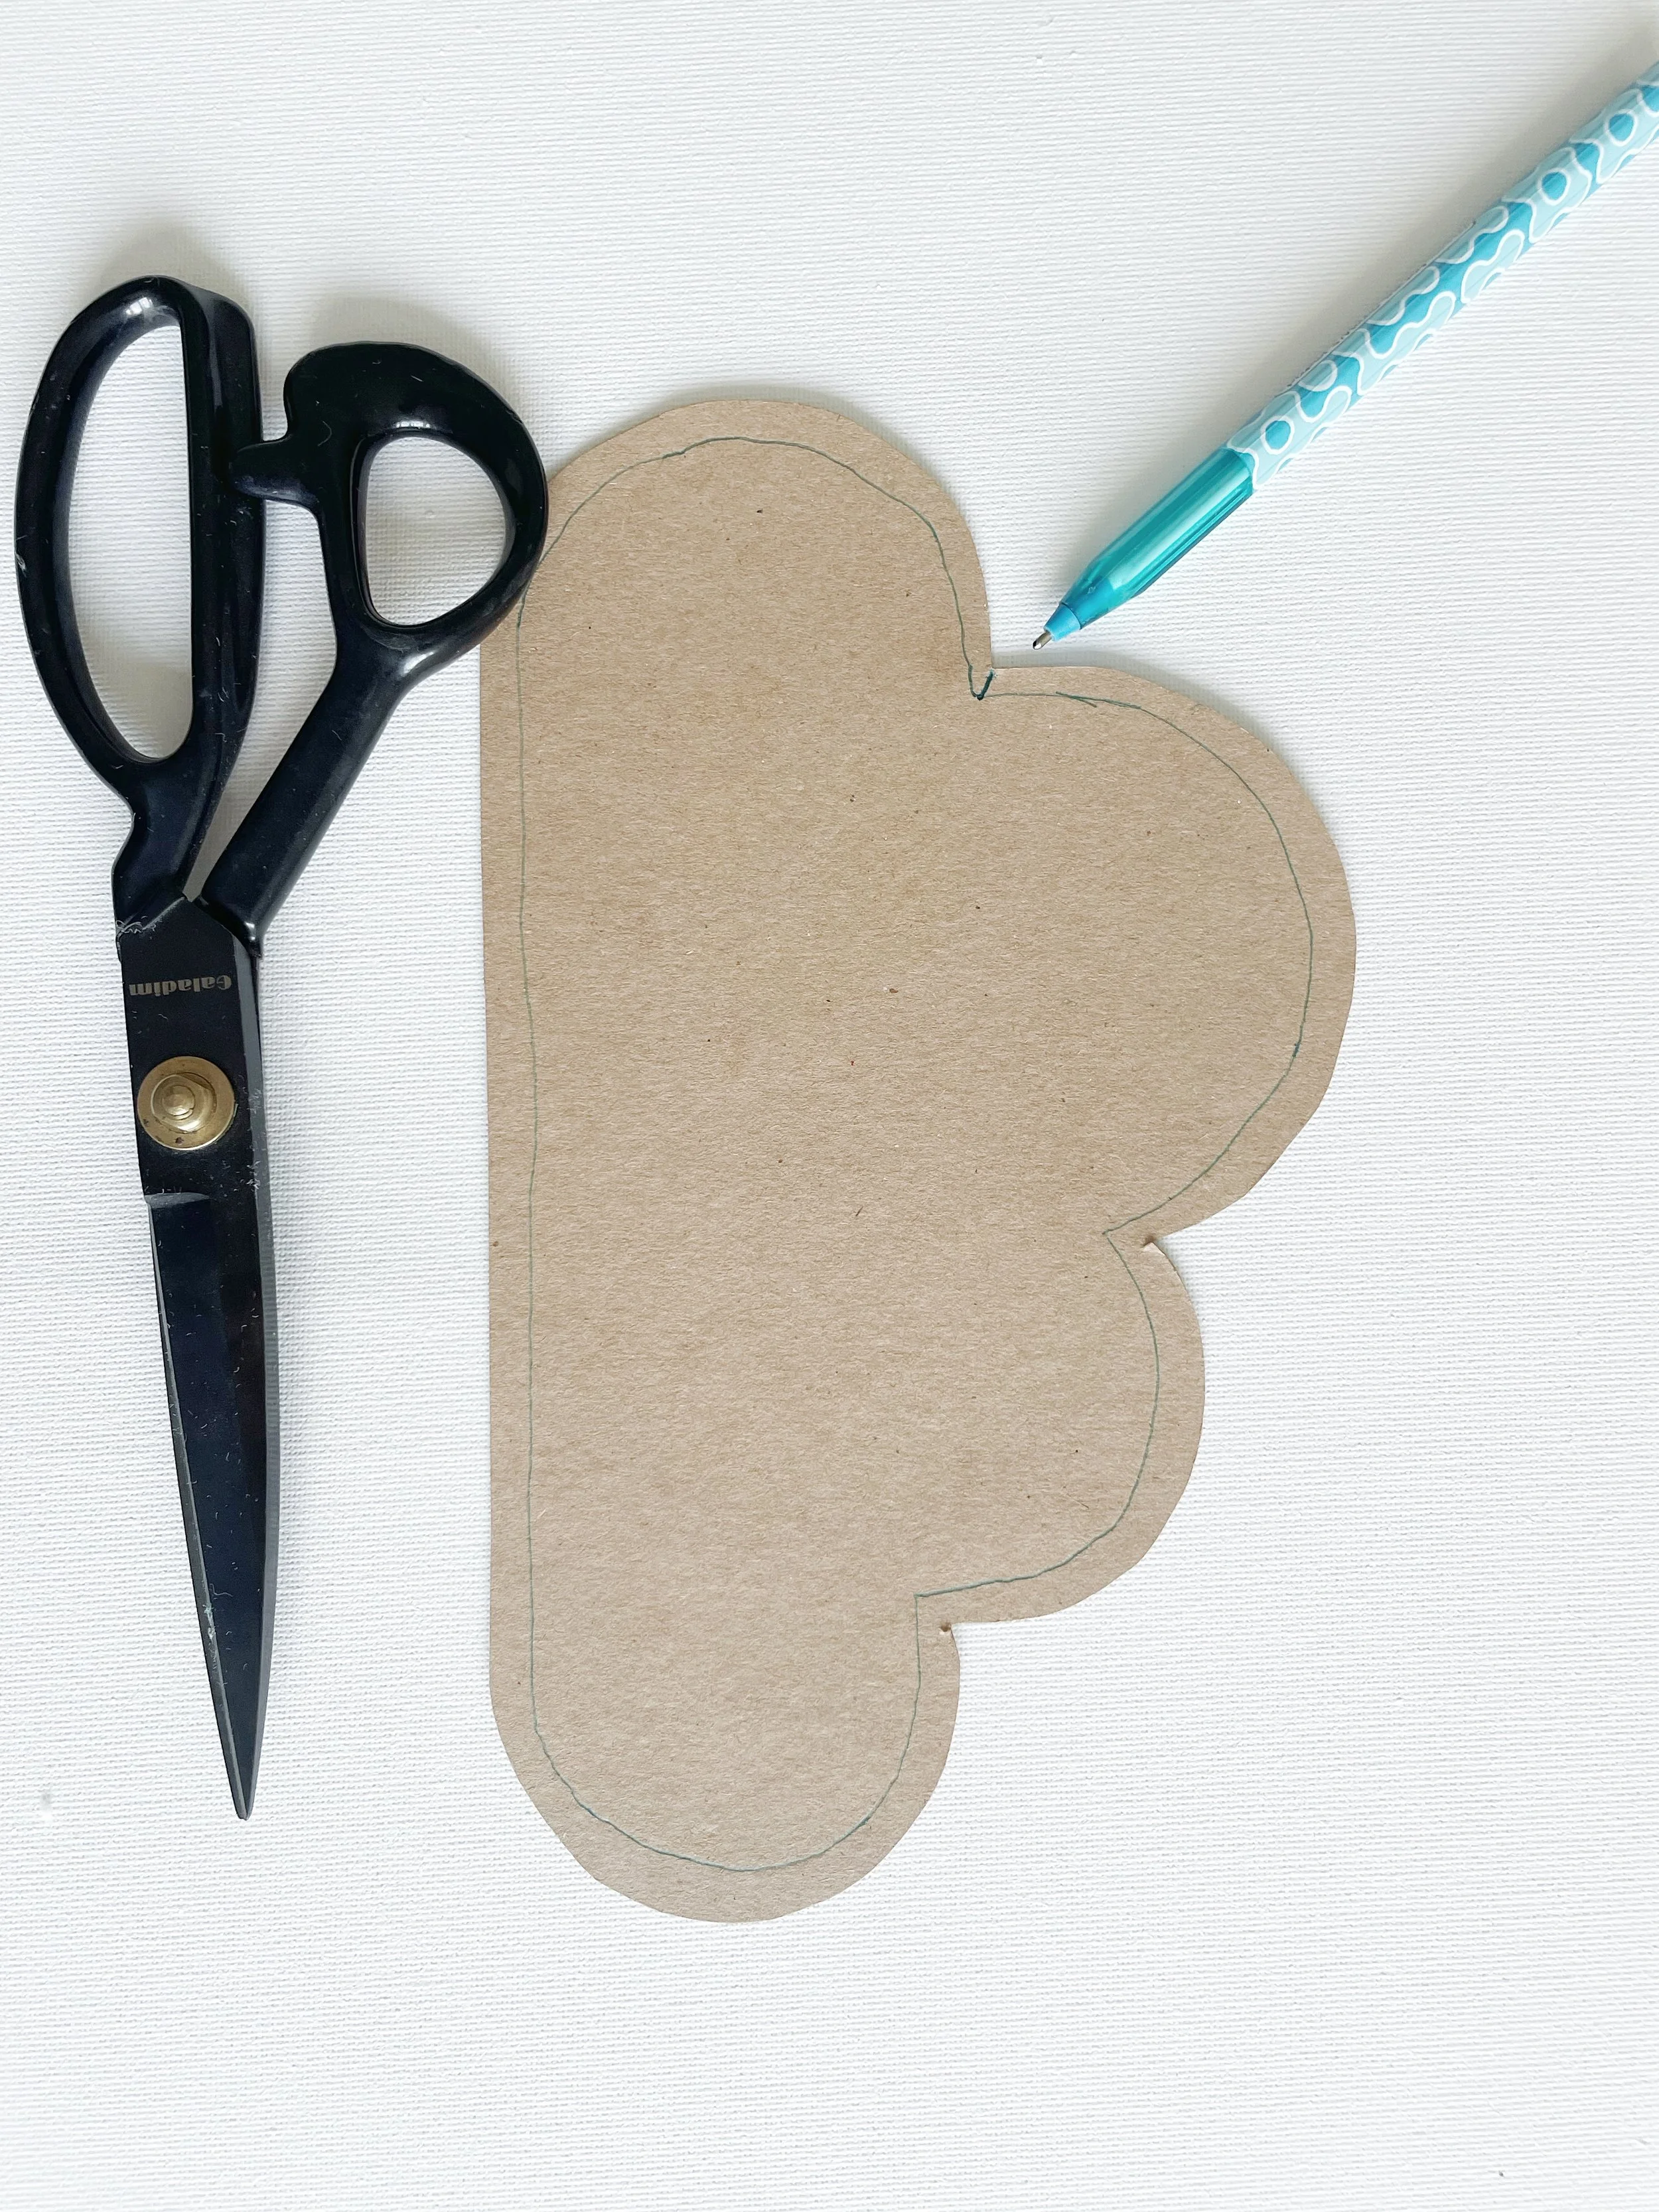
Create the cloud template…
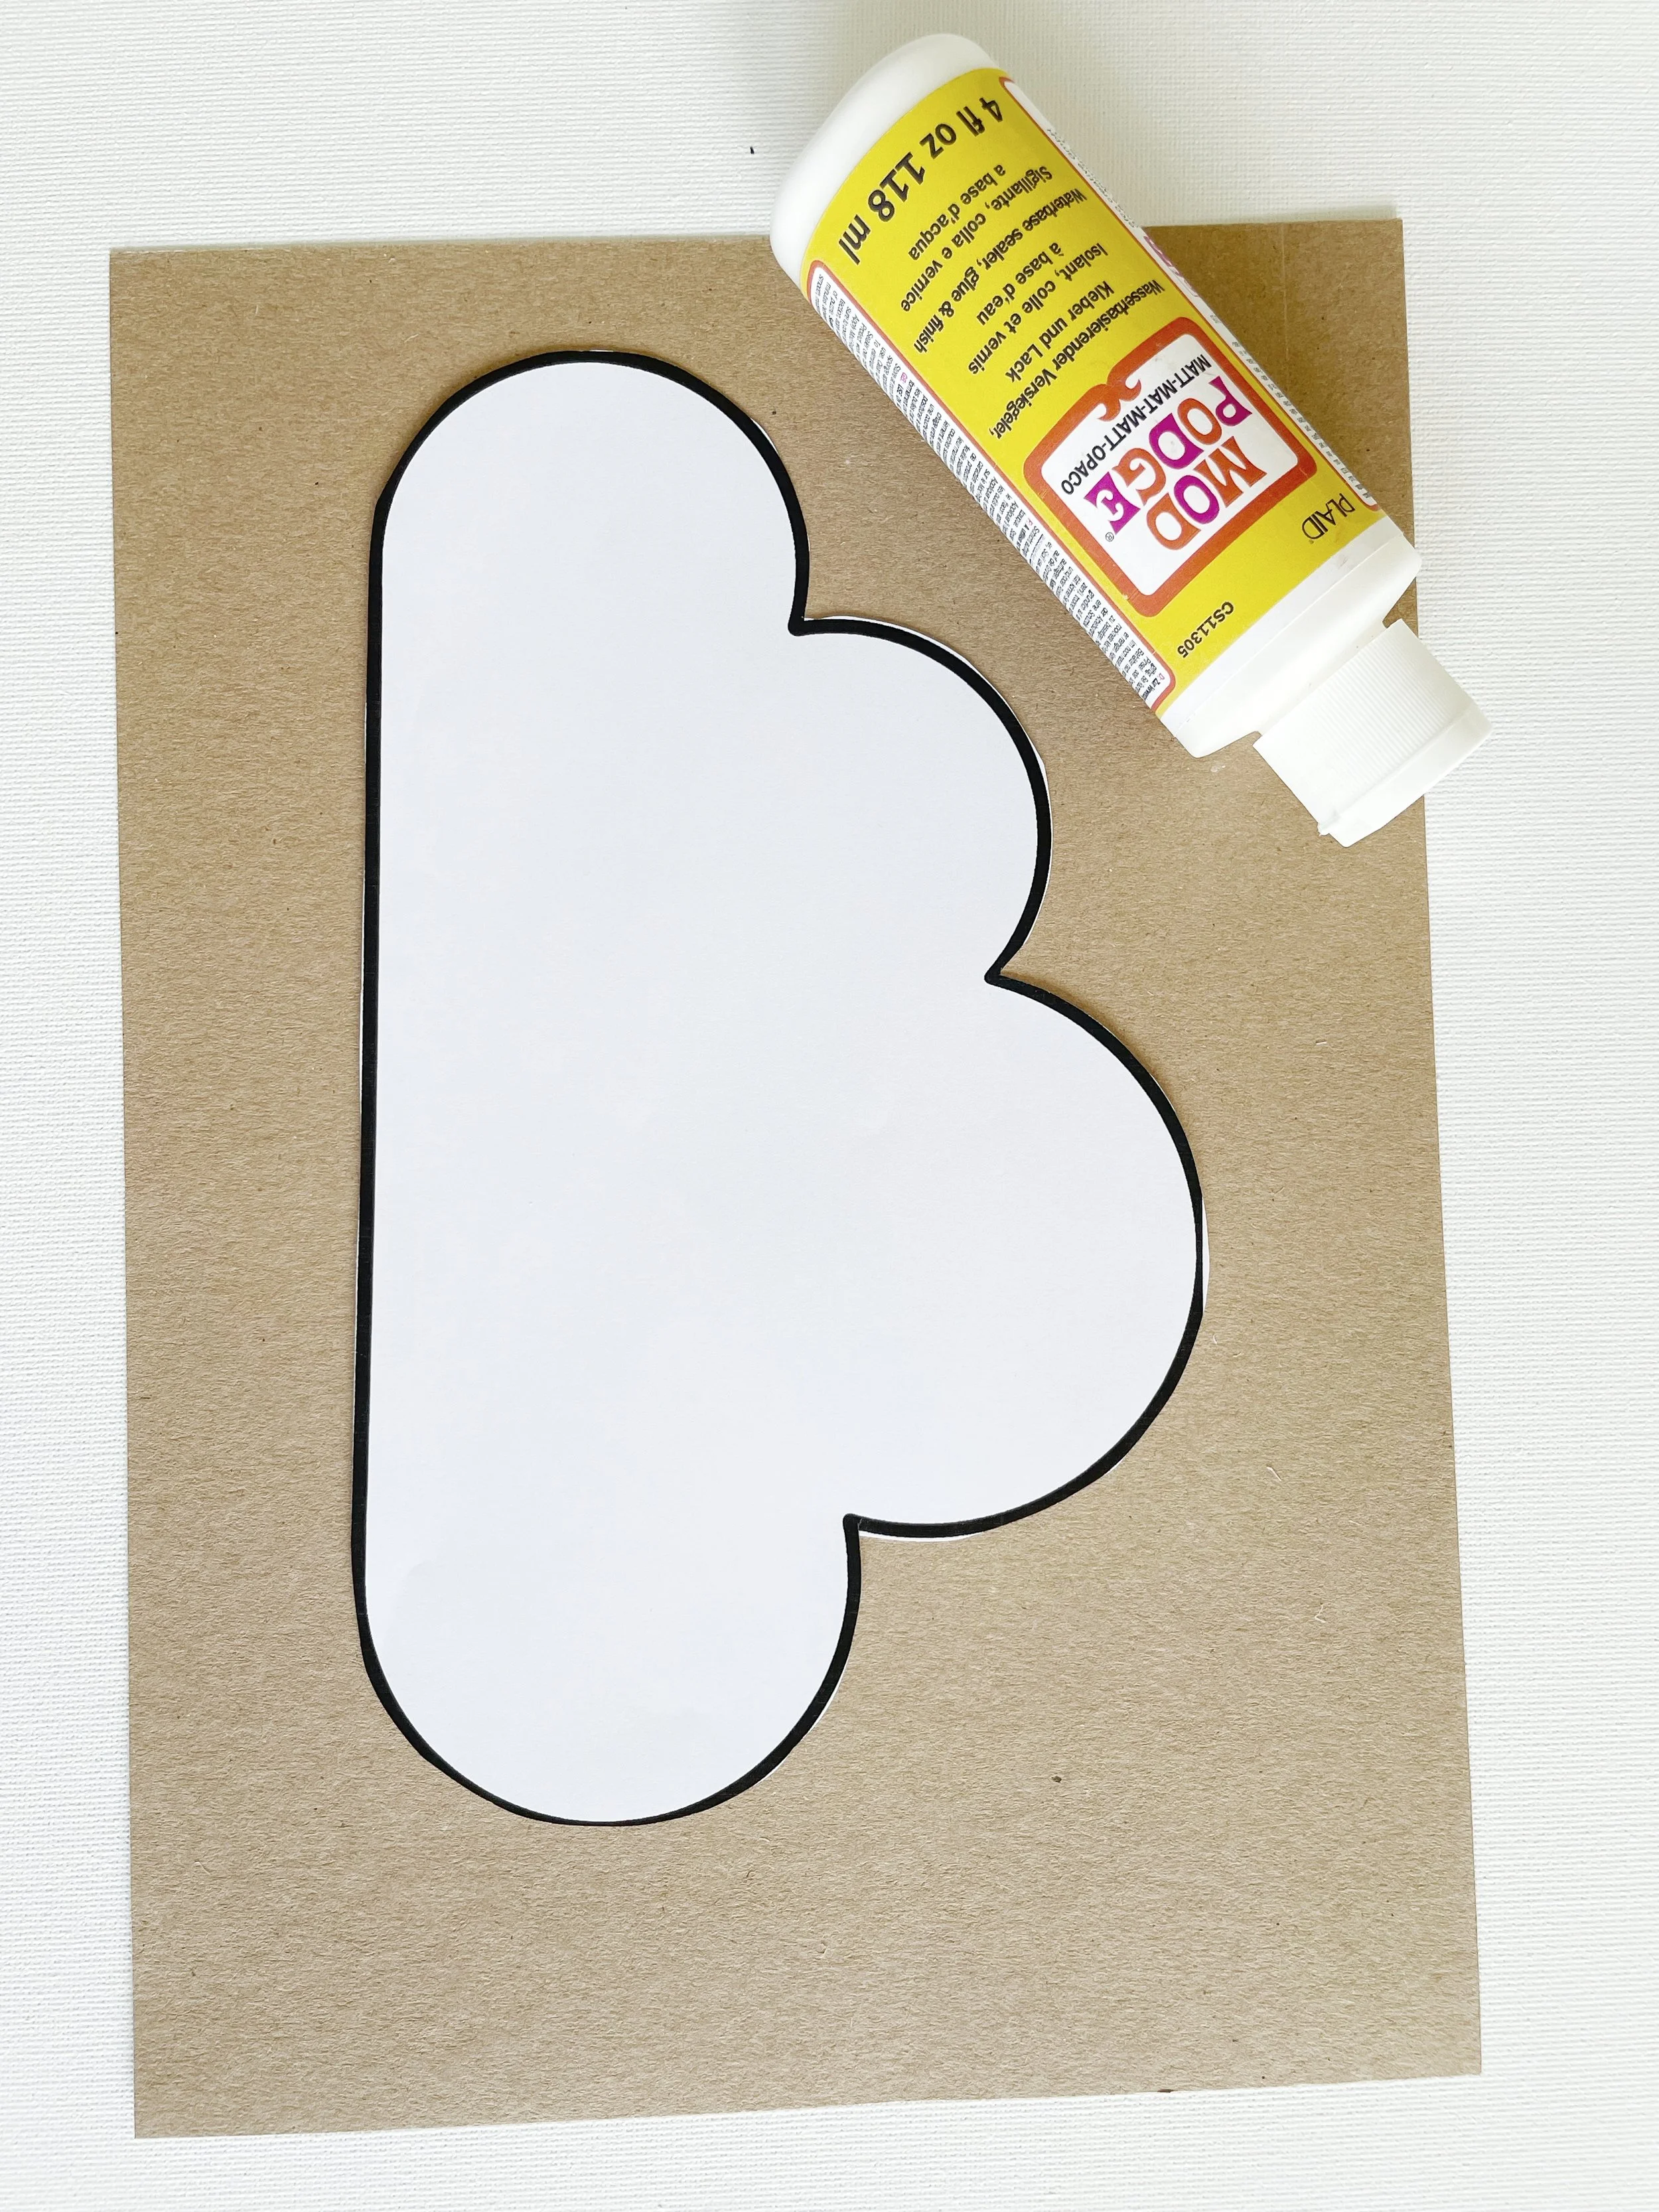
Print off the cloud template. You may need to adjust the size of the template on your printer to create the perfect sized cloud for your project.
When you are happy with the size of the template, print it and then carefully cut around it. Now glue the template on to the piece of card.
Once the glue has dried, carefully cut around the template.
Draw clouds onto fabric…
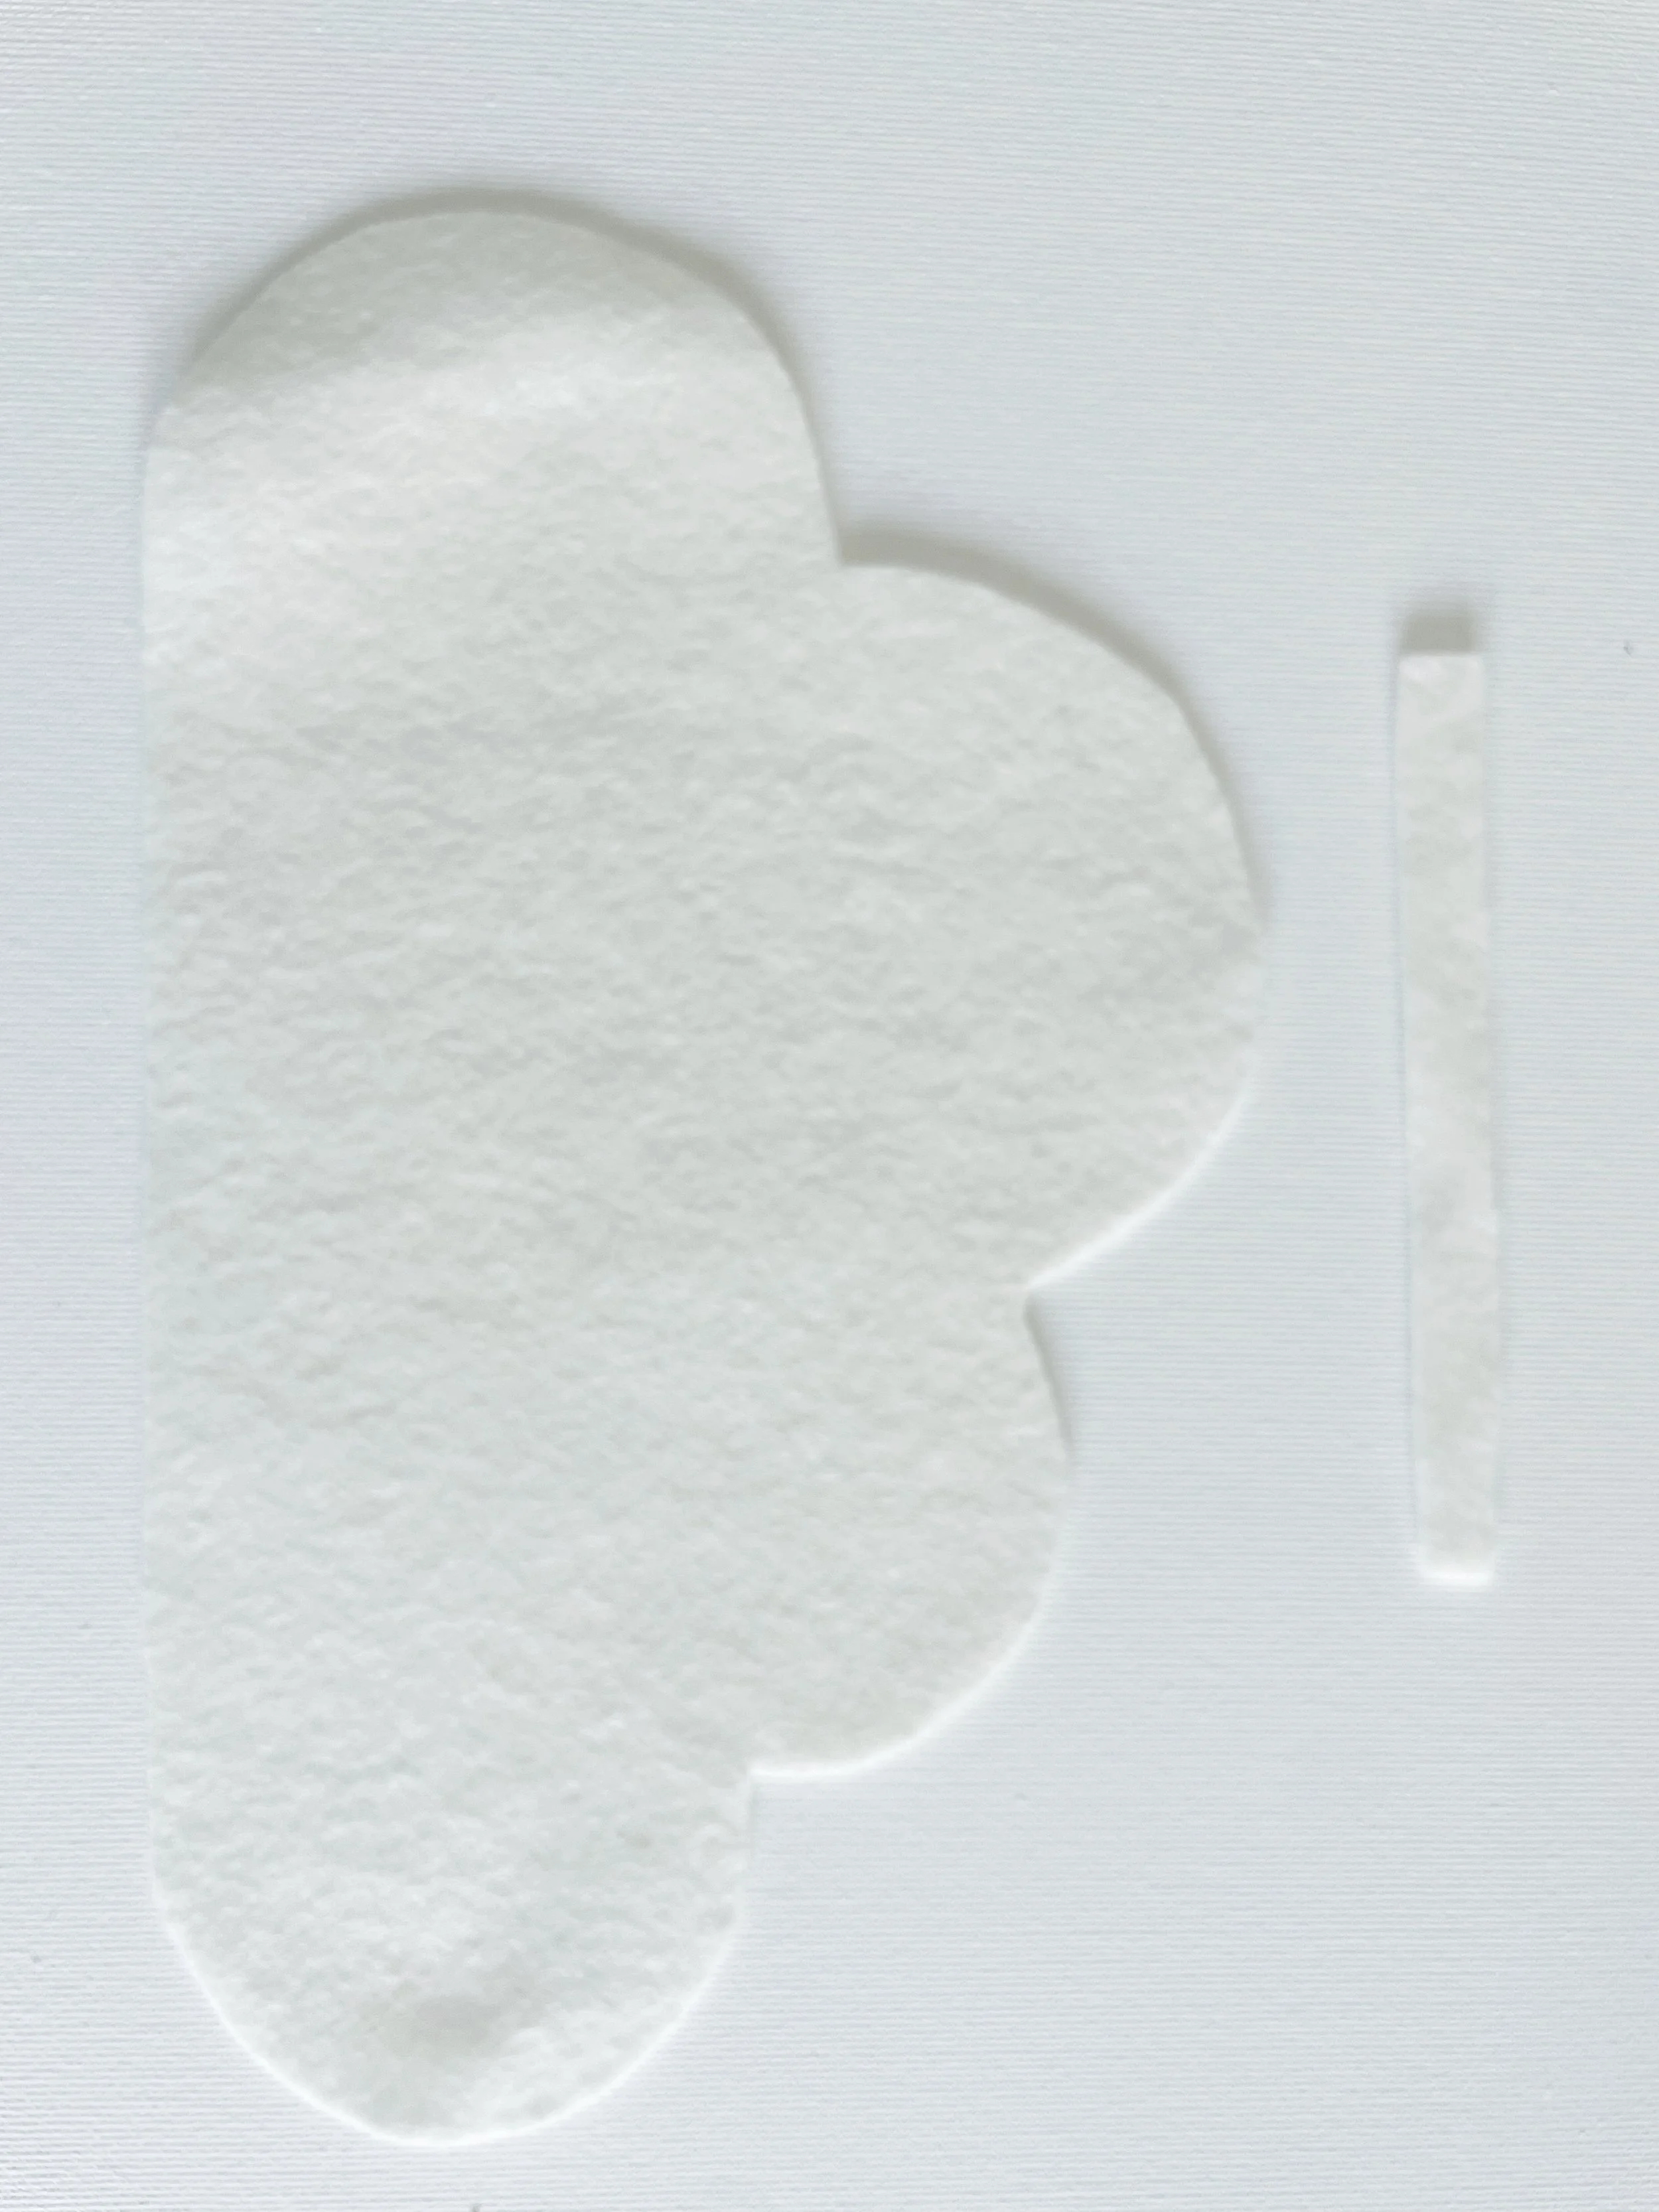
Neatly fold your wool felt in half so that you have two layers of wool felt to work with. For best results, give the felt a quick iron to remove any creases.
Place the cloud template on the top layer of the wool felt. Use your pen to draw around the template.
Use your scissors to cut carefully around the cloud shape. Cut through both layers of wool felt.
Turn over the cloud that has been marked with pen. Any pen marks will now be on the inside of each cloud.
This will ensure that no pen marks are visible on your finished cloud decor.
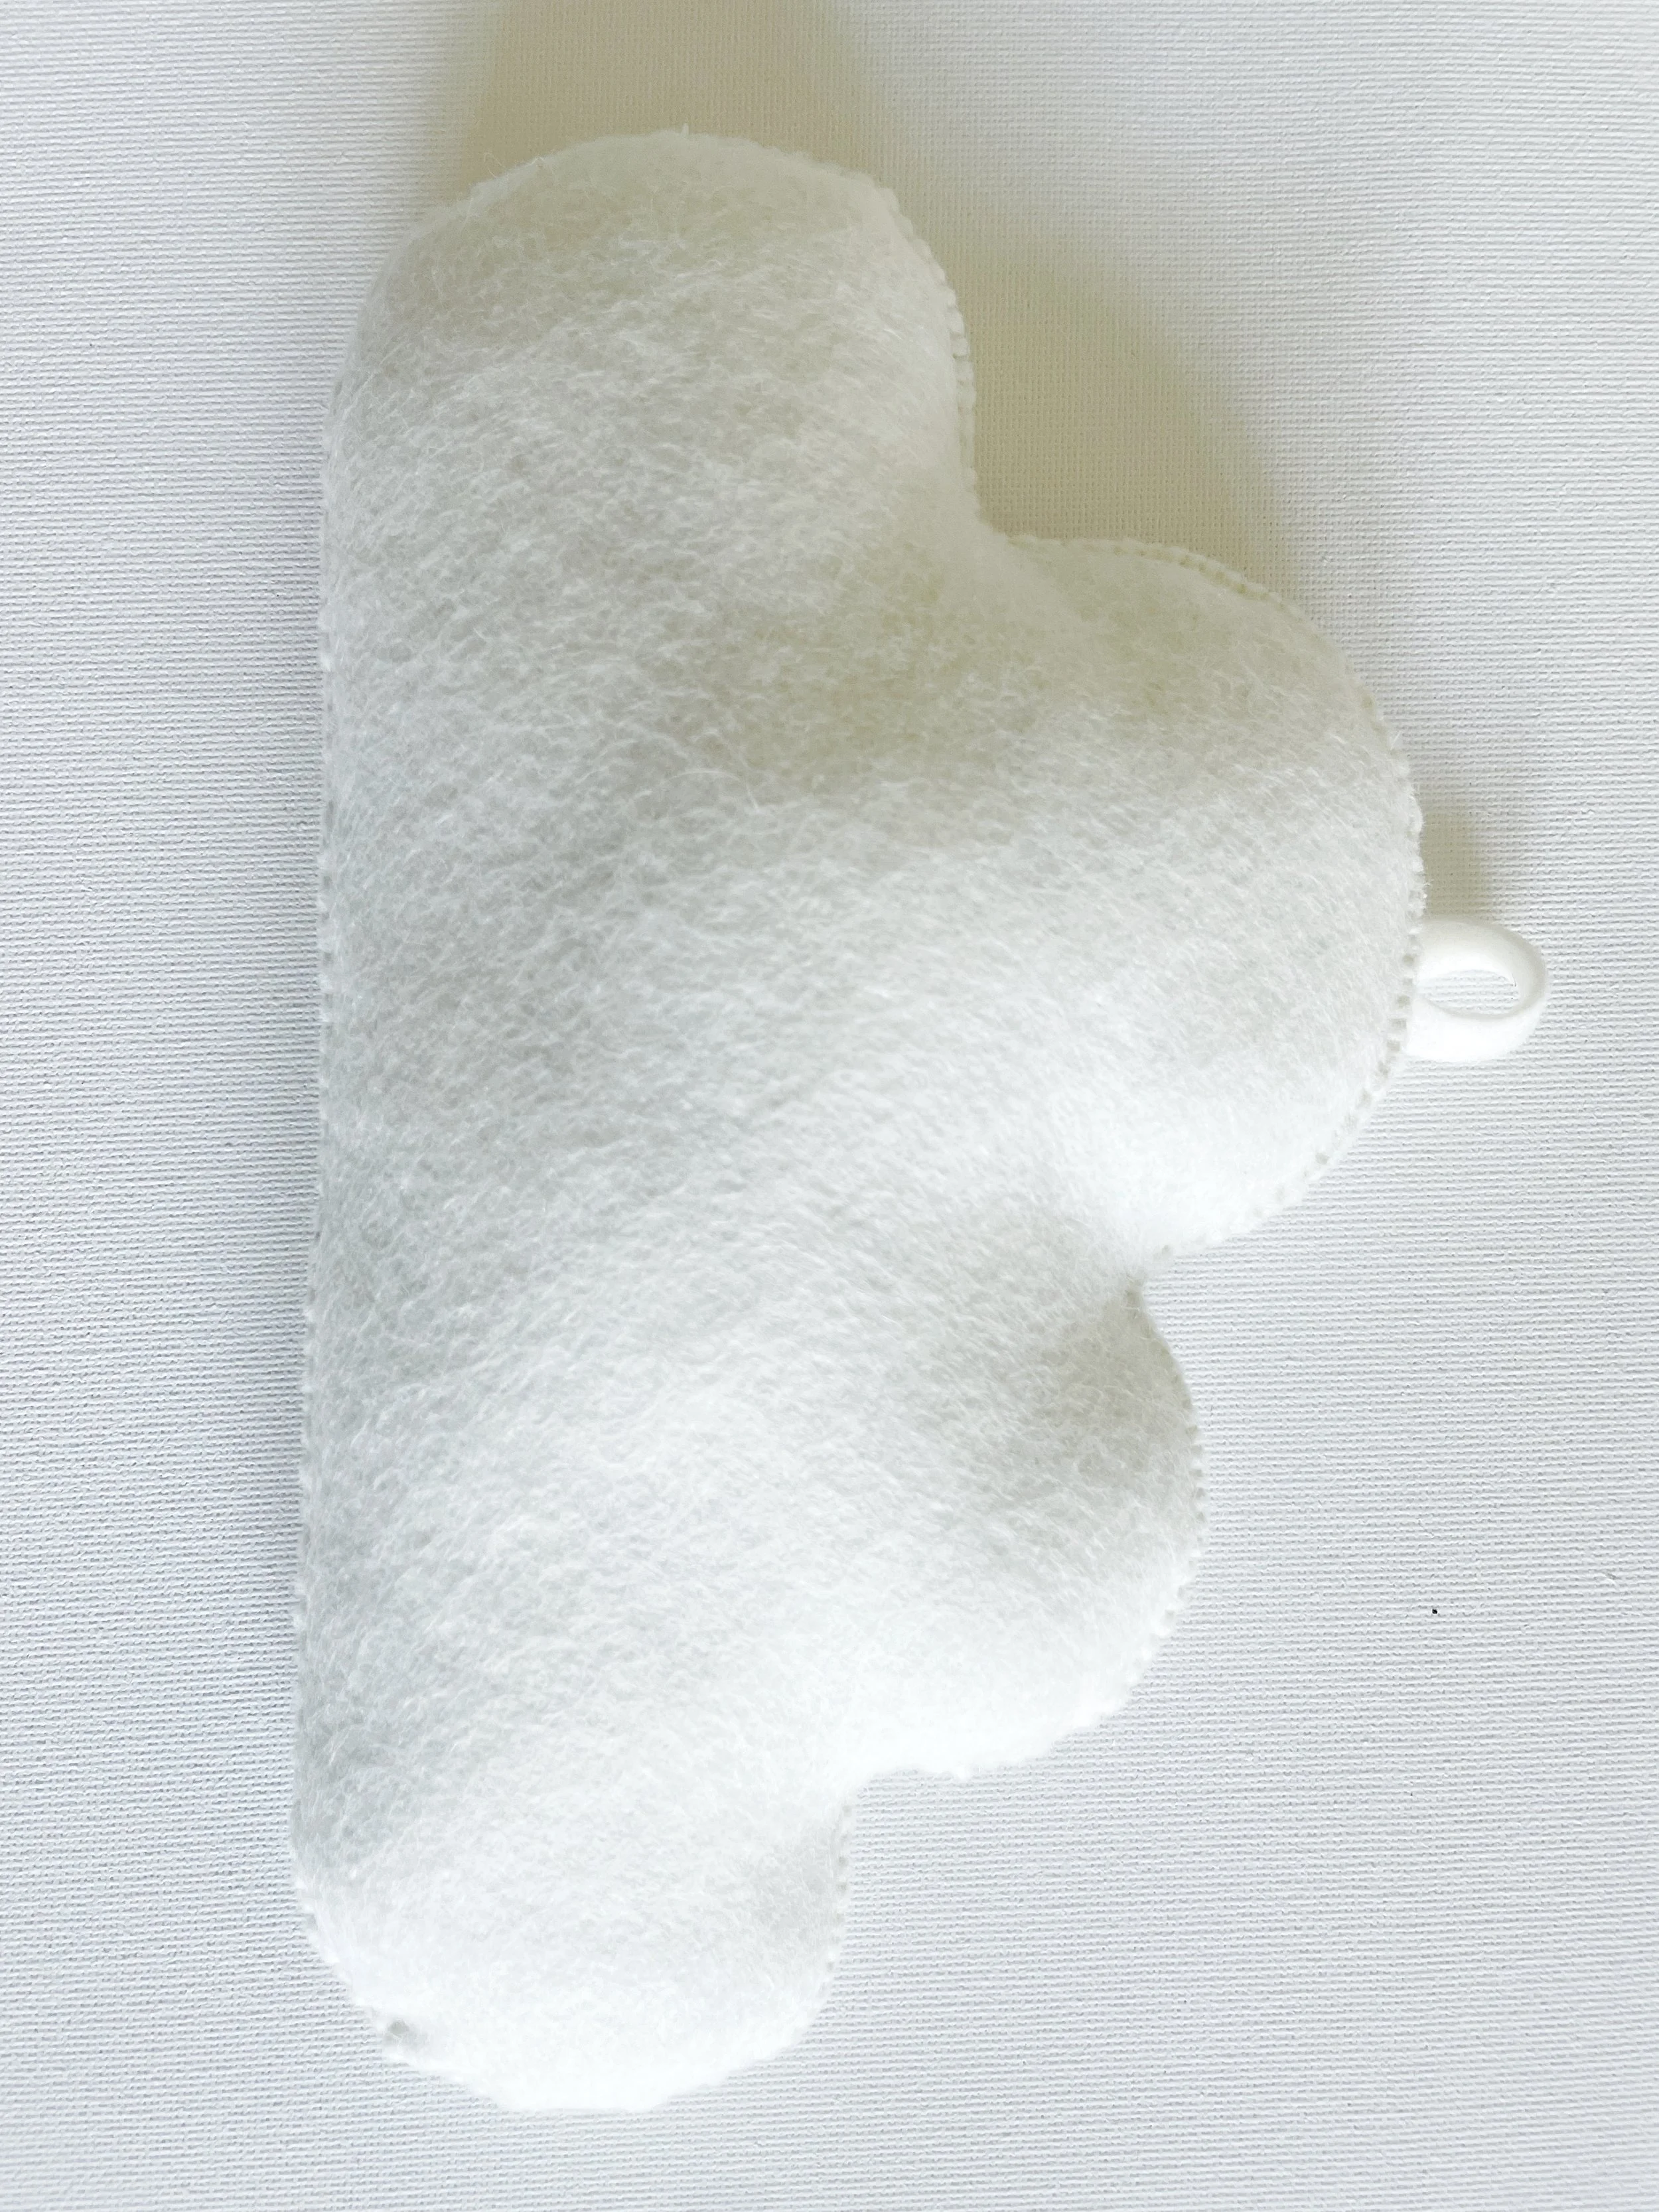
Make a loop for hanging…
To hang your clouds onto a wall you can buy little loops to sew into your fabric, but I’m going to show you a super easy way to make one using leftover wool felt.
It works beautifully and saves you the extra expense of buying hooks.
Just cut a strip of wool felt roughly 5 inches long and about half an inch wide.
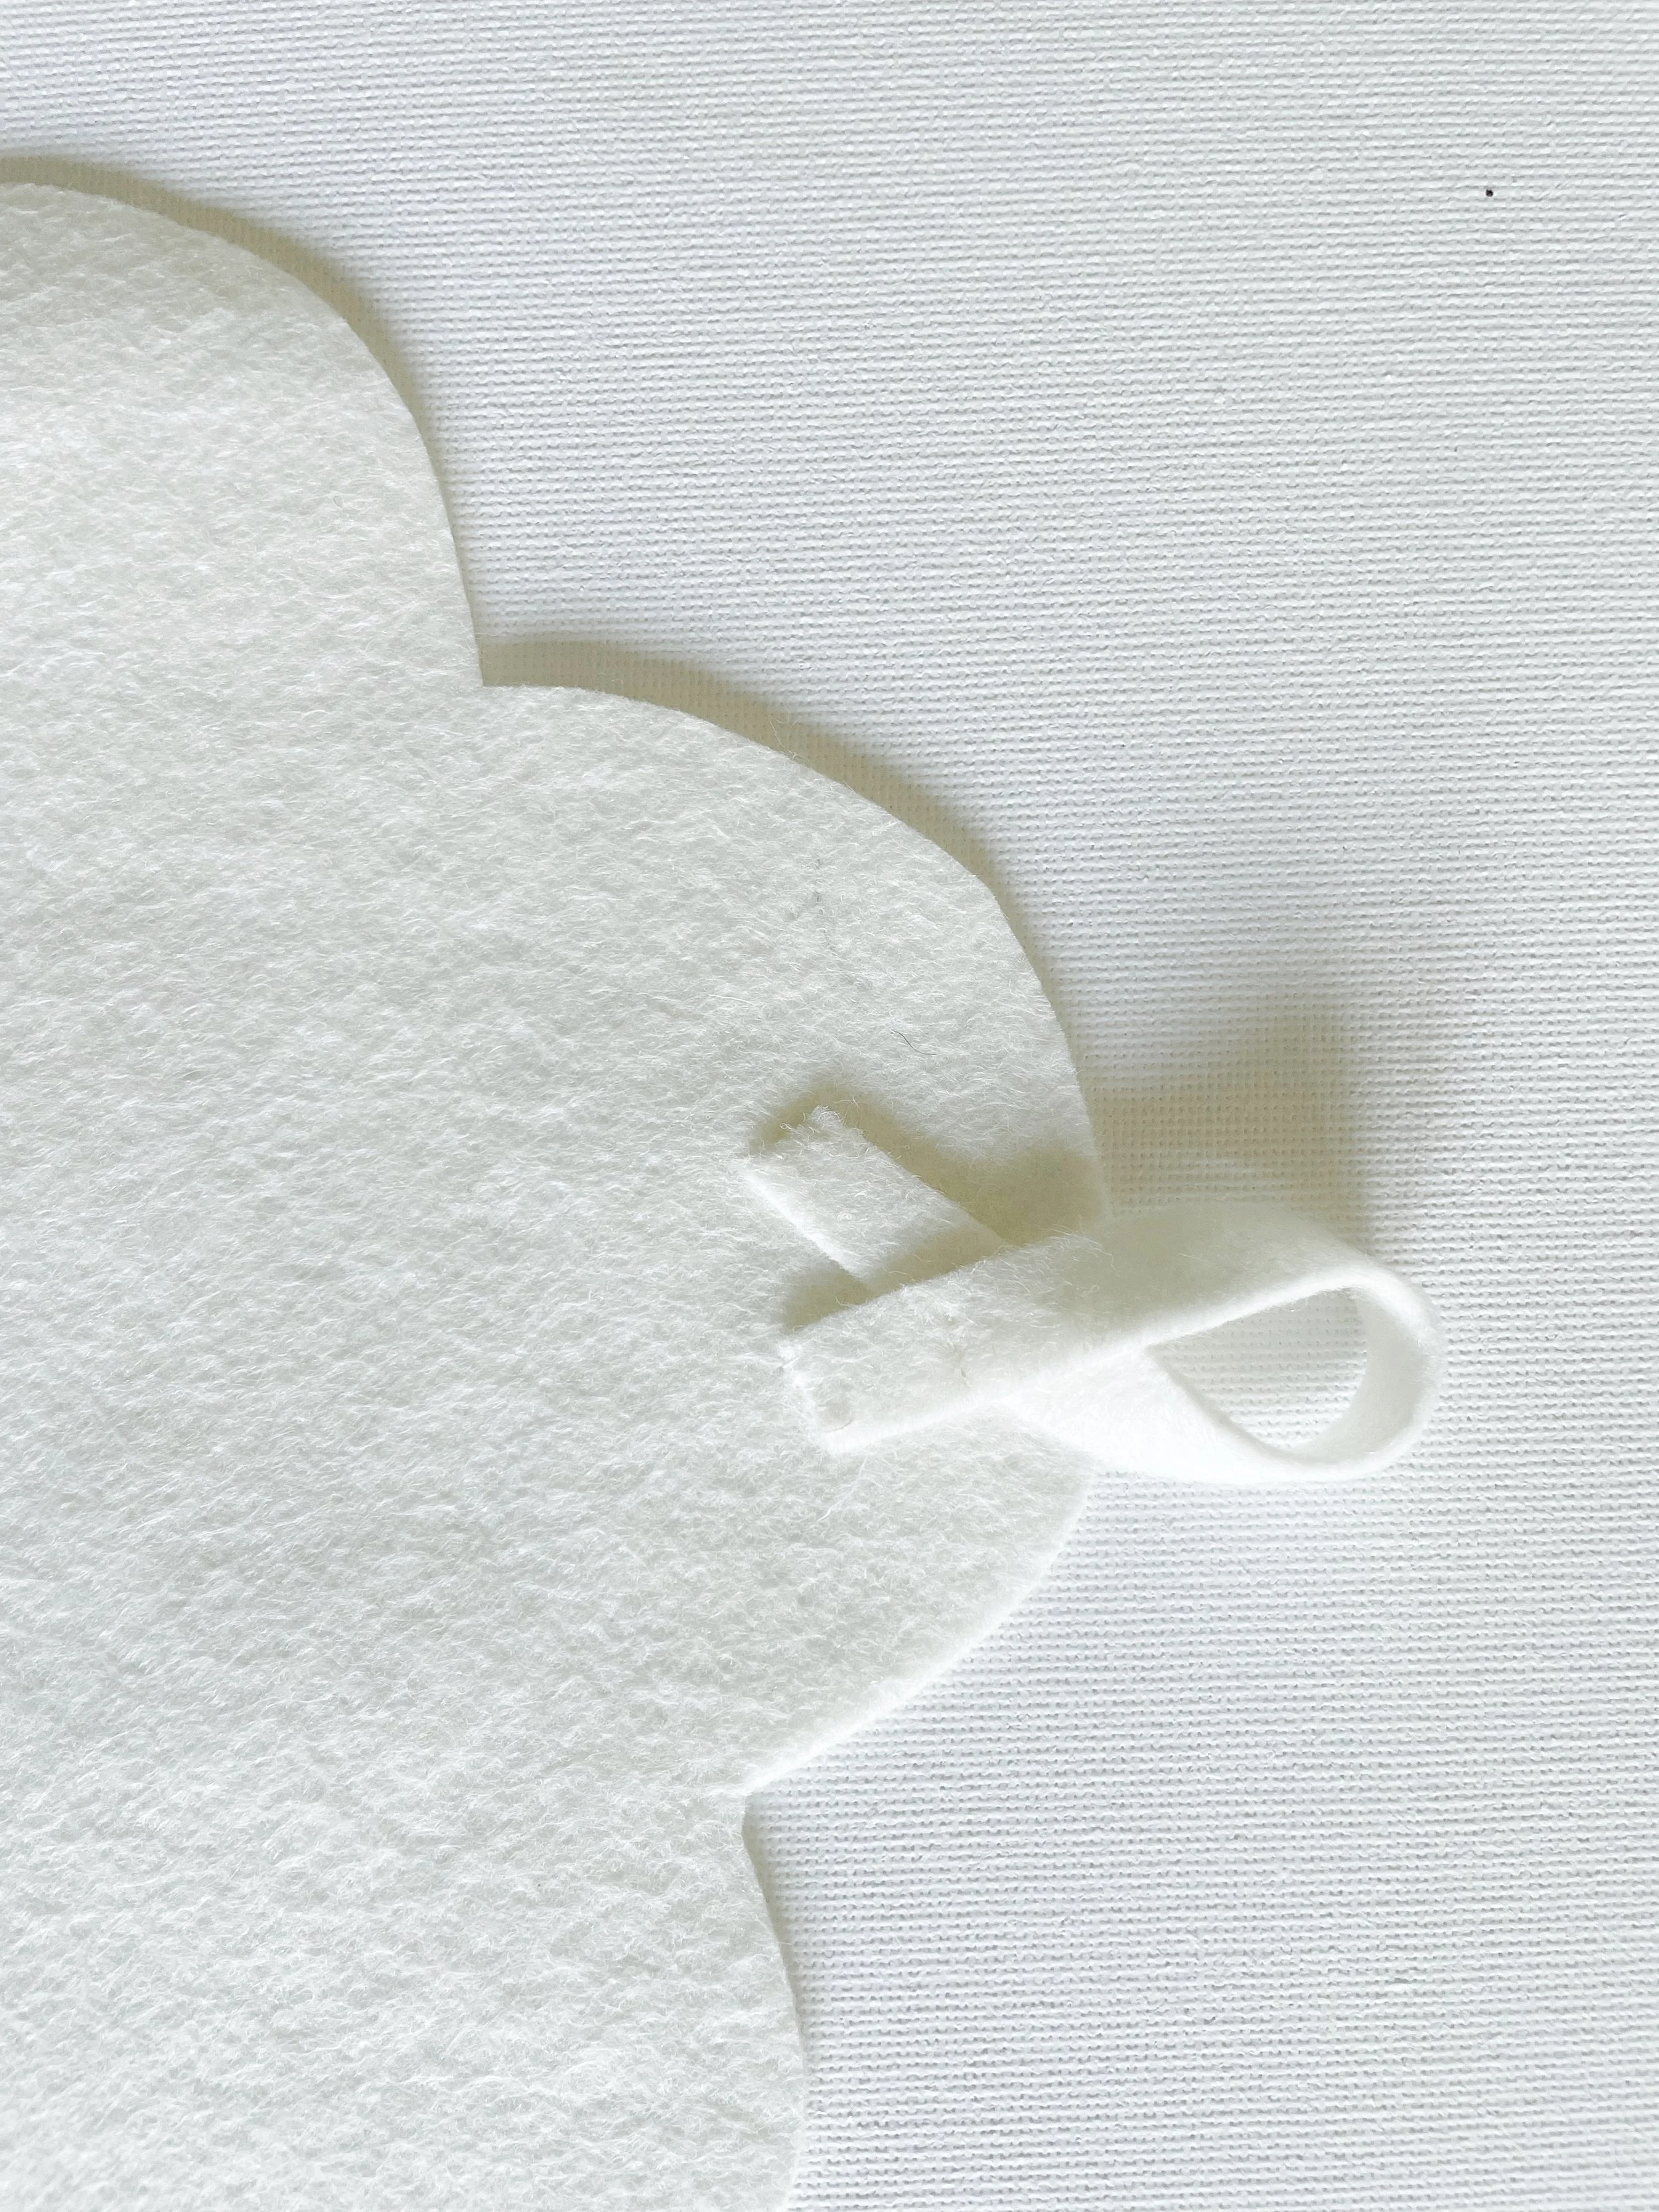
Create a small loop (shown above) and secure it to the back of the cloud with a few stitches at the base of each strand. Make sure to position it so that the loop peeks out just above the top of the cloud, this will make it much easier to hang.
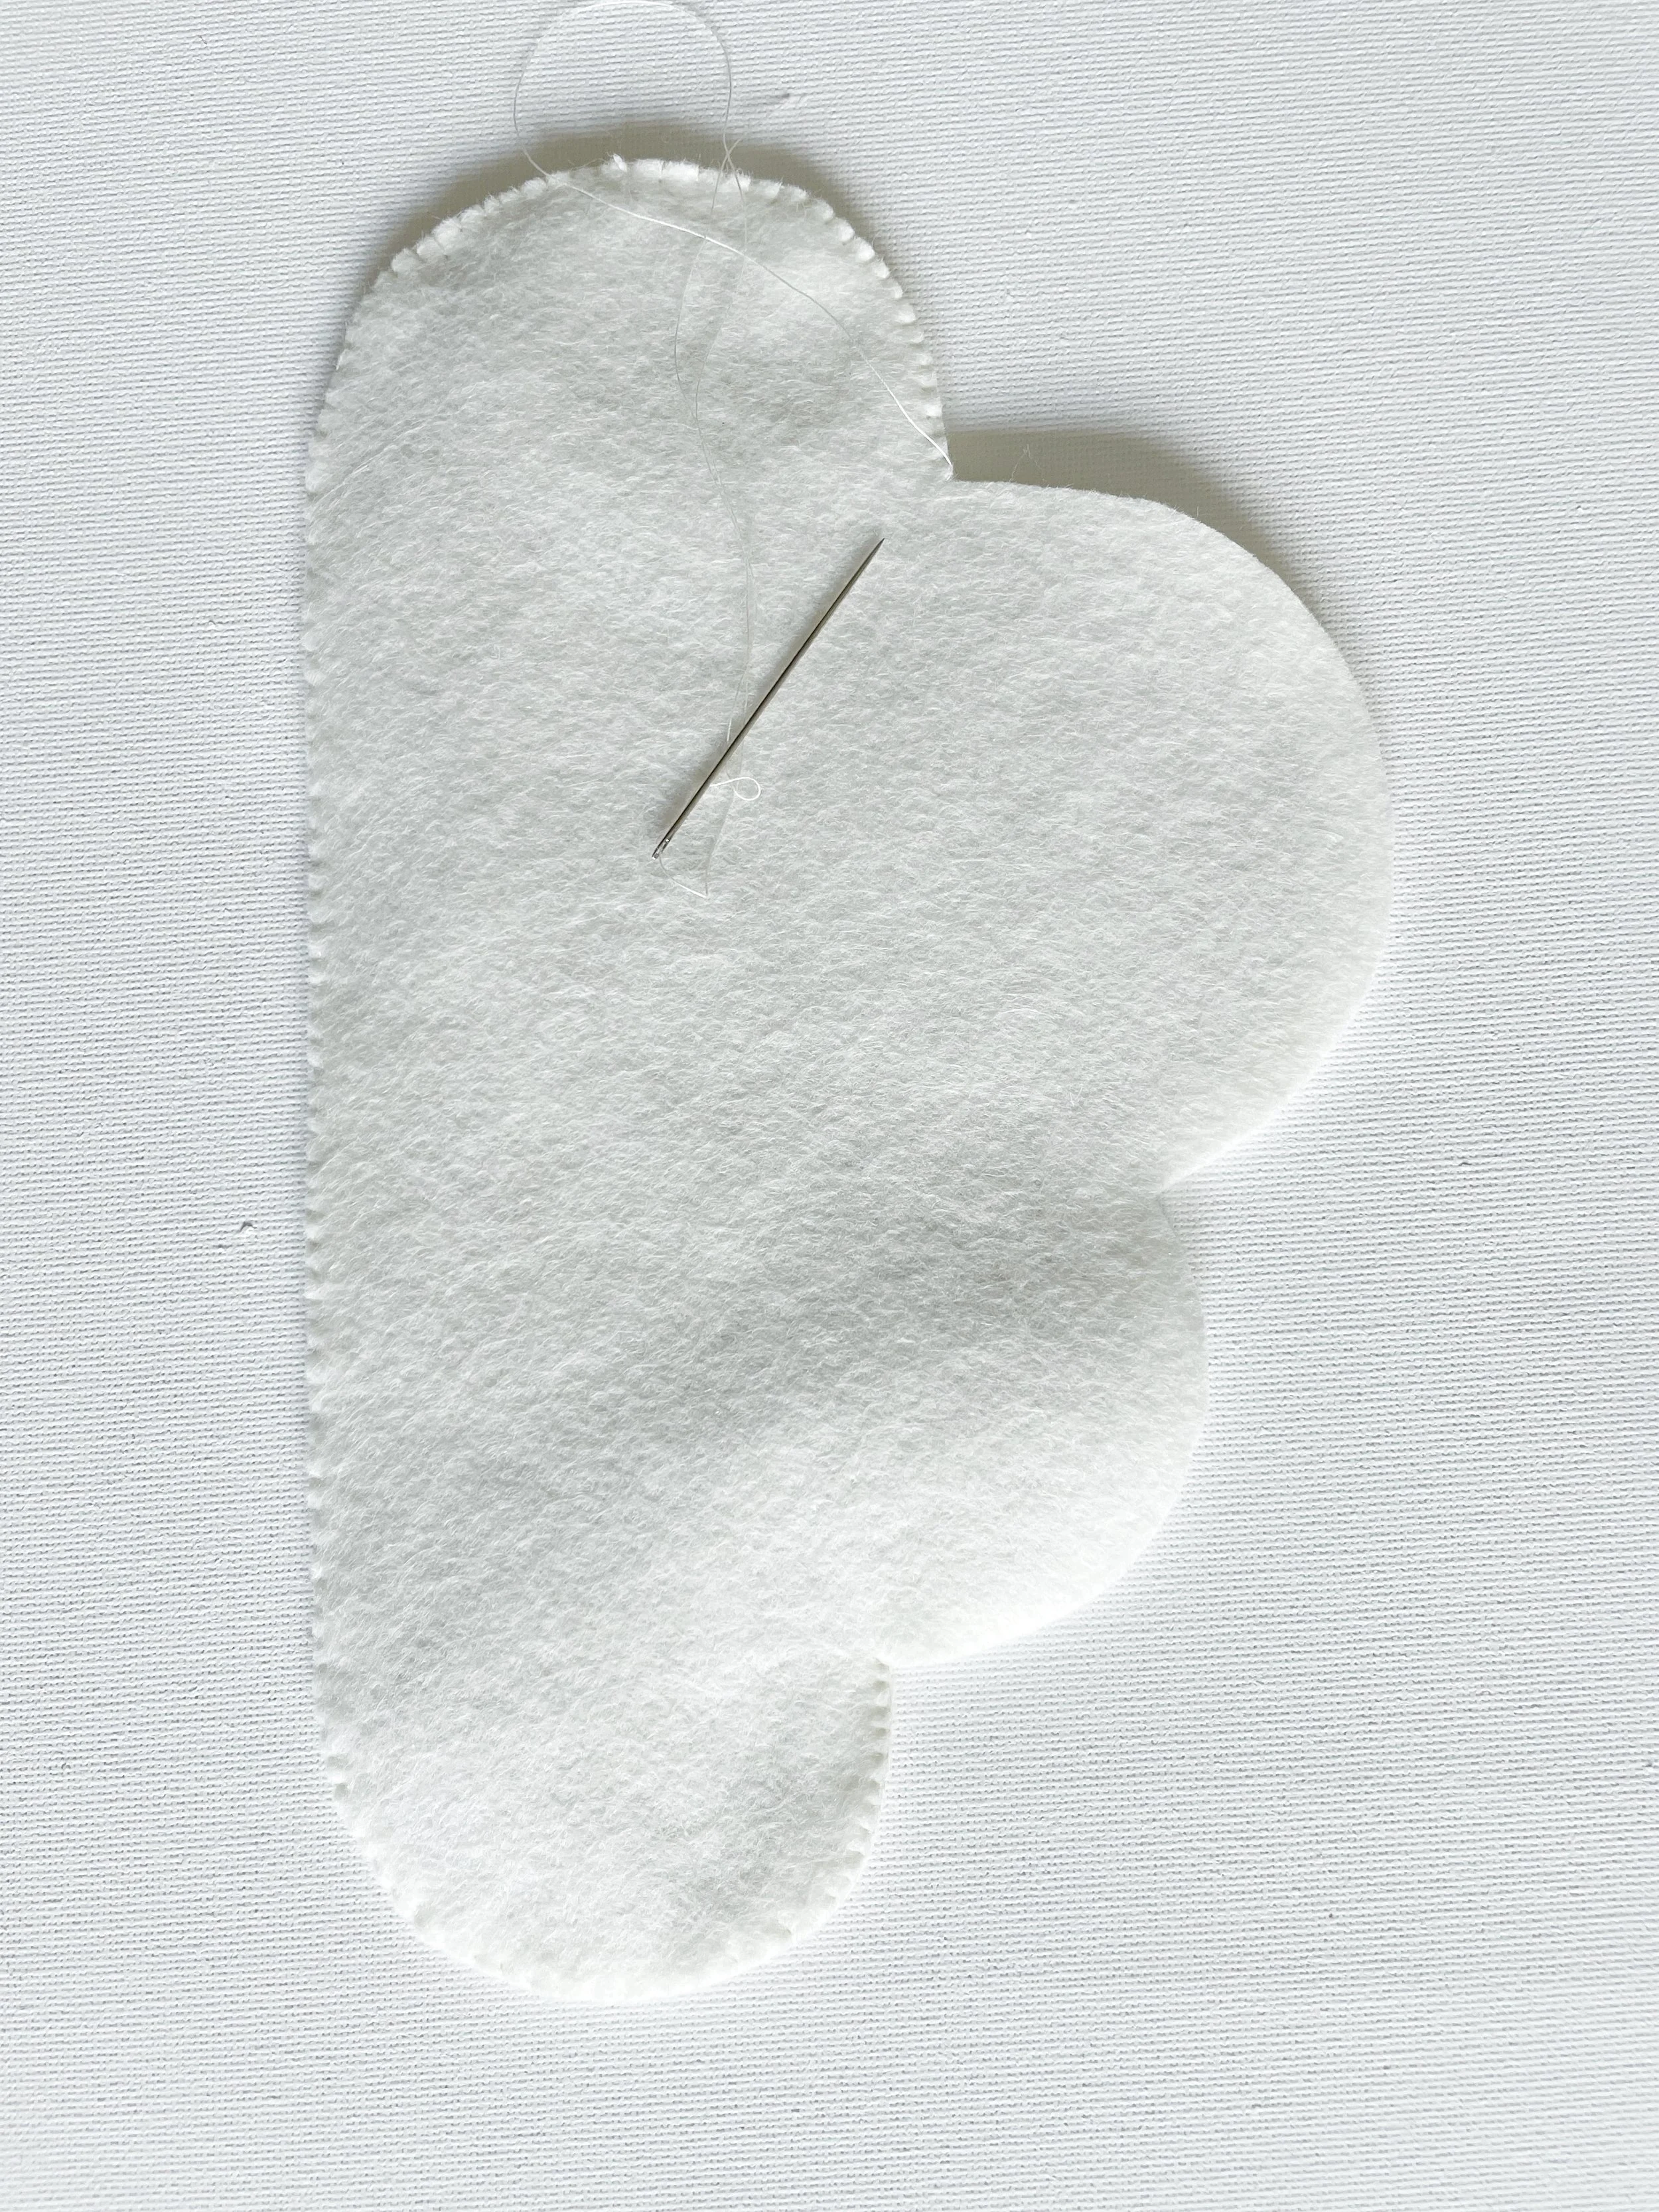
Prepare to sew…
Now it’s time to sew your clouds! Don’t worry if you’re brand new to sewing, I’ve shared two simple stitch options below.
I have used pink thread to show what the stitch should look like but obviously you will be using matching thread.
Choose the stitch that you feel most confident attempting. The running stitch is the easiest and requires very little skill.
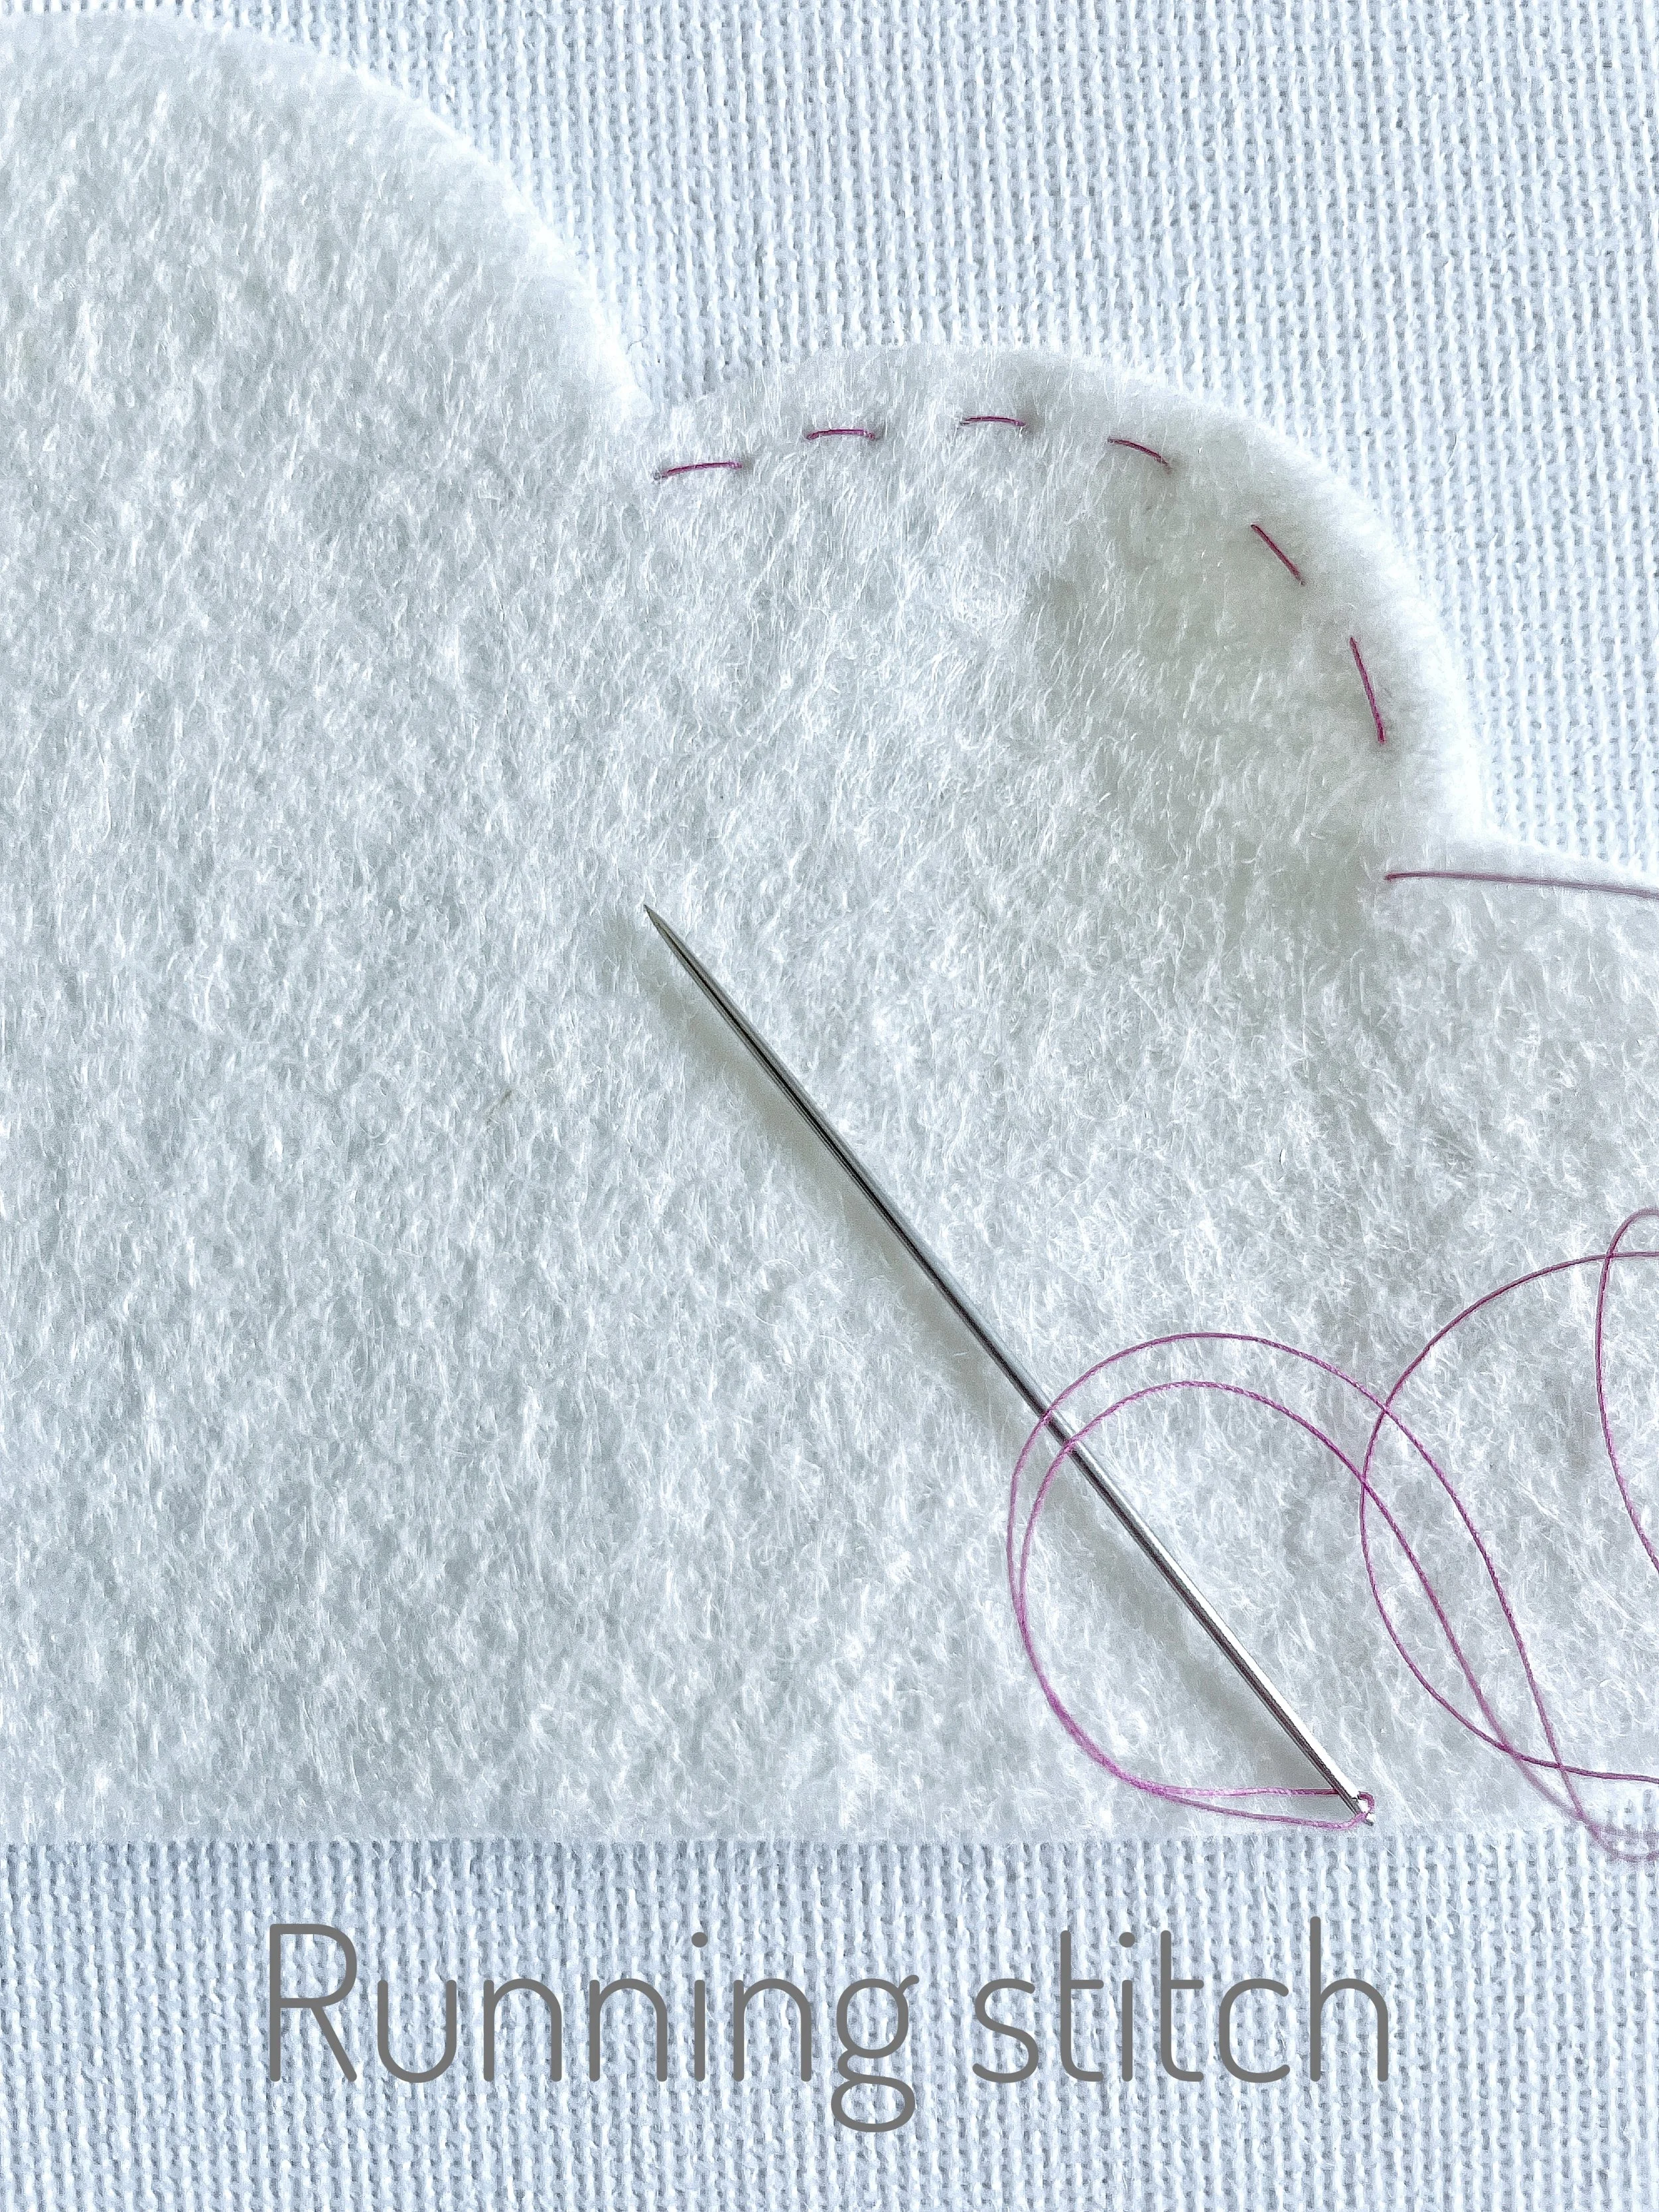
Rather than give full instructions for each stitch I thought it would be much clearer and easier for you to learn from a YouTube tutorial. This running stitch tutorial from Red Ted Art is Fantastic. You can watch it here: Running stitch tutorial.
If you are more confident at sewing, the blanket stitch is perfect for your cloud wall decor.

I have added a link to another brilliant tutorial by Red Ted Art for those of you that would like to learn this stitch. You can watch it here: Blanket stitch tutorial
Trim the cloud template…
Grab your pencil and draw a border about ¼ inch (or 1 cm) in from the edge of your cloud template.
Now, using your scissors, cut along that line to trim down the template a little. This creates just enough space for the stitches, while keeping a firm backing to the cloud to ensure it hangs nice and flat against your wall.
Glue the template to the fabric of one cloud shapes, making sure to leave an even border of fabric as shown in the picture below.
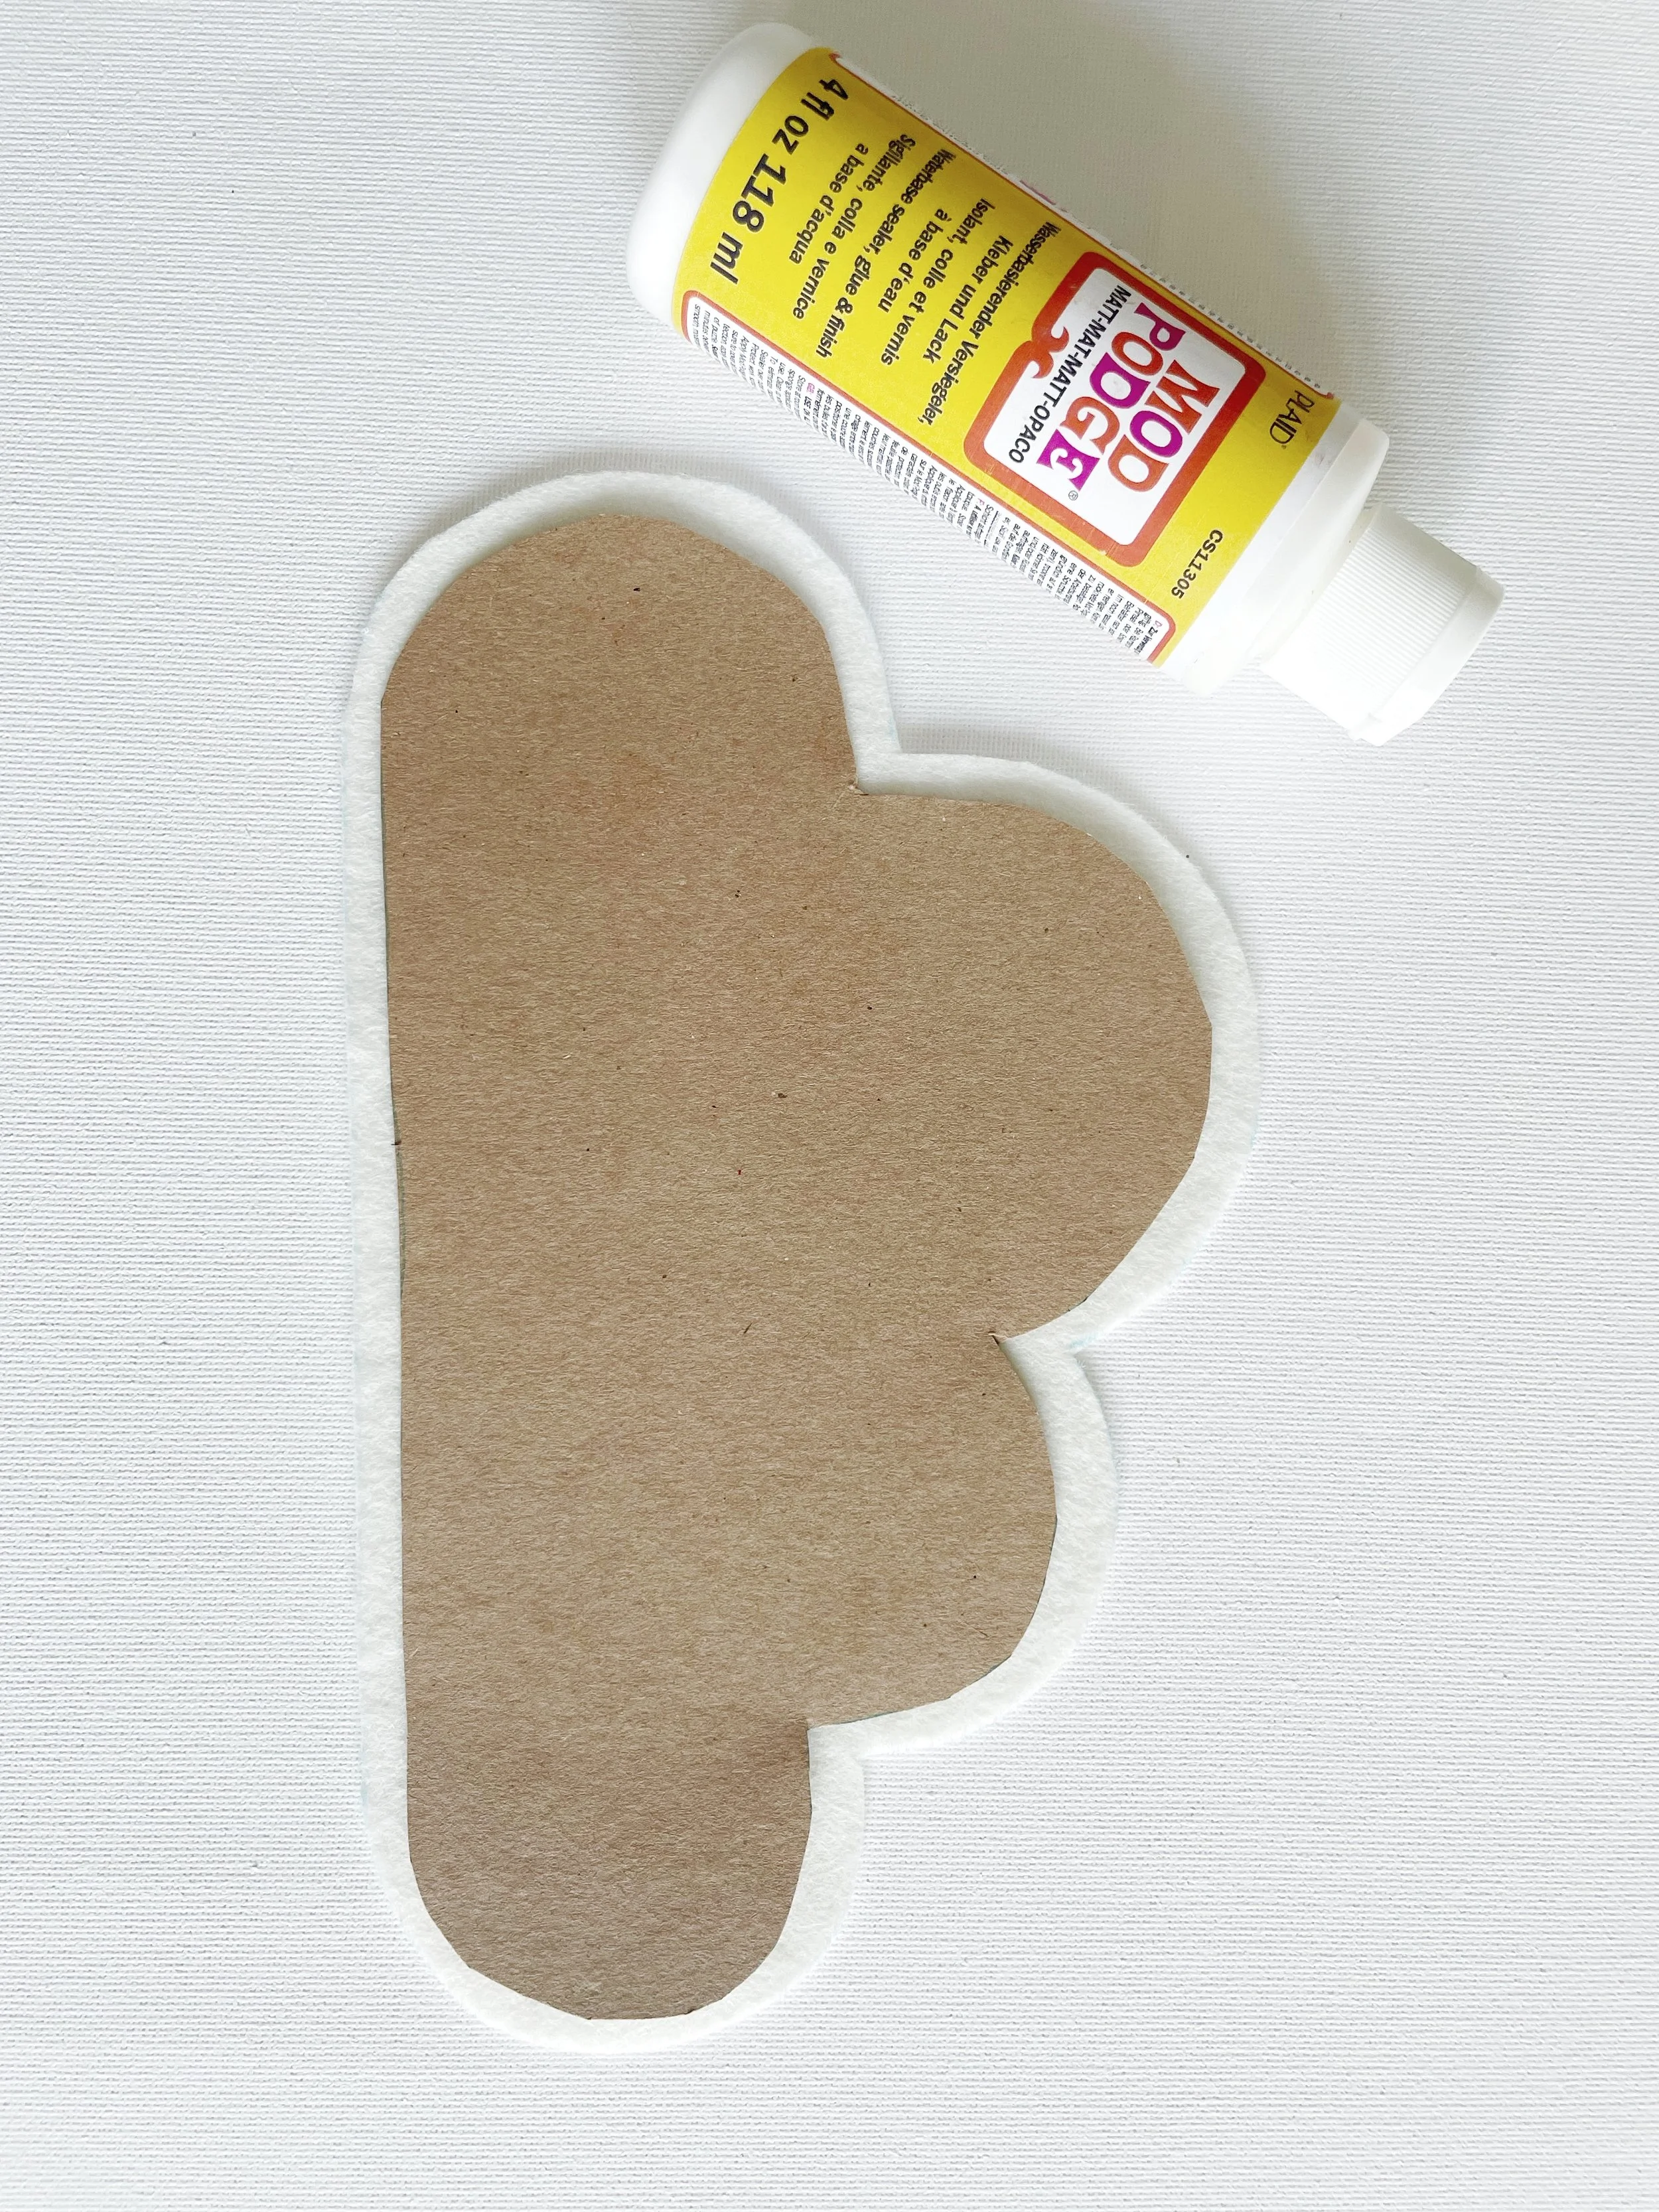
Once the fabric glue has dried and the card backing is nice and secure, place the second cloud shape on top of the card covered cloud. The card should be in the centre of the two clouds, a bit like the filling of a sandwich.
Now it’s time to start stitching around the edge using your chosen stitch. If you’re new to sewing take your time and enjoy the process, there’s no rush!
It doesn’t need to be perfect to be beautiful.
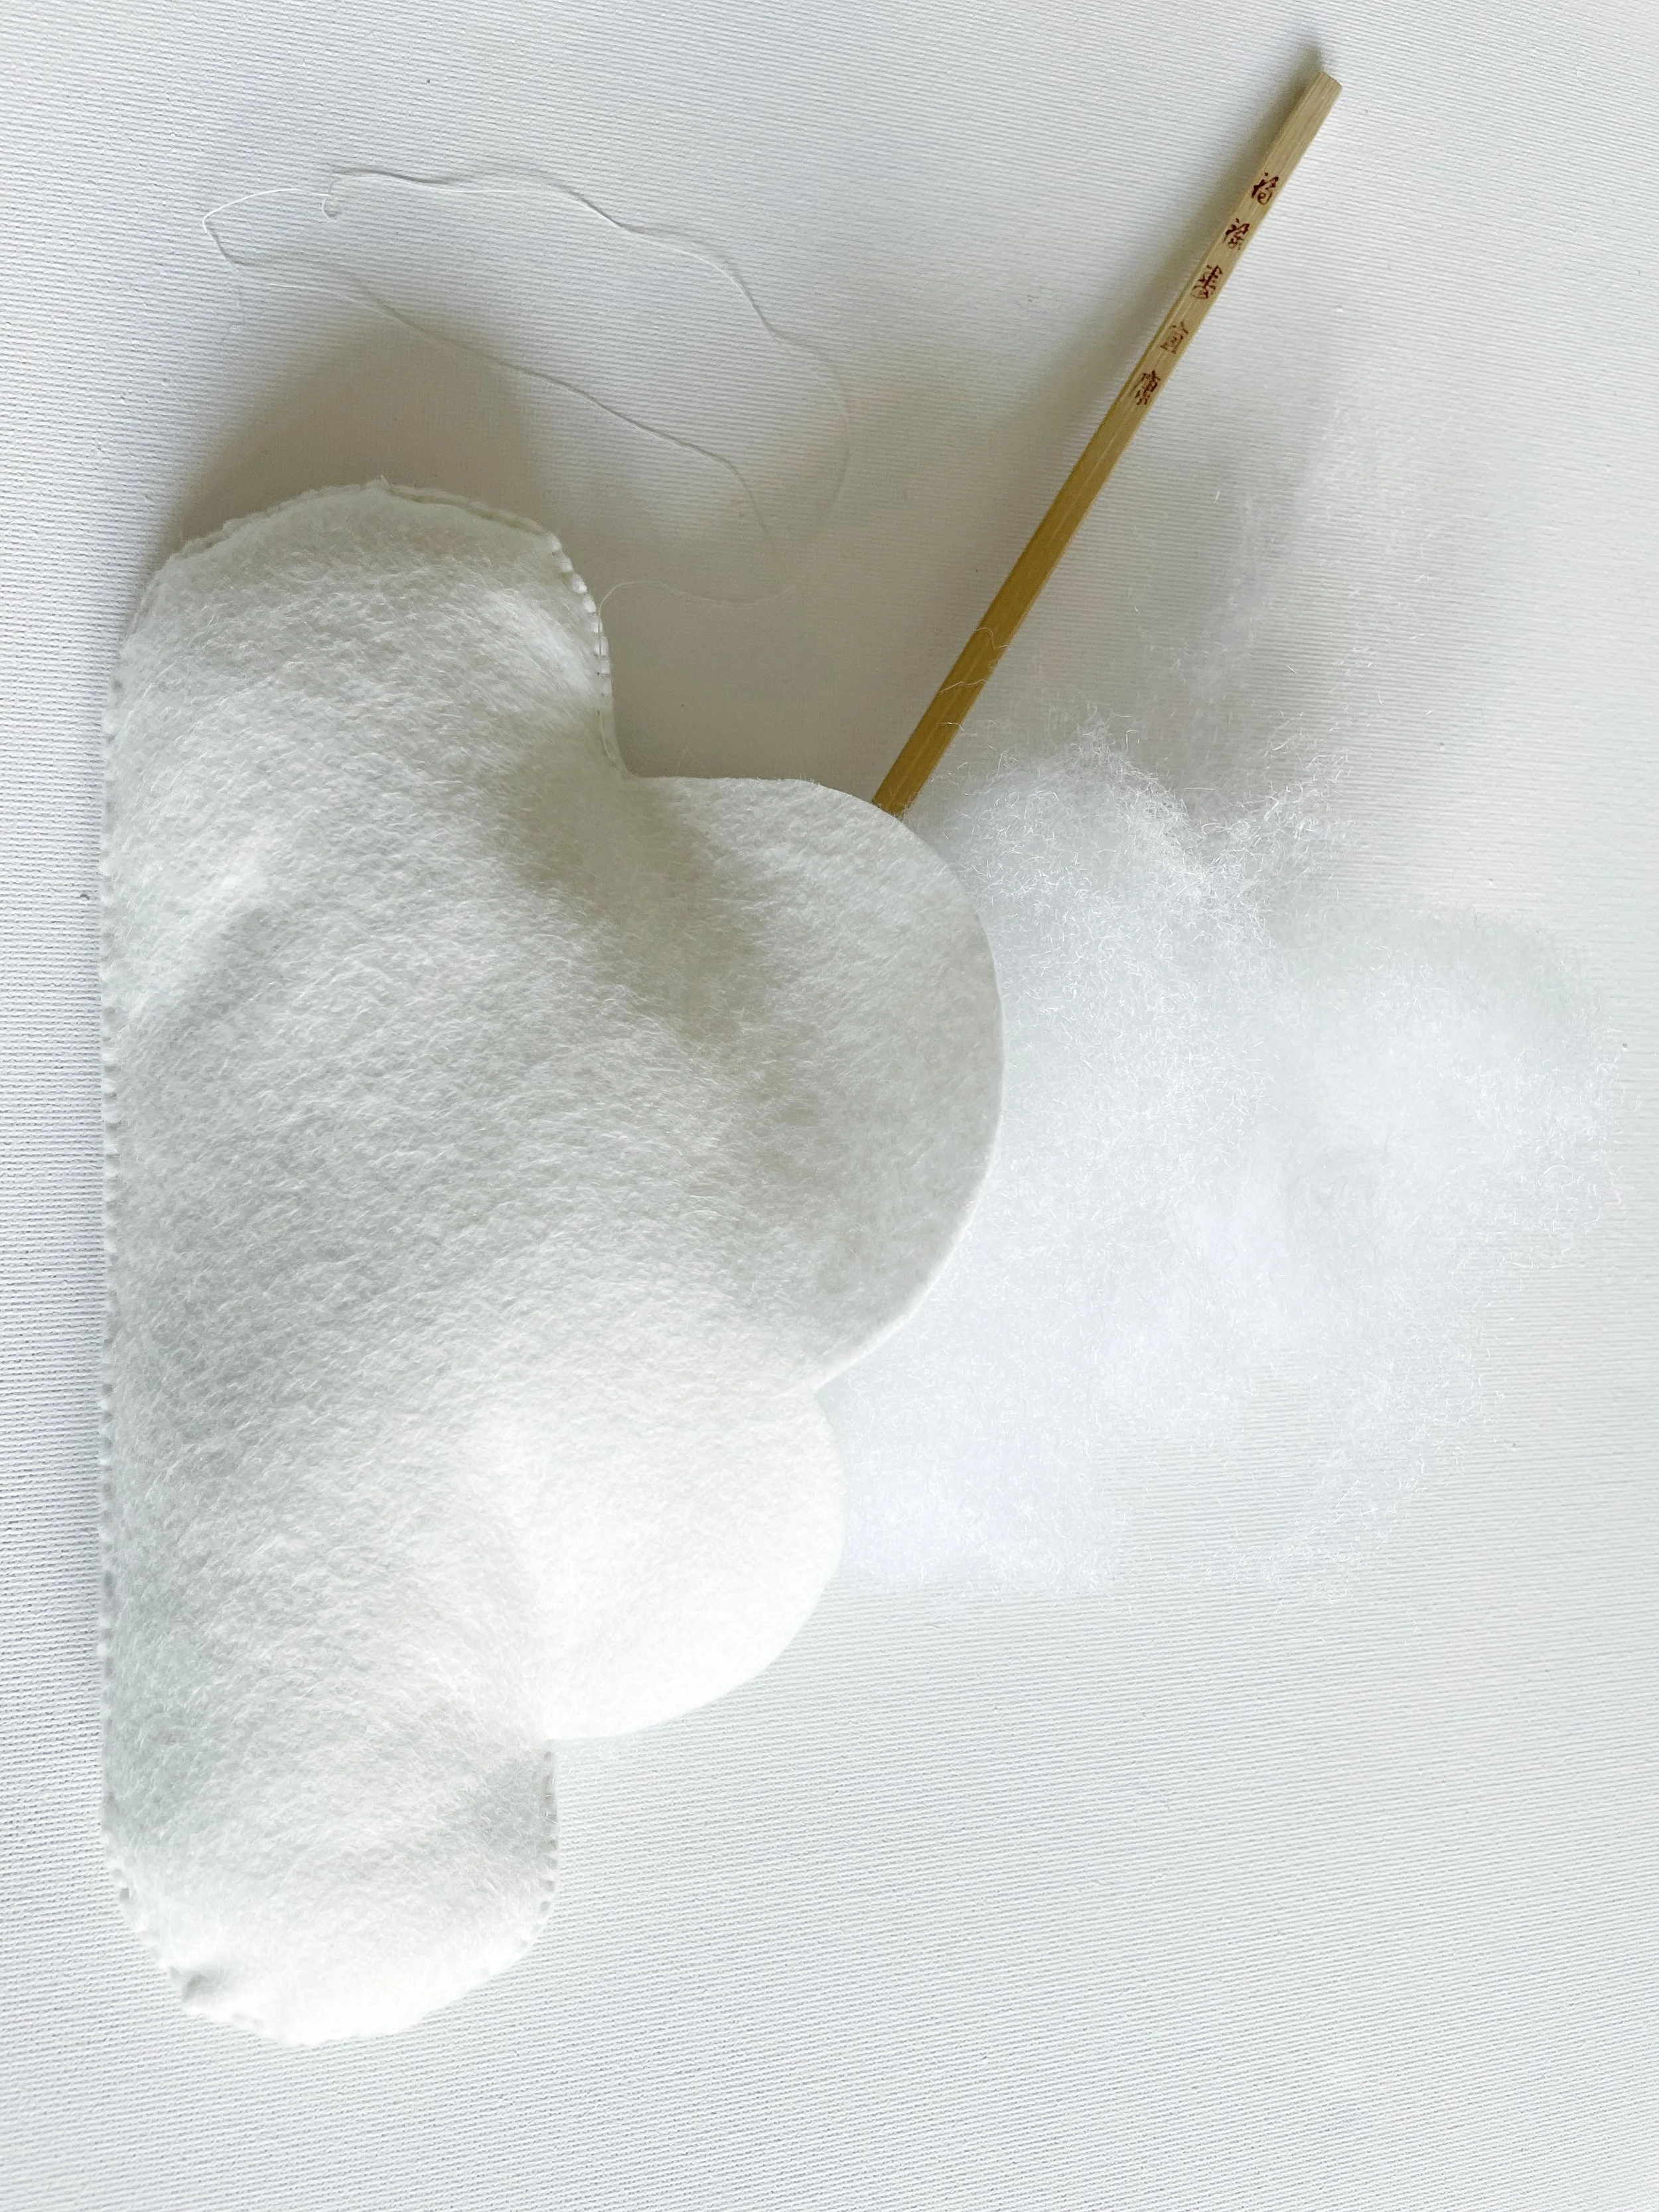
Add the stuffing…
Using your chopstick (or something similar), gently push the stuffing down into the edges of the cloud where you’ve already sewn. Take care, being too forceful can loosen or damage your stitches.
Keep adding small amounts of stuffing until your cloud feels soft and squishy, but not overstuffed. You're aiming for a soft, plushy feel, just enough to give it a plump fullness without stretching or damaging the stitches.
Once you're happy with the shape of your cloud, it's time to sew up the gap at the top. Tuck in that final bit of stuffing before closing it up with a few neat stitches.
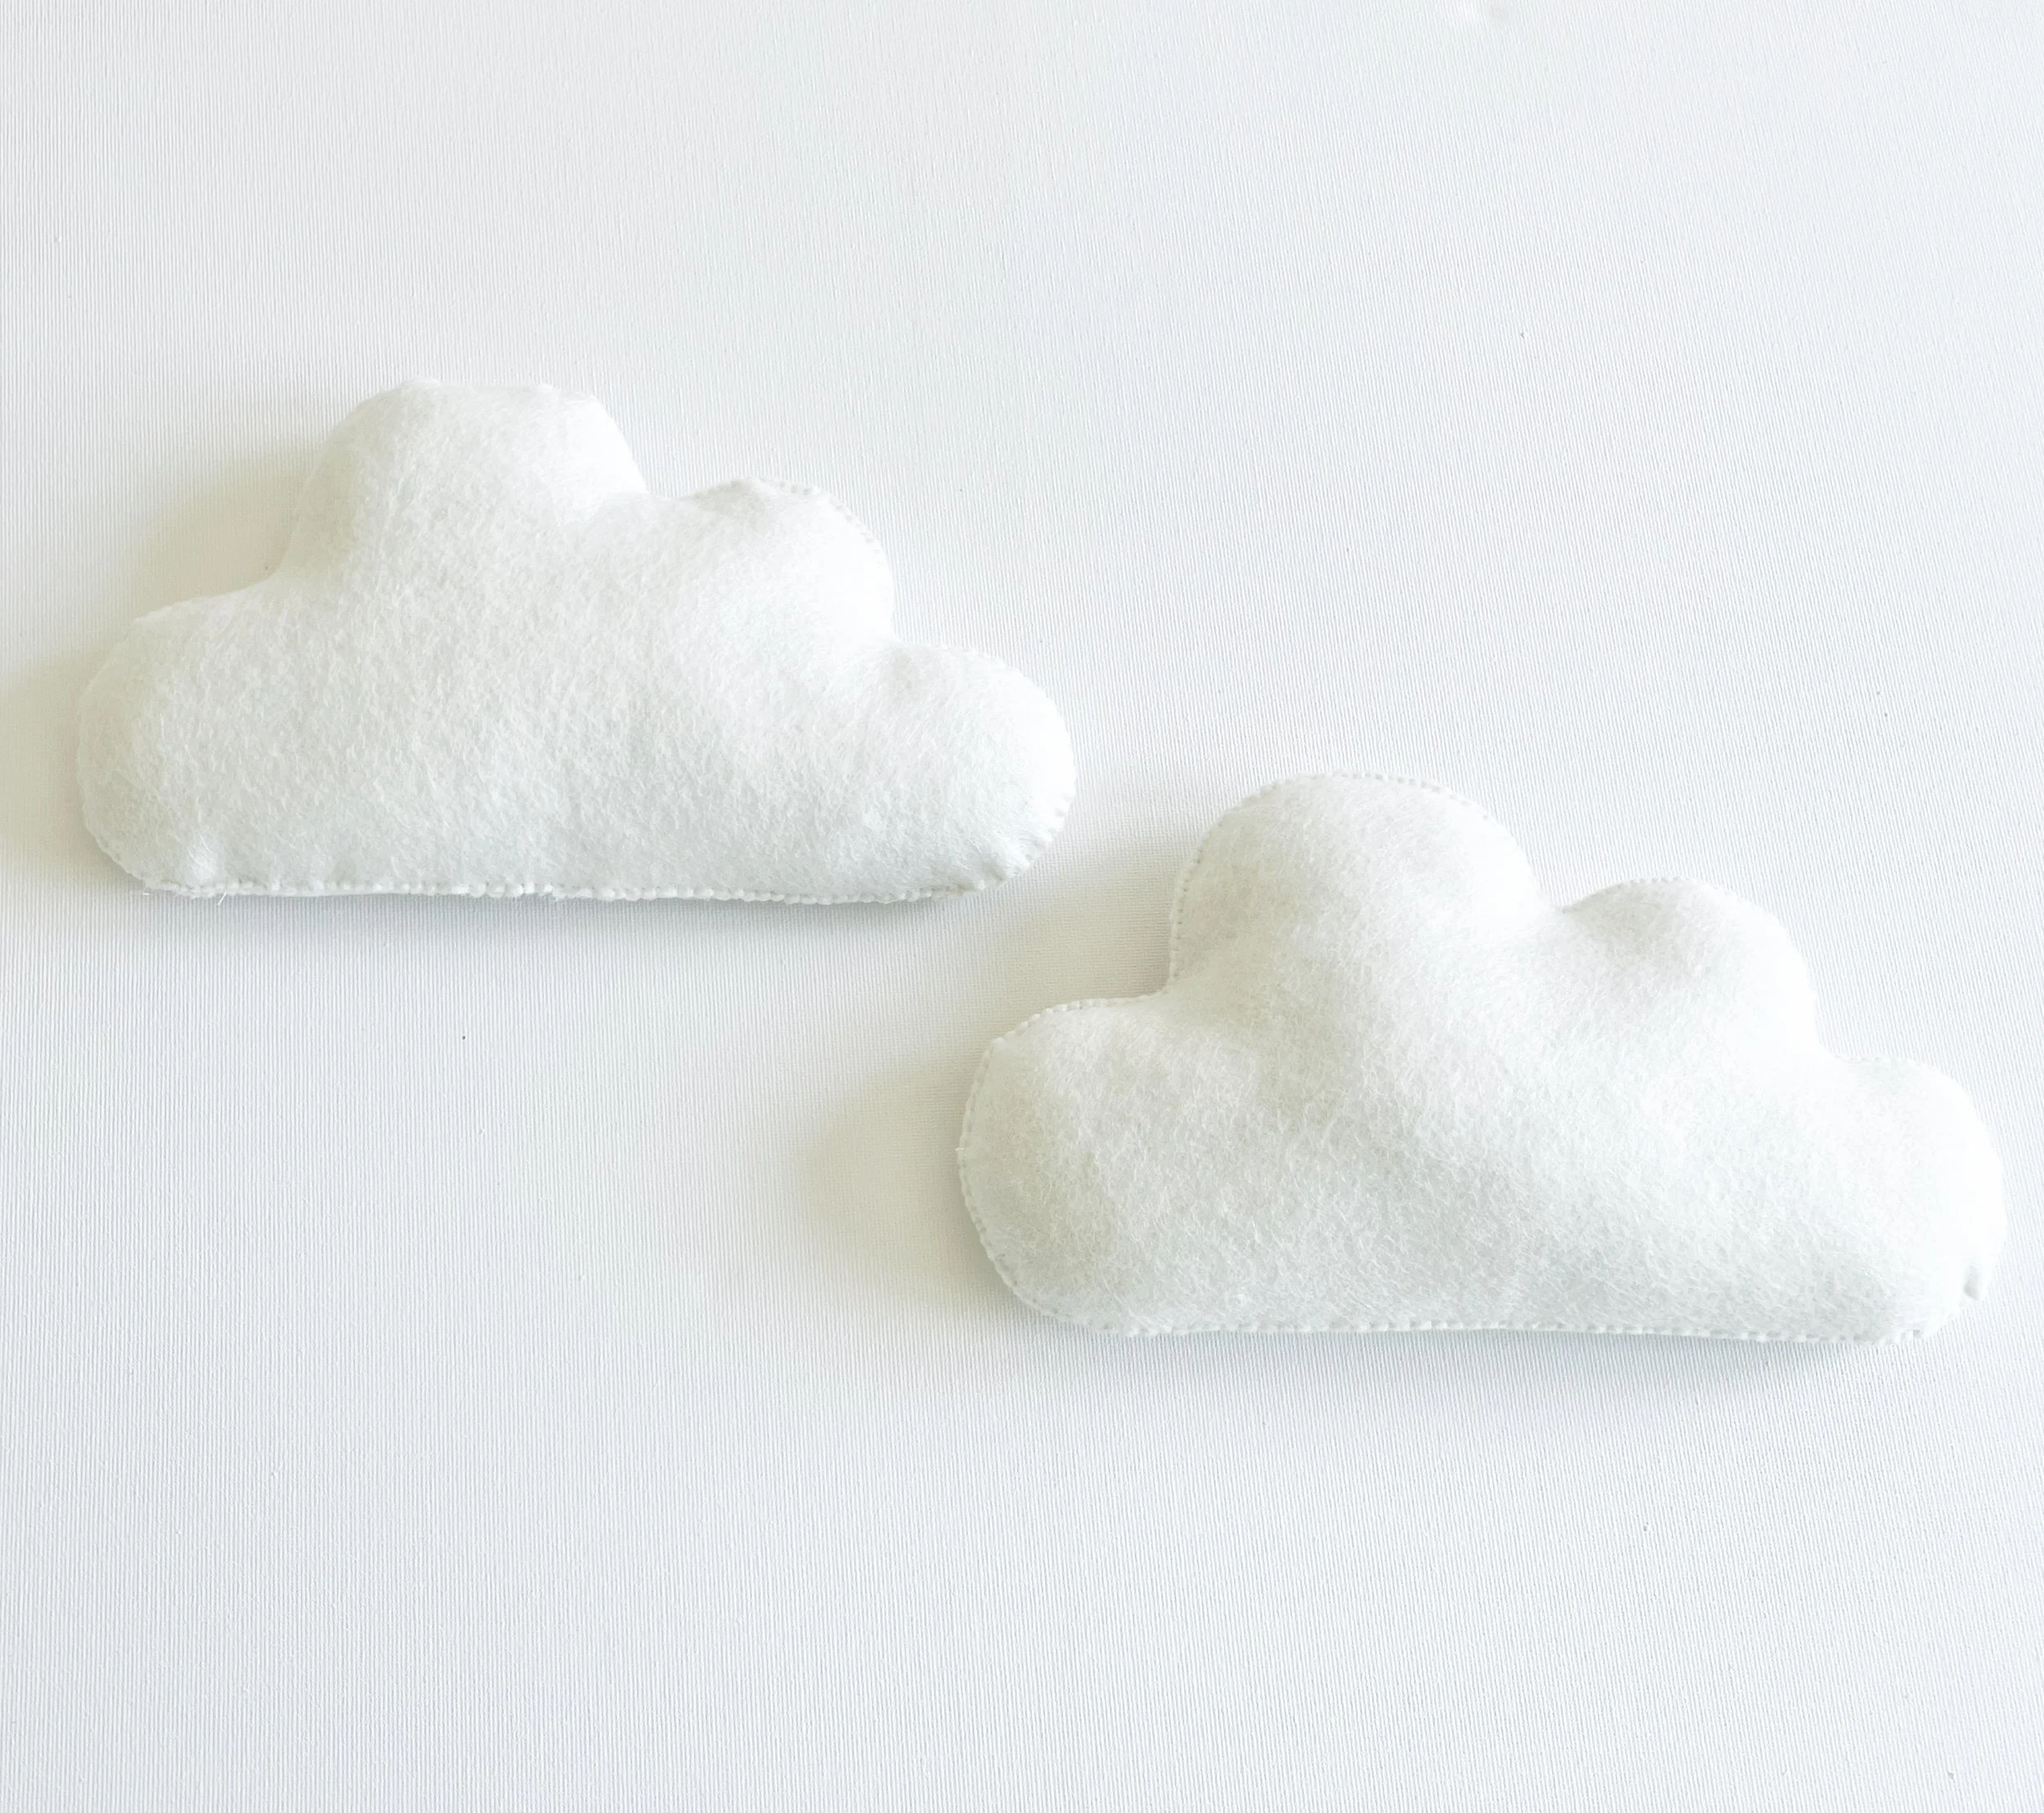
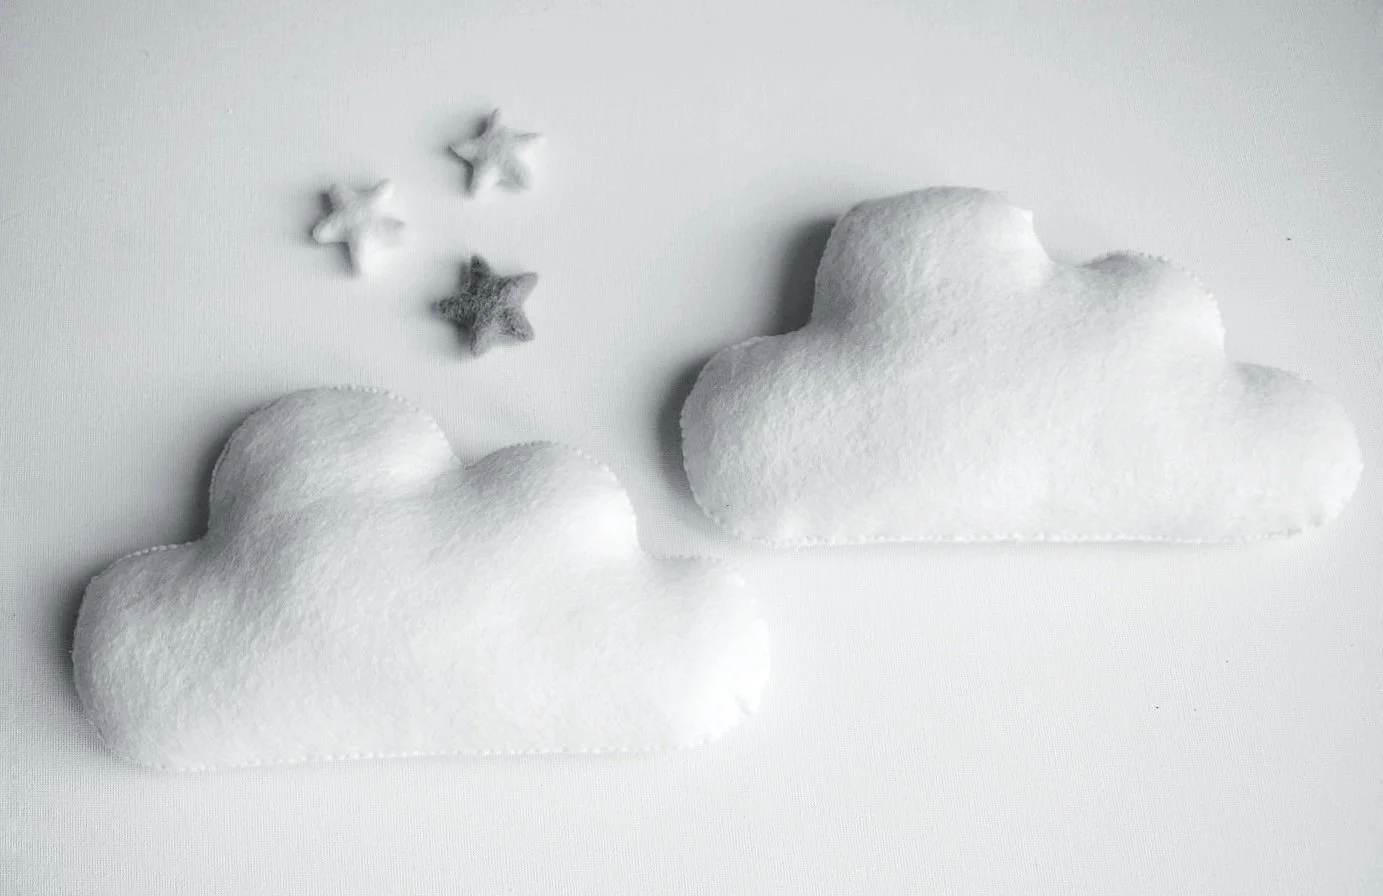
You’ve made your first cloud!
And there it is, you’ve made the first piece of your super- fluffy, dreamy cloud wall decor!
Sure, one cloud is great, but honestly, they look way cuter in pairs… or even a whole cloud family.
Get creative and make the beautiful cloud display that you’re dreaming of.
Repeat to make a second cloud
Now, just repeat the process to create a second cloud. Feel free to make it the same size, or mix things up with a smaller or larger cloud for a fun bit of contrast!
And that’s it! You’ve created your own beautiful fluffy cloud wall decor, ready to hang, gift, or even sell. Enjoy every second of it!
I really hope you had as much fun making this DIY cloud wall decor as I did putting it together for you. If you enjoyed this tutorial, be sure to check out the DIY Cloud Nursery Mobile too, it’s the perfect matching piece!
If you have any questions, tips, or just want to share how yours turned out, I’d absolutely love to hear from you, feel free to drop a comment below.
Love and Creativity, Karen x