
DIY felt Ball Dream Catcher
Making your own felt ball dream catcher is such a delight! With just a handful of supplies, you’ll soon be creating these sweet little treasures in no time at all.
They add such a dreamy softness to any space, perfect for a nursery, a child’s room, or simply as a gentle touch of charm anywhere in your home.
And let’s be honest, they make the loveliest gifts too! Baby showers, new arrivals, or just because… who wouldn’t adore receiving something so thoughtful and handmade?
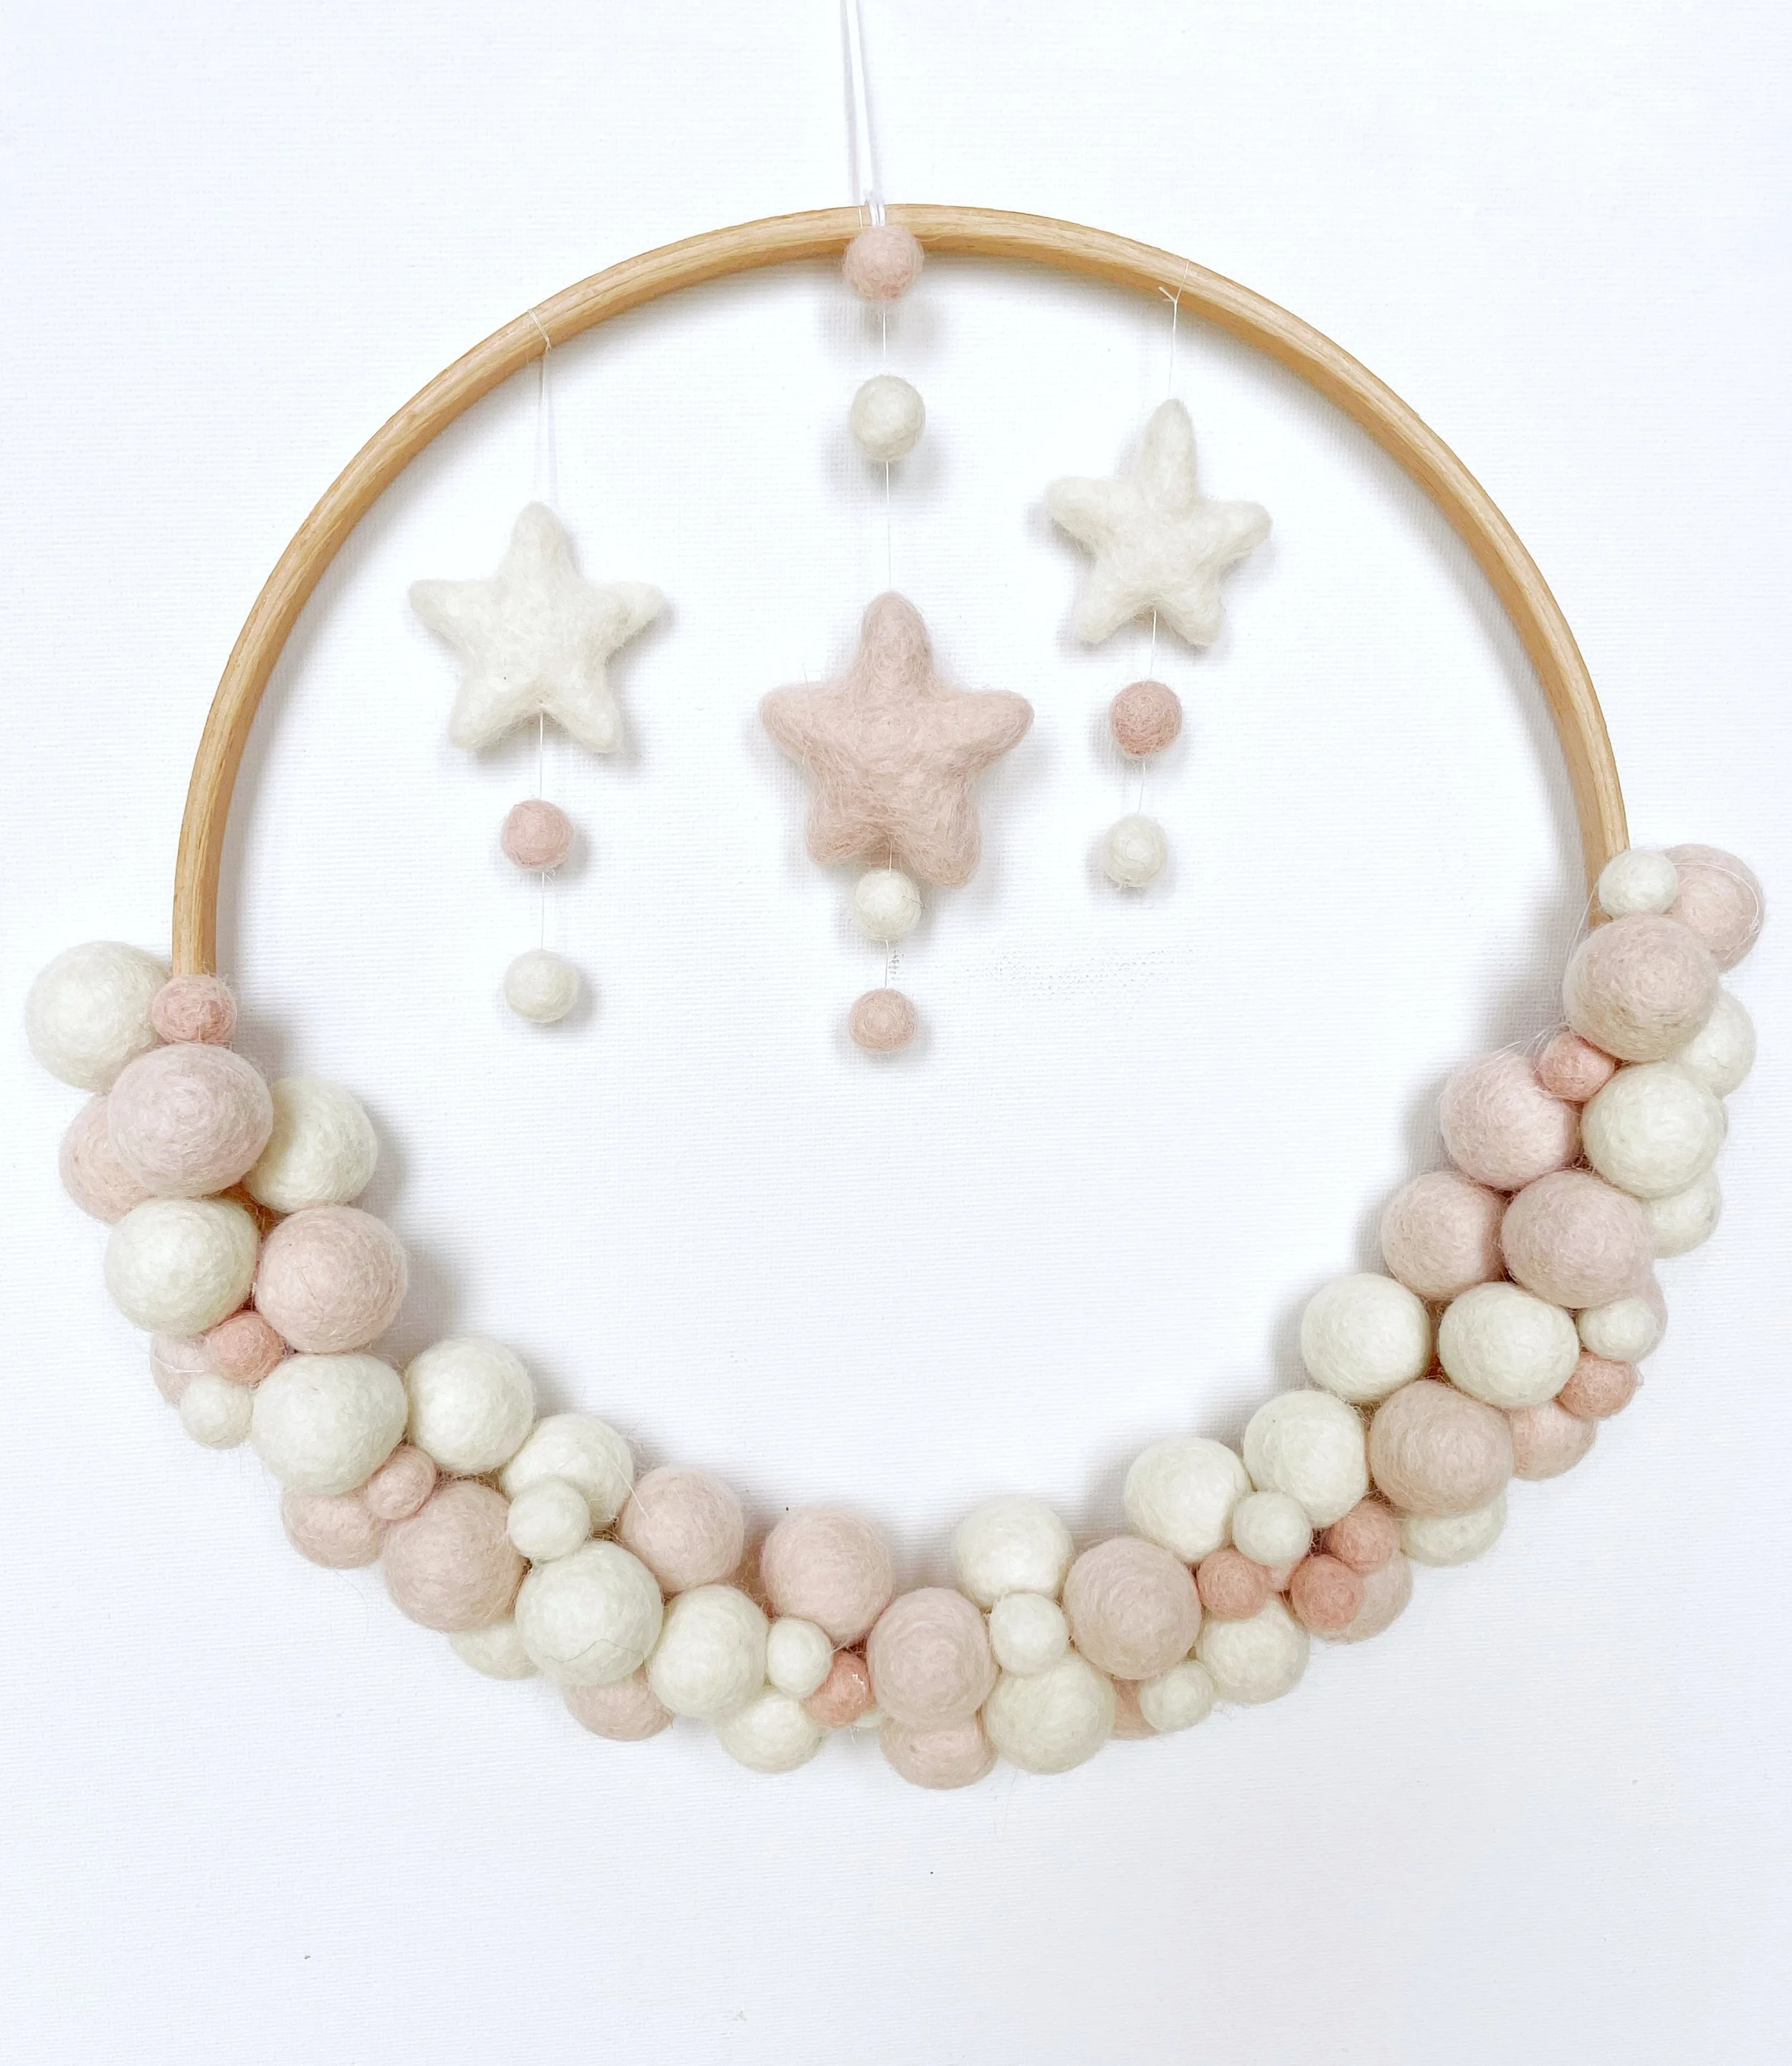
For my DIY dream catcher, I chose pastel pink and ivory felt balls to create a soft, marshmallowy look. But the beauty is, you can make it completely your own, try dreamy pastels, bold brights for a pop of fun, or calming neutrals for a cosy, natural feel.
Crafting is so good for the soul, so take your time and enjoy the process. The real beauty is in the act of creating; unleash your imagination and create something uniquely yours!
One tip I always recommend: read through the tutorial once or twice before you start. It’ll give you a boost of confidence, especially if you’re new to crafting.
If you enjoy this project, you might also like my felt ball garland tutorial it pairs beautifully with the dream catcher for a matching set. Felt is such a joy to work with, with endless colours, shapes, and styles to play around with.
Selling felt ball dream catchers…
Felt ball dream catchers are always a favourite! With endless colour combinations to choose from, they’re a fantastic seller at craft fairs and online shops. If you’re creating for the baby decor market, why not add a matching felt ball garland to your collection?
You could even offer them together as a bundle, irresistible!
And don’t stop there, felt ball curtain tie-backs are another beautiful addition to your range. You can find my full step-by-step tutorial for those right here.
If you’re planning to sell your creations, make sure to check out my Beginner’s Guide to Pricing Your Products. Pricing can be surprisingly tricky, but with a few tips and tricks, you’ll feel much more confident.
Why not Pin the Pricing Guide on Pinterest so you can find it easily whenever you need it!

What you need to make your felt ball dream catcher…
You really don’t need much to create your felt ball dream catcher, just a few simple supplies and you’re good to go:
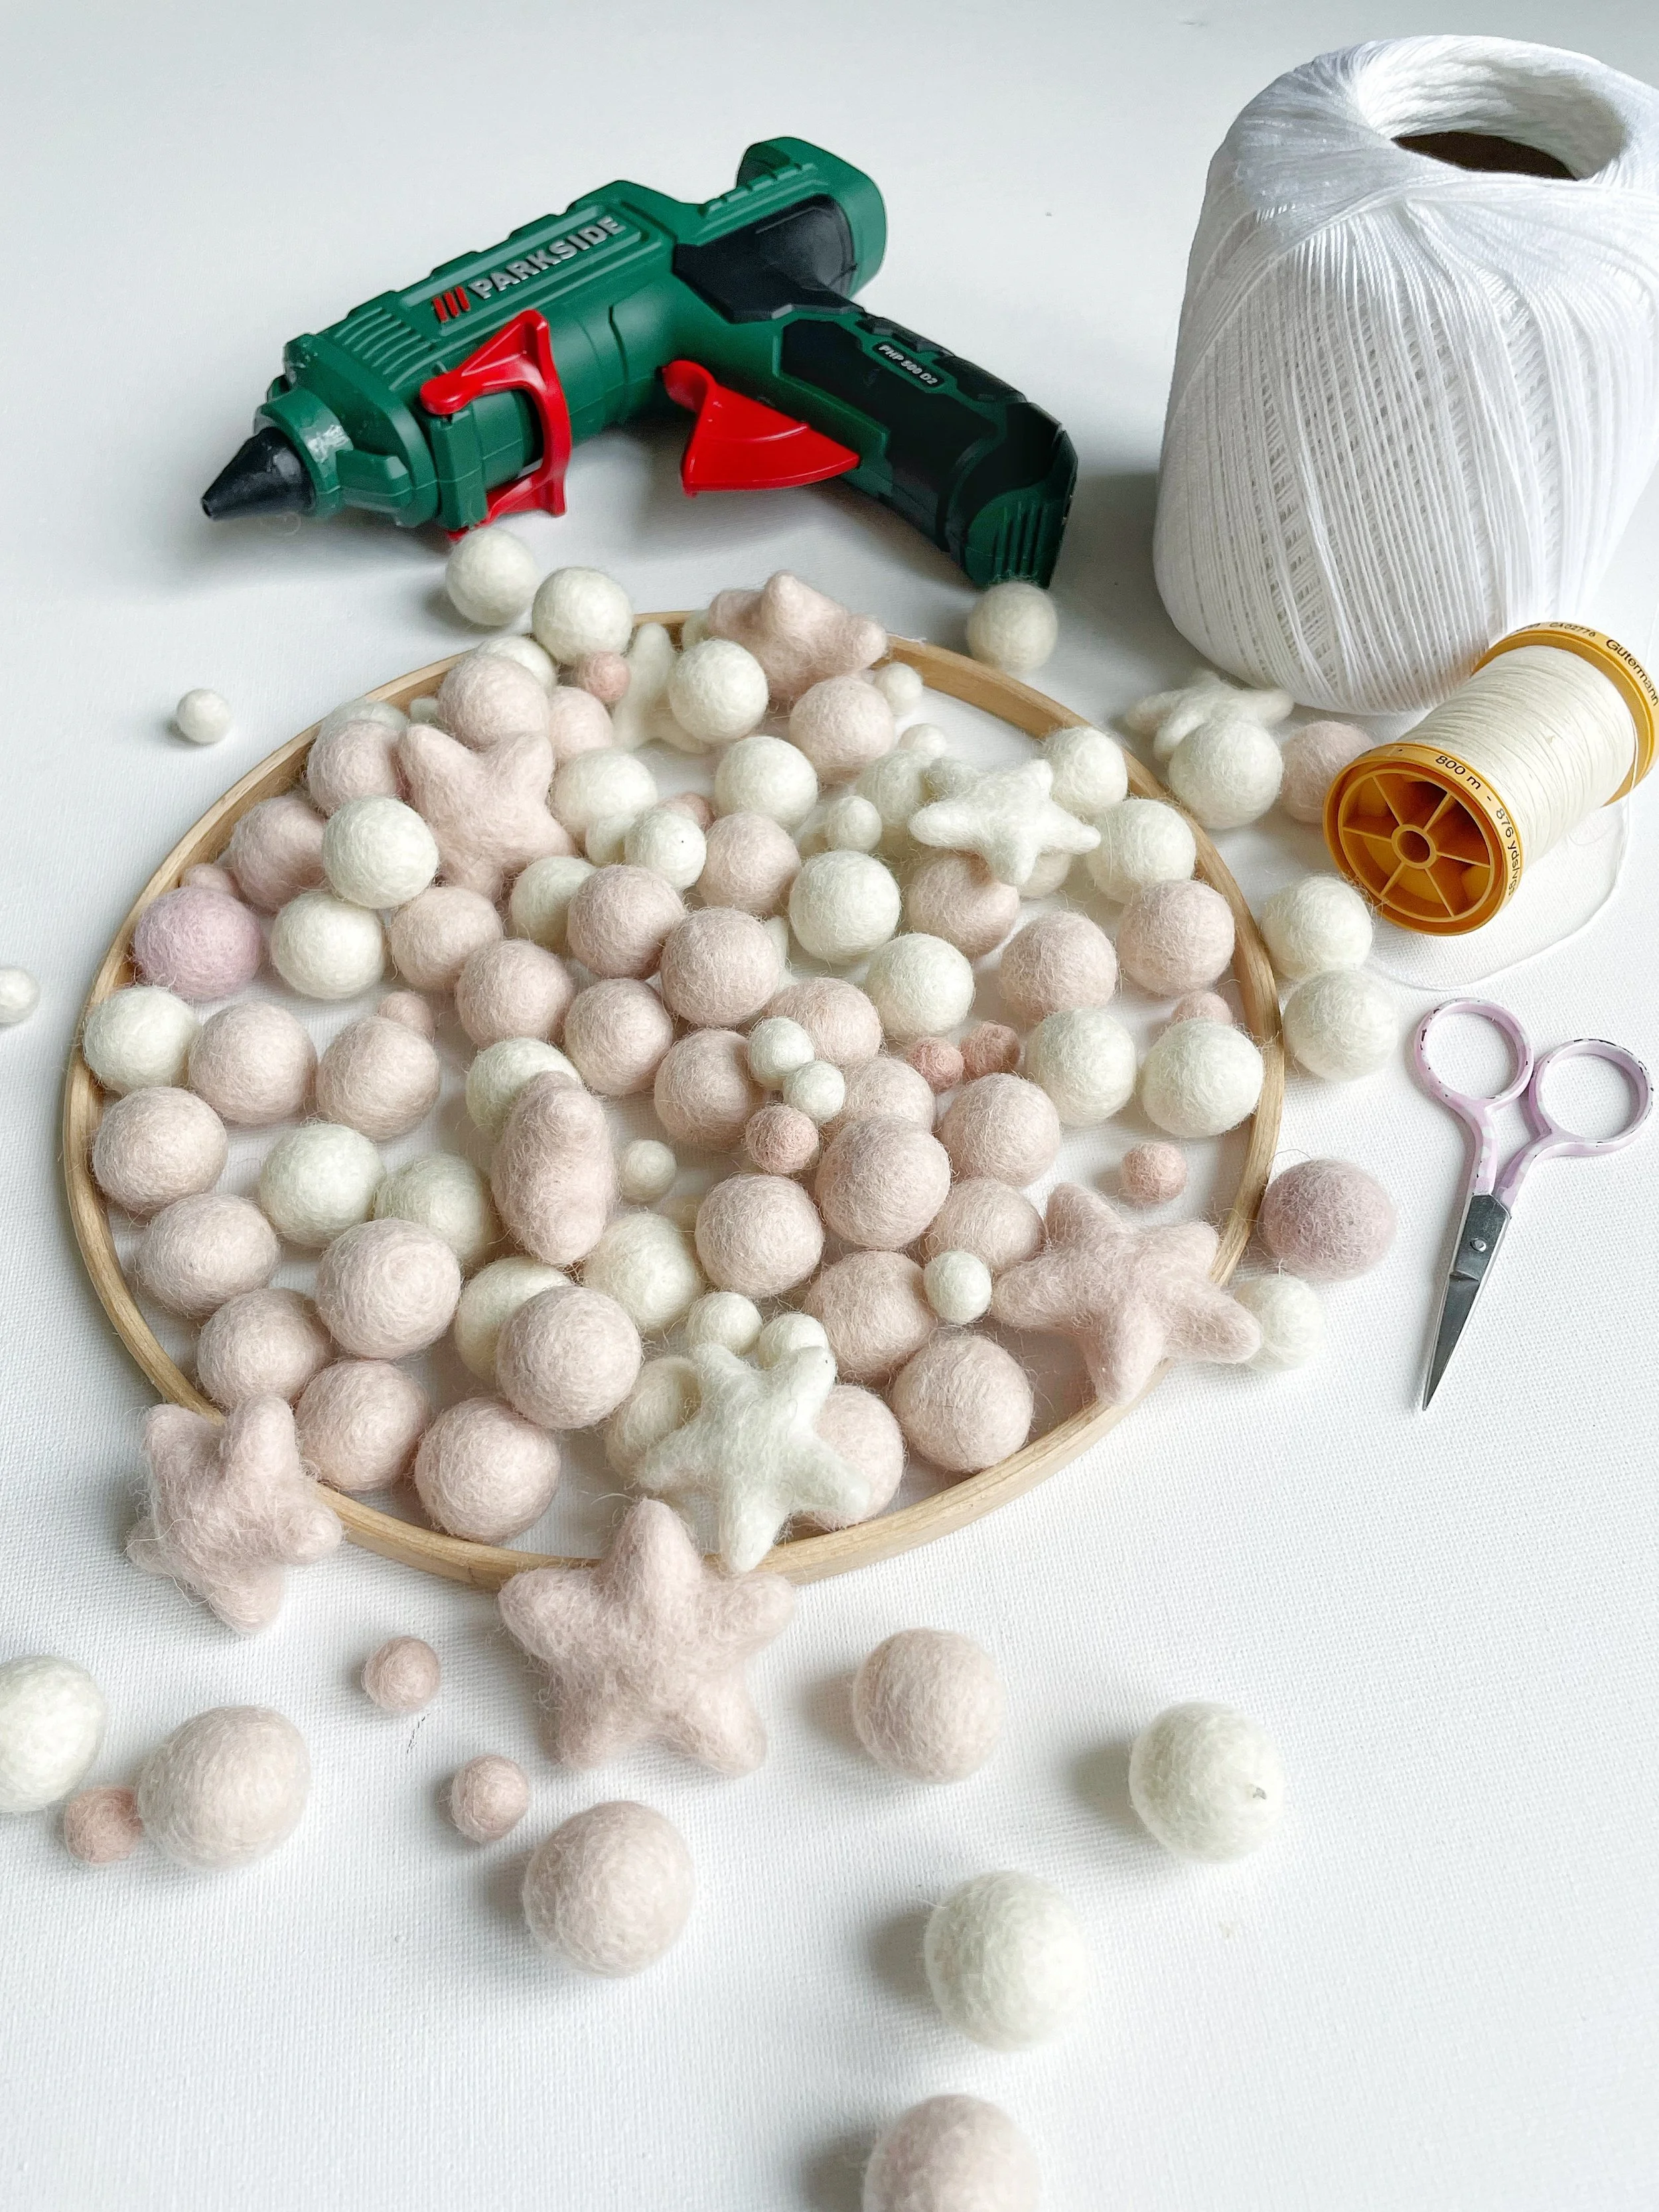
Wooden hoop – I used a 22cm/9 inch hoop, but honestly, any size you love will work beautifully with this design.
Felt balls & stars – For mine, I used a mix of 2cm and 1cm felt balls, along with a few 2cm stars.
About 42 x 2cm felt balls
About 28 x 1cm felt balls
3 felt stars
String or ribbon – Around 10 inches, or simply whatever you’d like to use to hang your dream catcher.
Cutting mat or tape measure
Sewing thread
Sewing needle
Glue gun
Scissors
Pencil
And that’s it! Gather your supplies, and let’s get started on making something truly magical.
Make a loop…
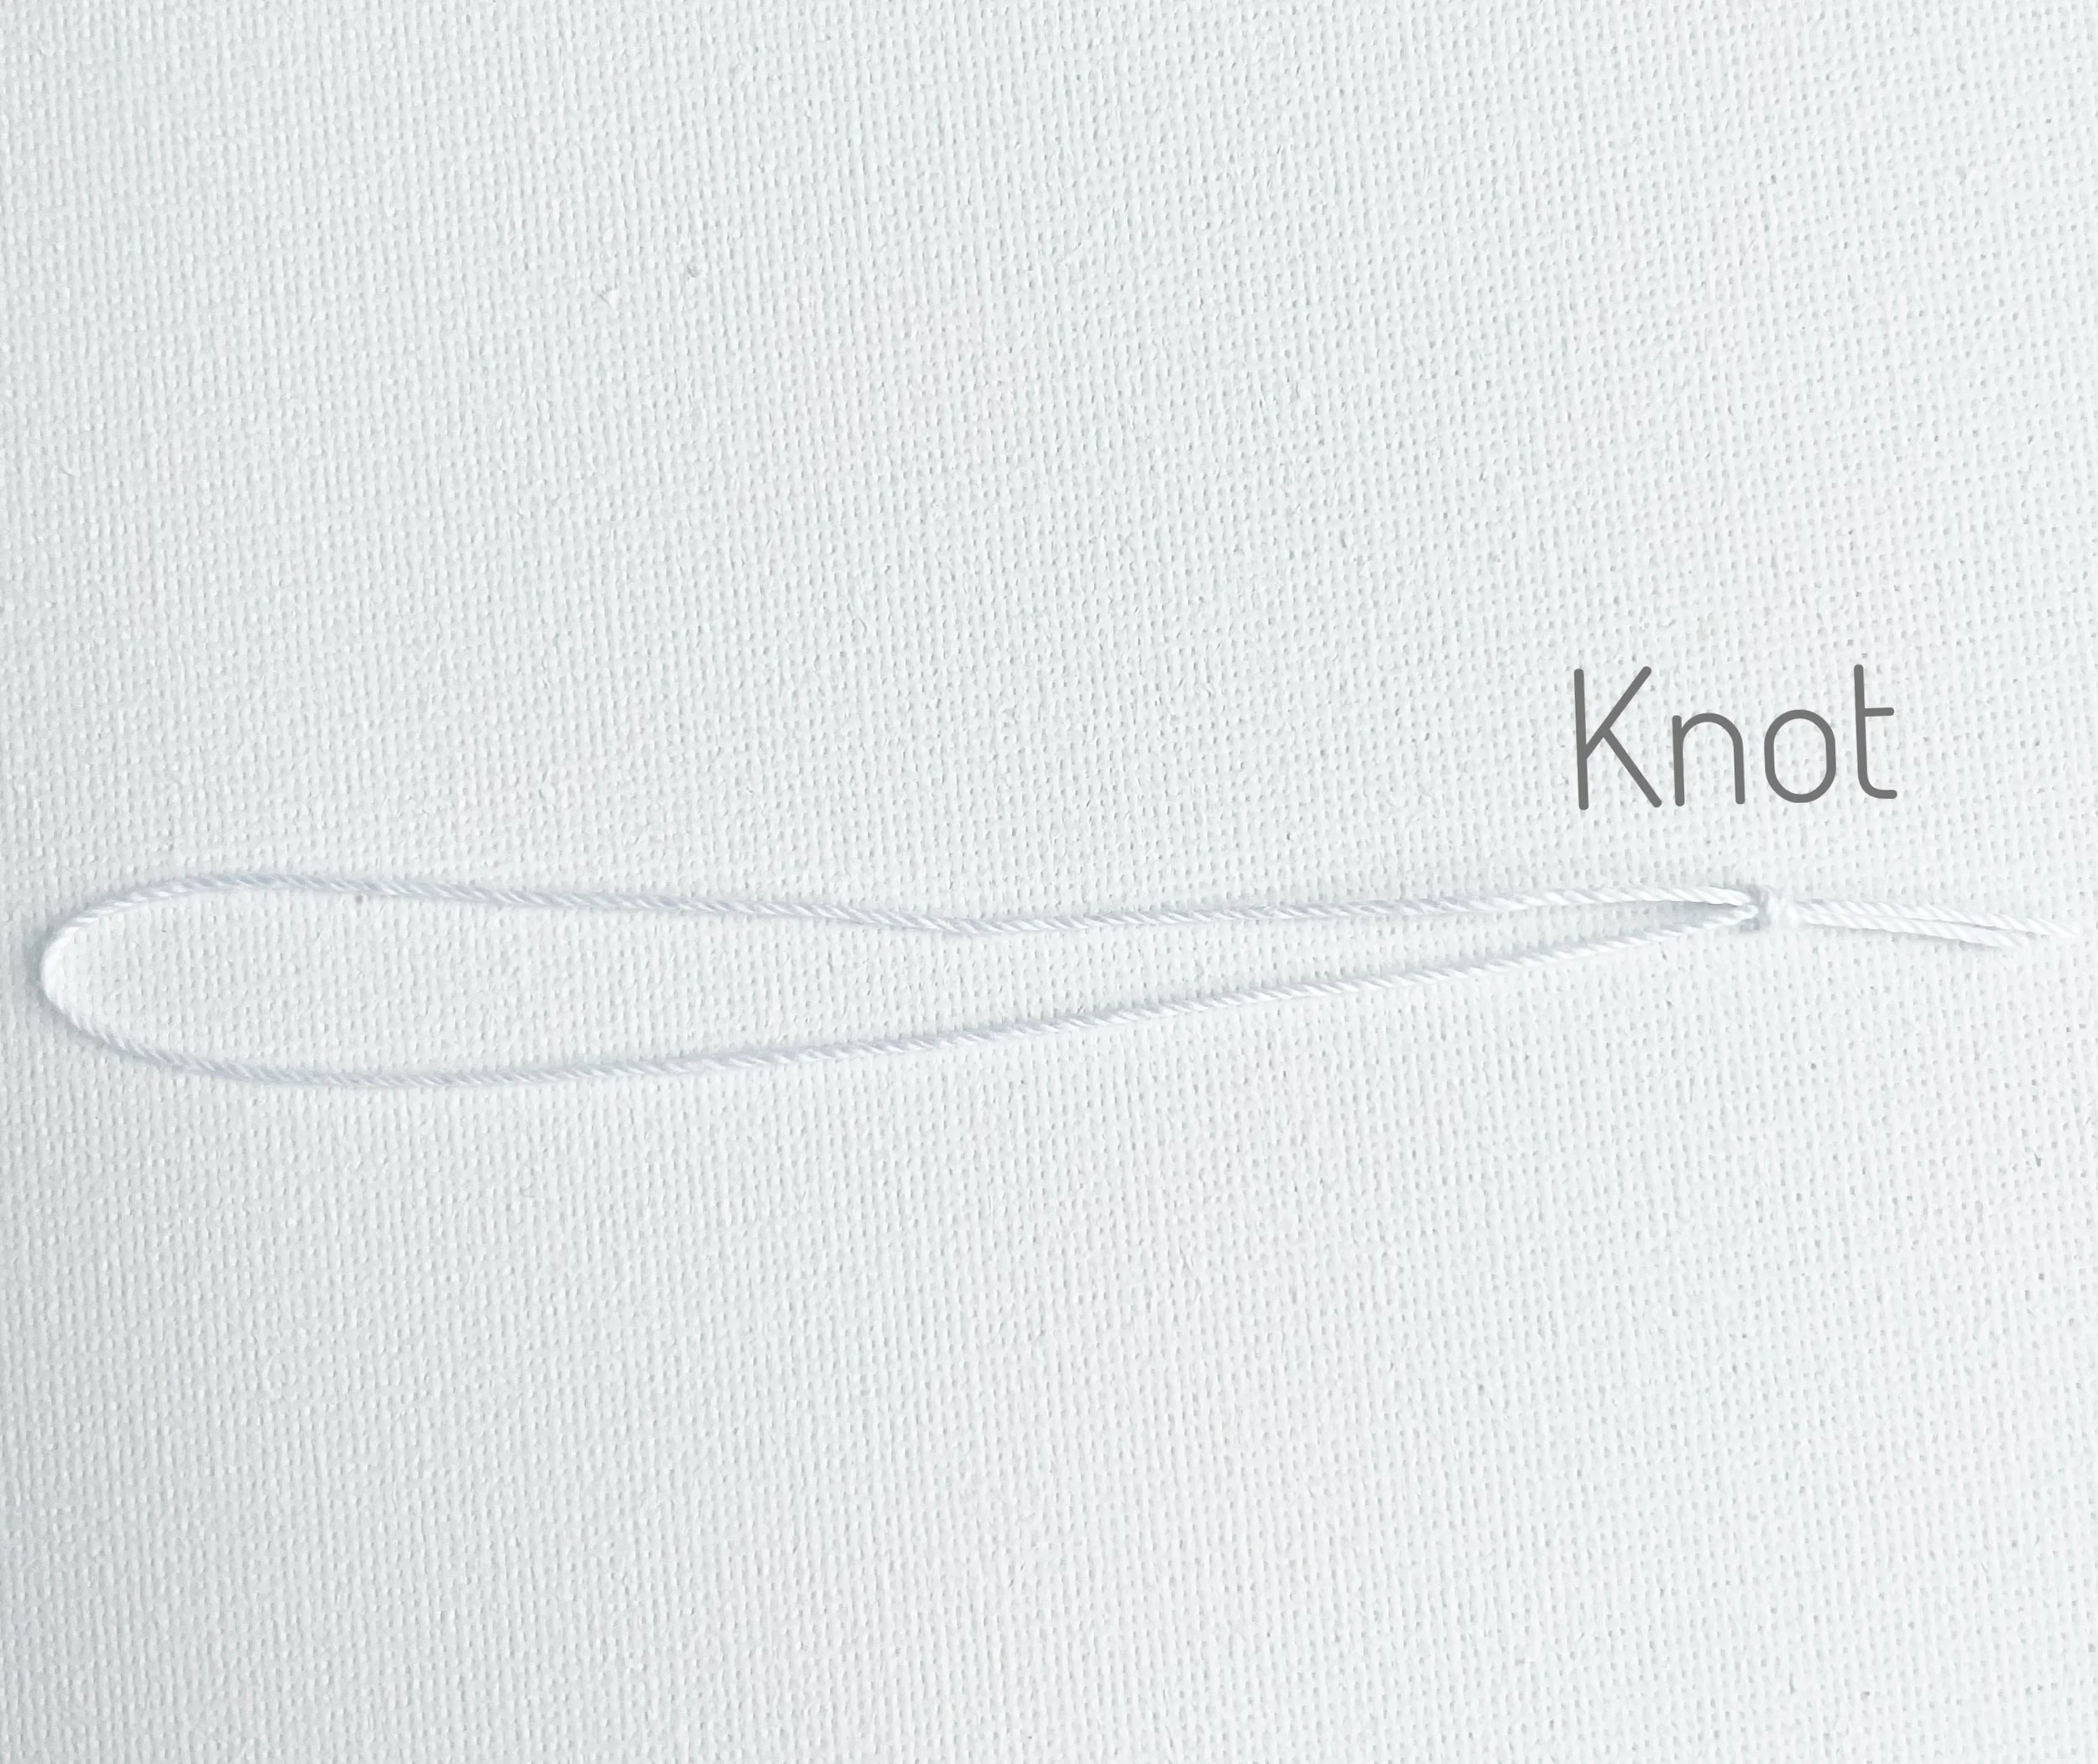
Cut a 10-inch piece of cotton string (or ribbon, if that’s what you’re using). Fold it in half and tie the ends together in a secure knot to make a little hanging loop (You can see how it should look in the image above).
Now take your loop of string and place the wooden hoop in the centre of it. One half of the loop should be in front of the hoop and the other half behind.
Take the front section, pass it over the hoop and through the back section of the loop, then gently pull to tighten. This will secure your hanging loop neatly onto the wooden hoop.
Attach the sewing thread to wooden hoop…
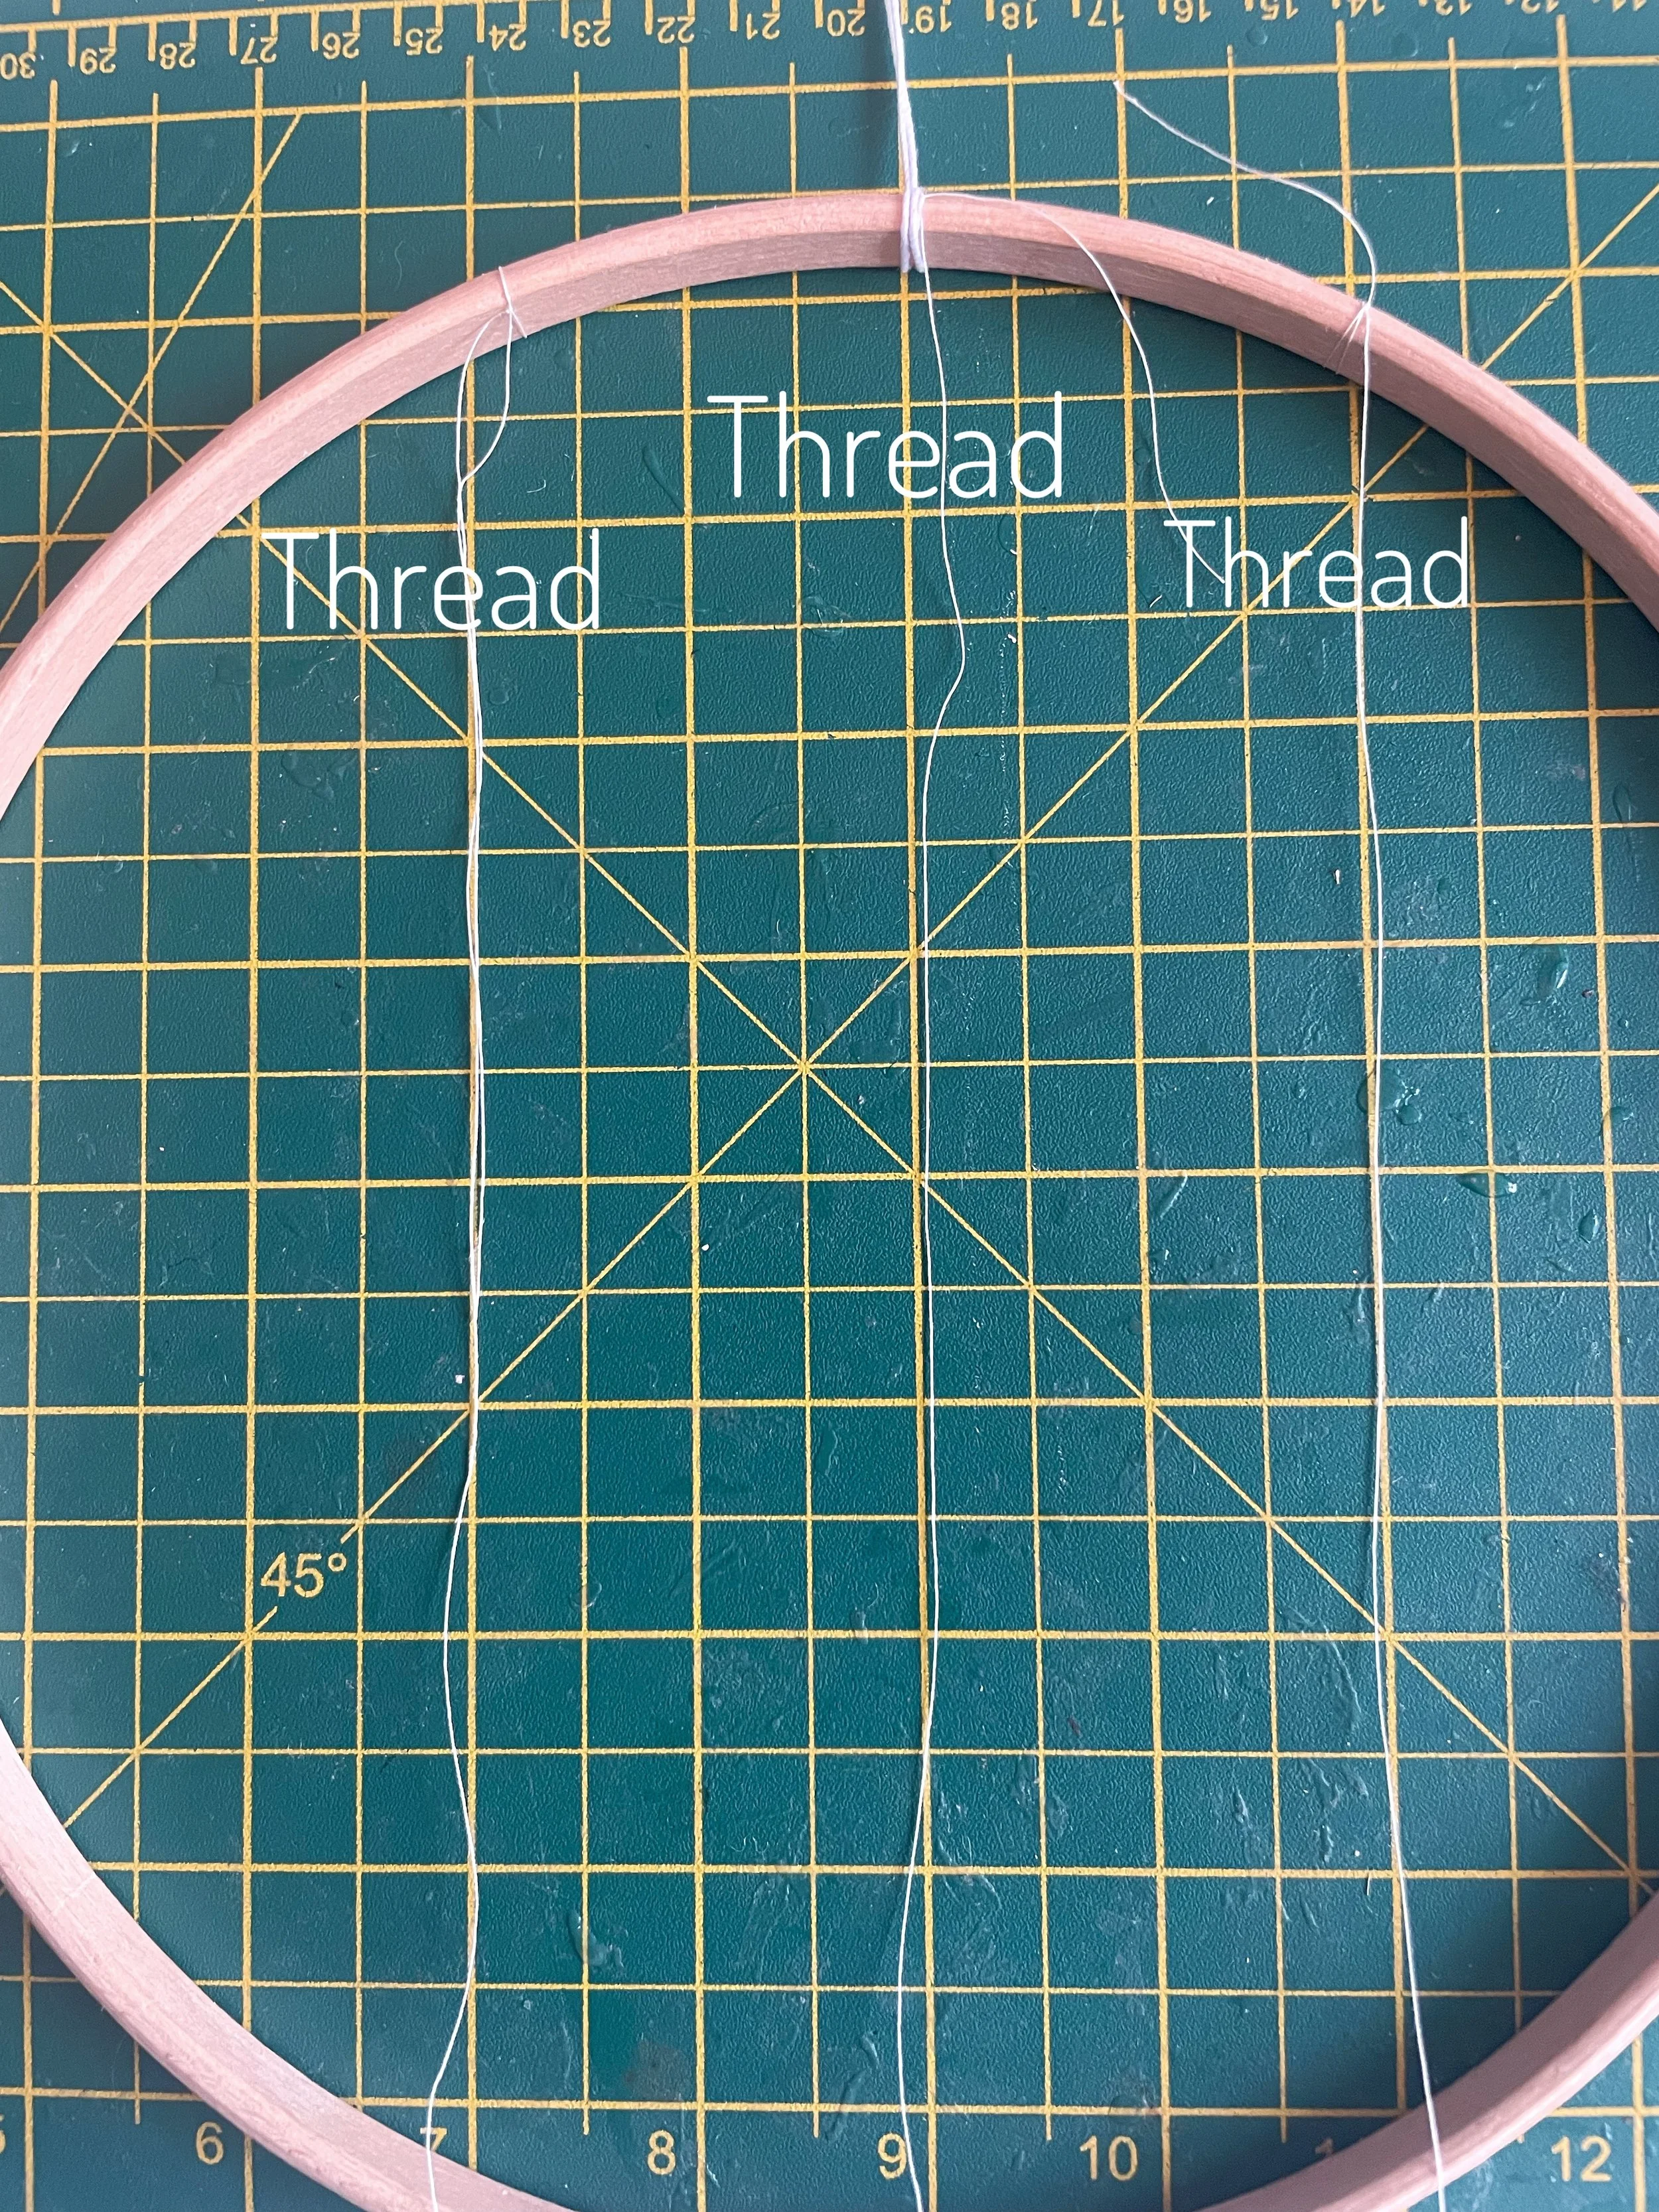
Now it’s time to attach the sewing thread to your hoop. These threads are what your stars and felt balls will dangle from, giving your dream catcher its magical look.
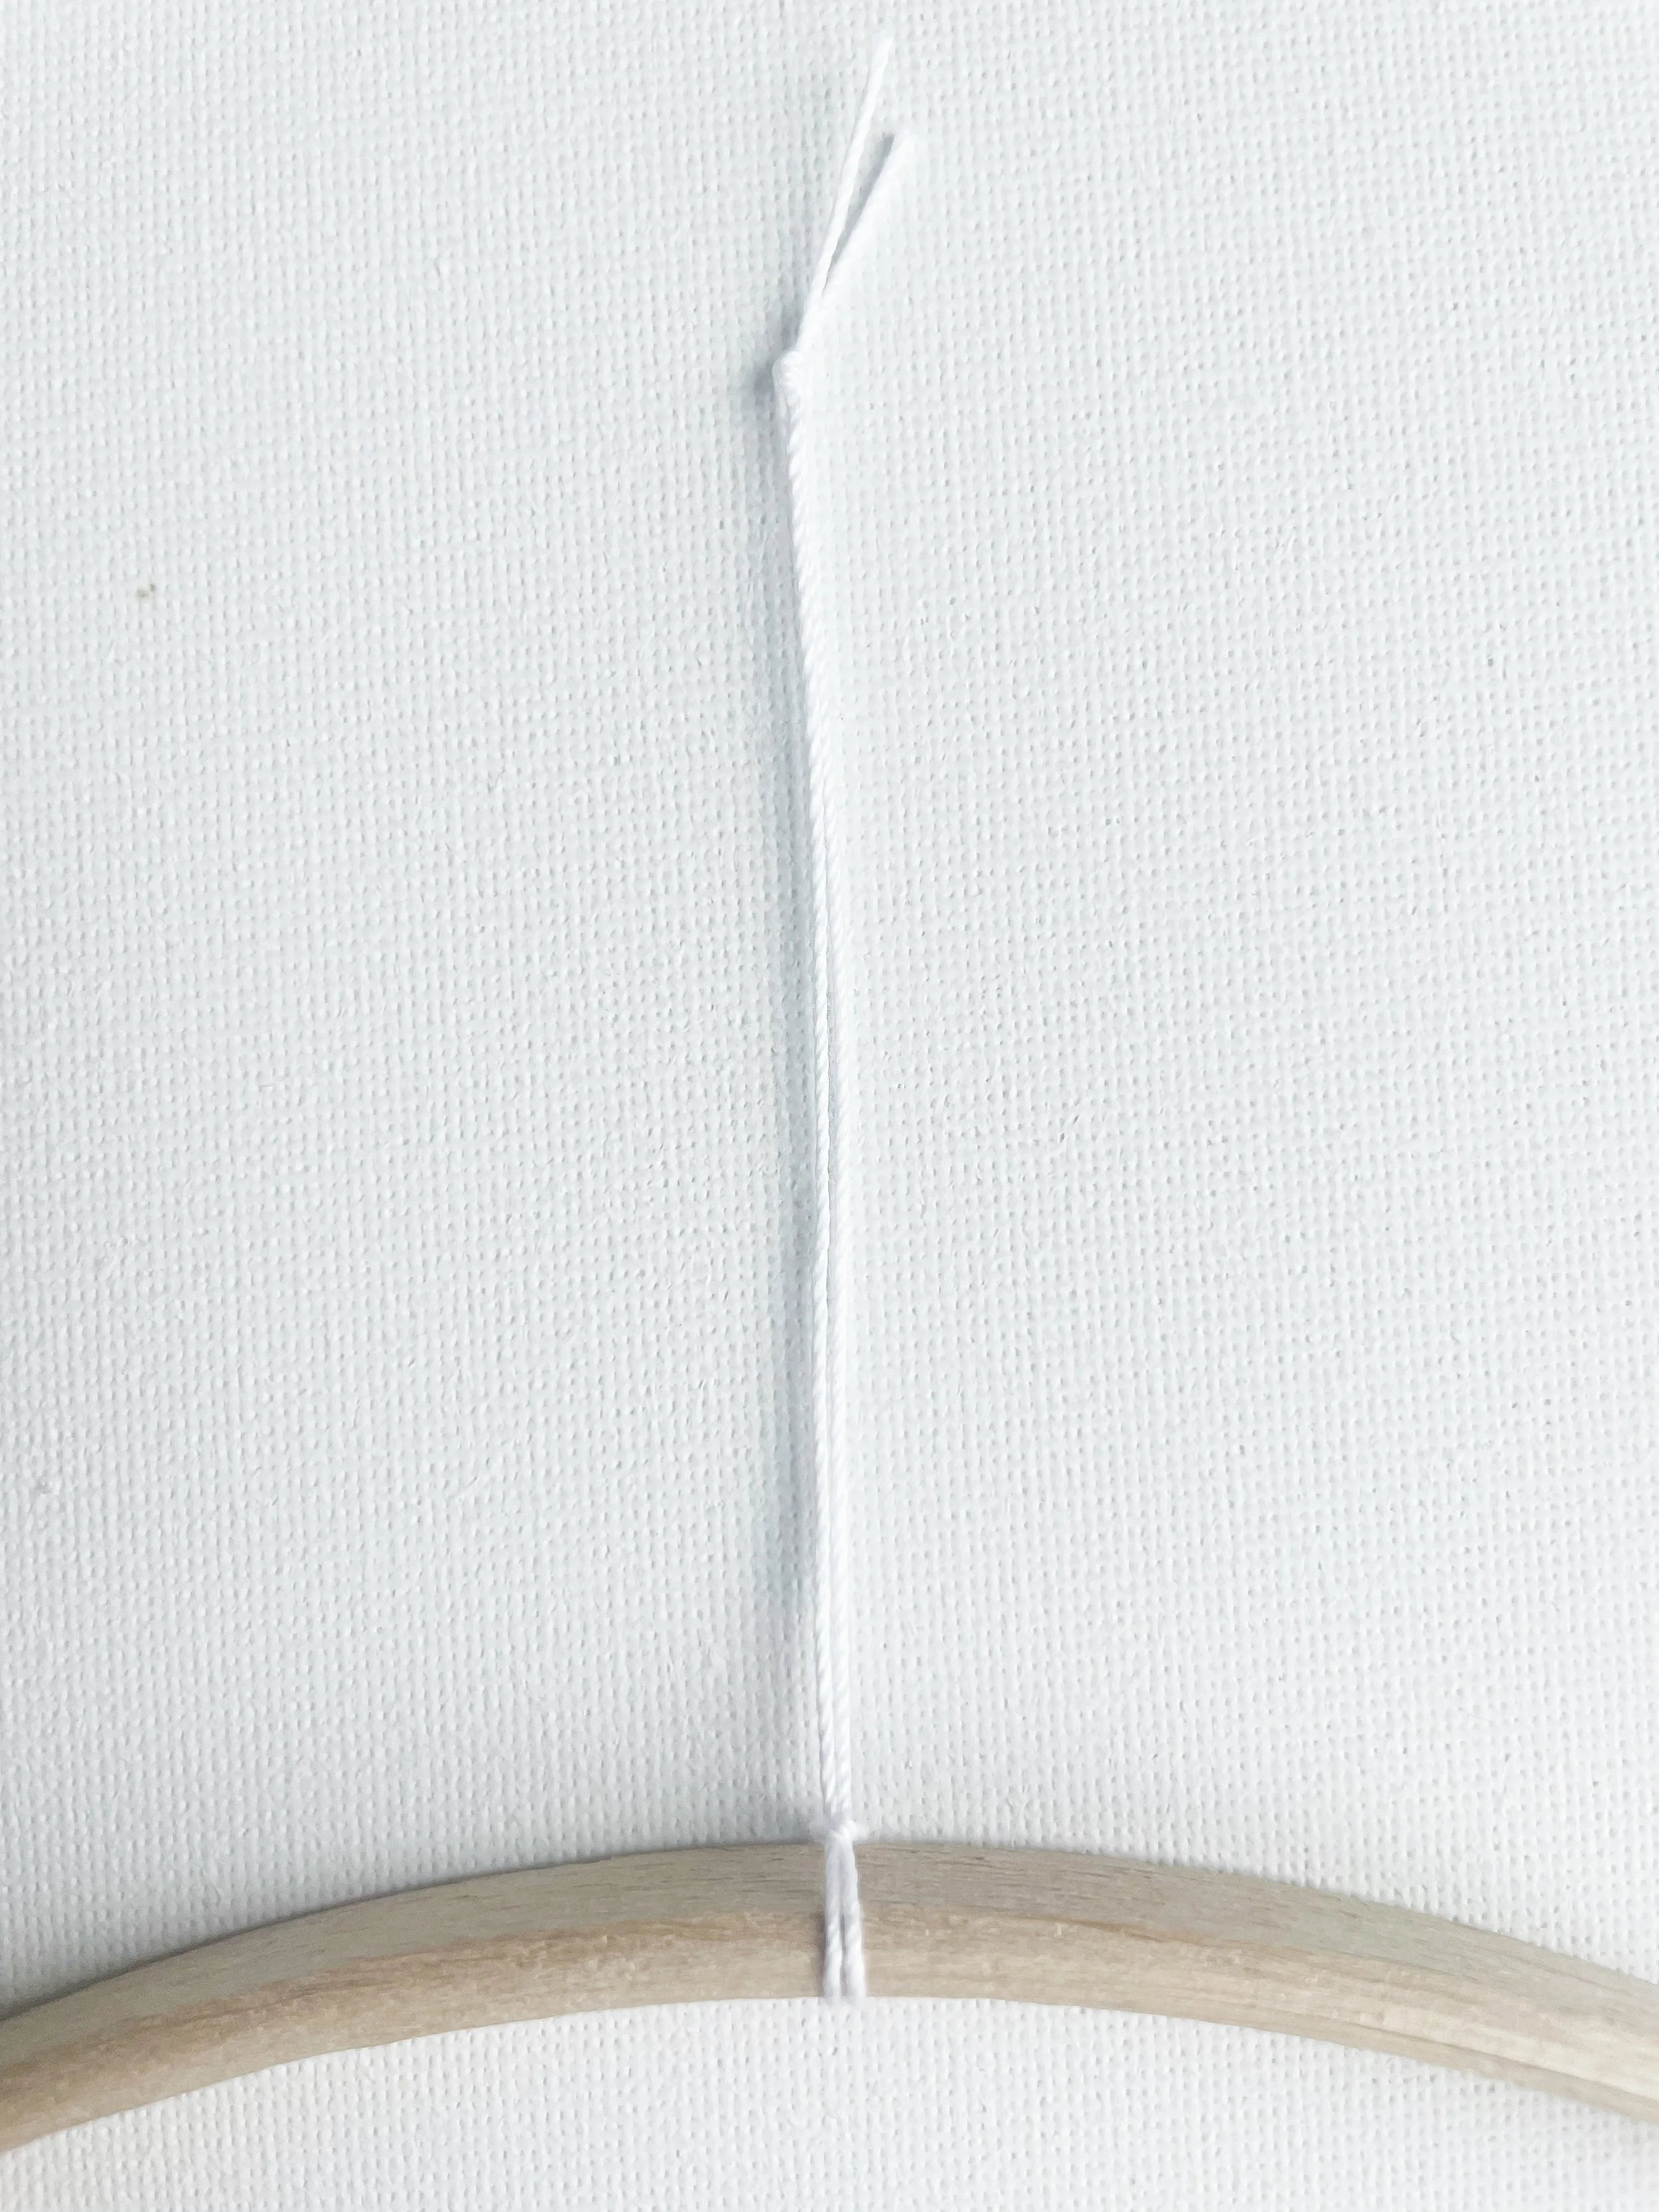
Cut a strand of thread about 9 inches long and tie it securely to the centre of the hoop, right next to the hanging loop.
Next, cut another 9 inch strand and tie it about 2 inches to the right of the centre thread. Then add a third 9 inch strand about 2 inches to the left of the centre.
Take a peek at the image above, you’ll notice the thread is very fine, but if you look near the word “thread” you can see exactly where they’re tied.
Here’s a little trick I like to use: take a pencil and make a tiny mark at the halfway point on each side of your hoop- you can measure this with your tape measure or cutting mat. This will act as a guide when it comes to gluing on your felt balls, helping you keep everything even and nicely balanced.
Thread the felt balls and Stars…
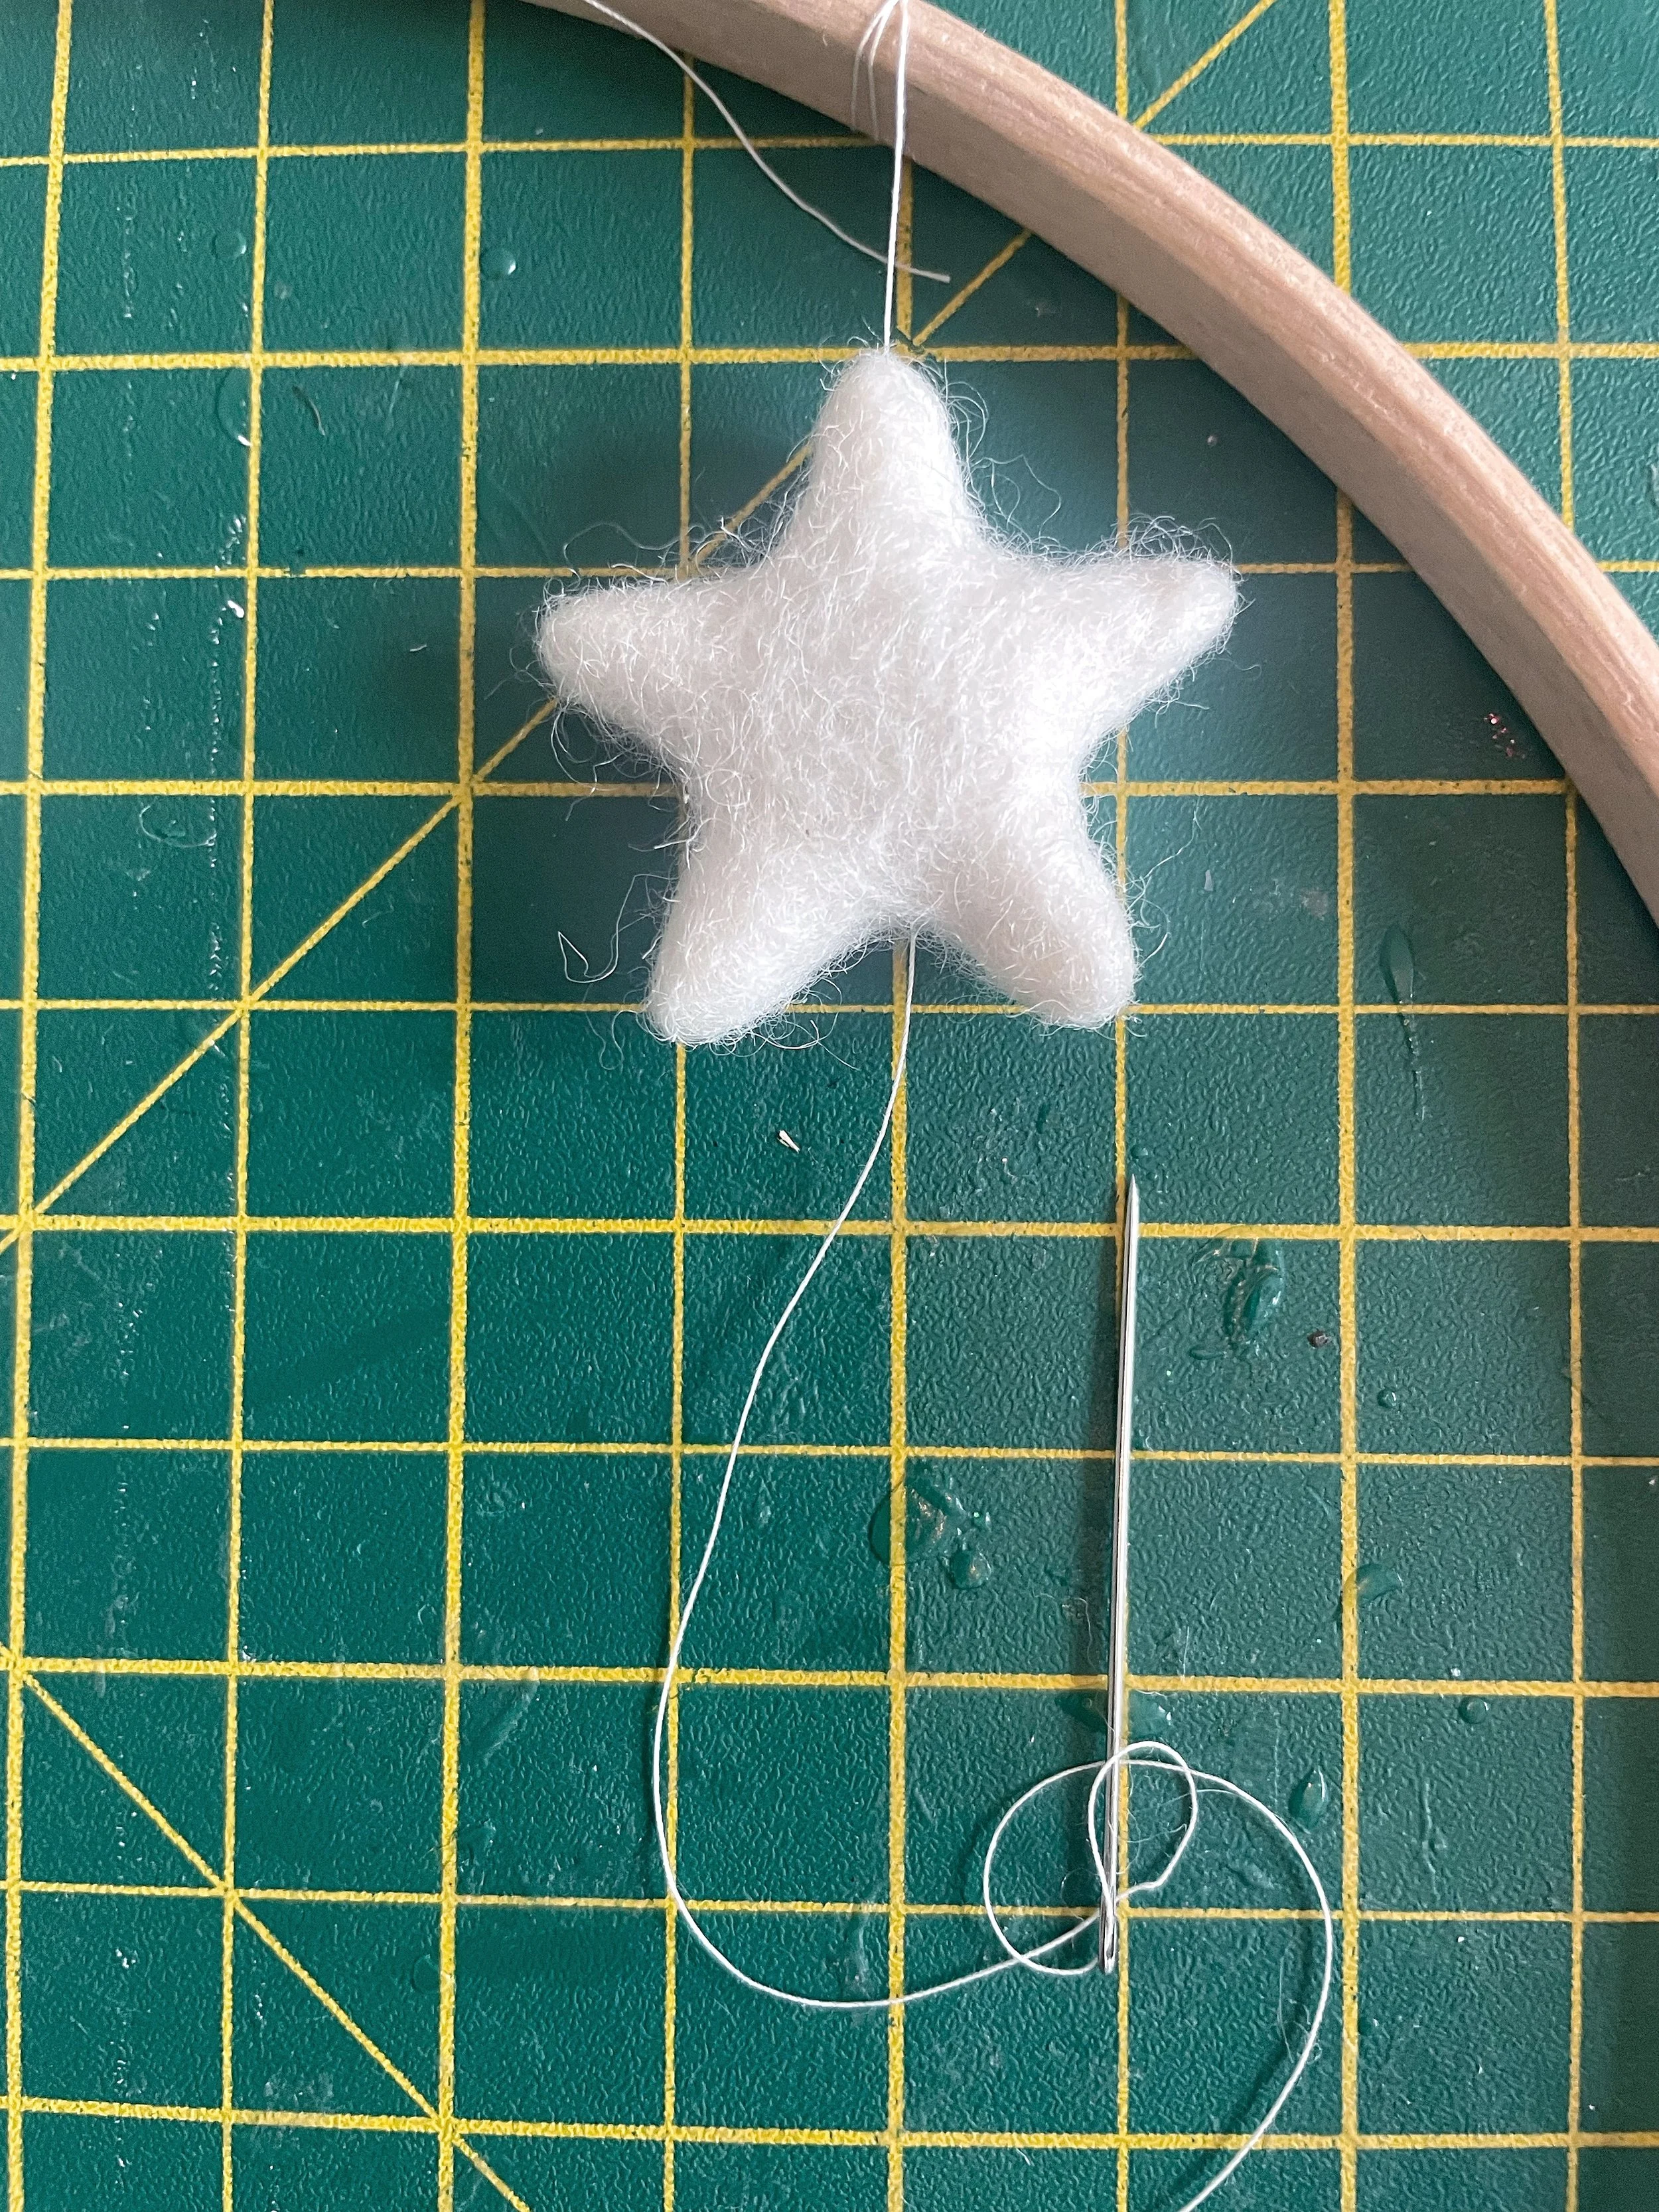
Now for the fun part, it’s time to add the felt balls and stars that will dangle in the centre of your dream catcher.
Thread your needle with one of the strands hanging from the hoop and slide the first star onto it. Gently move the star up the thread until it sits ½ inch below the wooden hoop.
To keep it in place, use your needle to make a small knot at the base of the star (you can see how this looks in the images below). This will stop it from slipping down the thread.
Use your needle to sew a loop at the base.

Take your needle through the loop and tighten
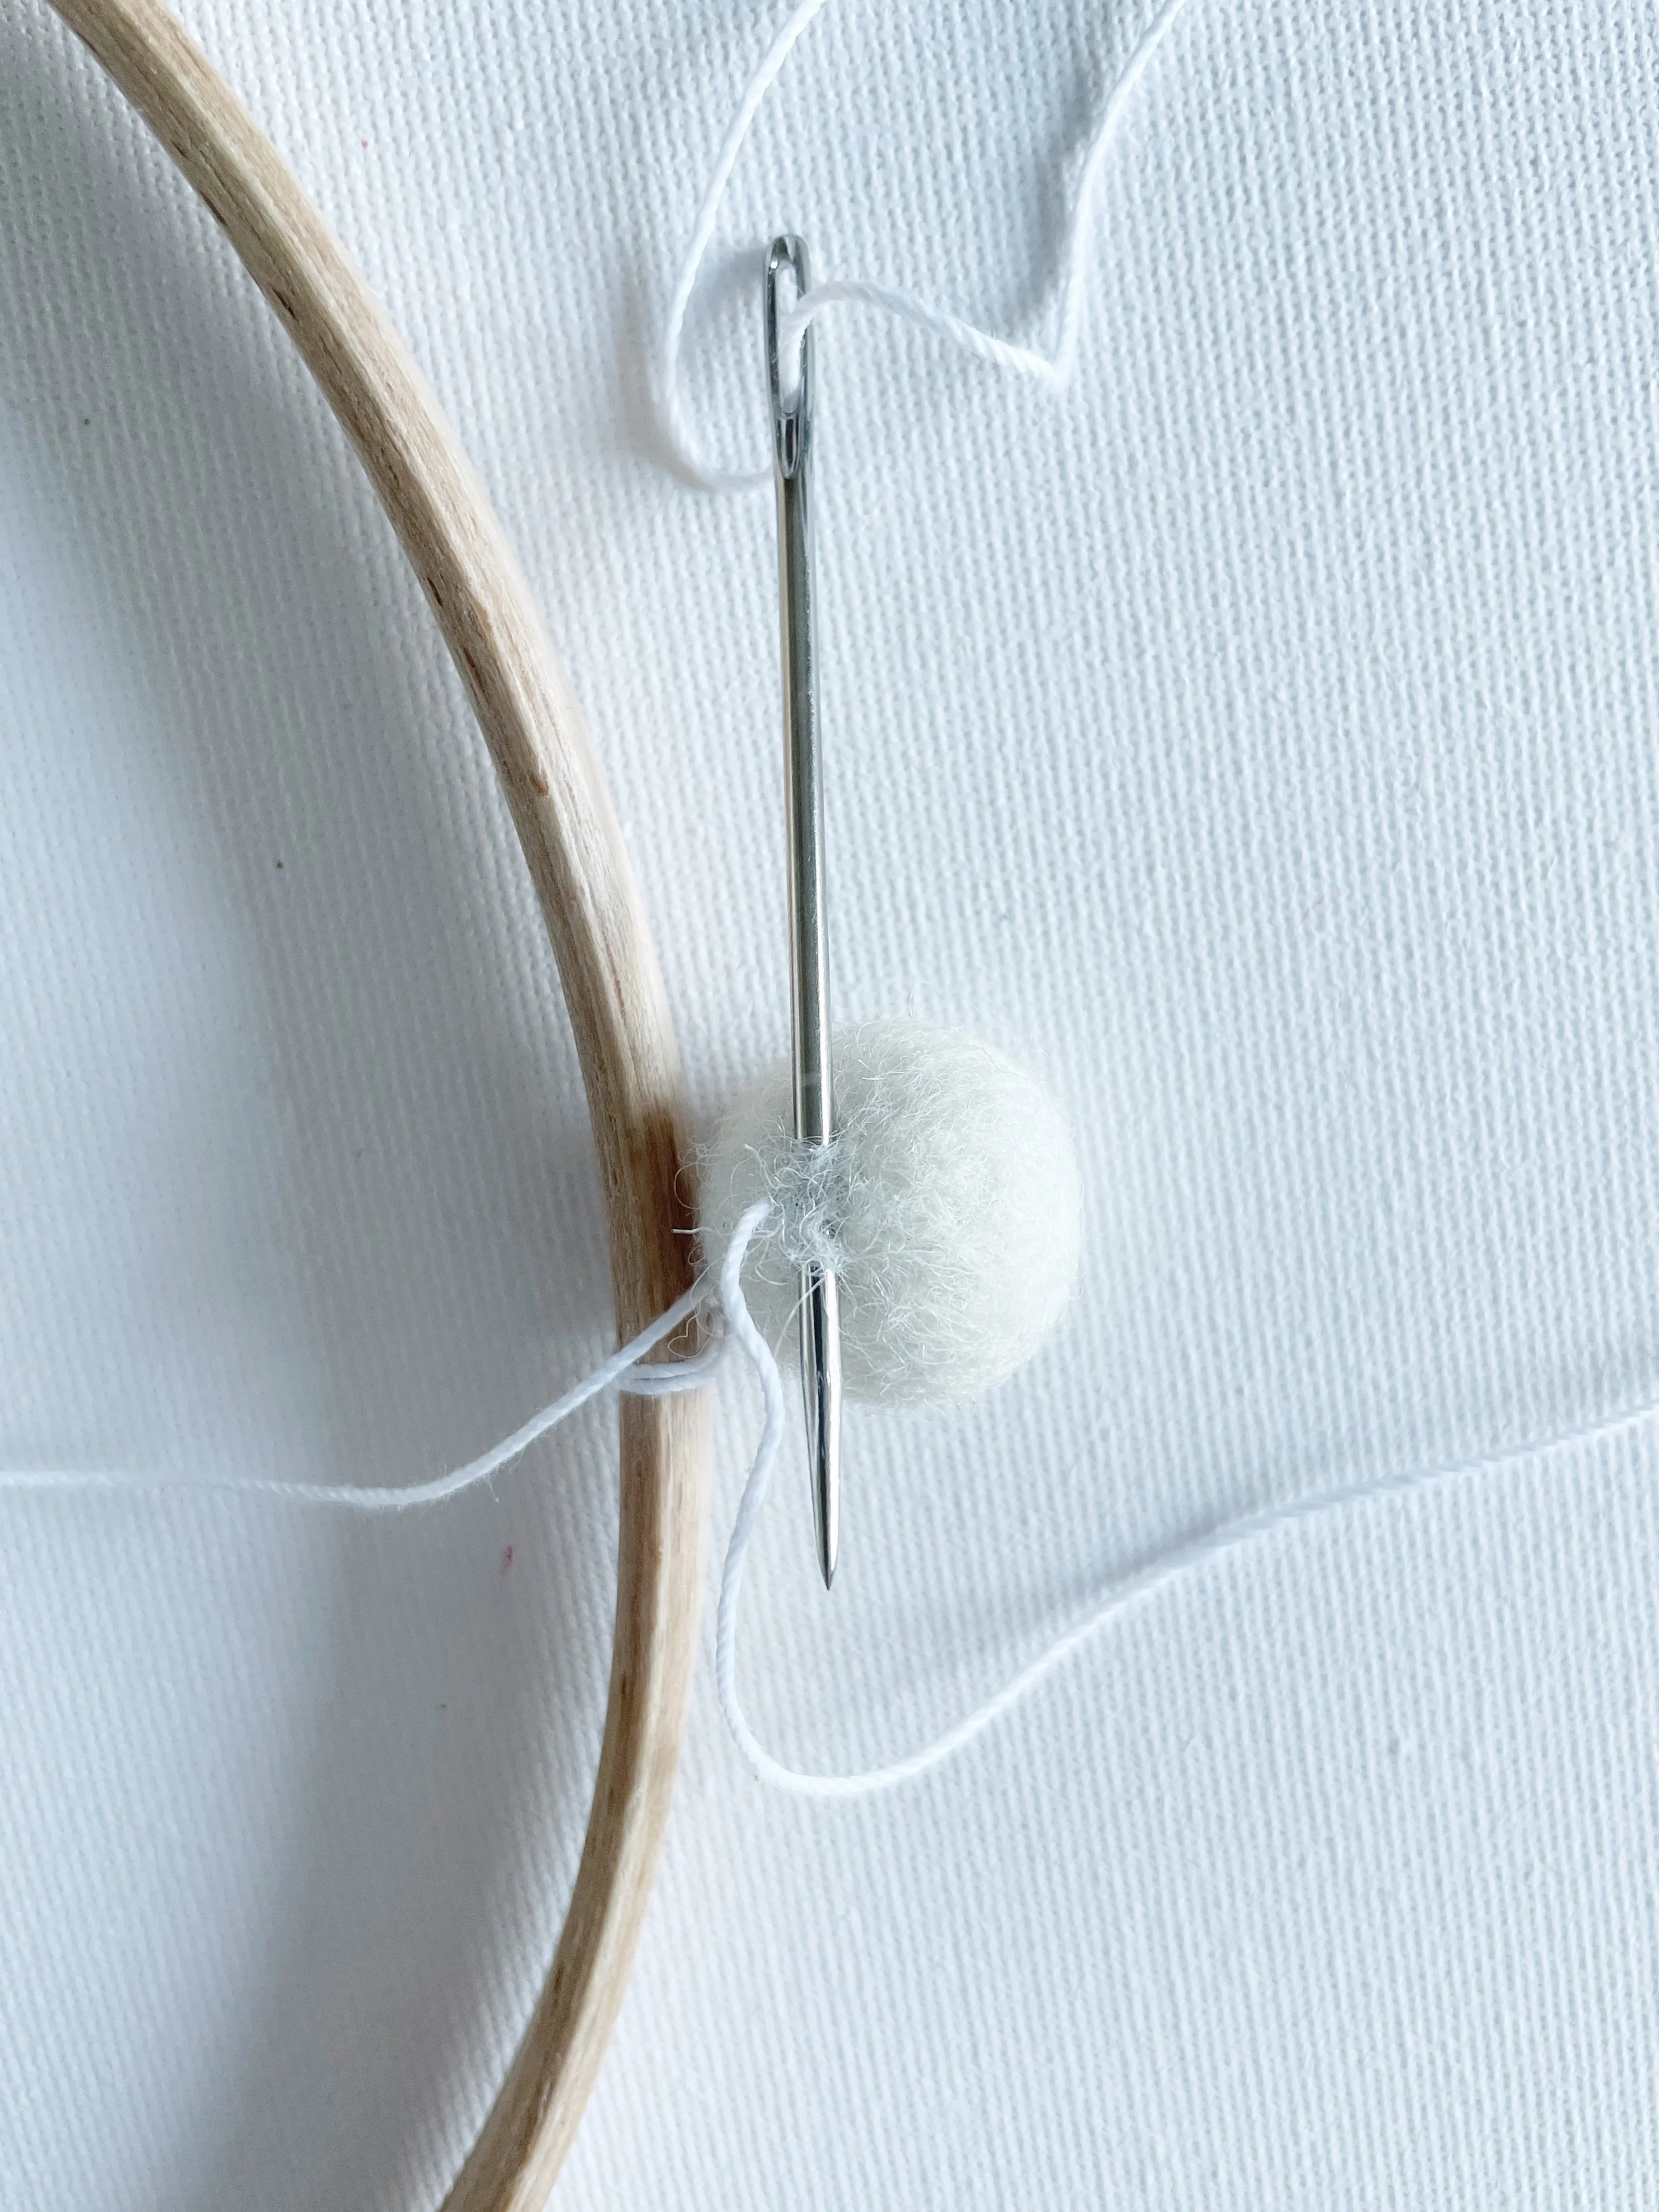
Continue threading your felt balls and stars onto the strands. You’ll see from the image above that I’ve lined up the two outer stars to create a nice balanced effect.
Here are the exact measurements I used to achieve this look:
Everything is spaced ½ inch apart.
1st & 3rd strand: Start with a star ½ inch from the hoop. Add the first felt ball ½ inch below the star, then a second felt ball ½ inch below the first.
2nd strand (middle): Begin with a felt ball ½ inch from the hoop. Add another felt ball ½ inch below, then a star ½ inch below that. Finish with two more felt balls, each spaced ½ inch apart.
This spacing creates a neat and balanced arrangement, but feel free to play around with the order to make it your own.
Glue the Felt Balls to the Hoop
Now that the dangling centre of your dream catcher is complete, it’s time for the fun part, adding the felt balls around the hoop.
Switch on your glue gun and get creative! You can go for neat rows, a more freestyle look, or something in between. Personally, I like to add a little texture by leaving tiny gaps at the back and mixing in a few smaller 1 cm felt balls here and there for interest.
But this is your design, so let your style shine.
Tip: If you’re planning to hang your dream catcher flat against a wall (like mine), it helps to lay the hoop flat on a surface, such as a cutting mat, while gluing the felt balls. This way, the back will stay nice and smooth, making it easy to hang flush against the wall.
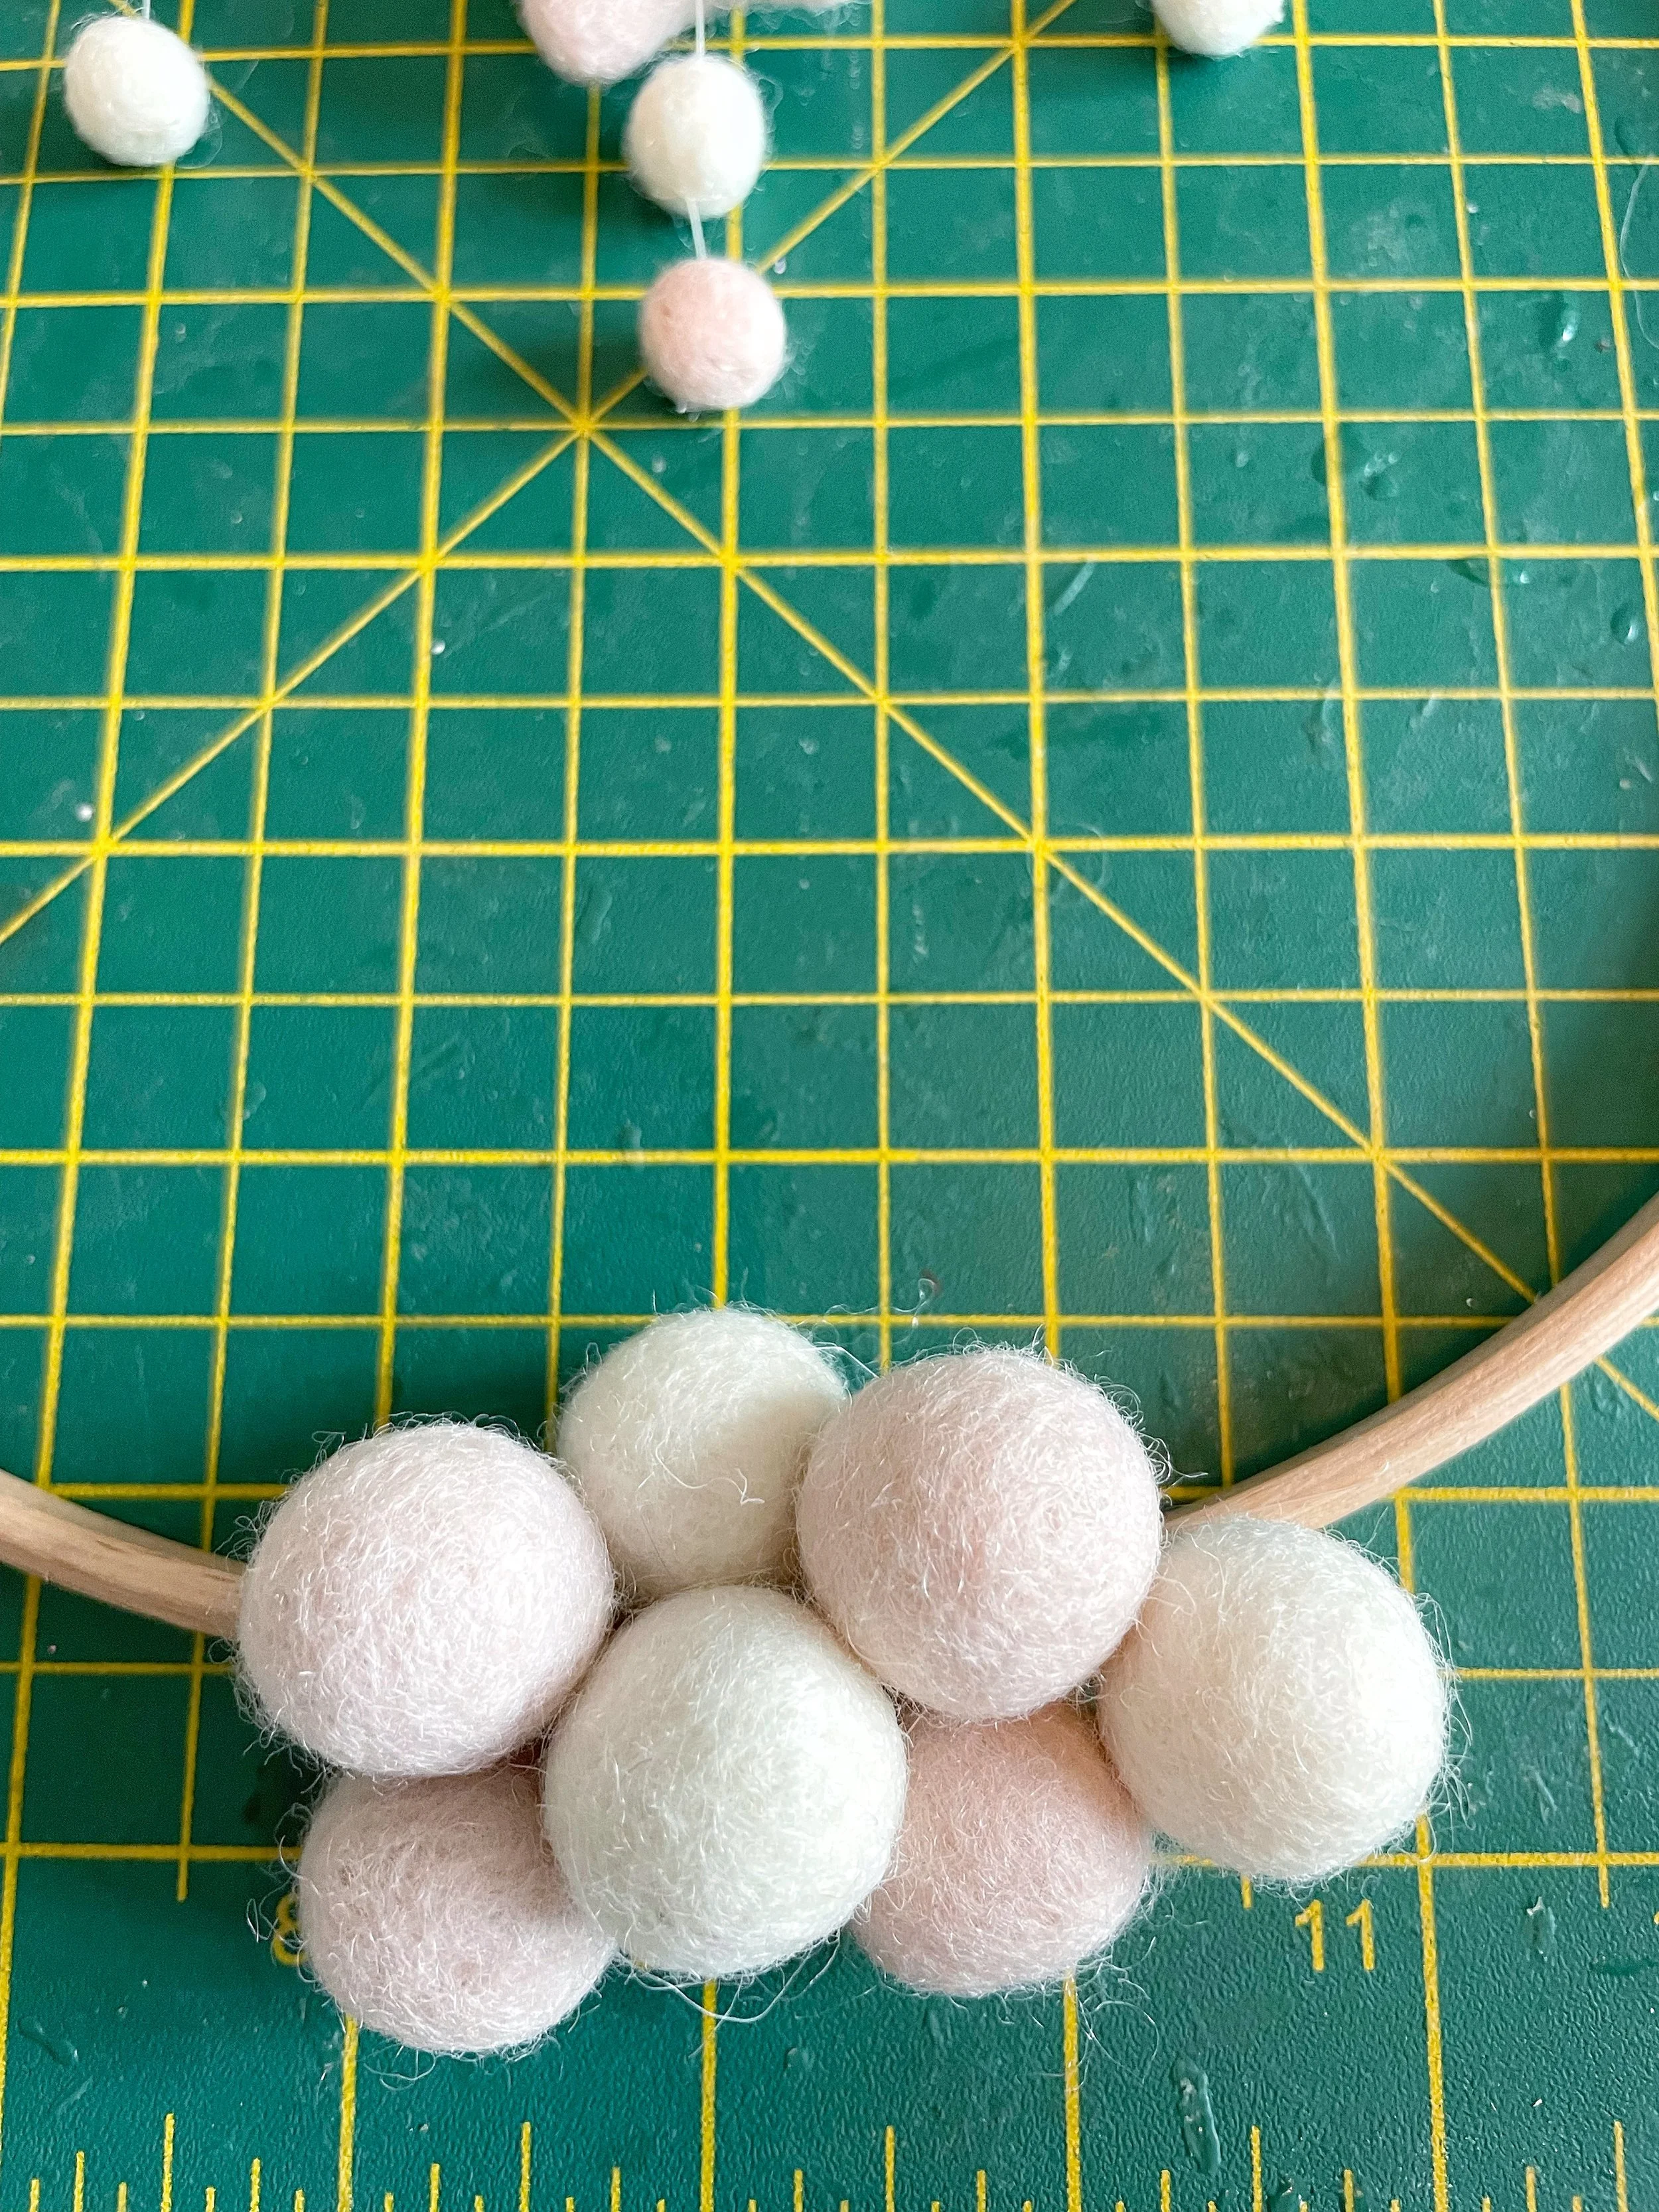
Take your first felt ball and add a small blob of hot glue to it with your glue gun. Press it firmly onto the wooden hoop and hold it in place for a few seconds while the glue sets.
Then move on to the next felt ball… and the next… and the next, you get the idea! Before long, your hoop will be beautifully covered.
Remember: If you’d like your dream catcher to hang flat against the wall, make sure to keep the hoop lying flat as you glue. Just be careful not to accidentally glue it to your work surface, pick it up every so often to check it’s staying free.
Keep building up your design by adding felt balls wherever feels right, it doesn’t have to be perfect, just whatever looks good to you. The beauty is in creating.
A quick word of caution: if you’re using the tiny felt balls, be extra careful! It’s easy to get hot glue on your fingers, and trust me, it stings.
To keep things safe, you can squeeze a little blob of glue onto a small dish and then use an orange stick (or something similar) to quickly dab the glue onto the felt balls. This way, your fingers stay out of harm’s way.
If you notice your glue is getting too runny, don’t worry. Simply switch off the glue gun for a couple of minutes to let it cool slightly, then carry on once it’s thickened up again.

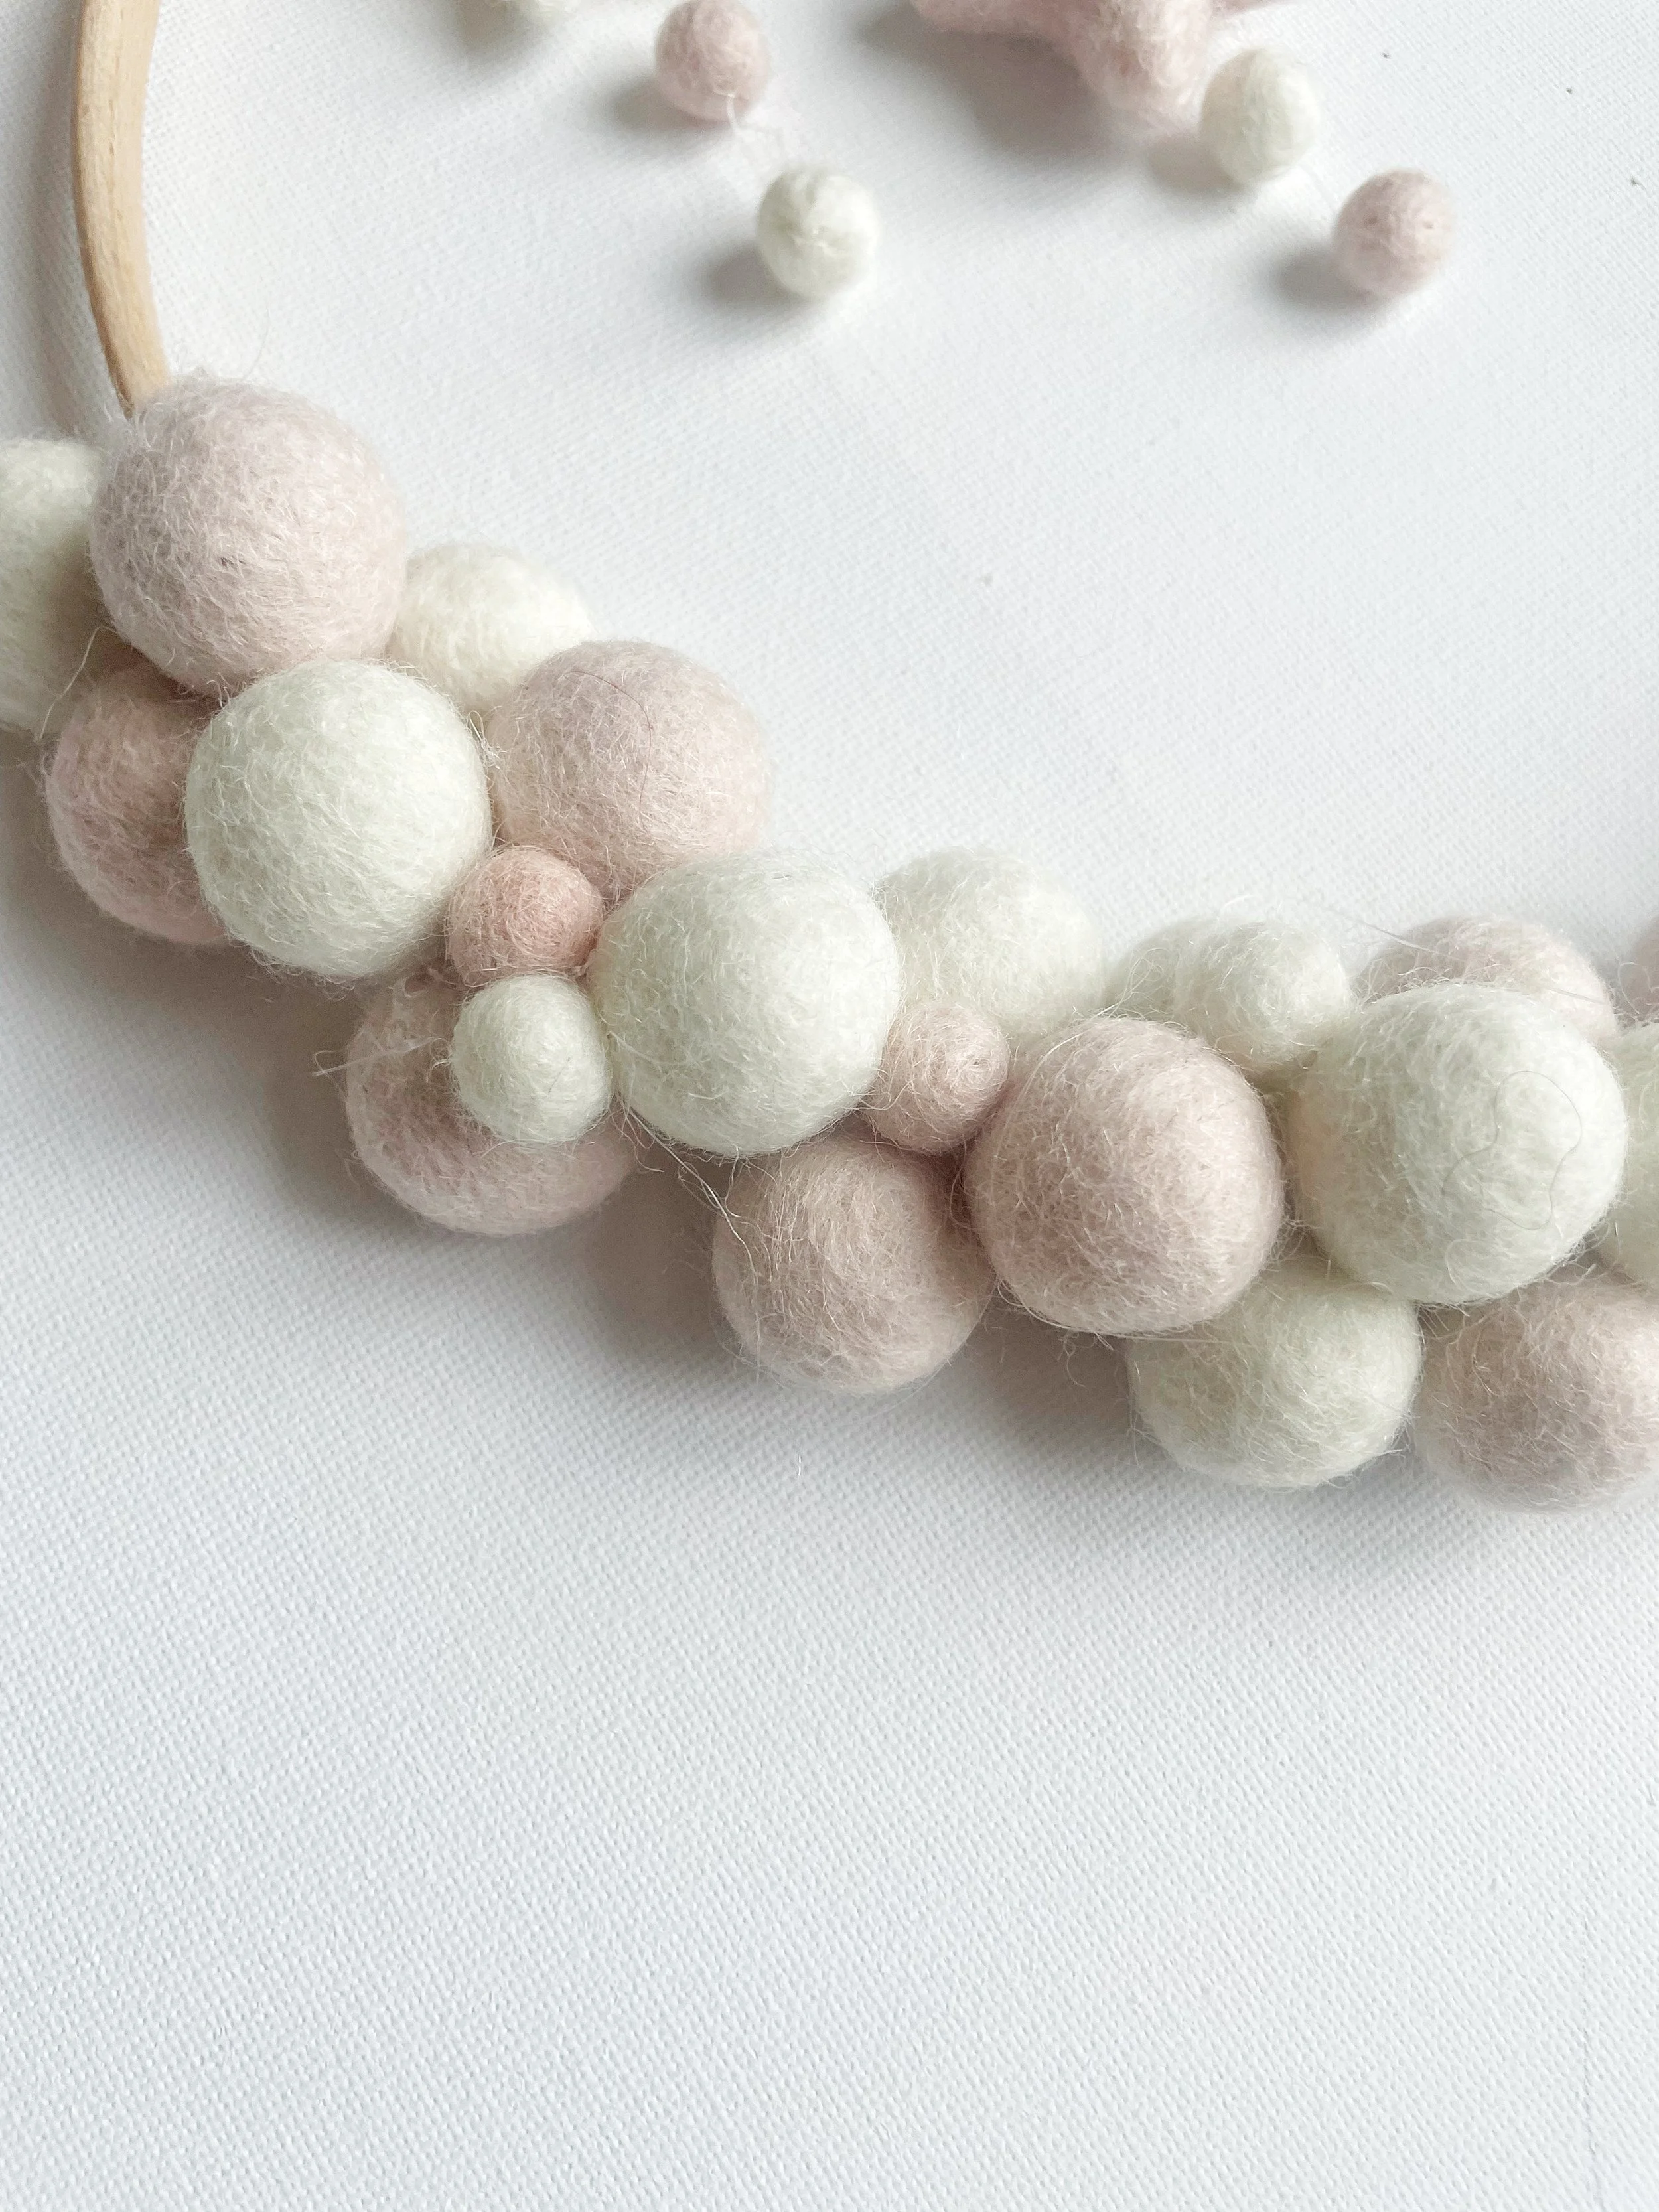
Keep glueing and adding until you reach the centre line you earlier marked with your pencil.
Once you’ve added all your felt balls up to the centre line, take a step back and admire your dream catcher. If you feel like it needs a little something extra, go ahead and tuck in a few more felt balls until it looks just right.
You may want to give your dream catcher a little tidy-up by carefully snipping away any visible bits of excess glue. Just take care not to snip into the felt balls themselves.
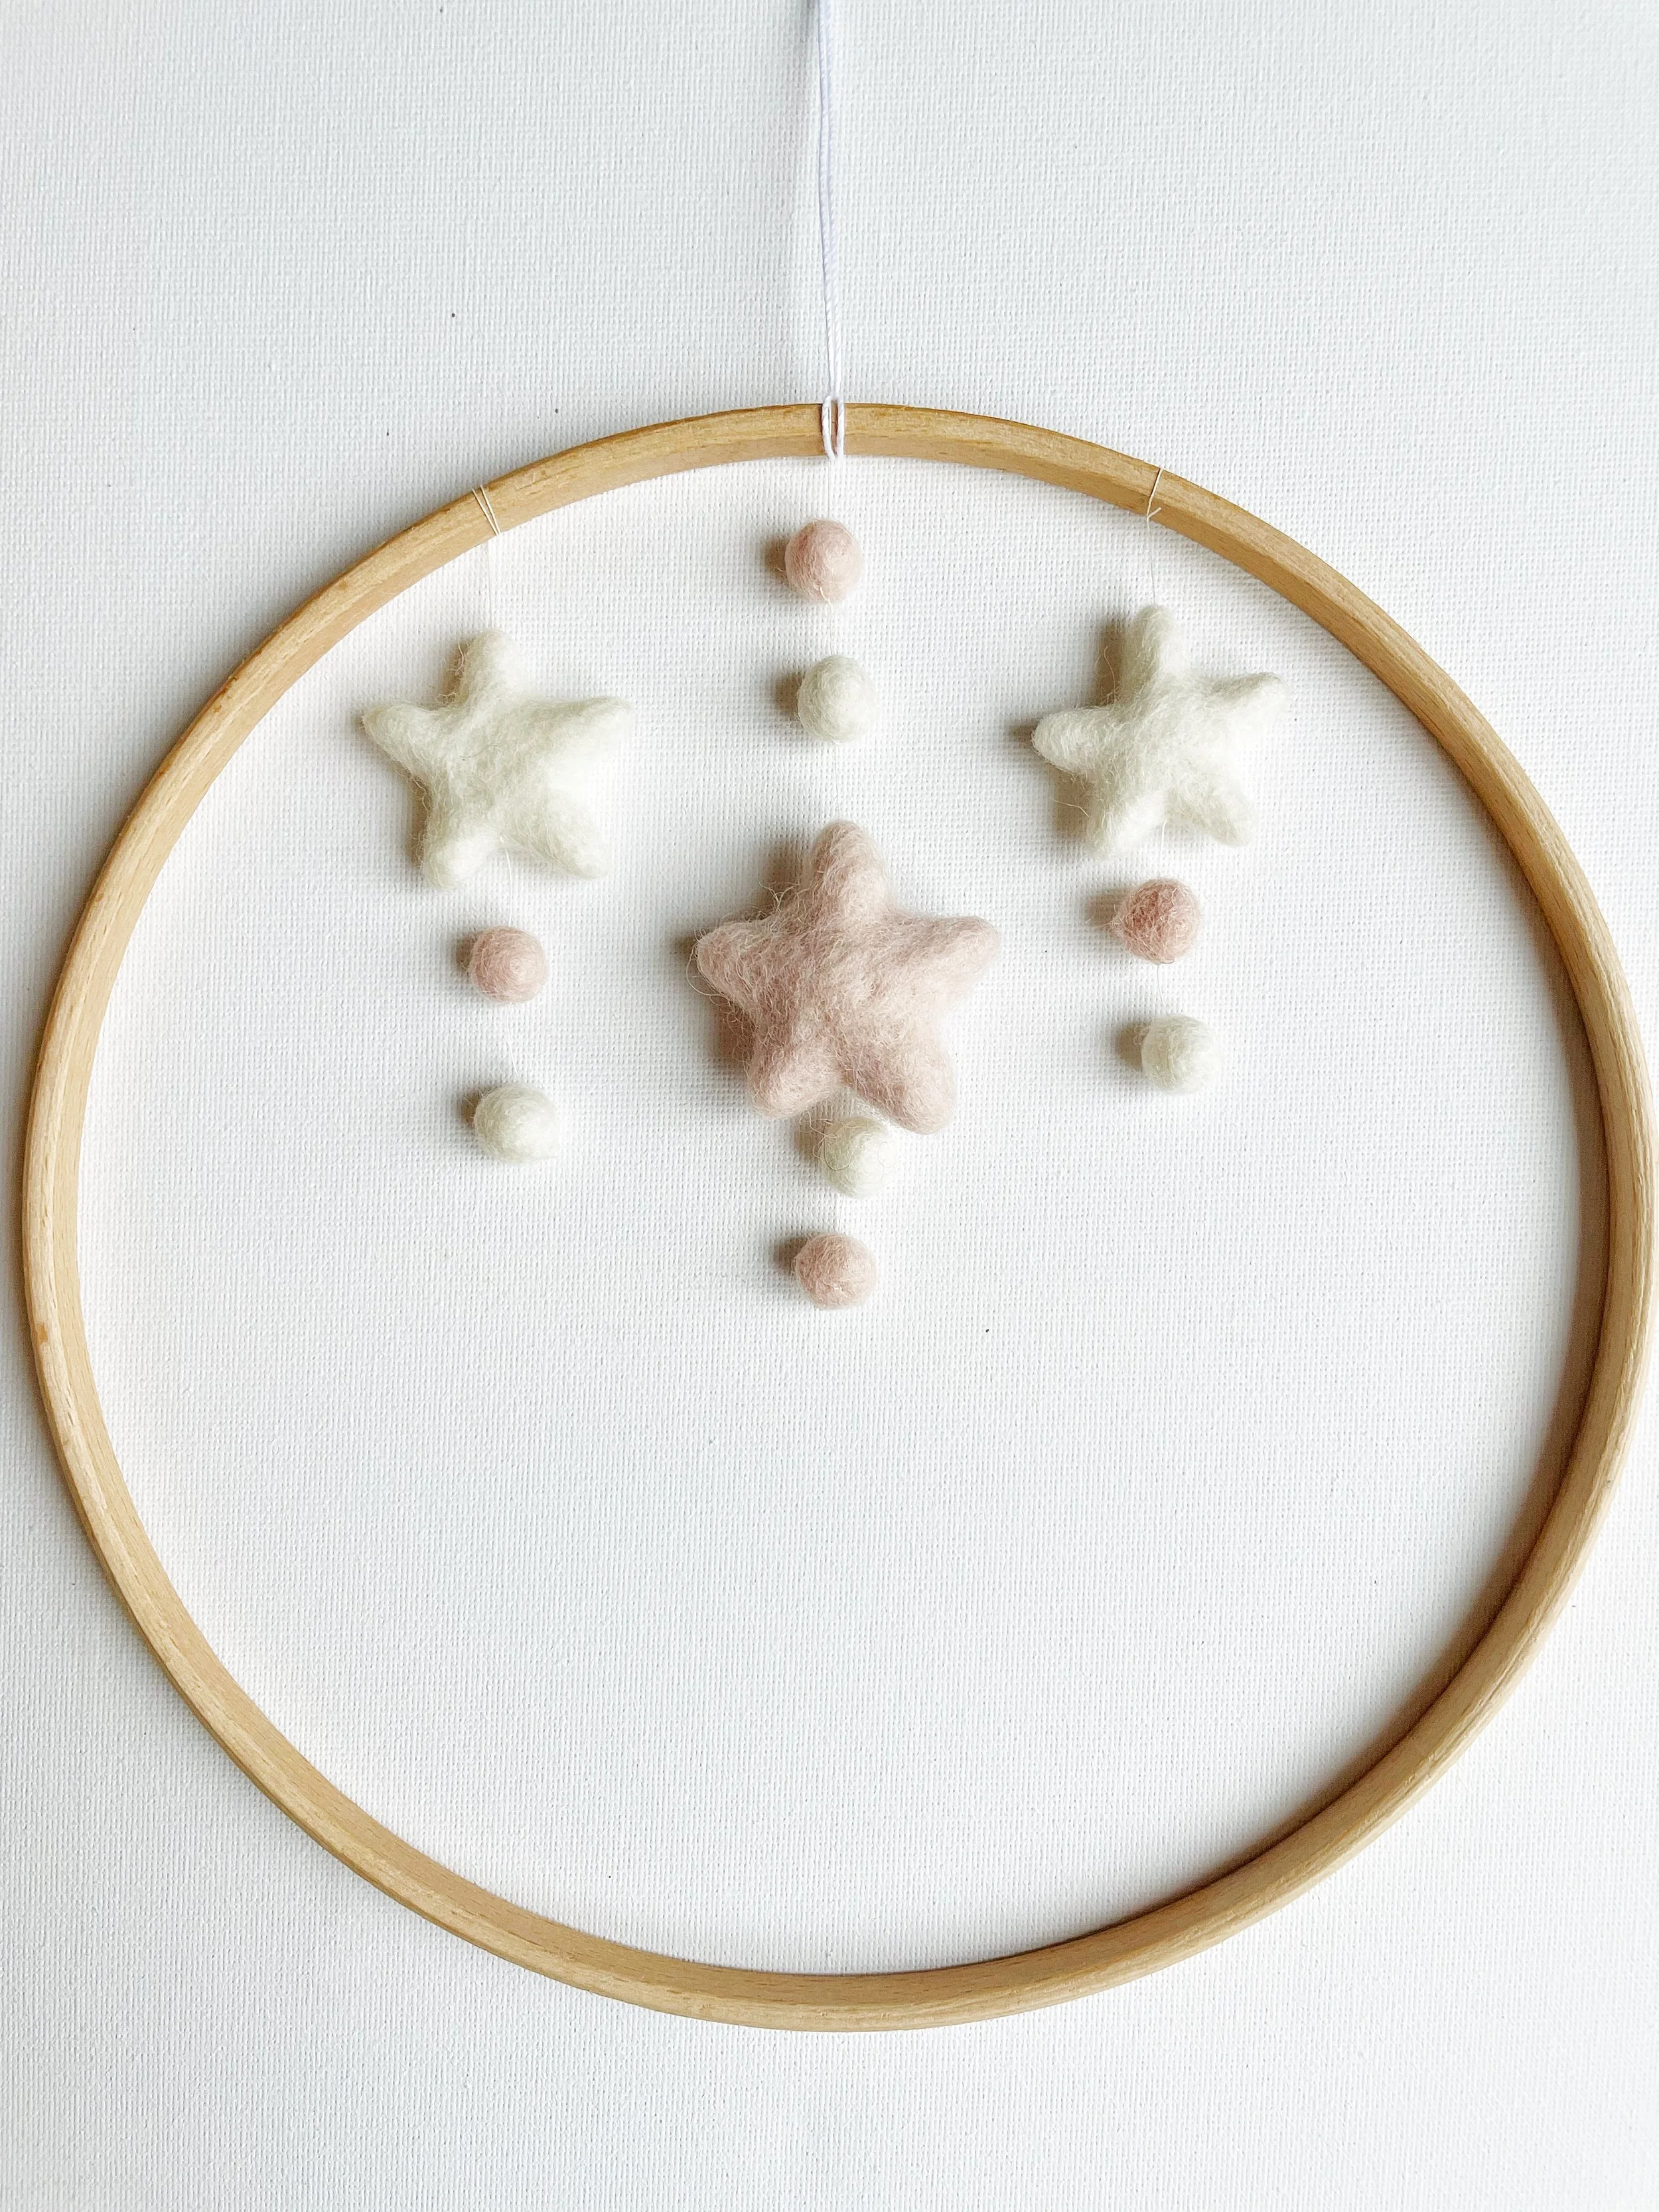
You’ve made a felt ball dream catcher!
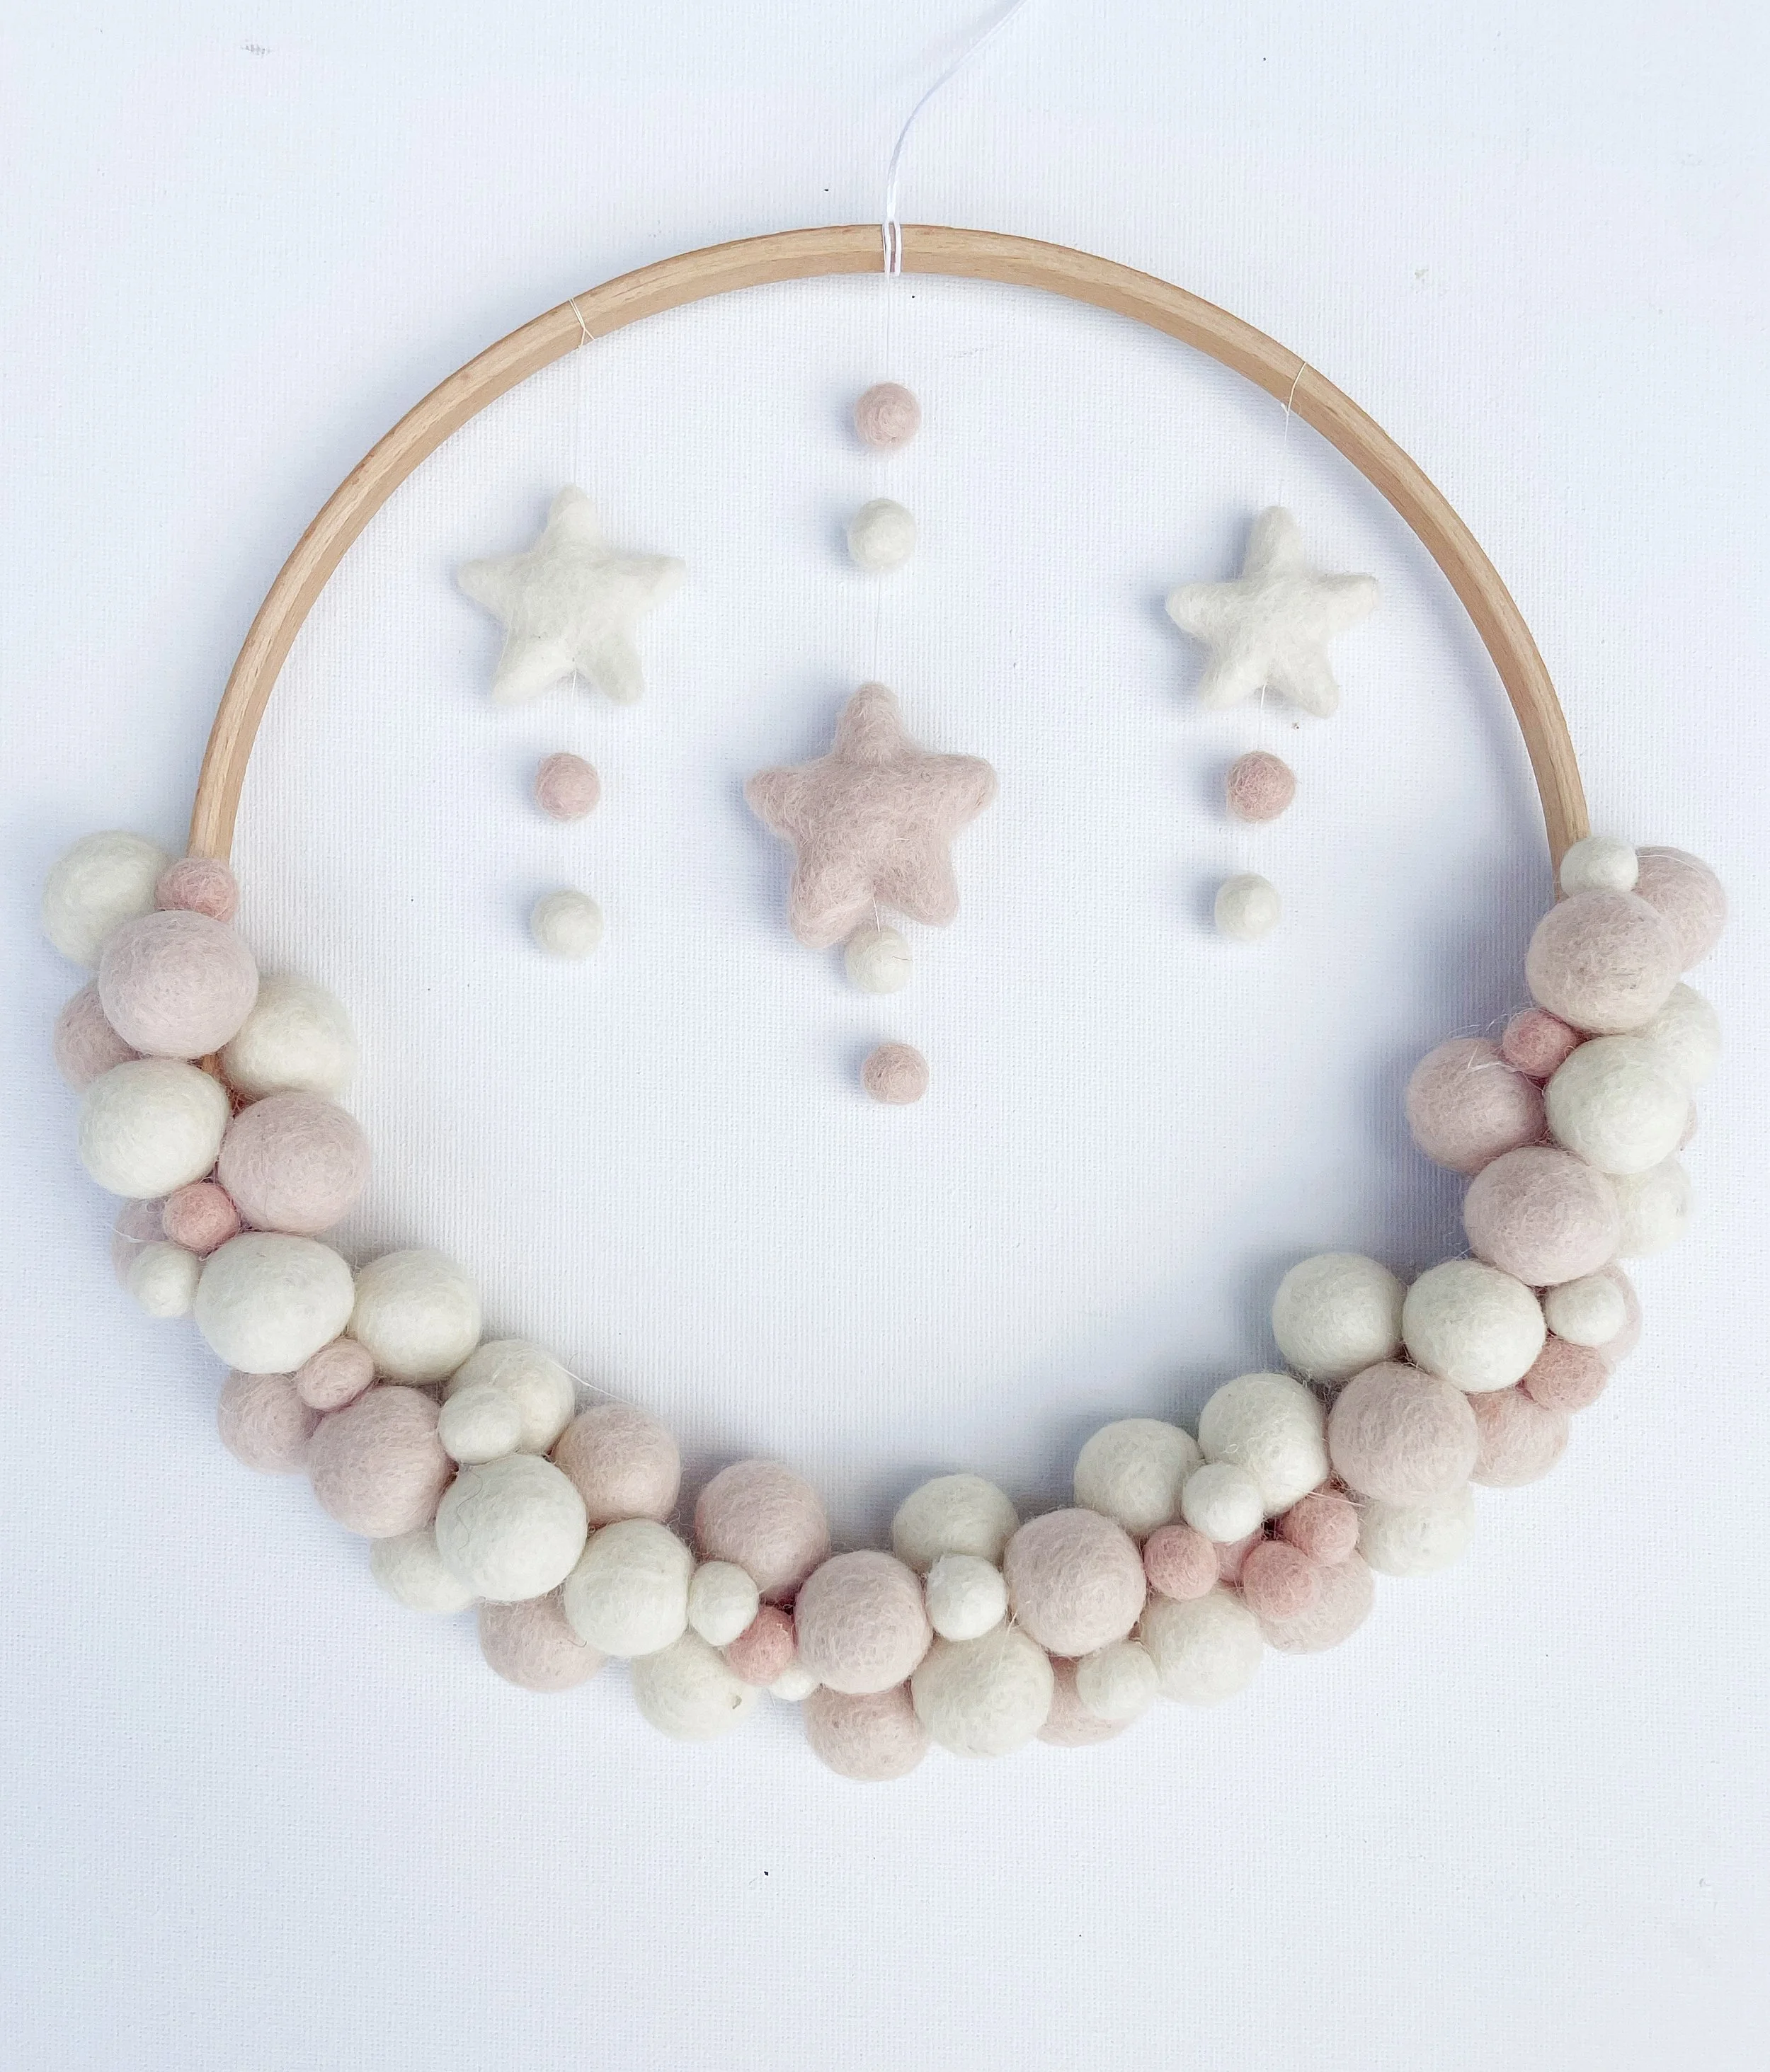
And there you have it, your very own handmade dream catcher! See, I told you it was nice and easy
I hope you’ve enjoyed making this sweet project as much as I loved putting the tutorial together for you. If you’re in the mood for more felt ball fun, be sure to check out my DIY felt ball garland tutorial, it’s the perfect matching piece to complement your dream catcher.
I’d be over the moon to see how your dream catcher turns out! If you have any questions, tips, or simply want to share your finished creation, drop a comment below, it truly makes my day to hear from you.
With love and a sprinkle of creativity,
Karen x