
Make a Spiral Nursery Mobile

Want to make your own nursery mobile? In this step-by-step guide, I’ll show you how to create a dreamy spiral mobile that adds the sweetest finishing touch to any nursery.
There’s something truly special about handmade nursery décor, it’s not only beautiful, but it also carries that extra touch of love and care that makes it feel one of a kind.
Plus, it can often be a more budget-friendly option too!
This spiral mobile is such a joy to see in action. The little felt stars twirl gently in the breeze, filling the room with a soft, calming, almost magical feeling.
The best part is that the design is simple and timeless. Whether your nursery style is modern and minimal, or cosy and traditional, it will fit right in.
And if you’re making it as a gift (such a thoughtful idea!), it’s sure to be treasured, there’s nothing quite like receiving something handmade with love.
For my version, I chose ivory felt balls with mint green stars for a soft, gender-neutral look. But that’s the beauty of this project, you can have fun playing with colours.
Whether you prefer subtle neutrals, dreamy pastels, or bold pops of colour, you can make it perfectly yours.
And if you’d like to take it one step further, why not make a matching star garland? You can find my full tutorial here: DIY Felt Ball Garland.
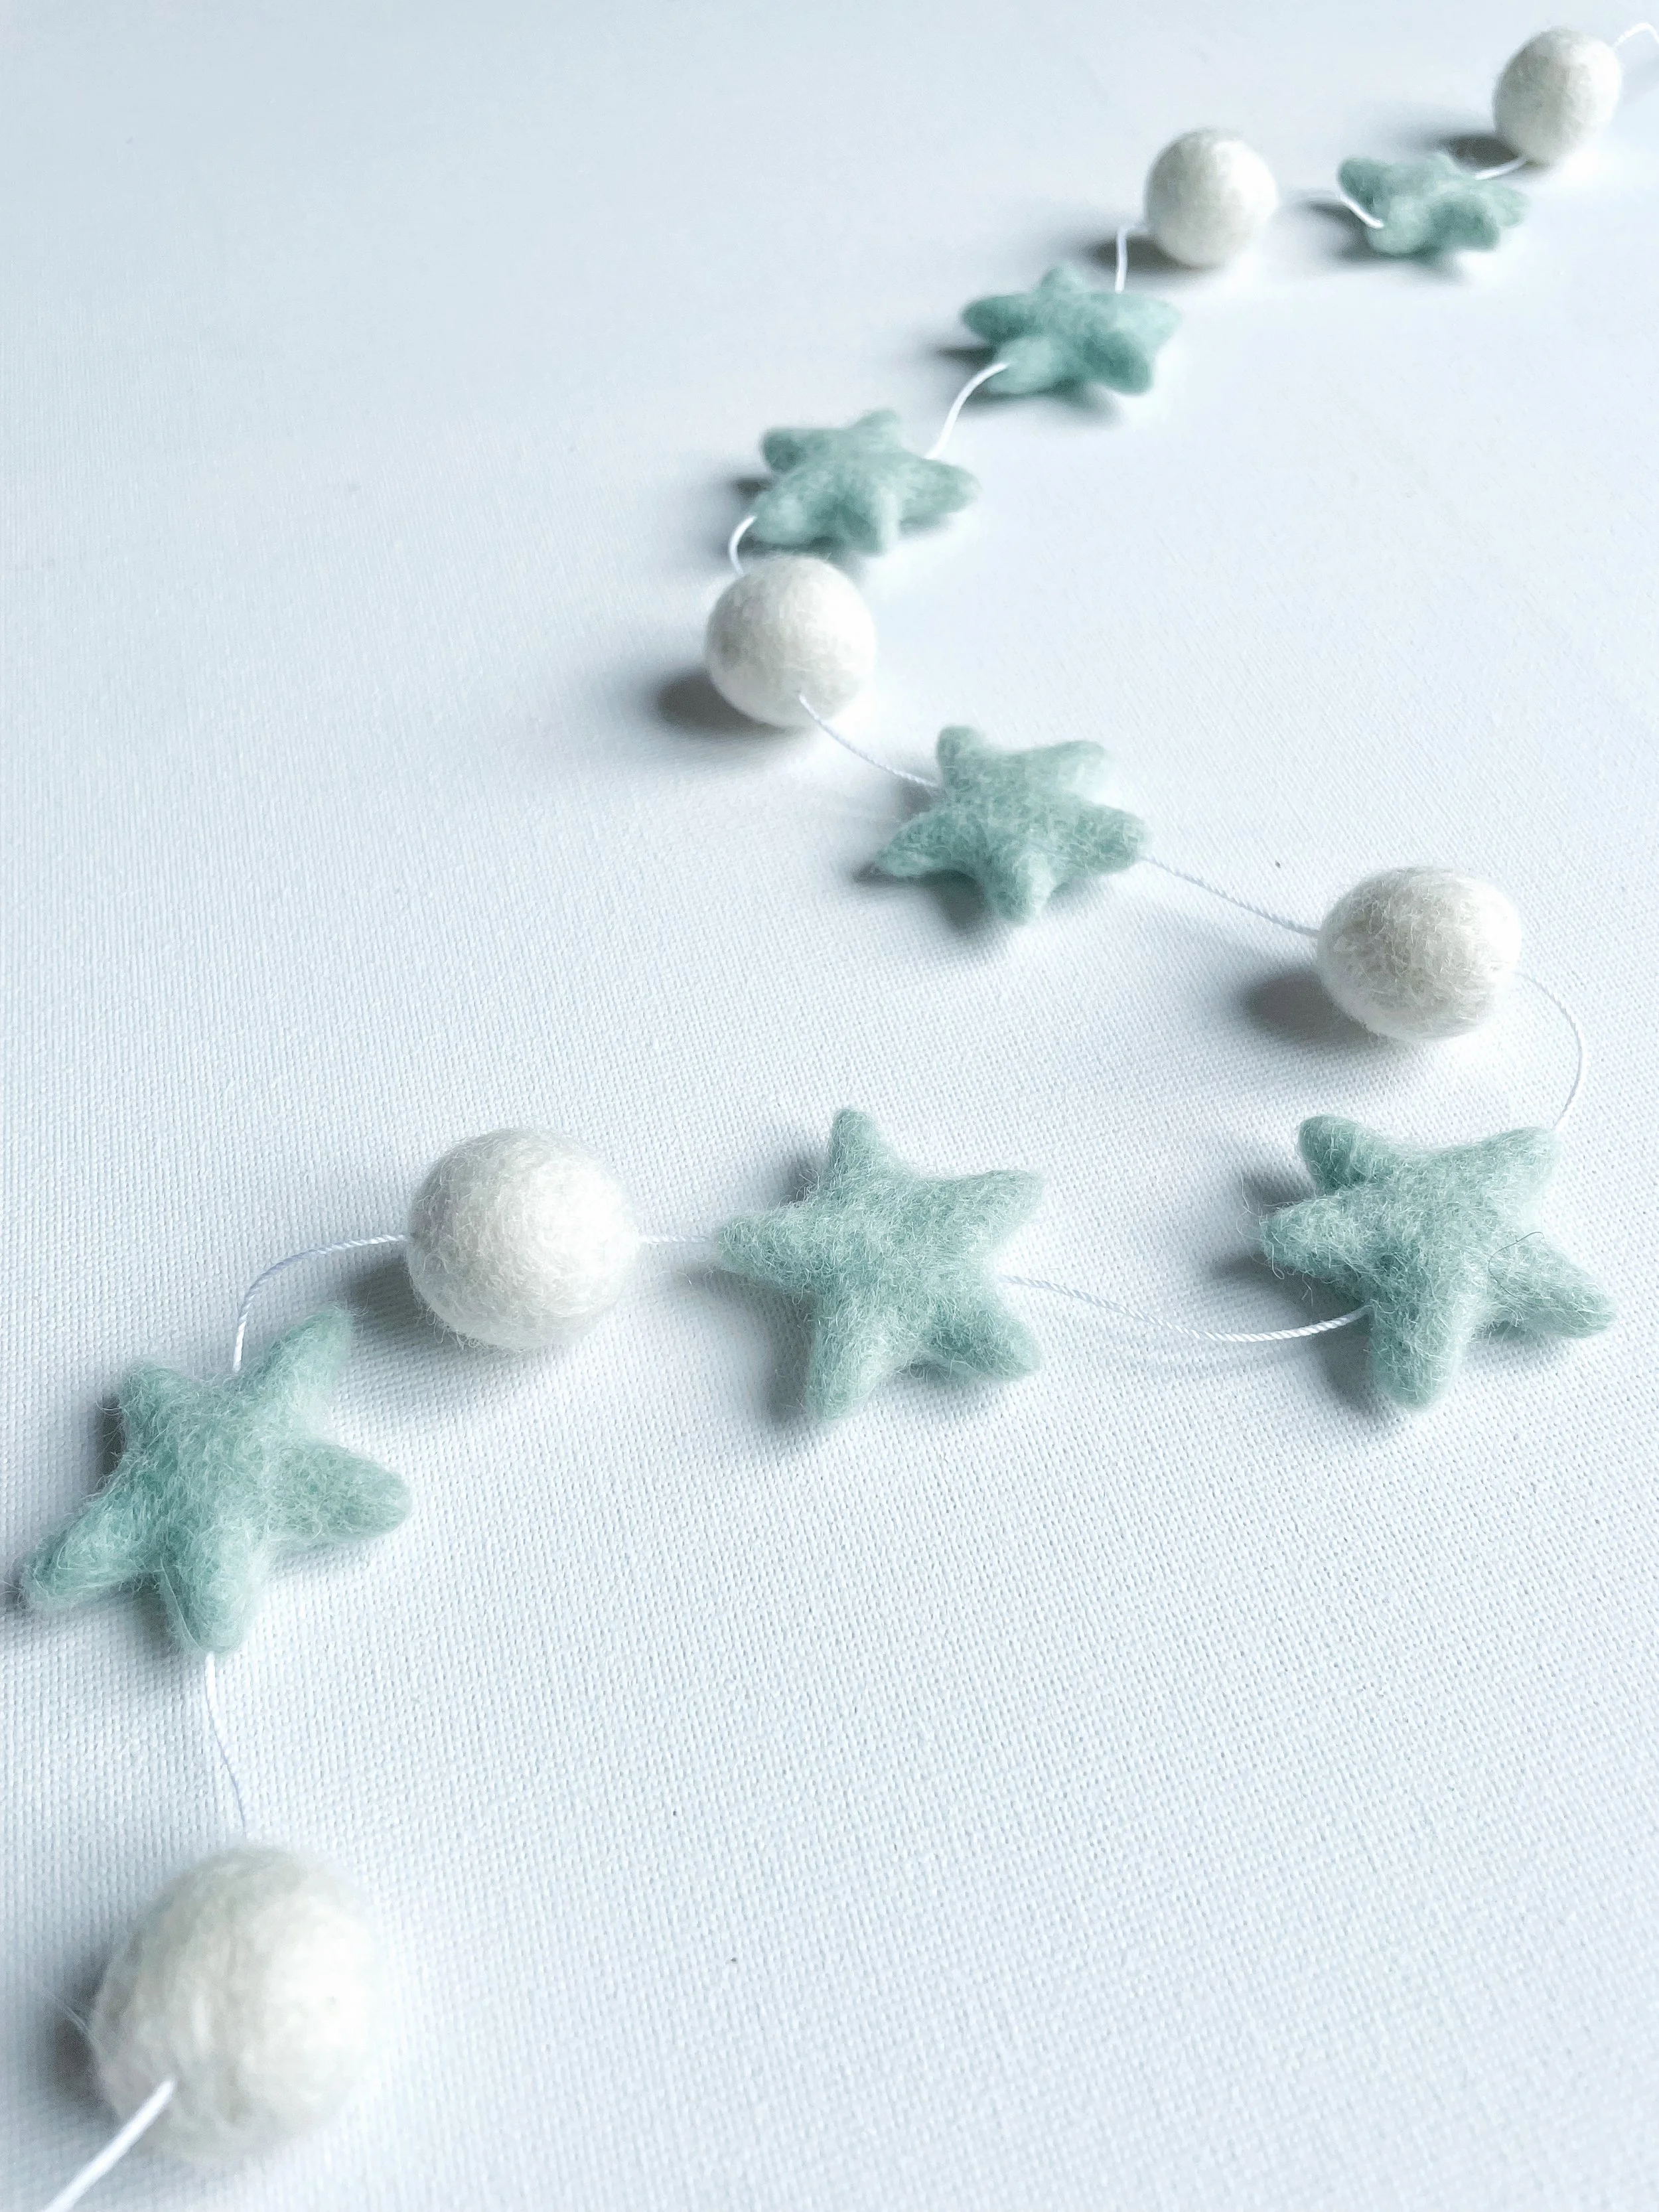
Flurraby Felt Ball Garland
There’s no denying that this project is a little fiddly. Some steps do call for a little patience, but none are difficult.
I’ll carefully guide you through each step so the whole process feels easy and fun.
There’s absolutely no need to rush. Handmade projects are little gifts for the soul, after all. Take your time, enjoy the rhythm of making, and let this become a calming moment in your day.
One tip I always recommend: read through the tutorial once or twice before you start. It’ll give you a boost of confidence, especially if you’re new to crafting.
And just a little heads-up… once you’ve made your first mobile, you might get hooked! Don’t be surprised if you suddenly want to make them for every parent-to-be you know.
Selling handmade nursery mobiles…
Handmade nursery mobiles are always such a hit, parents adore them, and they make the sweetest, most thoughtful gifts for a new baby or a baby shower.
They’re a beautiful addition to any shop, and even a lovely first product if you’re thinking of starting a handmade business.
Looking for more inspiration? You might also enjoy my Cloud Nursery Mobile tutorial, it’s another dreamy design that pairs perfectly with this one.

Flurraby DIY Cloud Mobile
If you're thinking about selling your creations, don’t miss my super-helpful Beginner’s Guide to Pricing Your Handmade Items , when you’re starting out, pricing can be much trickier than you think.
Why not save it to Pinterest to read later.

Safety
I’ve chosen only the safest, loveliest materials for this project, wool felt, natural wood, and soft cotton string. These are not only beautiful to work with but also perfect for creating a safe mobile for your little one’s nursery.
Because this mobile will be hanging in your baby’s room, it’s important to make sure every piece is securely attached and firmly in place. Always hang your mobile securely and well out of baby’s reach.
never hang it directly above the crib where tiny hands can grab it.
This design is on the longer side, so do keep that in mind when choosing where to hang it. And once your little one is able to stand or pull themselves up, it’s time to take the mobile down.
The lovely part is, you don’t have to part with it, you can tuck it away as a keepsake, save it for your next little bundle, or even repurpose it into a felt ball star garland (I’ve got a tutorial for that here!).
Speaking of which, felt ball garlands are also a wonderful way to use up any leftover felt balls from this project, so nothing goes to waste.
Alright, let’s dive in and get started!
What you need to make a nursery mobile…
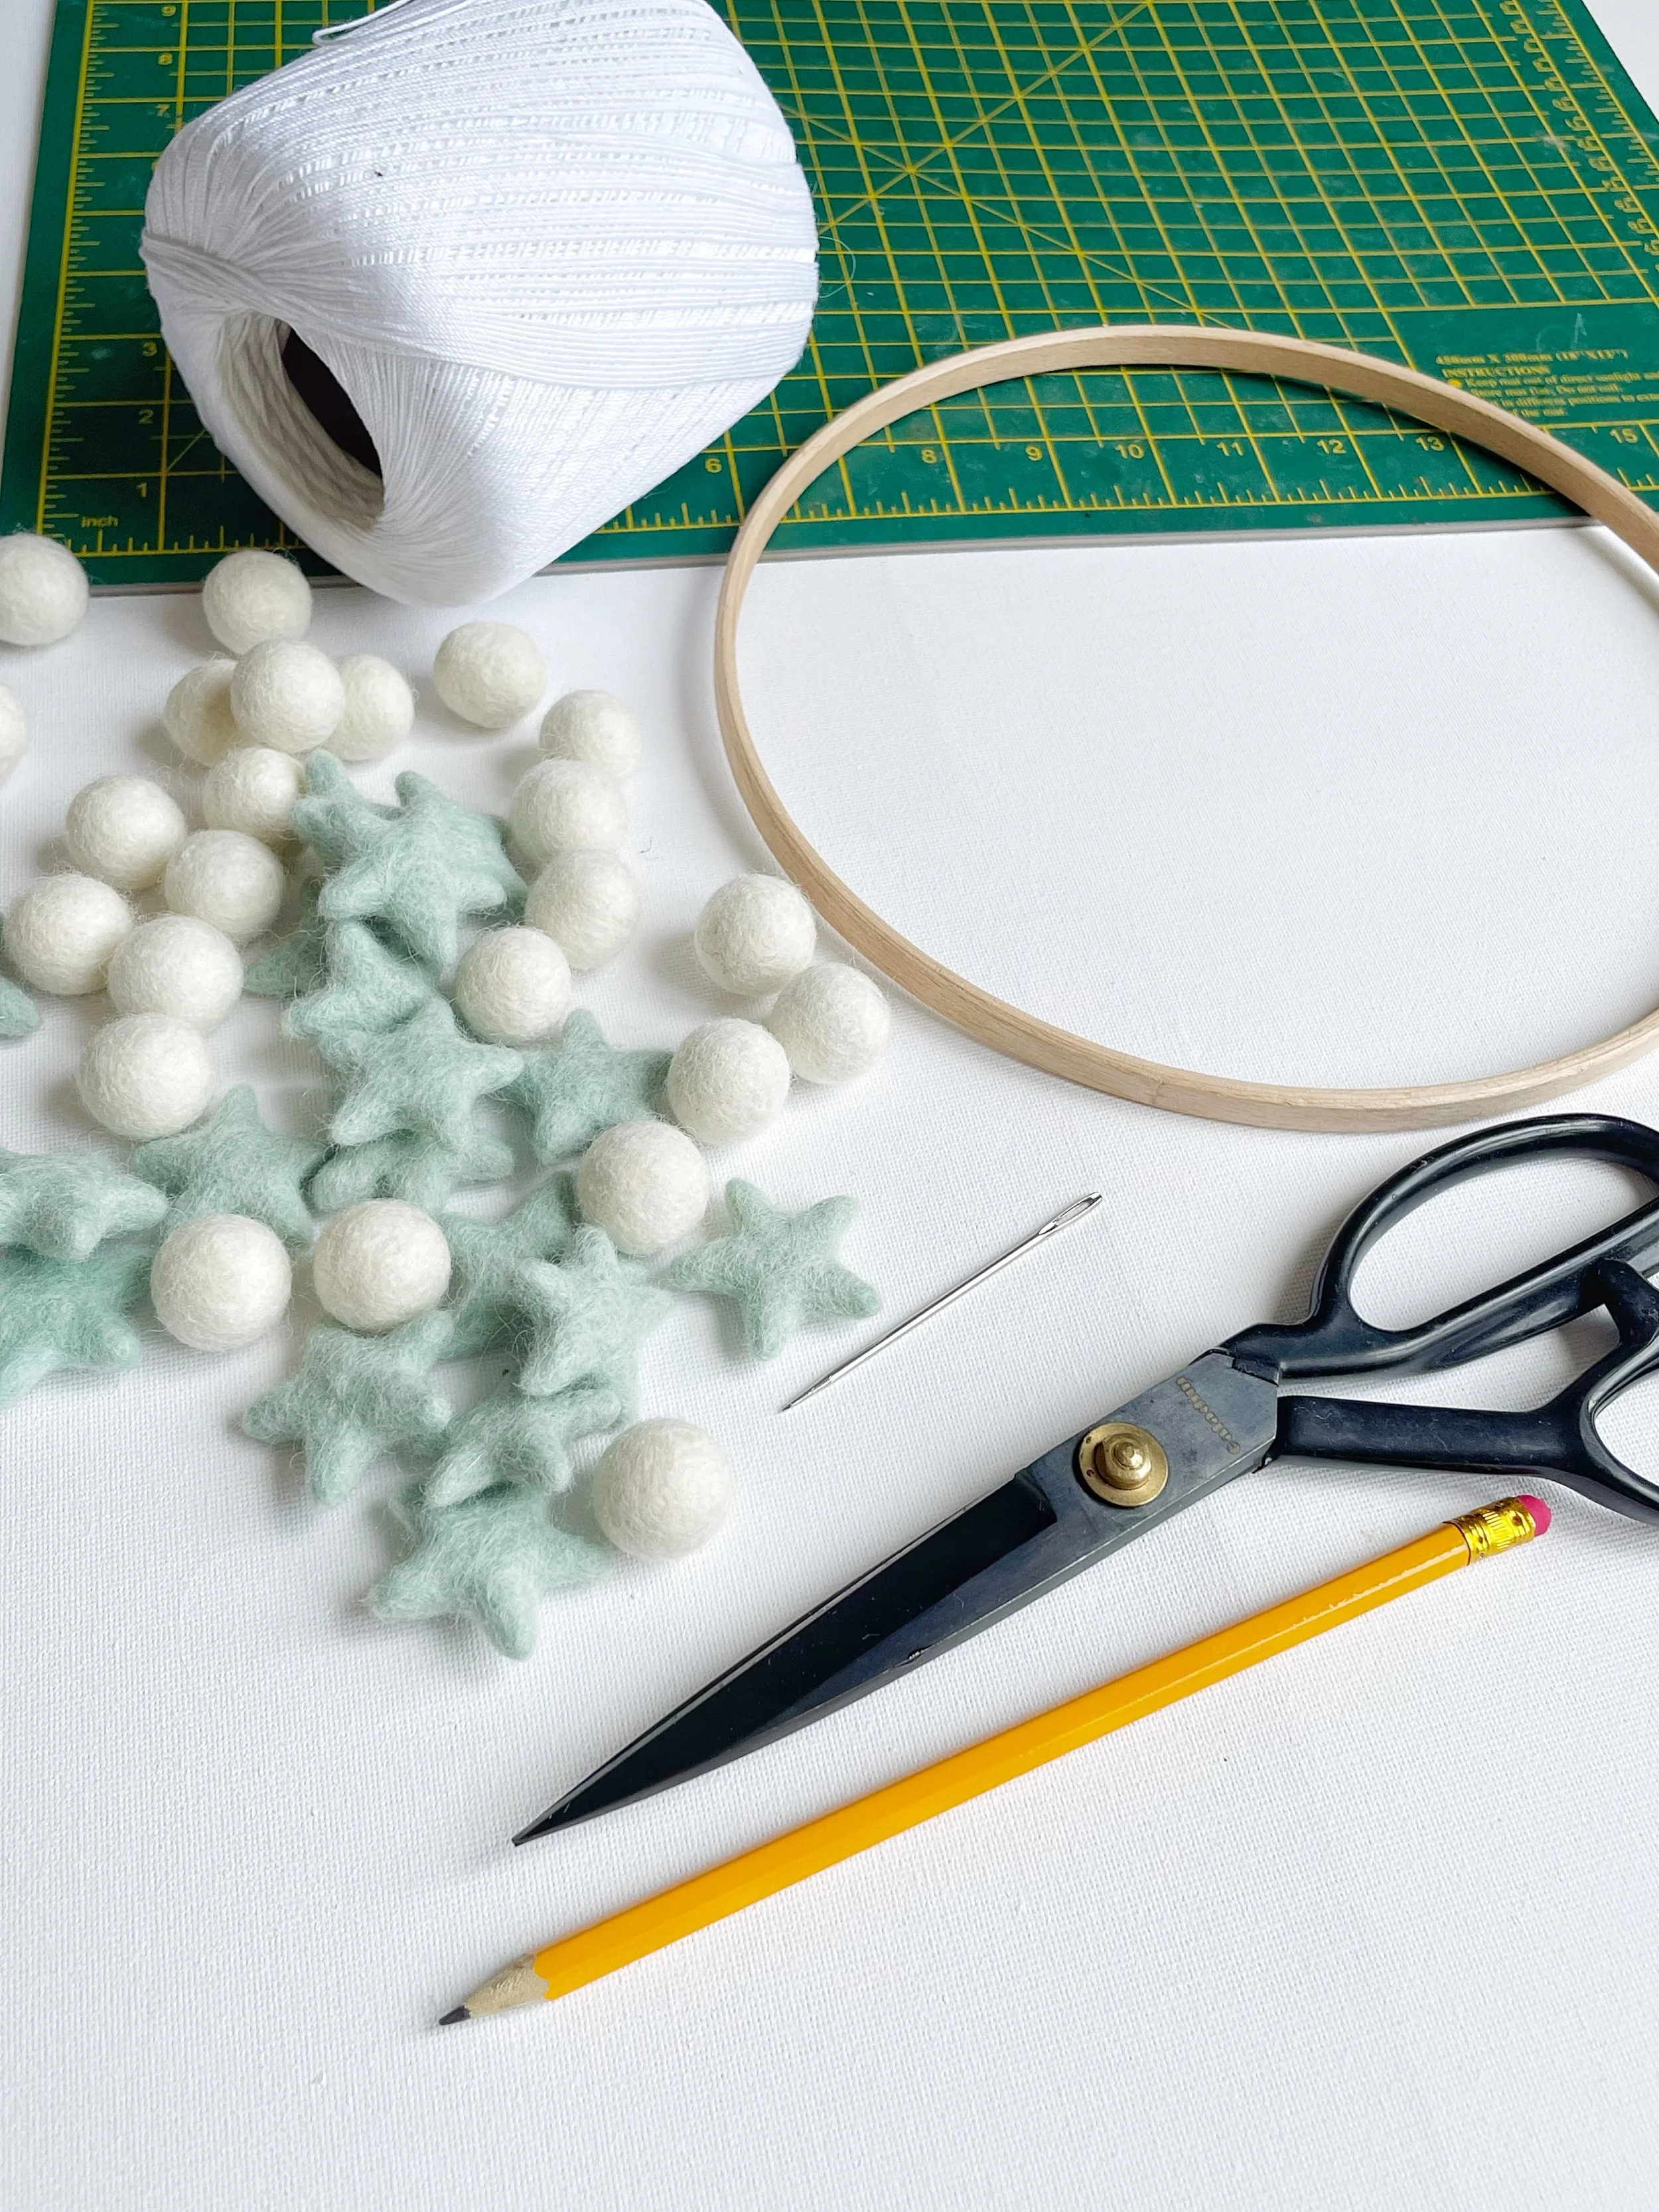
Felt balls - for this mobile I have used 29 felt balls and 28 felt stars. I have used 2cm felt balls.
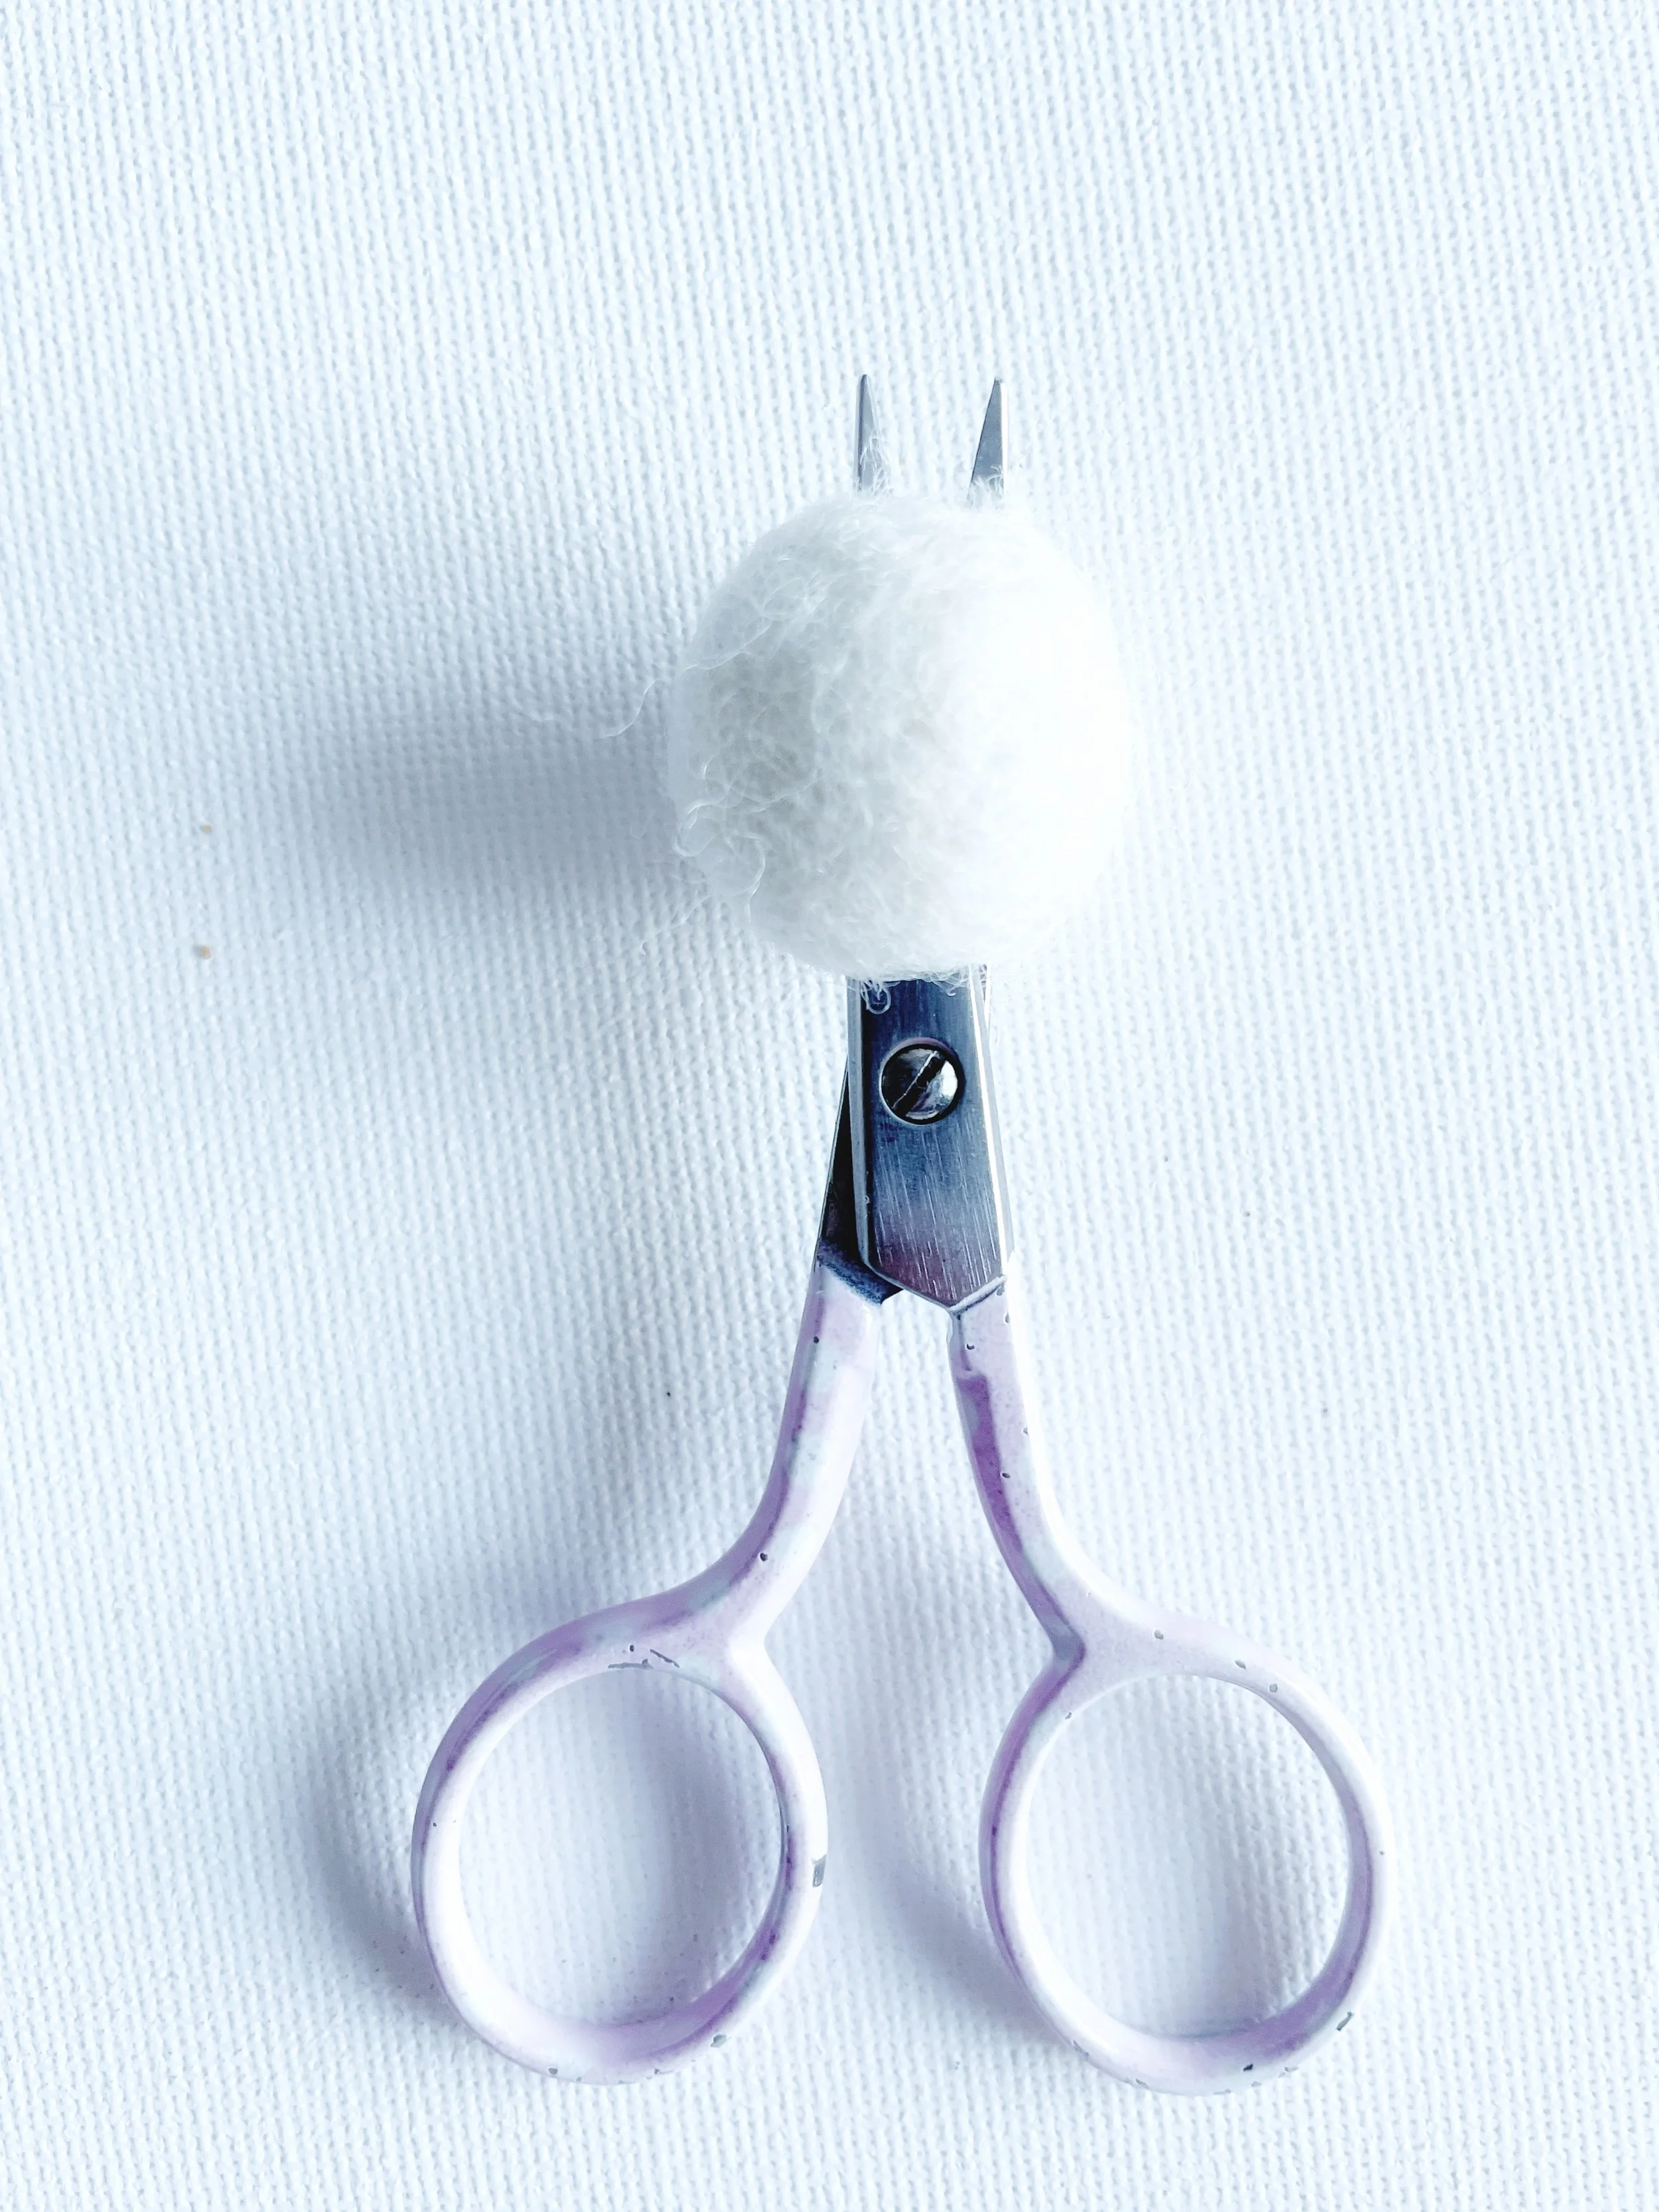
Scissors
Cutting mat - I’d really recommend using a cutting mat for this project. It makes getting the measurements nice and accurate so your spiral effect comes out beautifully.
You can use a tape measure if that’s all you have, but it’s definitely a bit more fiddly and takes longer. The cutting mat just makes everything so much easier, it’s definitely worth the small investment.
Tape measure
Large sewing needle - I have used a 7cm sewing needle.
Thread/string for hanging - I like to use Crochet thread size 10
Beech wood ring - I have used size 22cm/9"
Pencil & eraser
Measure and mark the beech hoop…
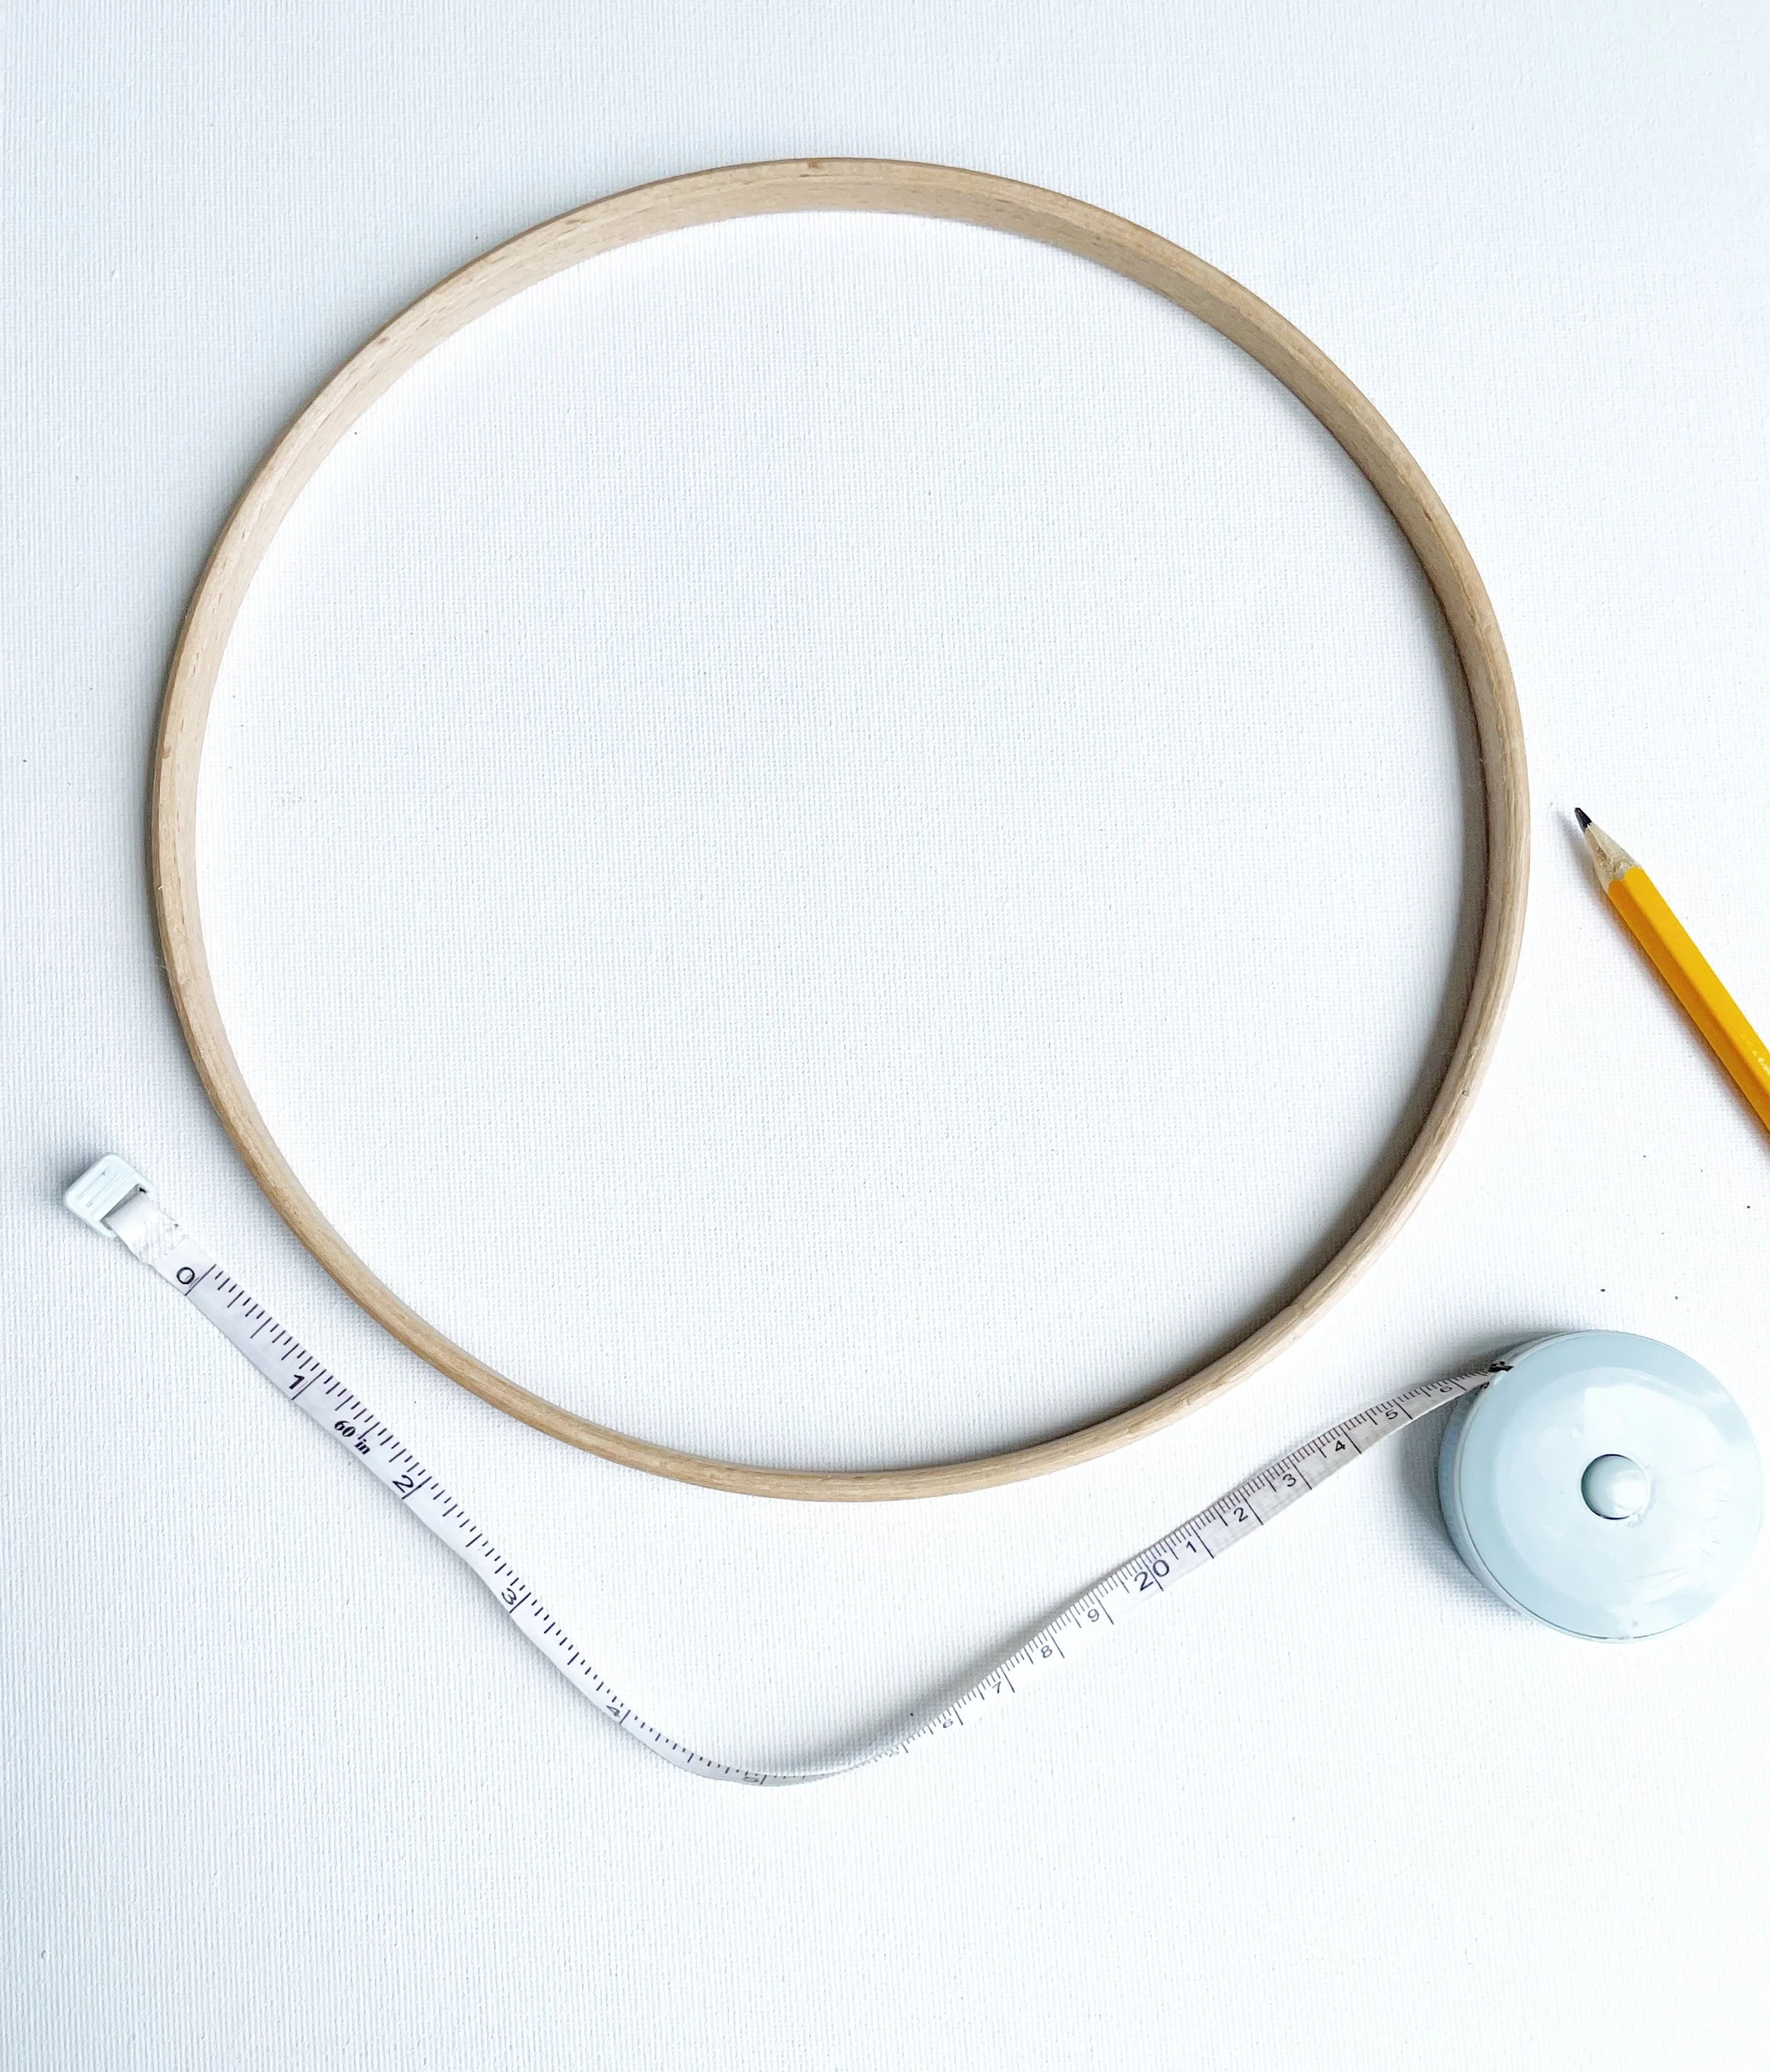
First things first, grab your pencil and mark out 14 evenly spaced points around your beech hoop. These little guide marks will show you exactly where each string will be attached.
If you’re working with a 22cm (9 inch) hoop, it works out to a mark about every 2 inches. Don’t stress if one of the gaps ends up just slightly over 2 inches, it won’t affect the look of your finished mobile at all.
Once everything is hanging, it will still look perfectly balanced and beautiful.
Add the string…
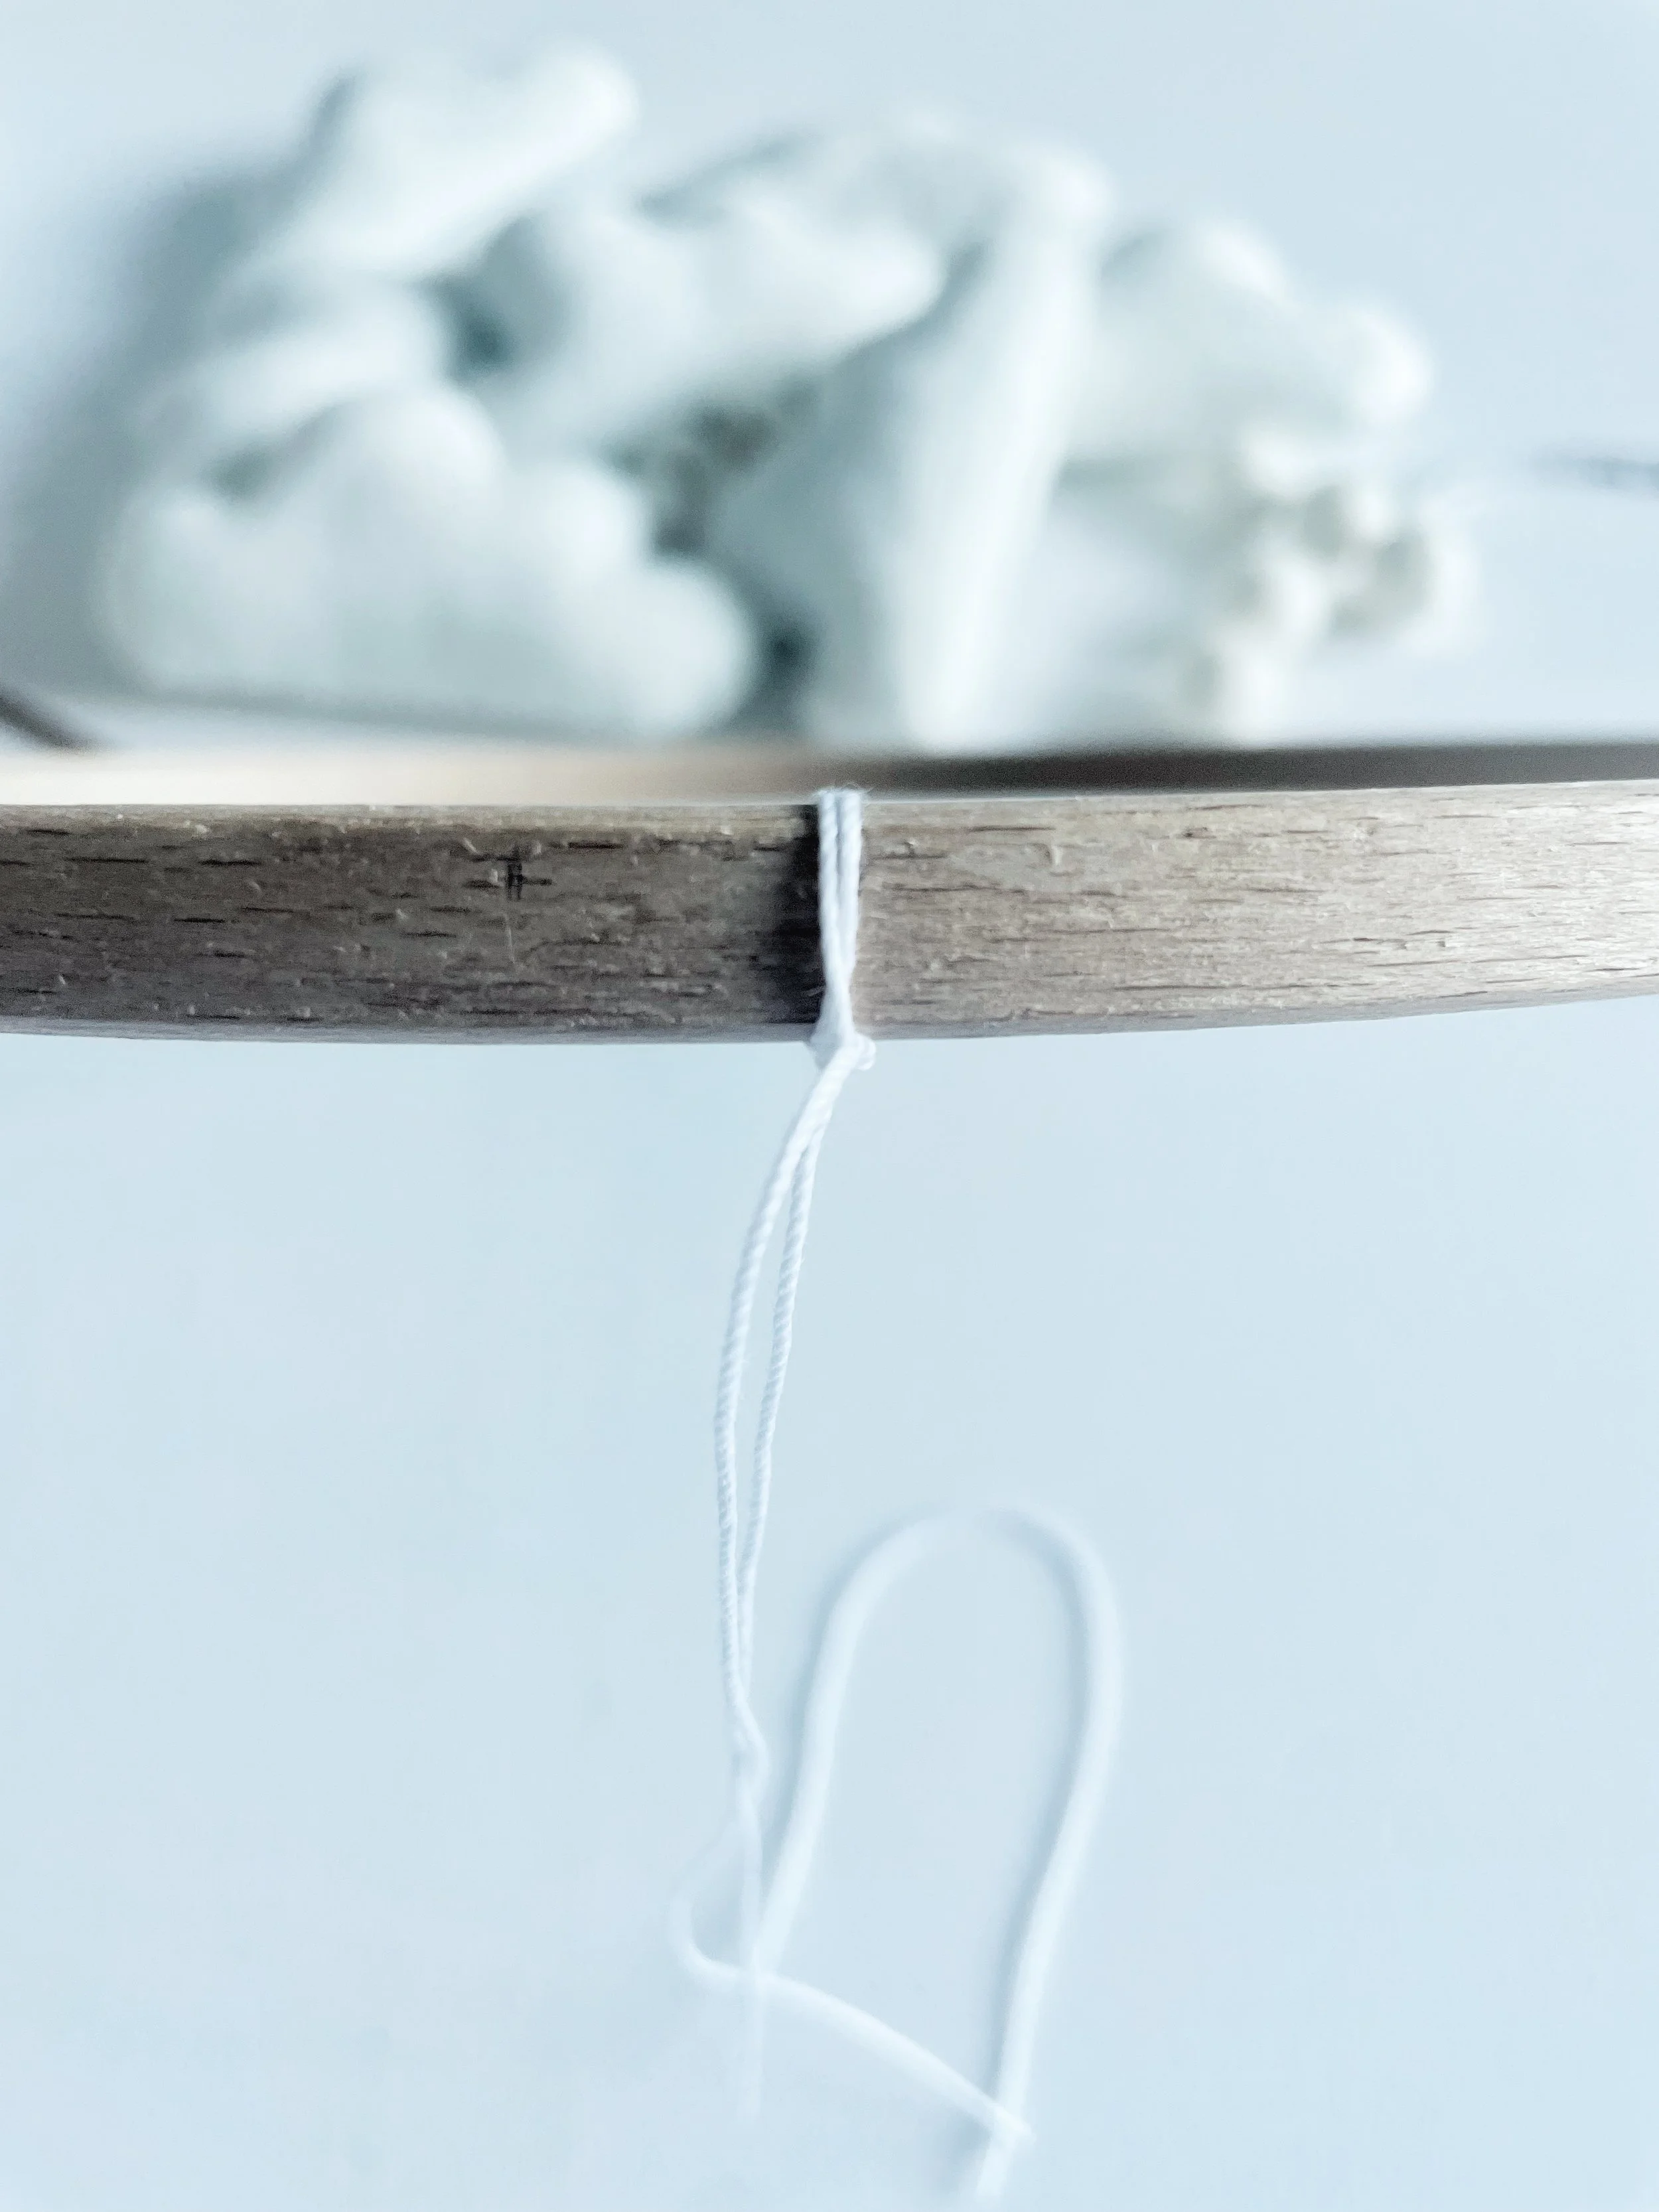
Cut 14 pieces of string, each about 60 inches long. Yes, that’s quite a lot of string! But starting long makes things so much easier, you’ll have plenty of length for your spiral, and you can always trim away the extra as you go along.
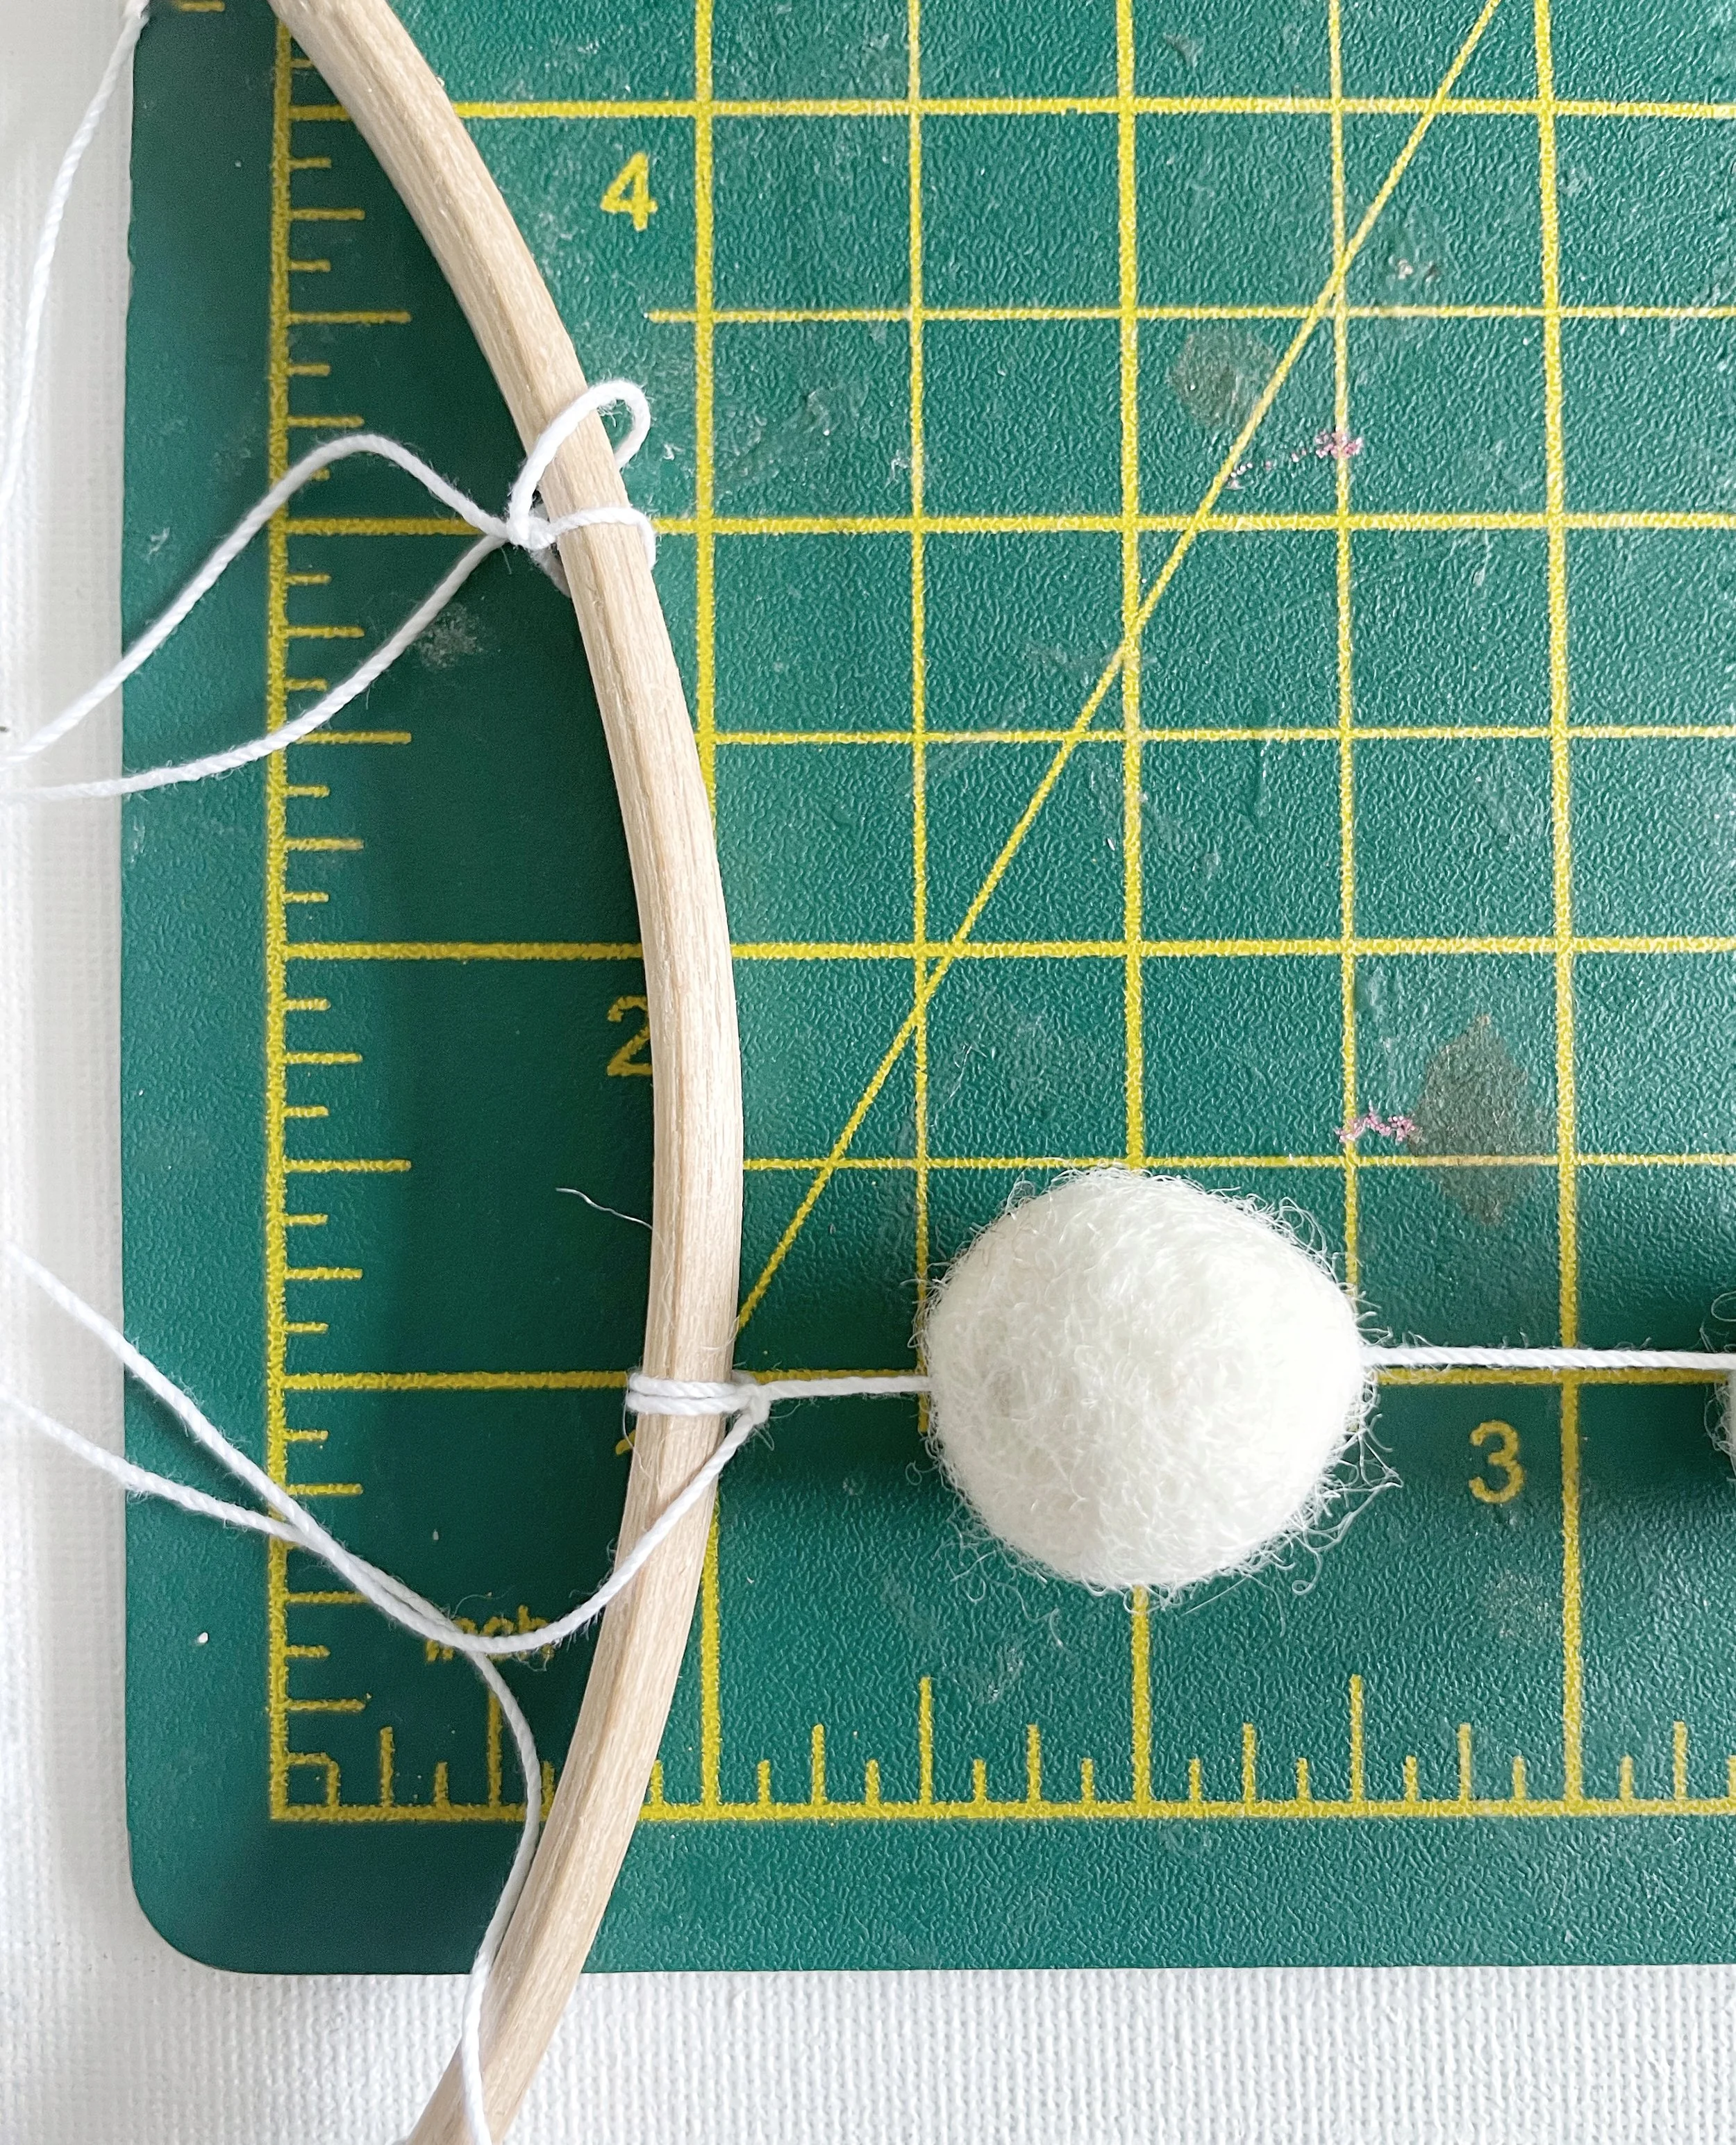
Take your first piece of string and fold it in half. Line up the fold with one of your pencil marks on the beech hoop so both ends hang down evenly, around 30 inches each.
Now, take one of the ends and loop it once around the hoop. Then, holding both ends together, tie a nice tight knot to secure it in place.
Don’t worry if it feels a little fiddly at first, you’ll quickly get into the rhythm, and before you know it, you’ll be knotting them on with ease.
Keep going, repeating this step with the rest of your strings until each pencil mark has its own little pair hanging down. This is the first step in bringing your spiral mobile to life!
Make a loop to hang your mobile…

Gather together fourteen strands of string and make sure they’re all positioned correctly. You’ll want the bottom lengths to hang smoothly around the outside of the hoop, while the top ends are all pulled upwards, gathering from the outside.
When everything looks even, gently gather the top ends together in your hand. Lift them up and tie them into one big, secure knot.
This knot will hold all your strings in place and give you a lovely central point to hang your mobile from.
It might take a little adjusting to get them sitting just right, but don’t worry, once tied, they’ll stay beautifully in place, and you’ll start to see your mobile really taking shape!
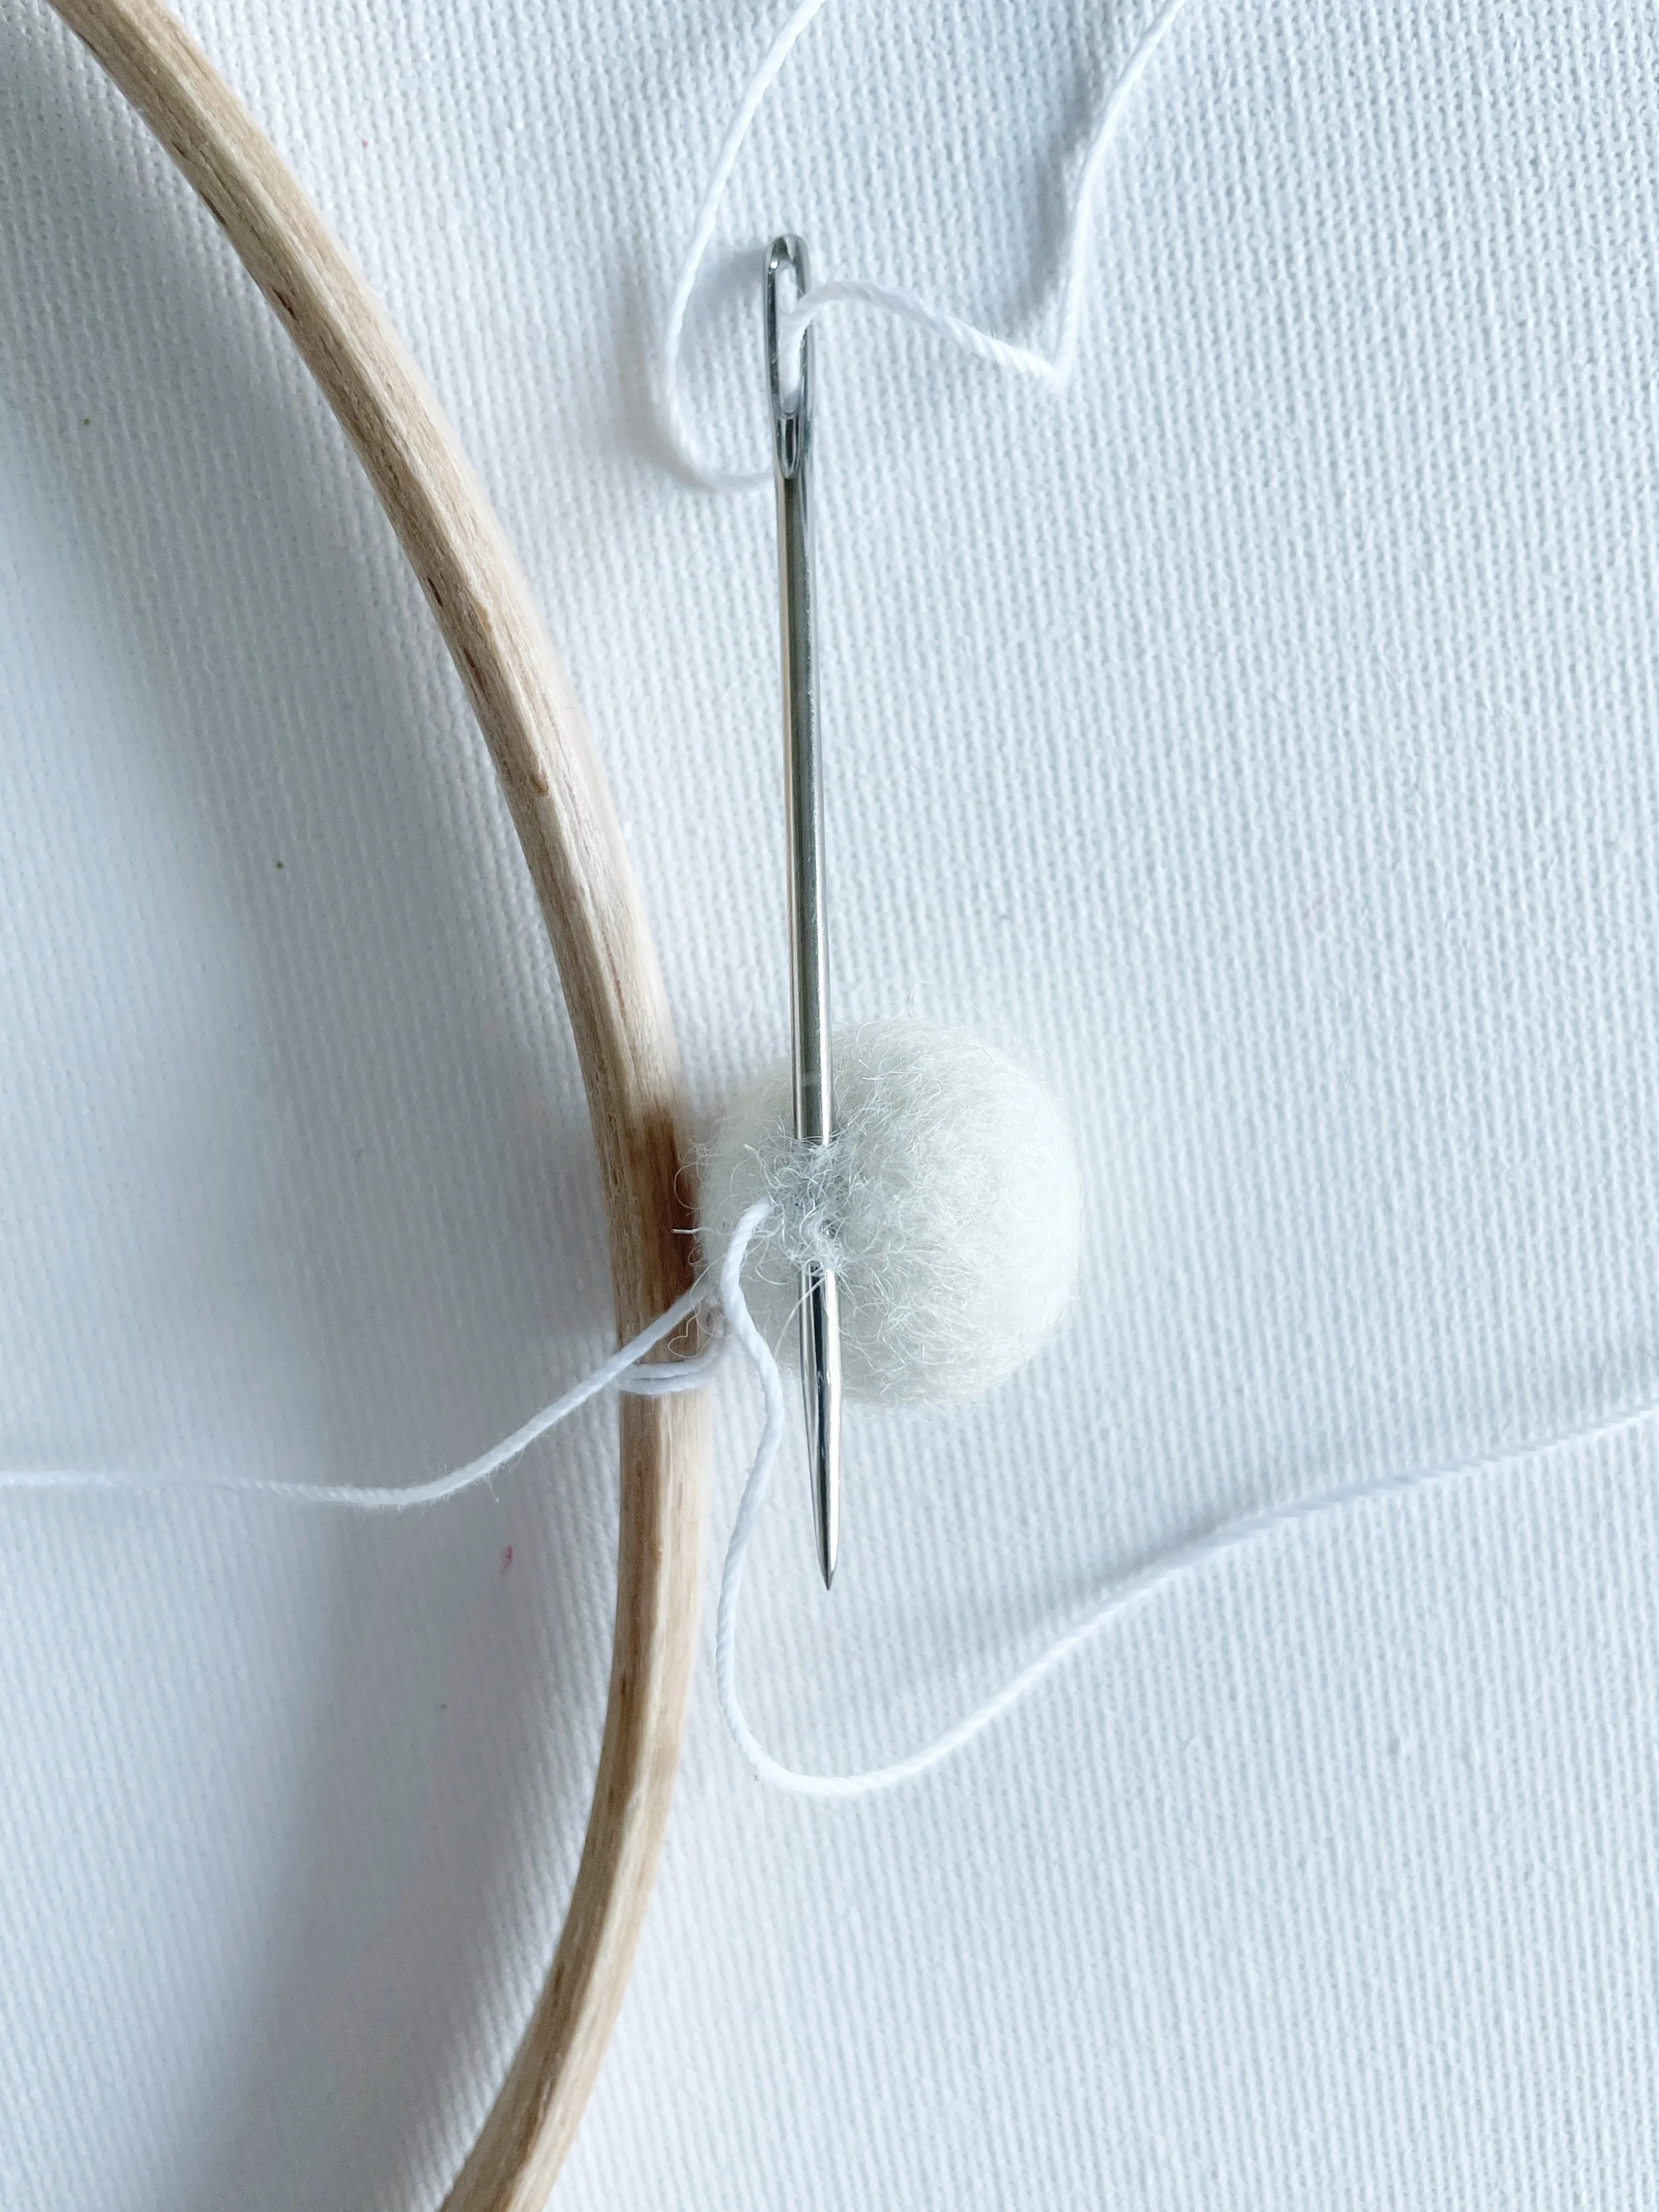
Now we’re going to use one of the felt balls to cover the knot we have just made.
Take your scissors and snip into the centre of the felt ball until your scissors come out the other end.
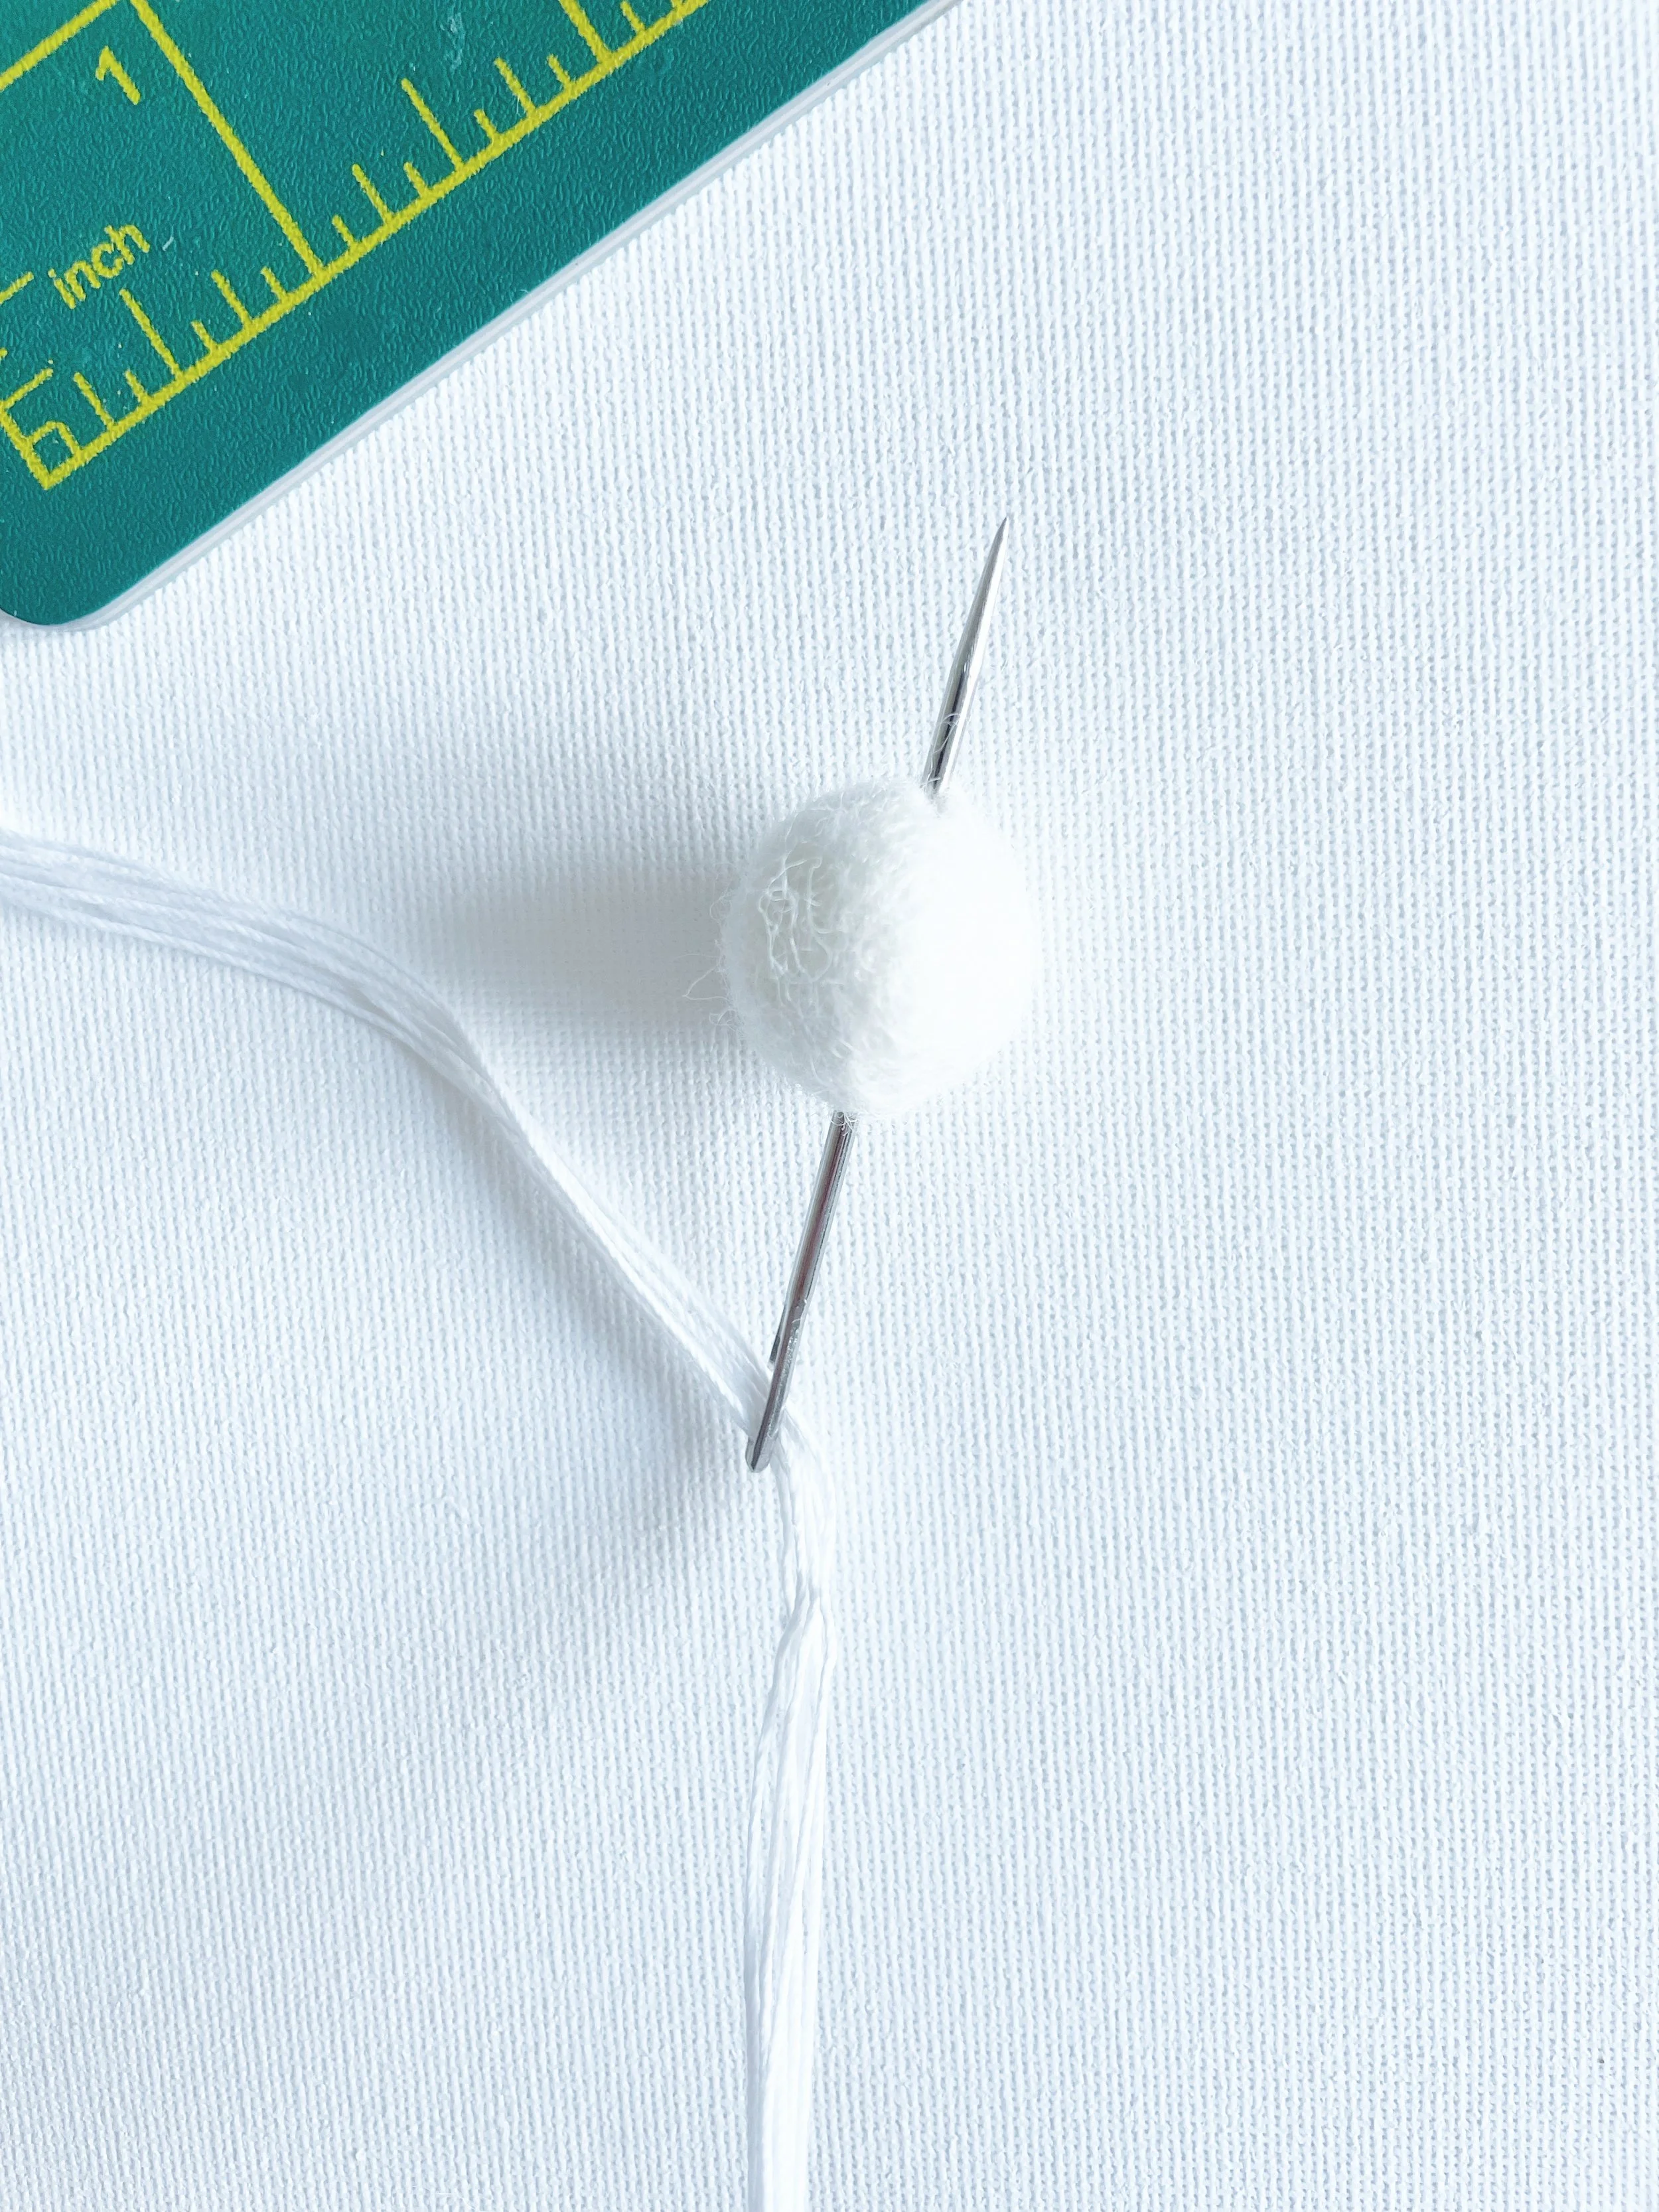
Take all 14 strands of string and thread them through your large needle. This part can be a little fiddly, so take your time and don’t get discouraged, they will go through.
A little patience here makes all the difference.
Once your strings are threaded, carefully slide the felt ball onto the strands. Gently ease it down until it sits snugly over the knot.
Push the felt ball down the thread until it completely covers the knot.
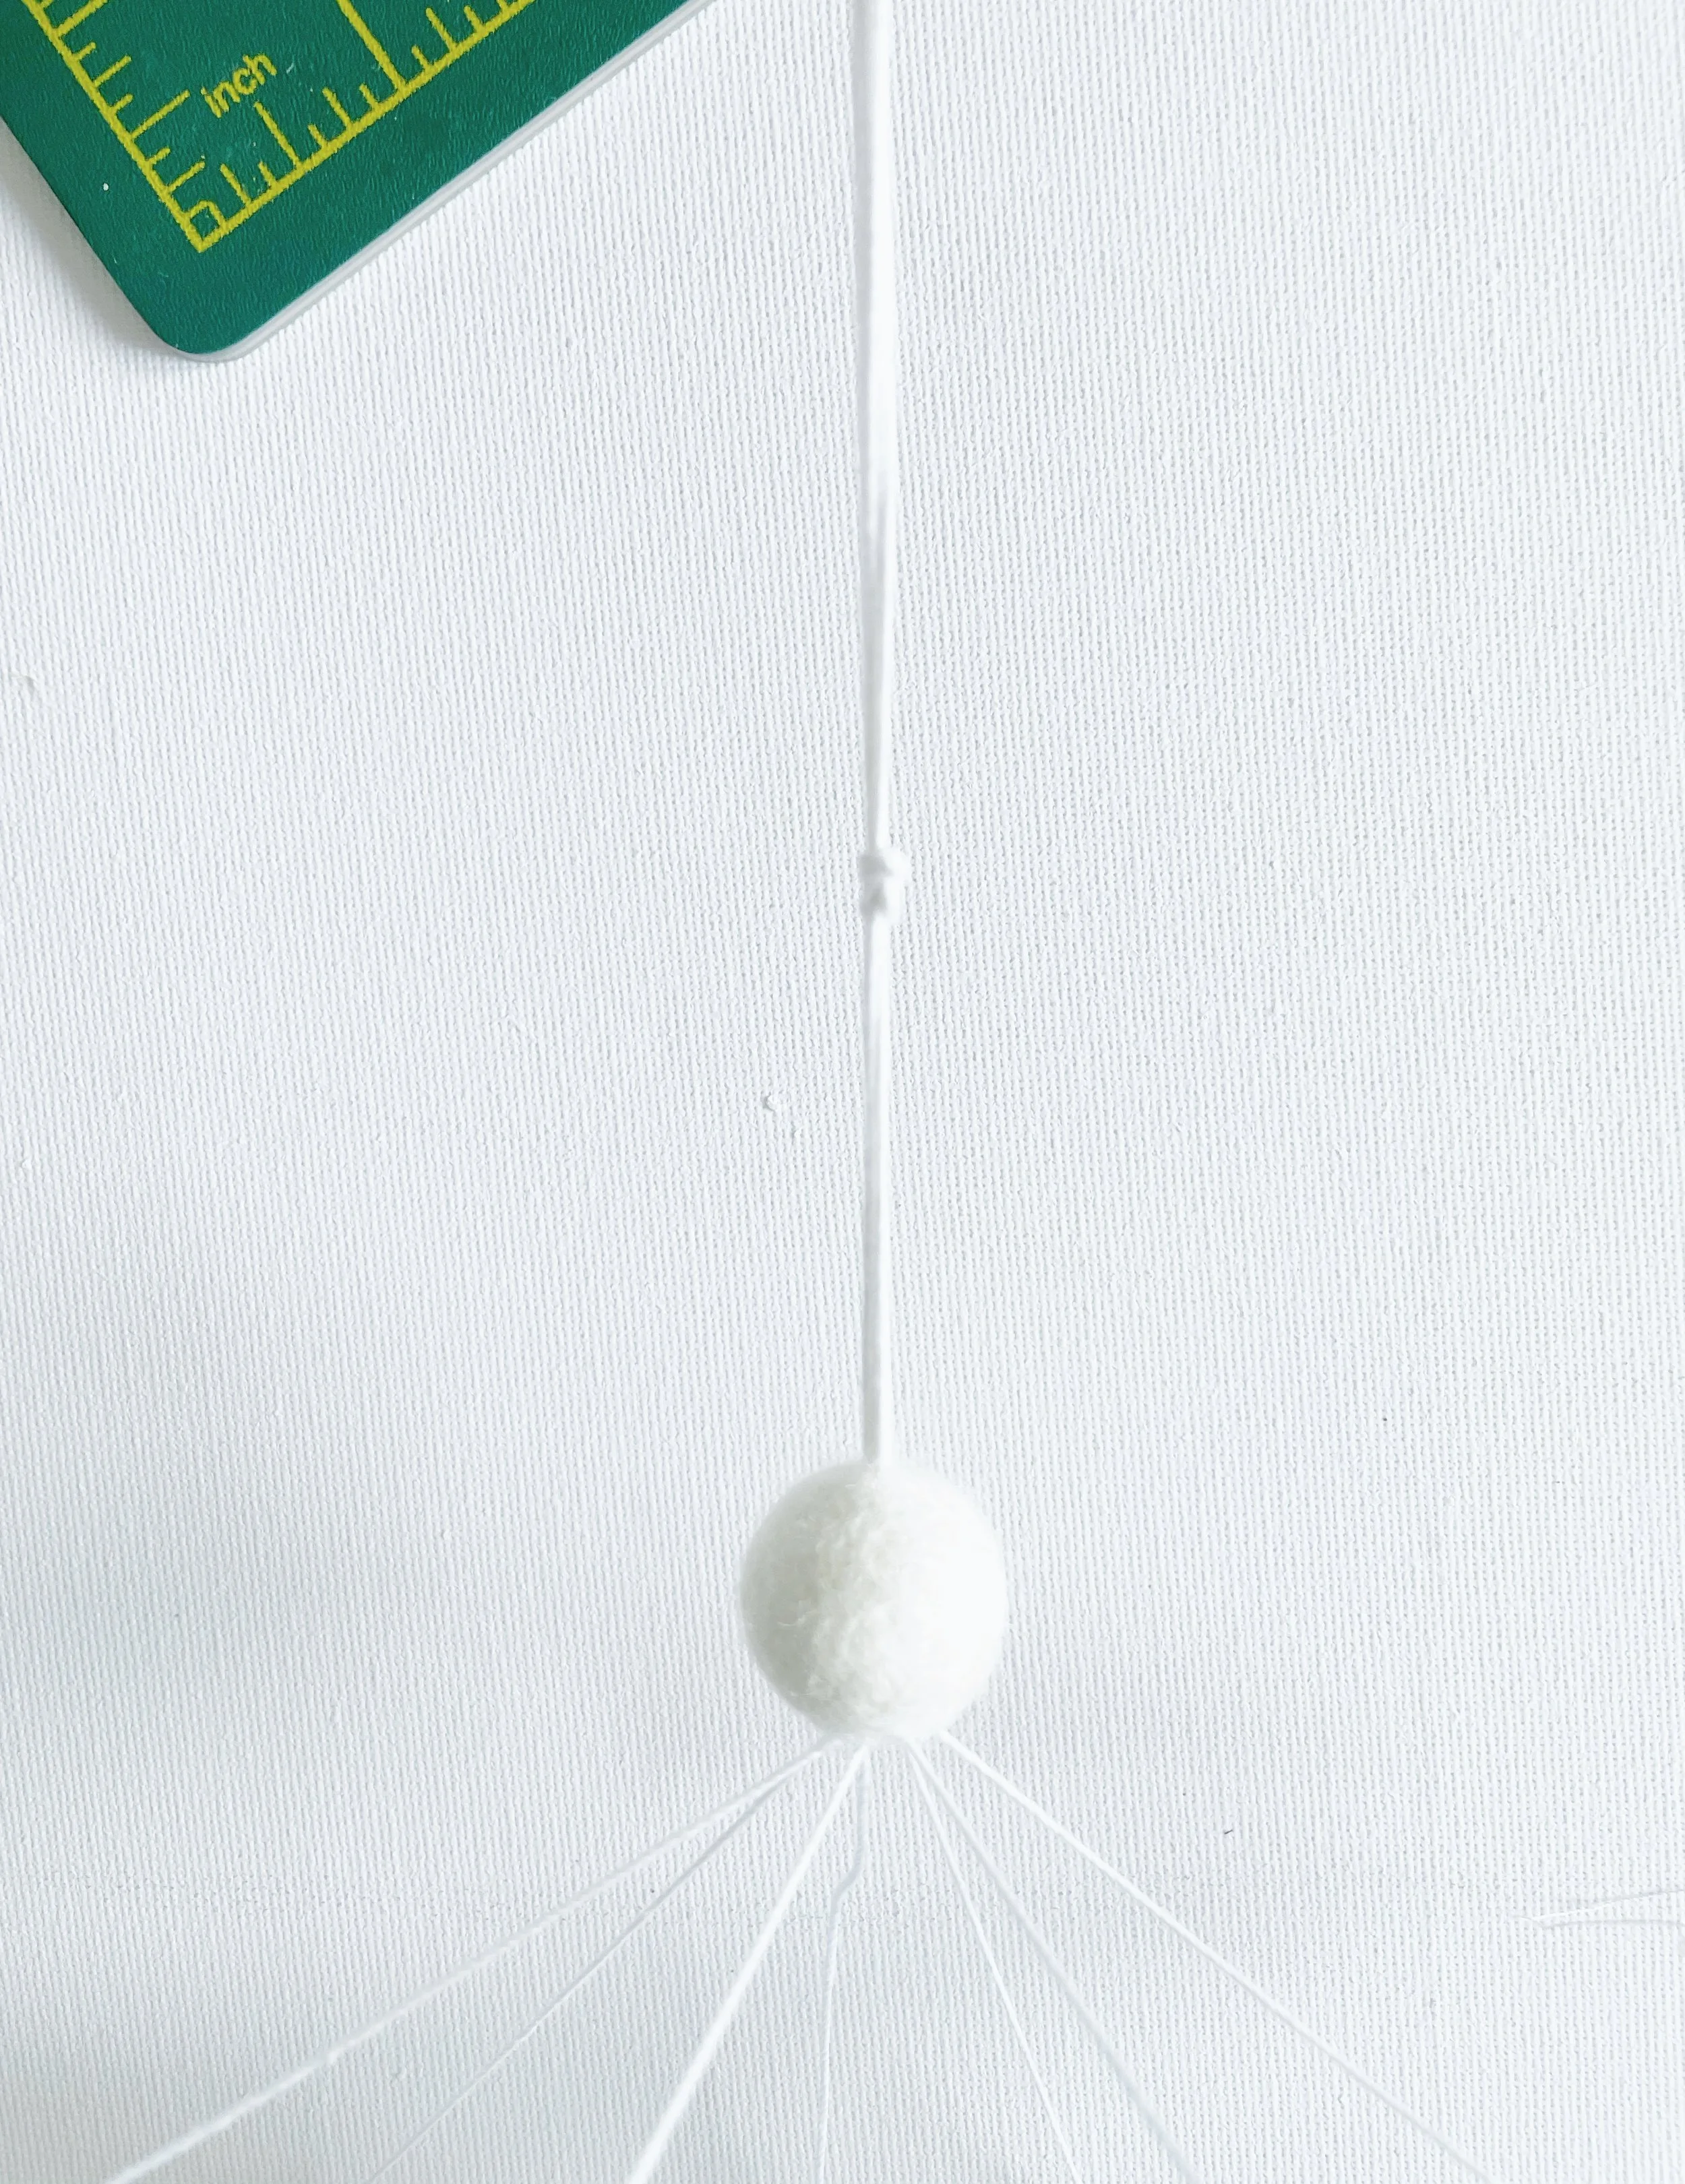
Next, tie a second knot in the strands about 1–2 inches above your felt ball. Give it a good, firm pull so it feels nice and secure.
This knot needs to be secure as it will make the loop that you will use to hang your mobile.
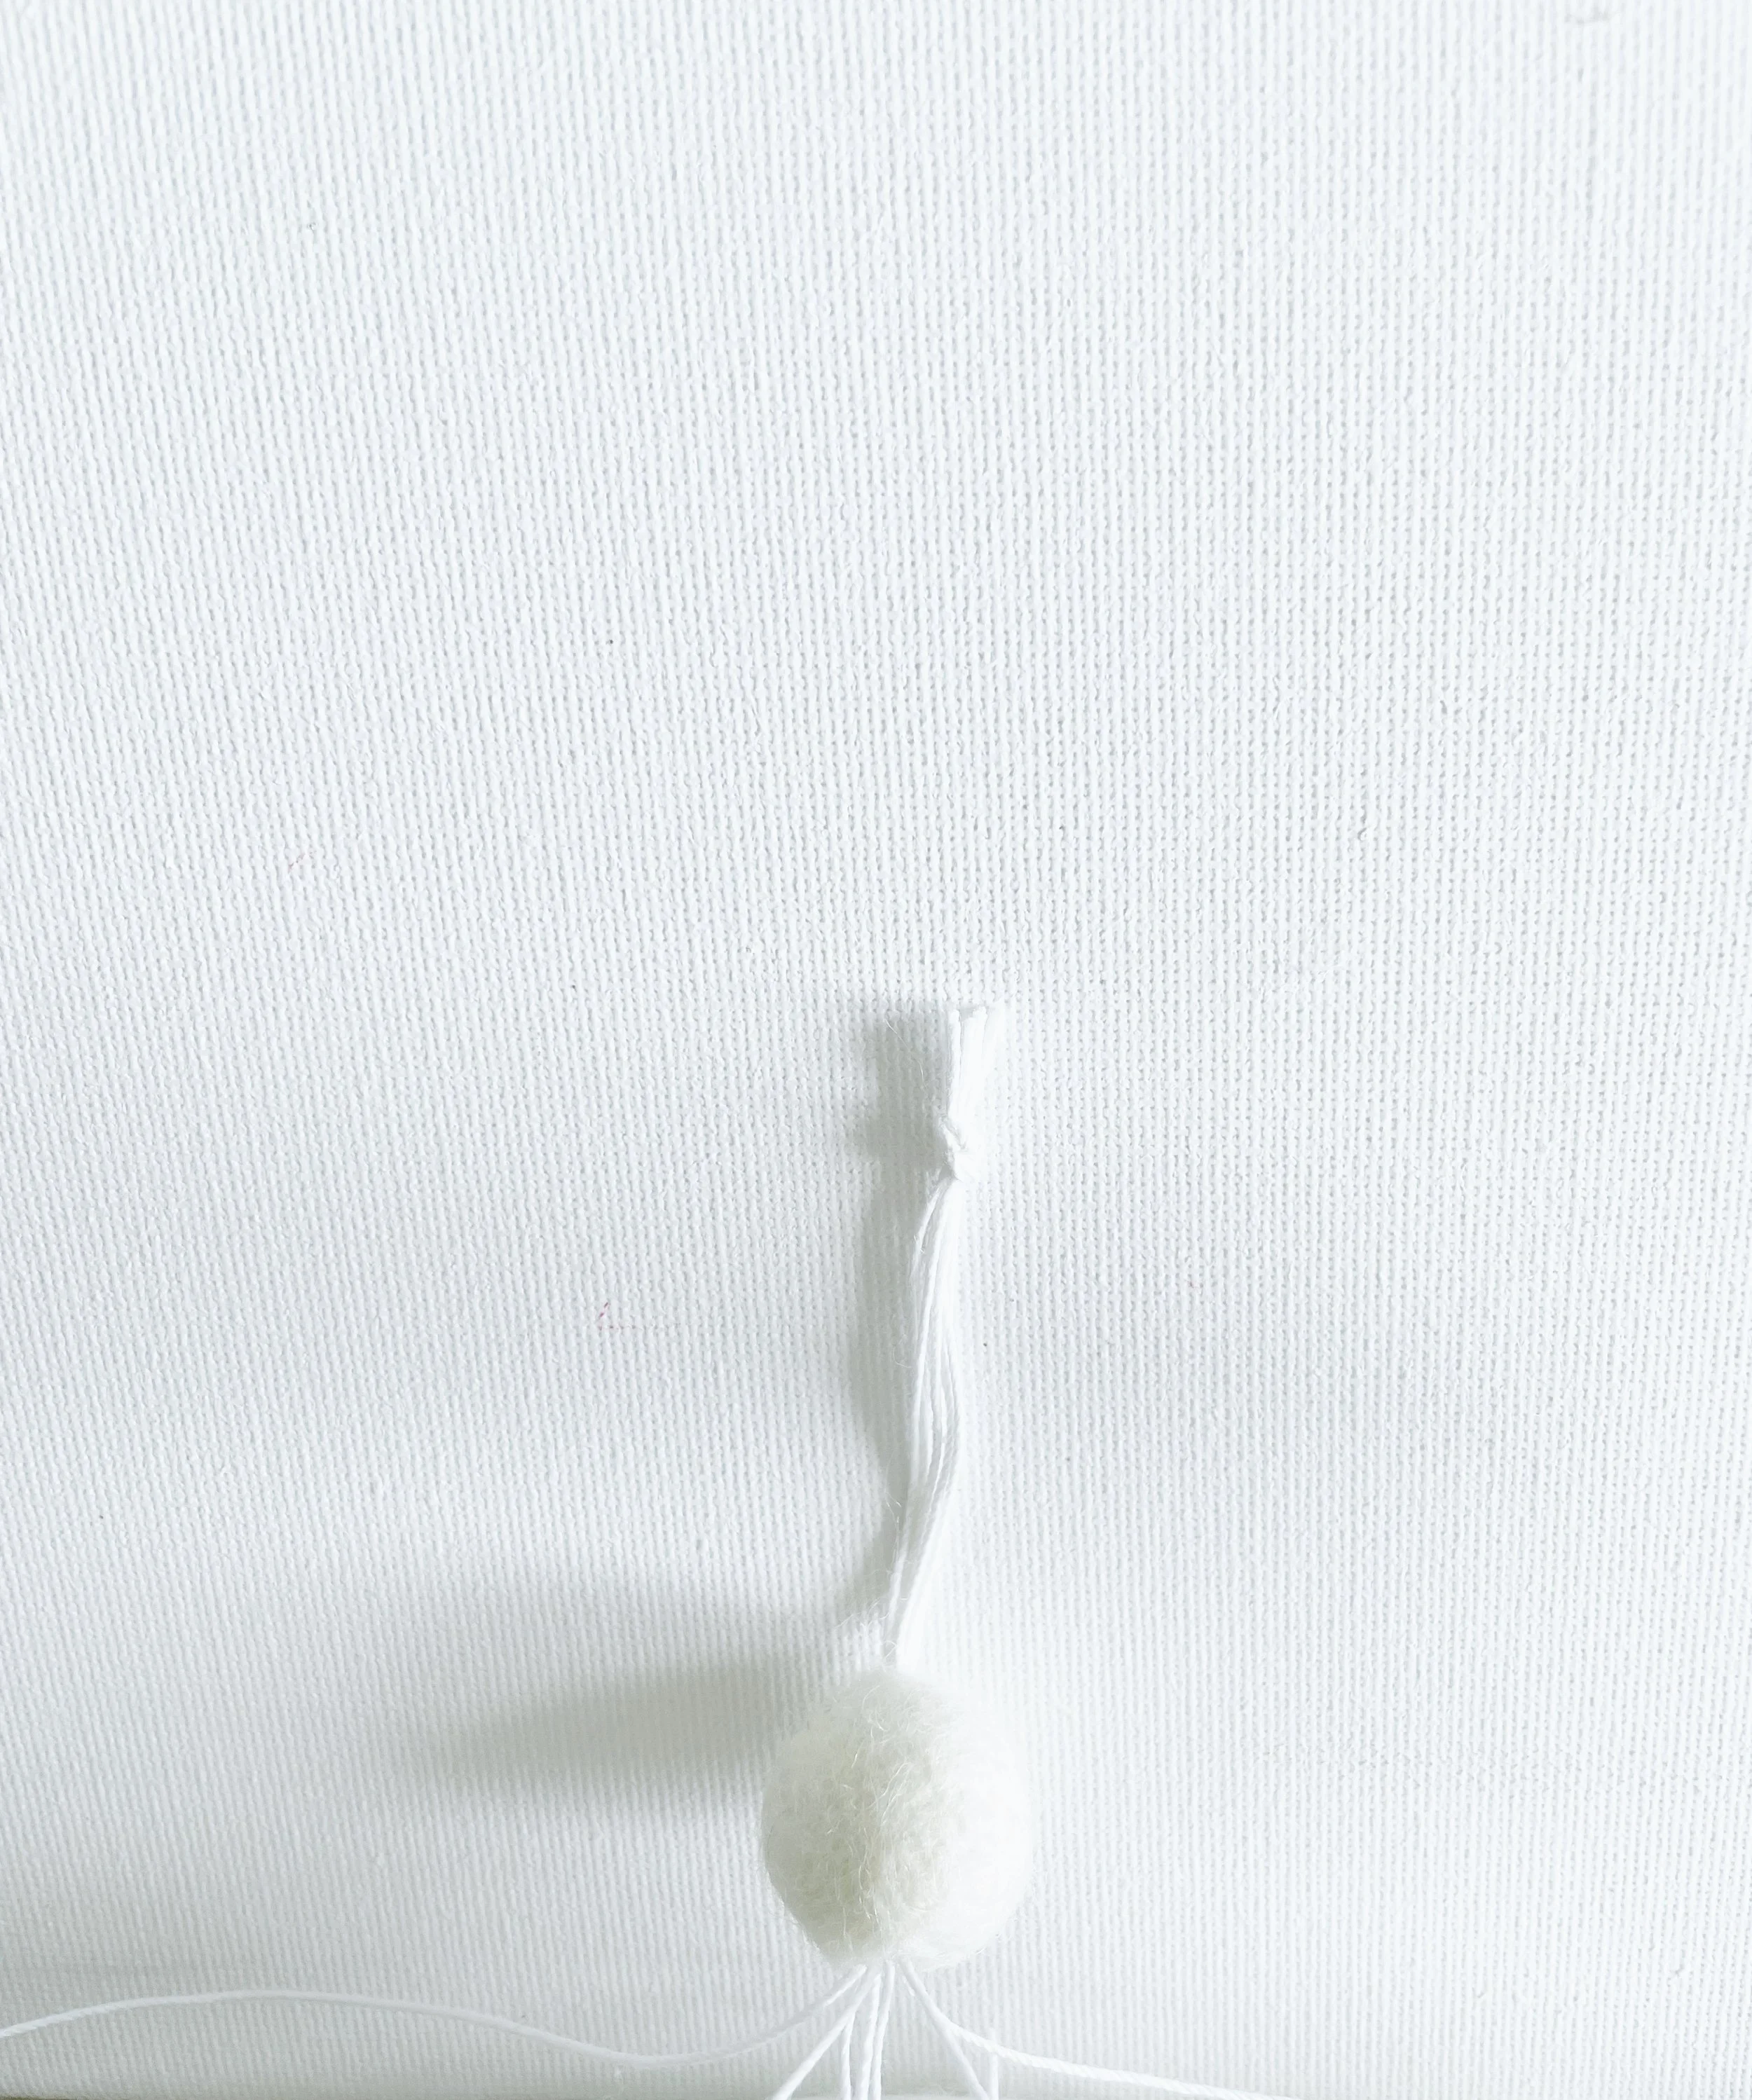
Once you’re happy that it’s secure, trim away the excess thread above the knot with your scissors. Just be sure to leave a little extra length above the knot (like in the photo above), so it stays neat and strong.
And there you have it, you’ve just created the loop for hanging your beautiful nursery mobile!
Time to attach the stars and felt balls…
This is the part where your mobile really starts to take shape, it just takes a little focus. Don’t worry though, it’s not tricky at all.
Once you get into the swing of it, the process feels easy and even quite calming.
To create that dreamy spiral effect, you’ll want to stagger the first felt ball on each string. Place the first one at 0.5 inch, the next at 1 inch, the third at 1.5 inches, and continue in that pattern.
This simple little step is what gives your mobile its soft, cascading swirl.
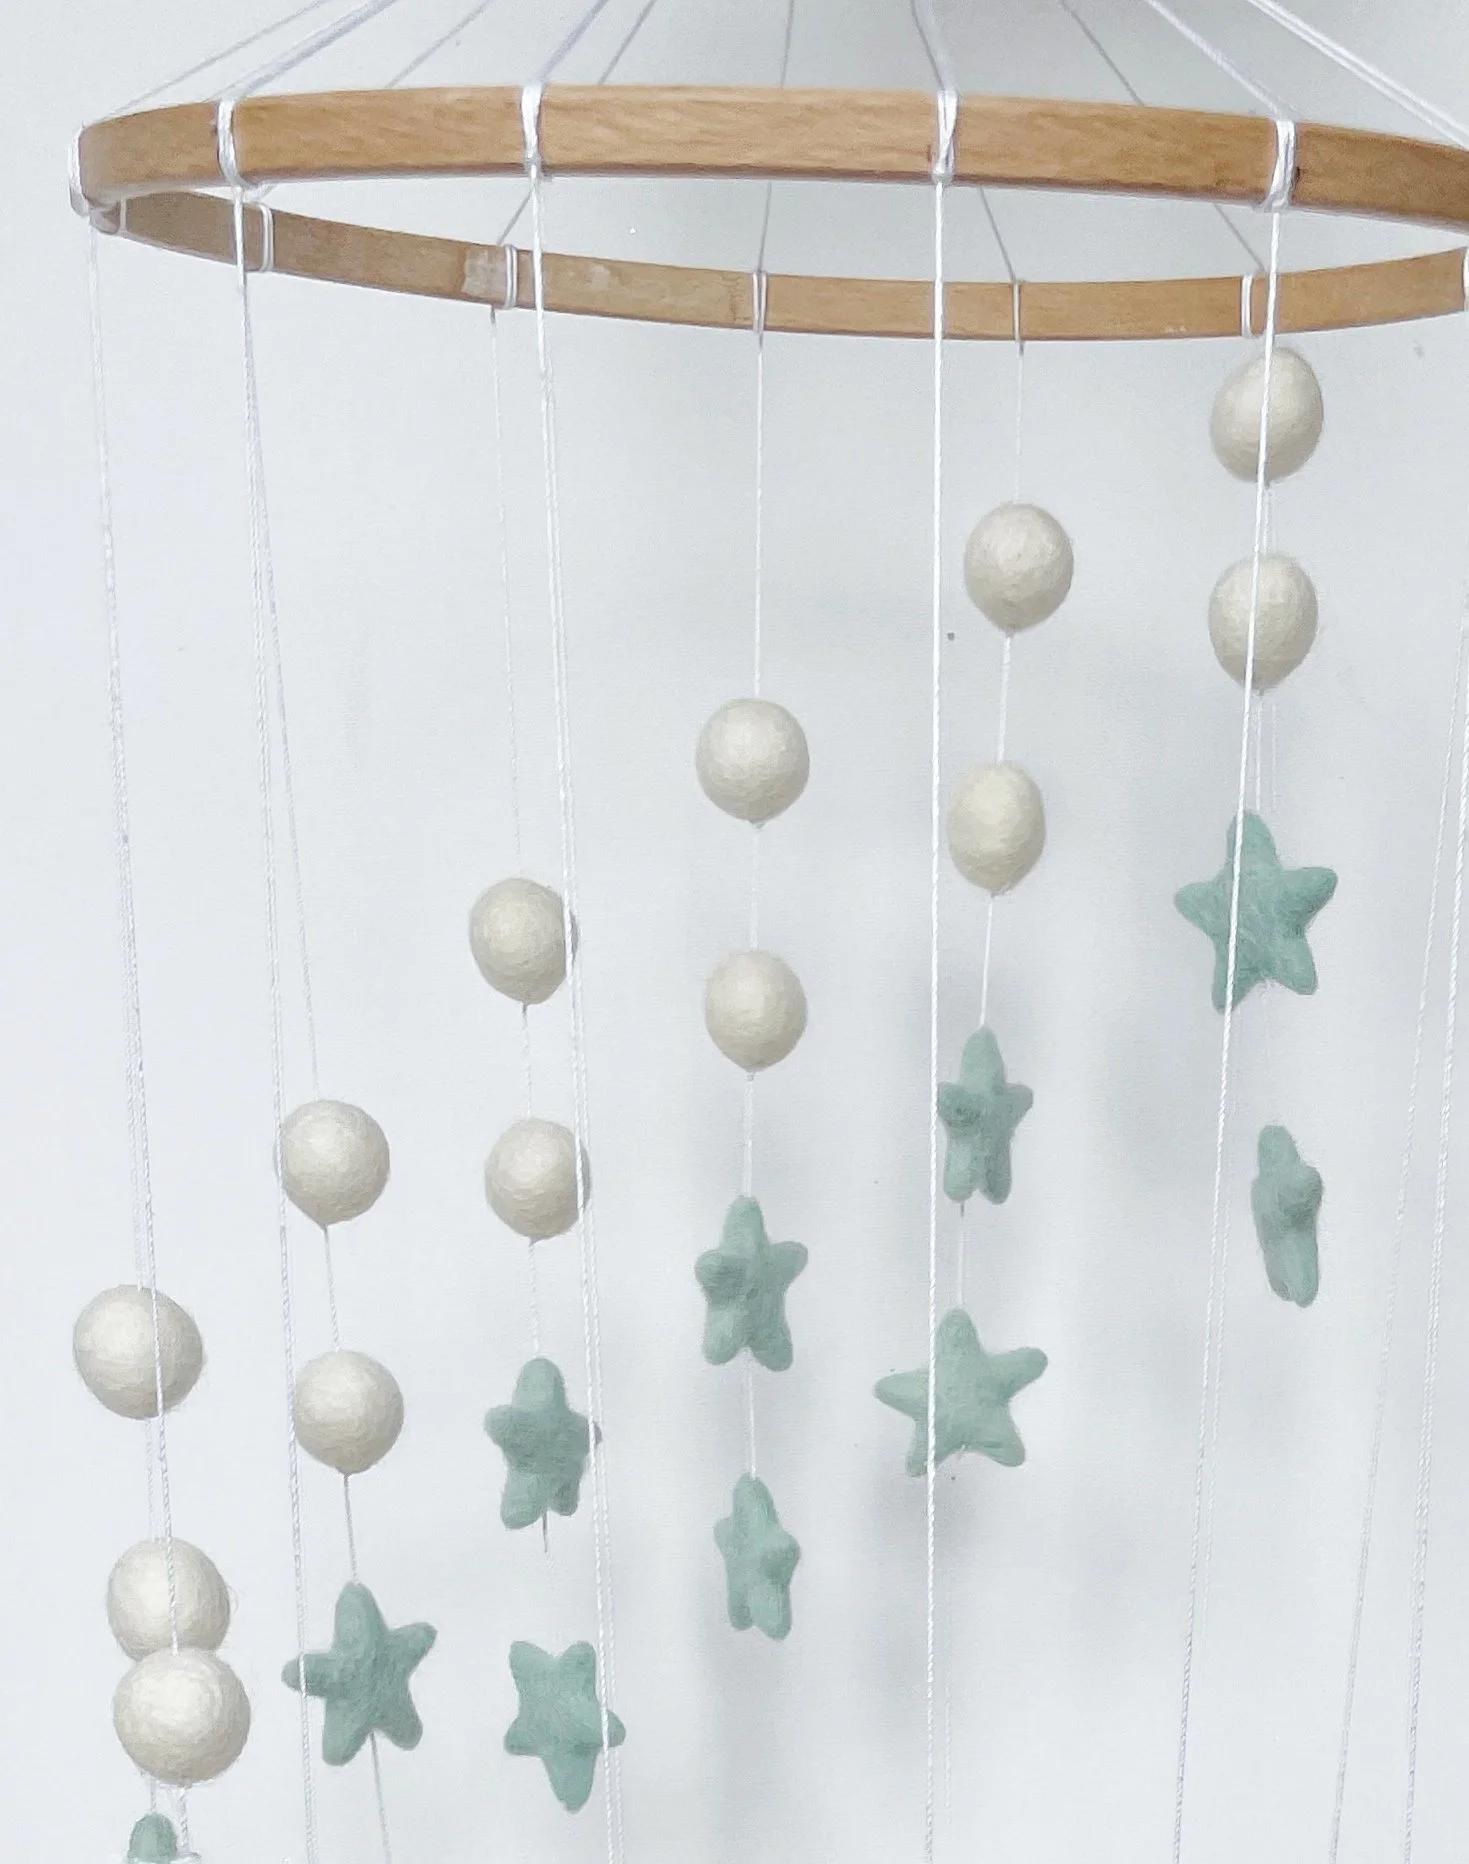
As you can see in the picture above, the spiral effect comes from staggering the first felt ball on each string just 0.5 inch lower than the one before. It’s a simple little trick, but it works like magic to create a beautiful spiral.
Ready to try it yourself? Let’s get started!
Thread your large needle with one of the strands of string, then gently slide the felt ball onto the string. It can be a little fiddly getting the needle all the way through, so don’t worry if it takes a moment.
Here’s a handy little trick: stand the blunt end of your needle on your cutting mat (or any hard surface), then gently press the felt ball down onto the needle with your fingers. This way you’ve got more control, and the ball will slide on much more easily.
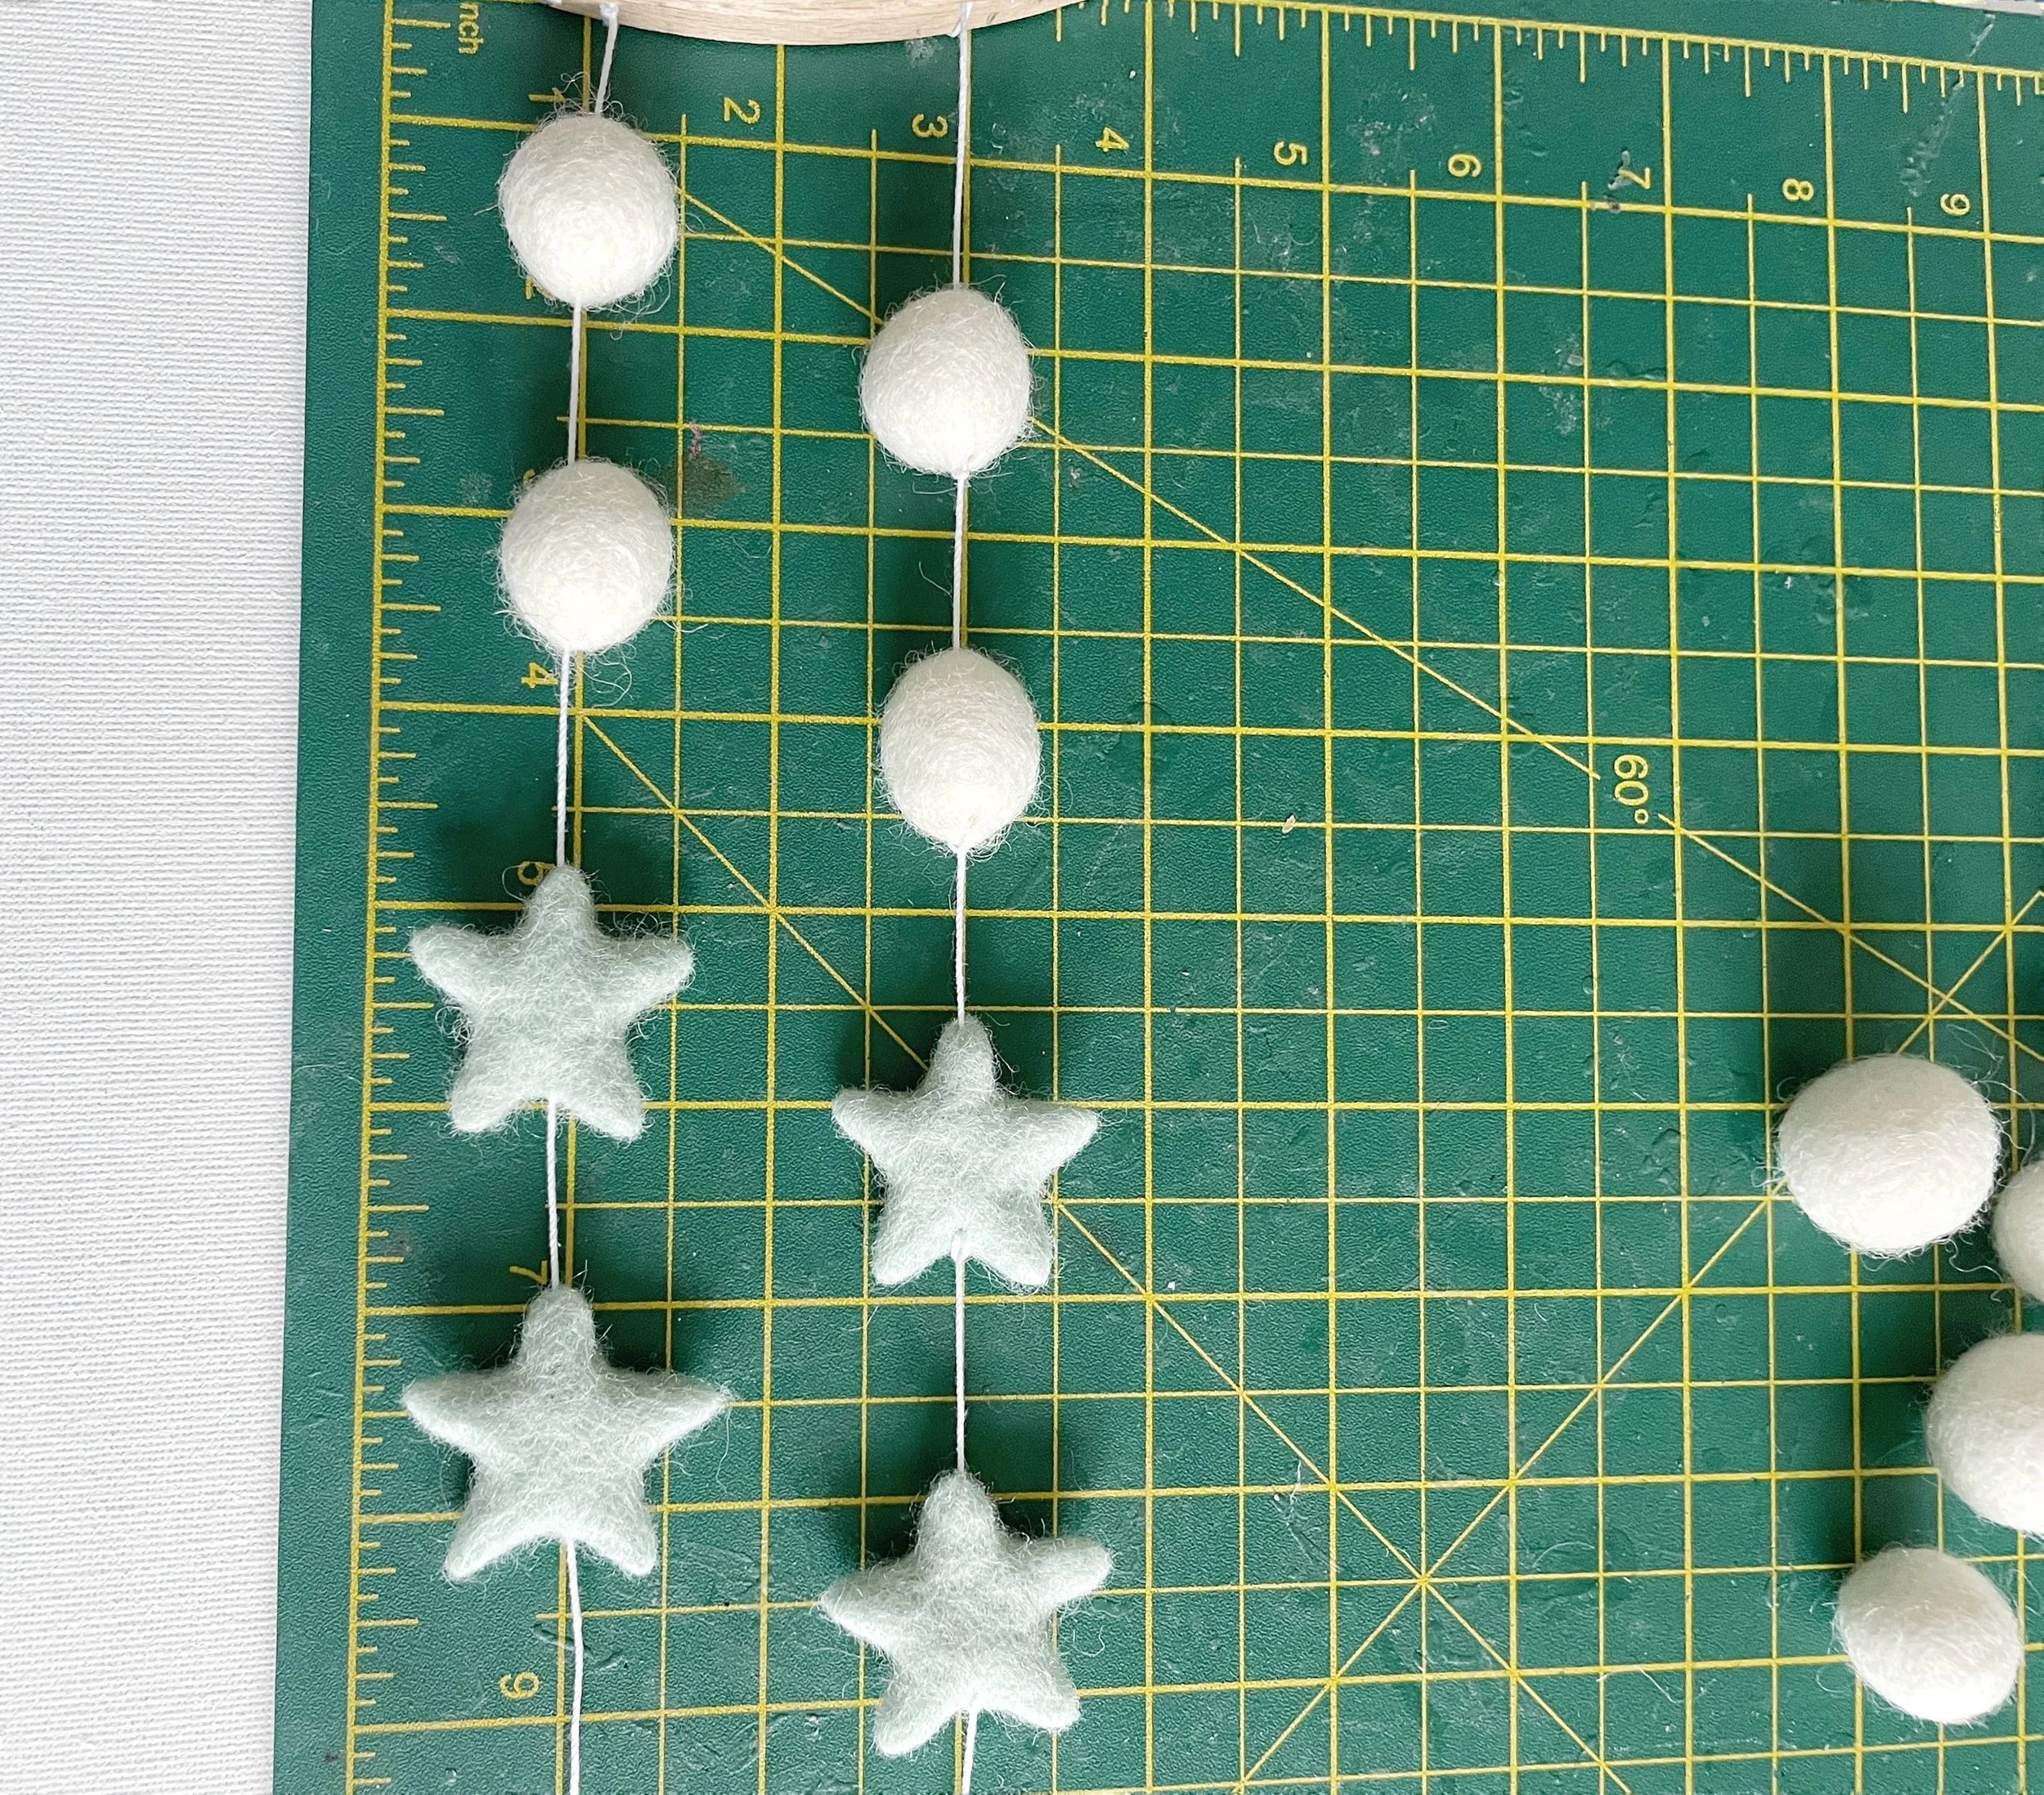
Next, place your wooden hoop at the 1-inch mark on your cutting mat (You can refer to the picture above for a visual!). Slide the felt ball down the string until it sits 0.5 inch below the top of the wooden hoop.
To keep it secure, use your needle to tie a neat little knot at the base of the ball. Now your first piece is in place, well done!
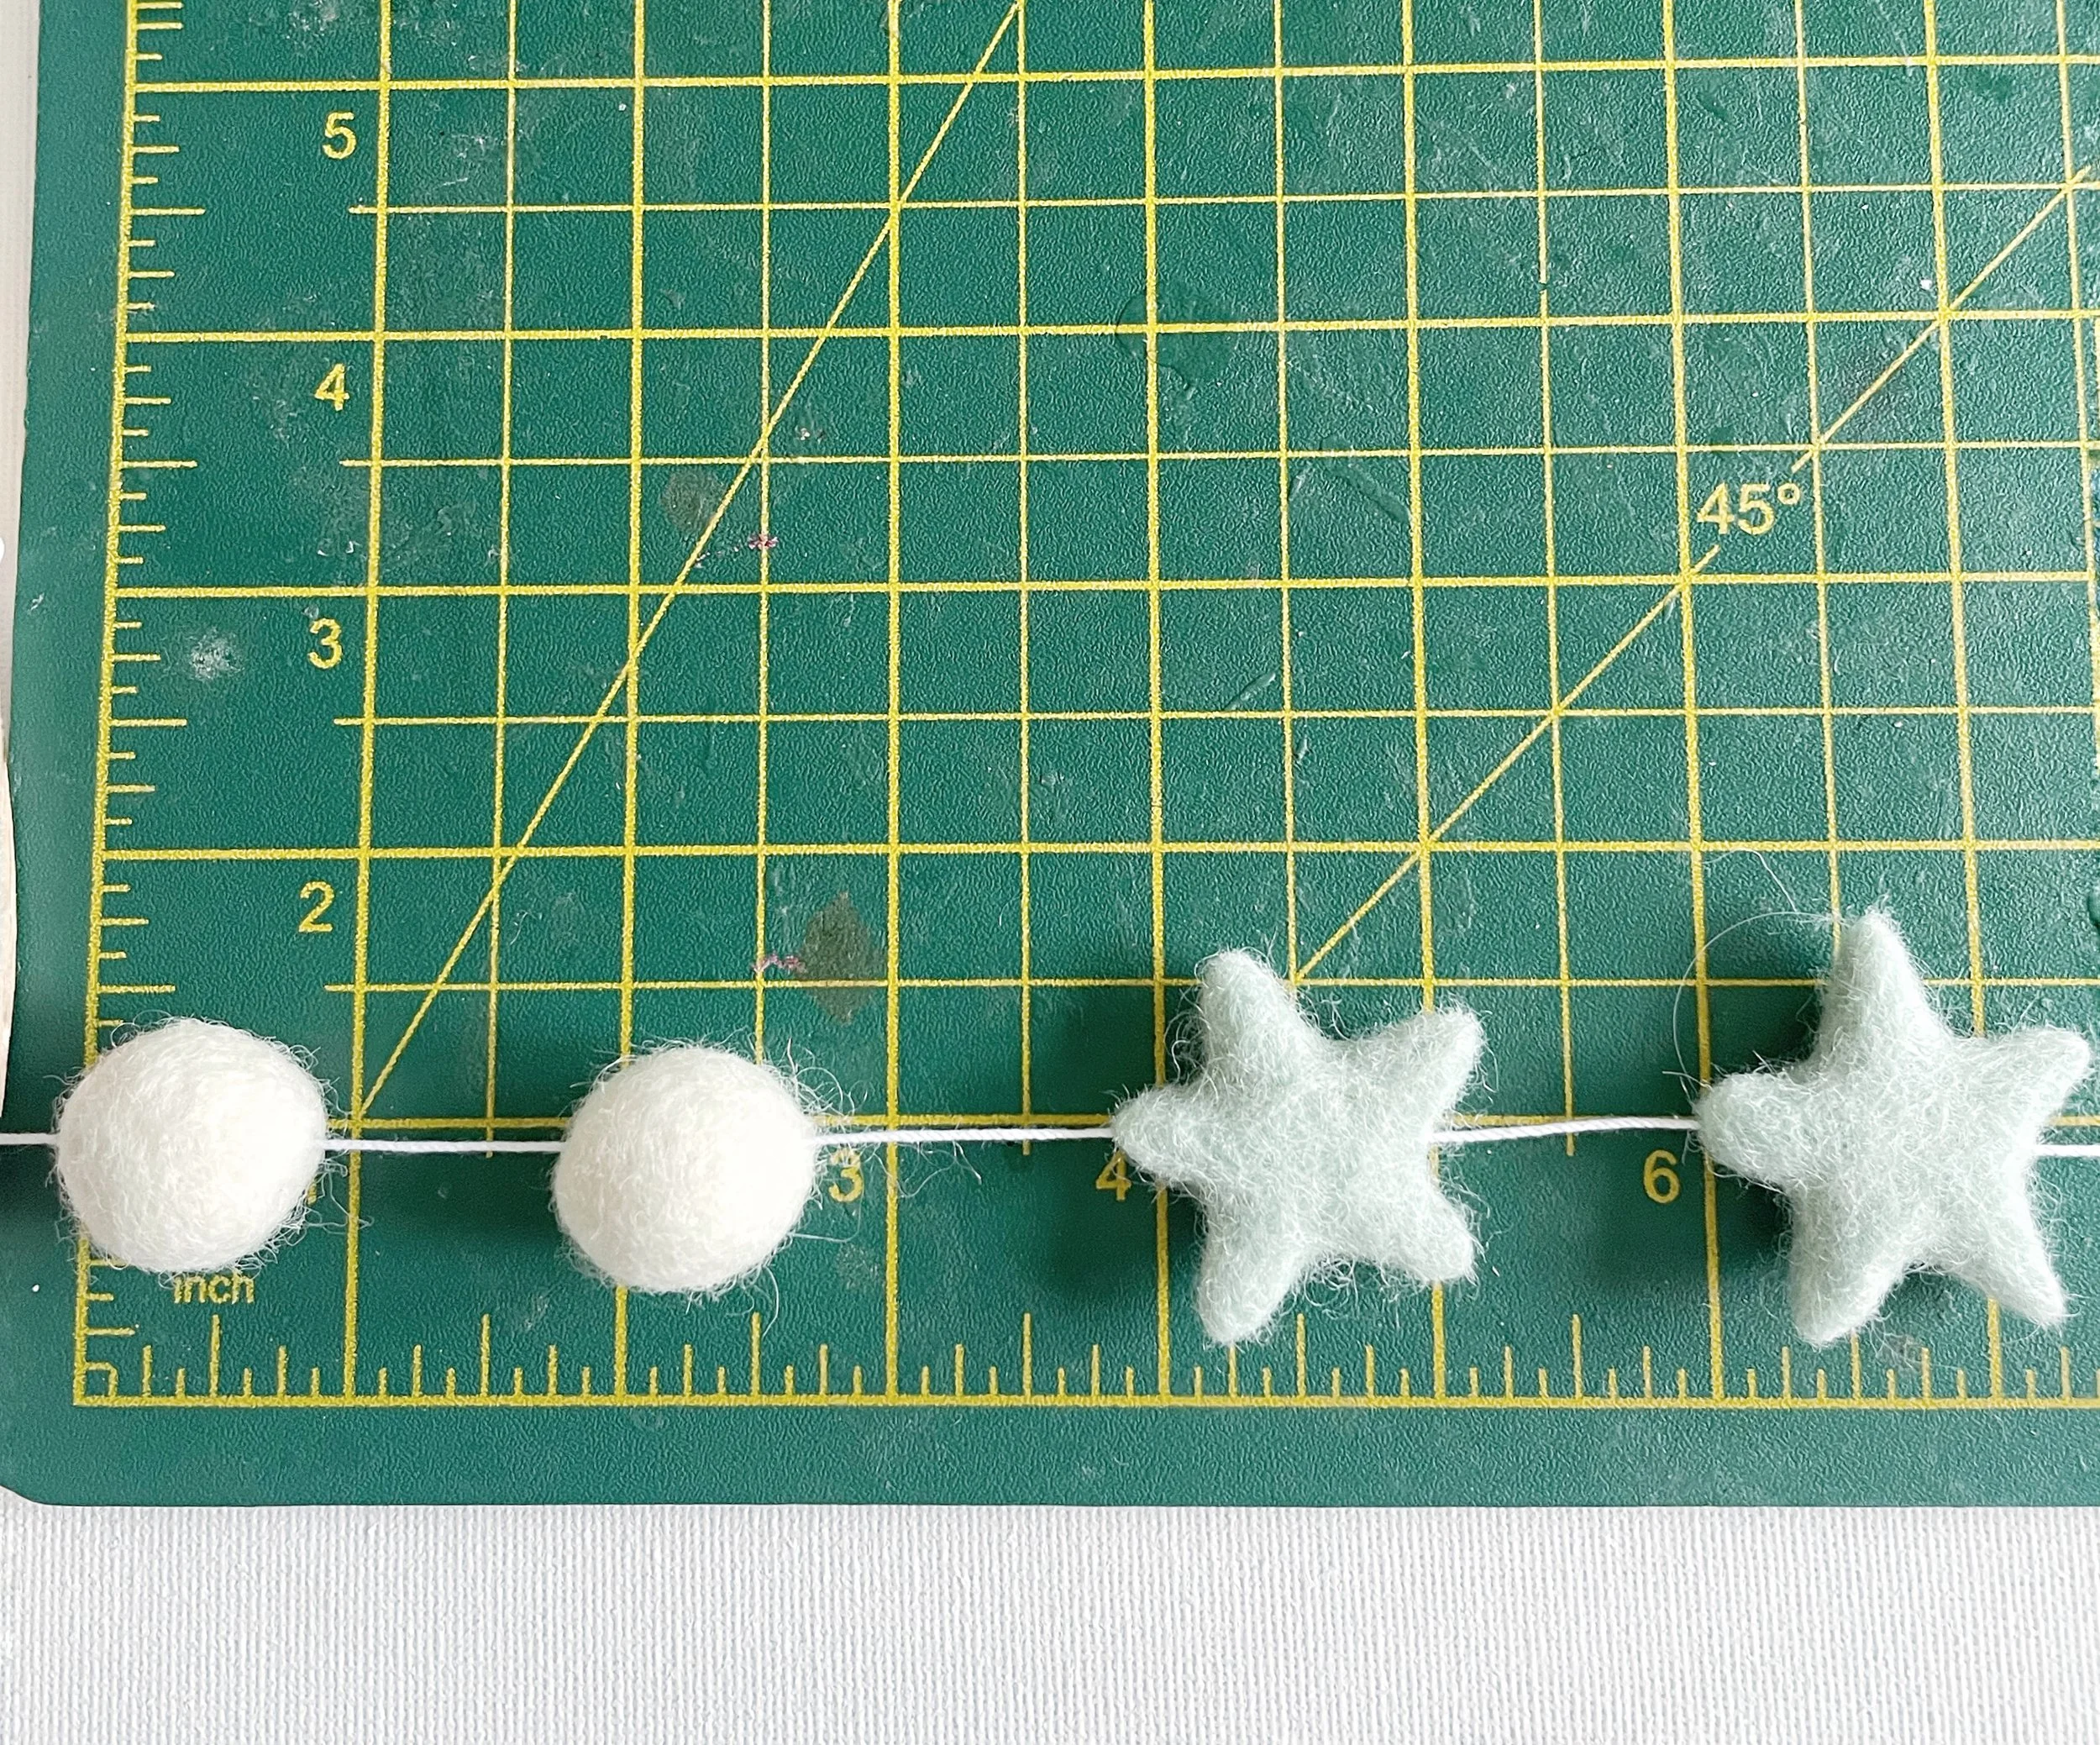
Go ahead and add another felt ball, followed by two felt stars, onto the same string. Keep them spaced 1 inch apart.
In the picture above, you can see how I’ve used the cutting mat to space out a 1 inch gap between each felt ball and star.
What works best for me is lining up the base of the first felt ball with the 1 inch mark, then placing the top of the next felt ball at the following inch mark. That way, you get a nice, even 1 inch gap.
I then move the string so that the base of the felt ball I have just threaded sits right on the inch line, I then place the tip of the felt star so it rests neatly on the next inch line.
Once secure, I move the string again so that the base of the star I have just threaded sits right on the inch line, I then place the tip of the final star so it rests neatly on the next inch line.
Even though it doesn’t look like they’re sitting right on the inch lines in the picture, don’t worry, they really are spaced 1 inch apart. Taking a little extra care with your measurements will help your spiral look beautifully even.
Don’t forget to tie a tiny knot under each ball and star to keep them securely in place.
Take your next piece of string and thread on a felt ball, sliding it down until it sits exactly 1 inch from the top of the wooden hoop.
Now add another felt ball and two felt stars, spacing each one precisely 1 inch apart, just as you did with the first string. Keeping these measurements accurate is what makes your spiral come together beautifully.
You’ll notice that by staggering your measurements, the next strand of felt balls and stars will naturally fall into the little spaces between the ones on the strand before it.
Hold your mobile up every time you add a new string, you should start to see the spiral gently taking shape. I find this little check-in really helpful, as it makes sure everything is lining up beautifully.
And if something looks a bit out of place, you can adjust it right away instead of redoing lots later on. So much easier and far less fuss!
After threading on your felt balls and stars, I like to give each string a little trim as I go. It makes working on the rest of the mobile so much easier, with far fewer tangles to wrestle with!
Just be sure to leave a good few extra inches of string below the last star, this gives you some wiggle room to fix any mistakes if needed. You’ll tidy everything up properly once you’re happy with how your finished mobile looks.
Keep going with the remaining strands in the same way: stagger the first felt ball on each new string 0.5 inch lower than the one before, and leave a 1 inch gap between each felt ball and star as you thread them along.
Carry on until every strand is strung with its little felt balls and stars, ready to complete your spiral design.
And remember to check and adjust as you go.
And that’s it! Once all your strings are threaded in their staggered pattern, your spiral nursery mobile is complete.
Give it one last check to make sure you’re happy with how it’s turned out. When you are, go ahead and neatly snip away the extra bits of string.
Just take care not to cut too close to the knots, otherwise your last little star might slip loose and you won’t have enough string to secure it in place.
Grab an eraser and gently remove any pencil marks from the beech ring.
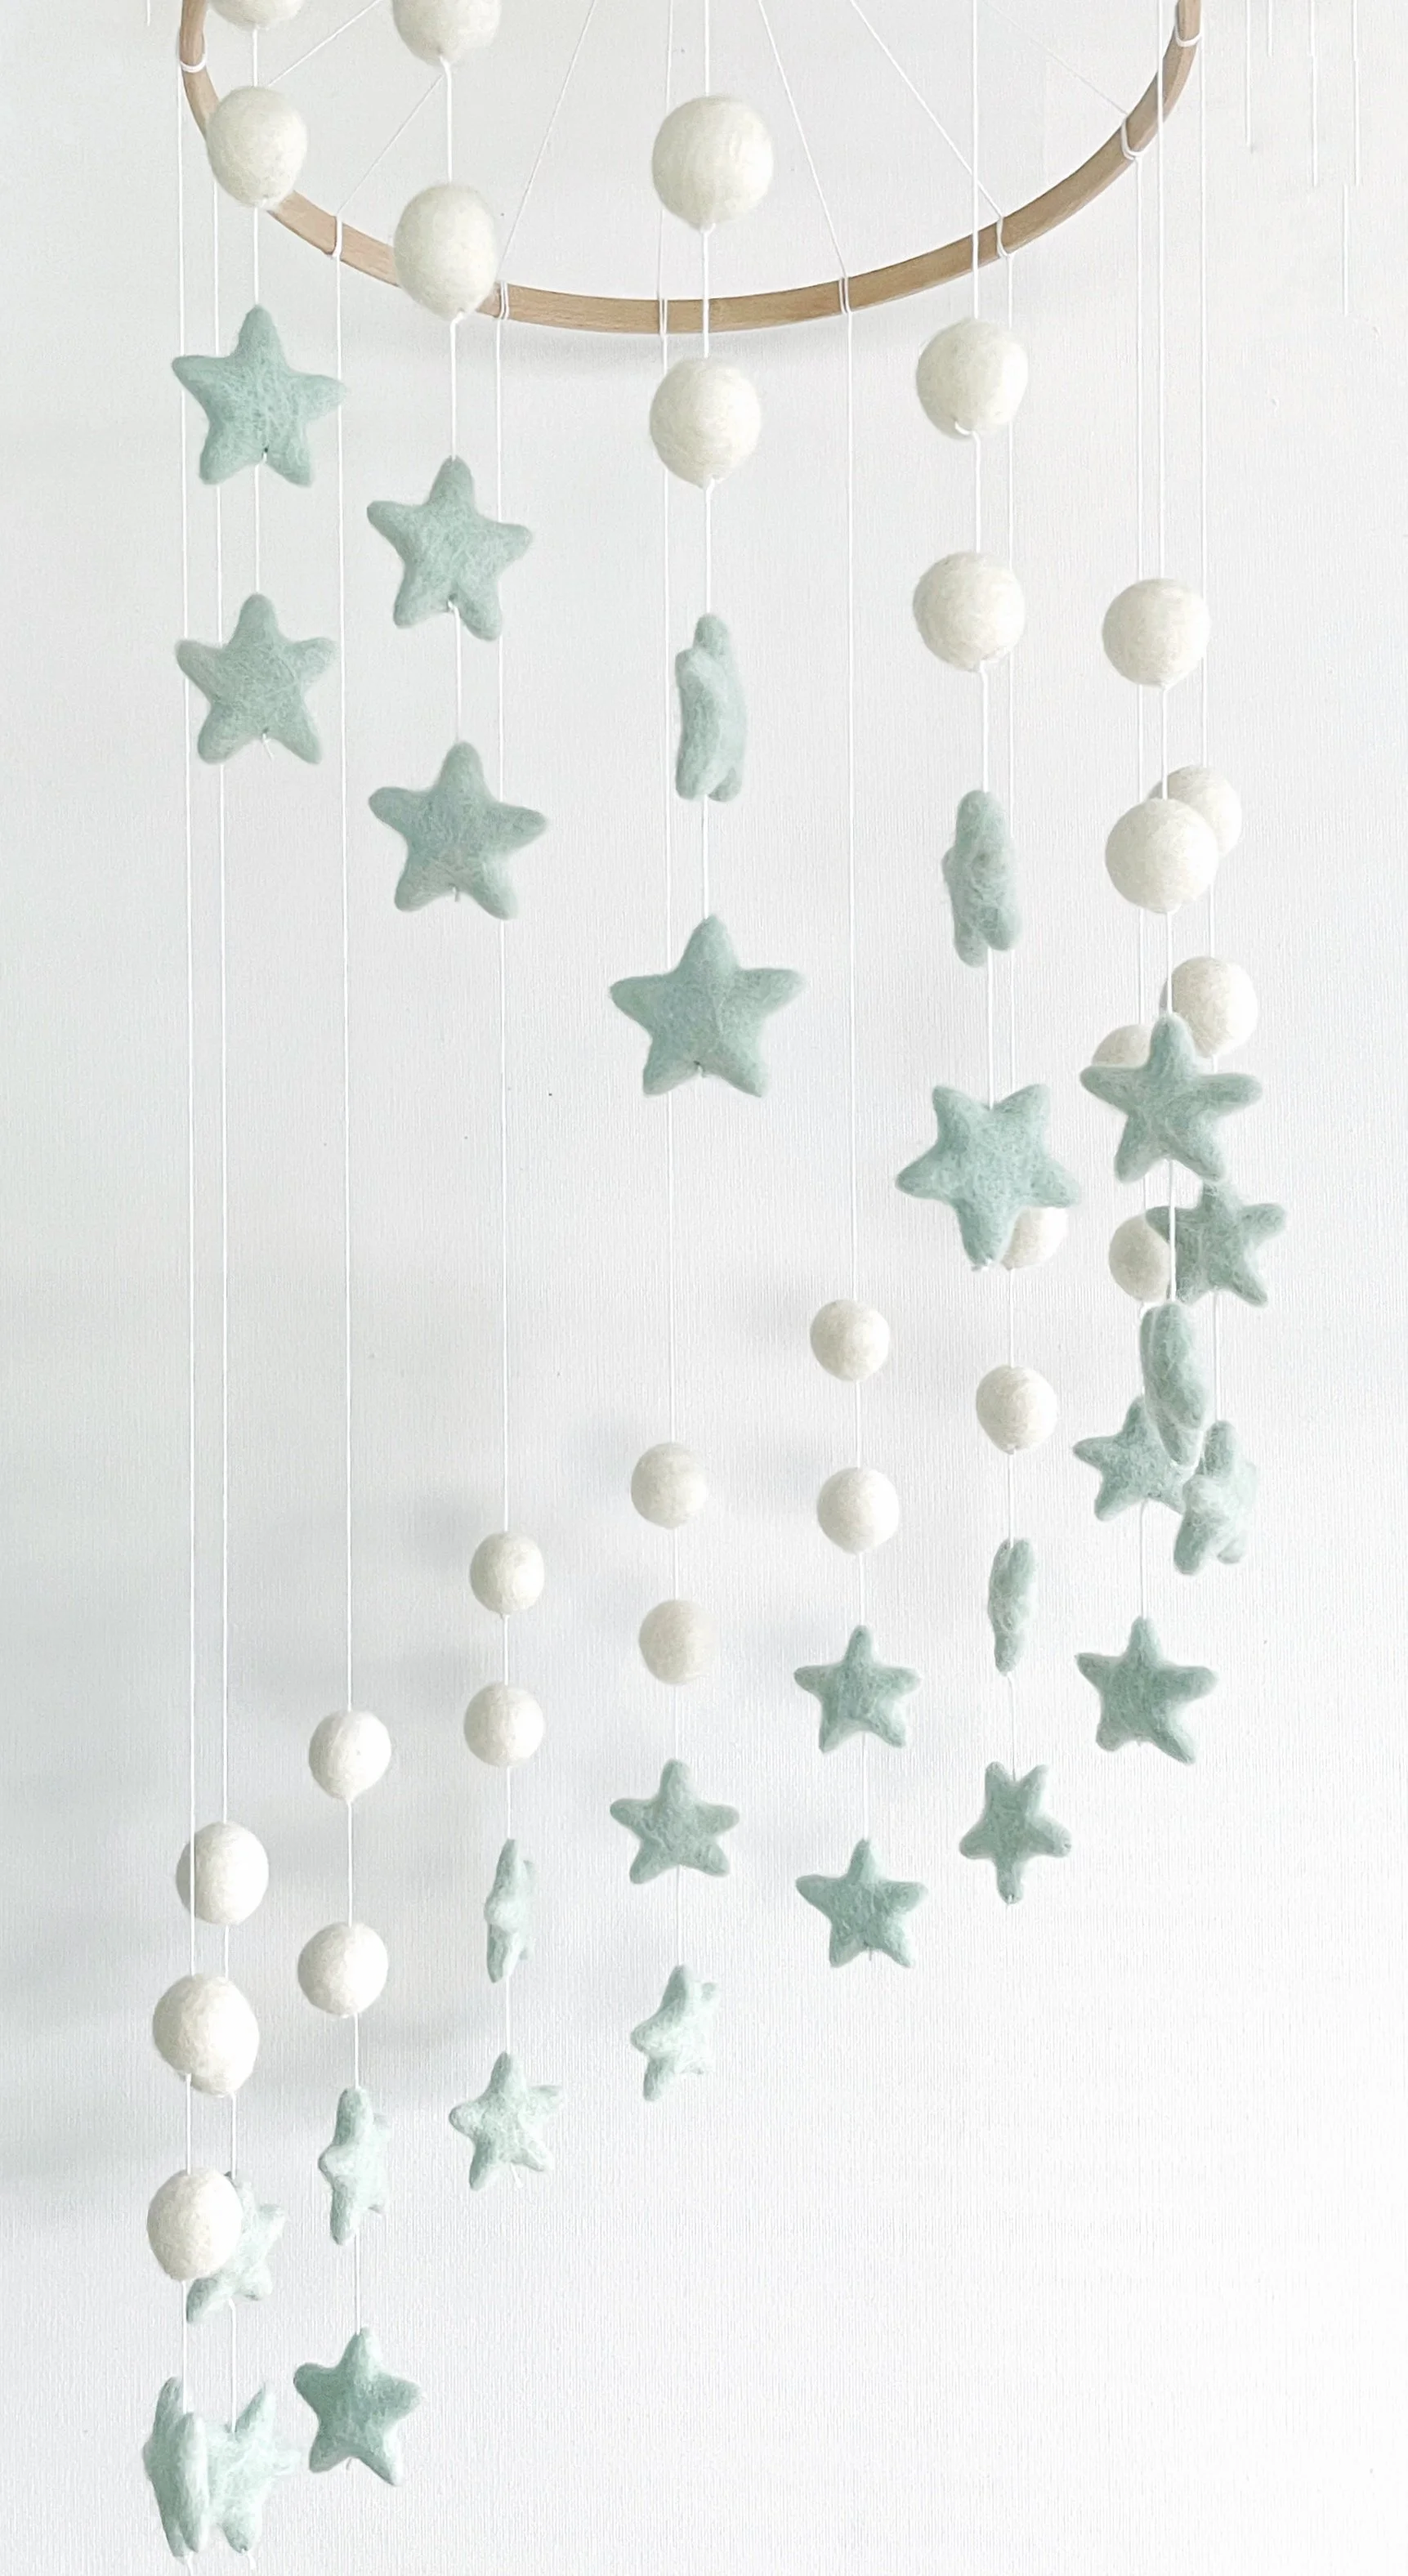
Now your beautiful spiral mobile is ready to be hung up and admired, it’s such a sweet handmade touch for any nursery, and a lovely reminder of what you can create with just a little love and imagination.
I really hope you had as much fun making this DIY spiral nursery mobile as I did putting it together for you. If you enjoyed this baby mobile tutorial, be sure to check out the felt ball garland tutorial too, it’s the perfect matching piece!
If you have any questions, tips, or just want to share how yours turned out, I’d absolutely love to hear from you, feel free to drop a comment below.
Sending love and a sprinkle of creativity, Karen x